change NISSAN GT-R 2015 R35 Multi Function Display Owners Manual
[x] Cancel search | Manufacturer: NISSAN, Model Year: 2015, Model line: GT-R, Model: NISSAN GT-R 2015 R35Pages: 298, PDF Size: 11.39 MB
Page 14 of 298
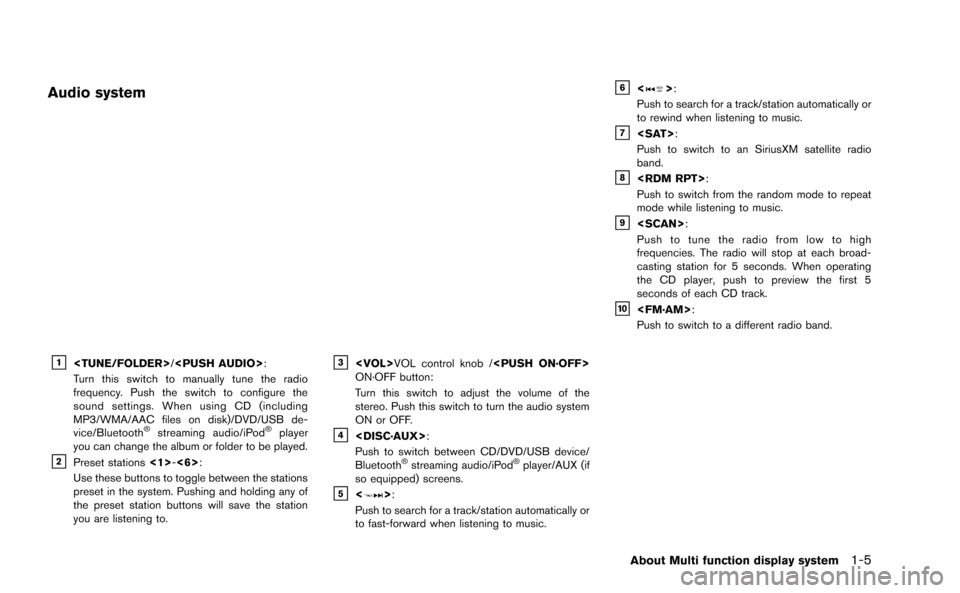
Audio system
&1
Turn this switch to manually tune the radio
frequency. Push the switch to configure the
sound settings. When using CD (including
MP3/WMA/AAC files on disk)/DVD/USB de-
vice/Bluetooth
®streaming audio/iPod®player
you can change the album or folder to be played.
&2Preset stations <1>-<6>:
Use these buttons to toggle between the stations
preset in the system. Pushing and holding any of
the preset station buttons will save the station
you are listening to.
&3
ON·OFF button:
Turn this switch to adjust the volume of the
stereo. Push this switch to turn the audio system
ON or OFF.
&4
Push to switch between CD/DVD/USB device/
Bluetooth
®streaming audio/iPod®player/AUX (if
so equipped) screens.
&5<>:
Push to search for a track/station automatically or
to fast-forward when listening to music.
&6<>:
Push to search for a track/station automatically or
to rewind when listening to music.
&7
Push to switch to an SiriusXM satellite radio
band.
&8
Push to switch from the random mode to repeat
mode while listening to music.
&9
Push to tune the radio from low to high
frequencies. The radio will stop at each broad-
casting station for 5 seconds. When operating
the CD player, push to preview the first 5
seconds of each CD track.
&10
Push to switch to a different radio band.
About Multi function display system1-5
Page 17 of 298
1-8About Multi function display system
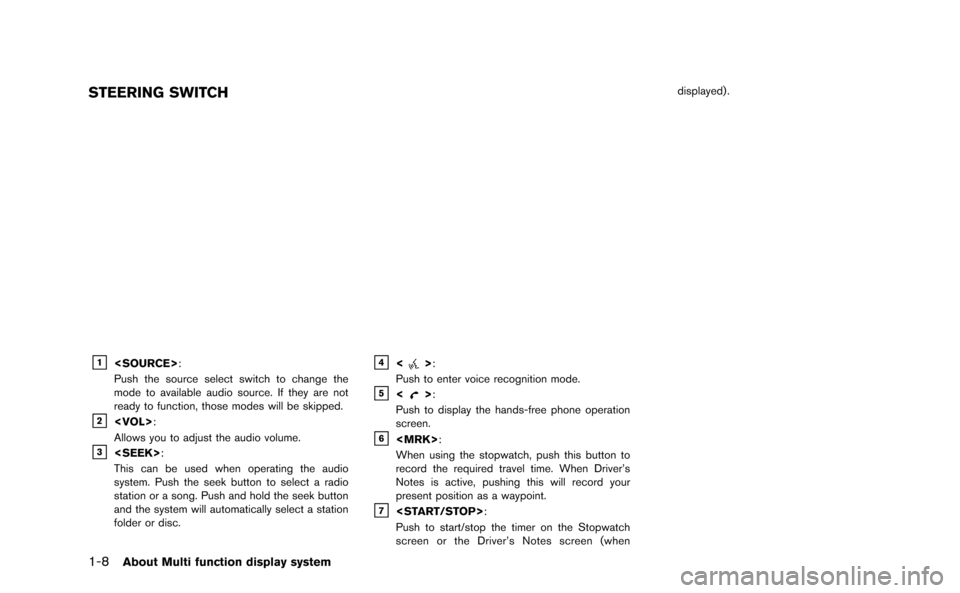
STEERING SWITCH
&1
Push the source select switch to change the
mode to available audio source. If they are not
ready to function, those modes will be skipped.
&2
Allows you to adjust the audio volume.
&3
This can be used when operating the audio
system. Push the seek button to select a radio
station or a song. Push and hold the seek button
and the system will automatically select a station
folder or disc.
&4<>:
Push to enter voice recognition mode.
&5<>:
Push to display the hands-free phone operation
screen.
&6
When using the stopwatch, push this button to
record the required travel time. When Driver’s
Notes is active, pushing this will record your
present position as a waypoint.
&7
Push to start/stop the timer on the Stopwatch
screen or the Driver’s Notes screen (when displayed) .
Page 19 of 298
1-10About Multi function display system
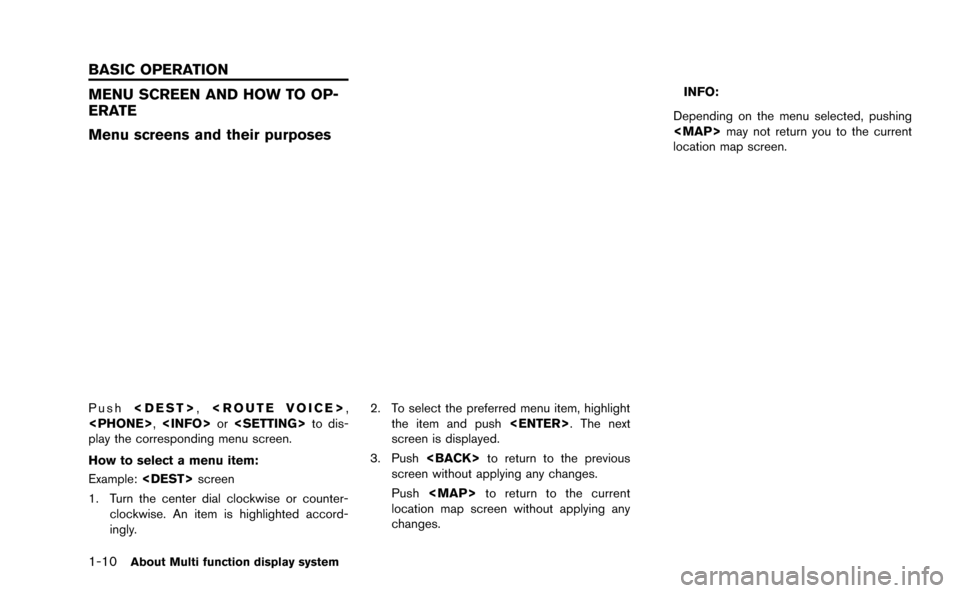
MENU SCREEN AND HOW TO OP-
ERATE
Menu screens and their purposes
Push
play the corresponding menu screen.
How to select a menu item:
Example:
1. Turn the center dial clockwise or counter- clockwise. An item is highlighted accord-
ingly. 2. To select the preferred menu item, highlight
the item and push
screen is displayed.
3. Push
screen without applying any changes.
Push
Page 20 of 298
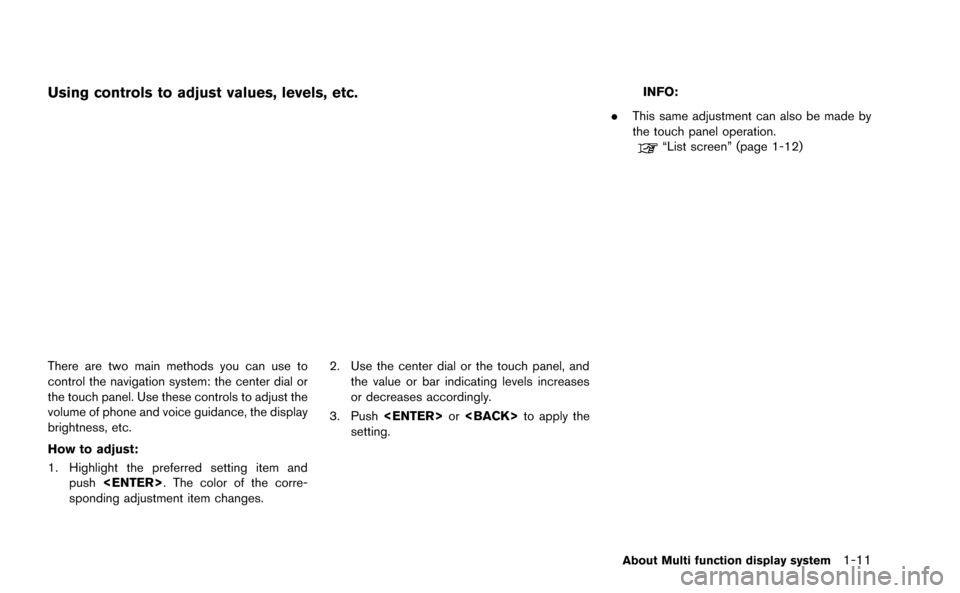
Using controls to adjust values, levels, etc.
There are two main methods you can use to
control the navigation system: the center dial or
the touch panel. Use these controls to adjust the
volume of phone and voice guidance, the display
brightness, etc.
How to adjust:
1. Highlight the preferred setting item andpush
sponding adjustment item changes. 2. Use the center dial or the touch panel, and
the value or bar indicating levels increases
or decreases accordingly.
3. Push
setting.
INFO:
. This same adjustment can also be made by
the touch panel operation.
“List screen” (page 1-12)
About Multi function display system1-11
Page 30 of 298
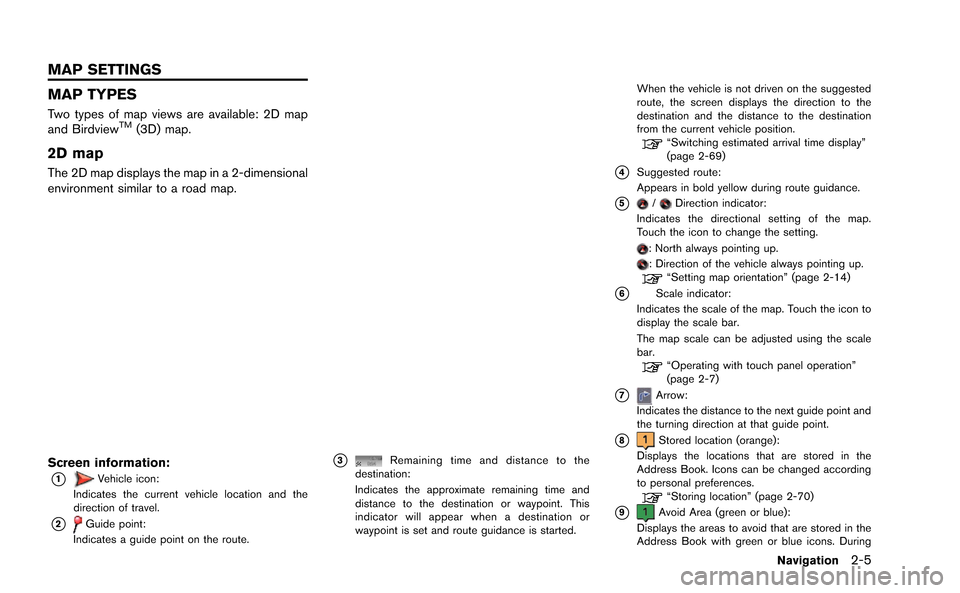
MAP TYPES
Two types of map views are available: 2D map
and BirdviewTM(3D) map.
2D map
The 2D map displays the map in a 2-dimensional
environment similar to a road map.
Screen information:
*1Vehicle icon:
Indicates the current vehicle location and the
direction of travel.
*2Guide point:
Indicates a guide point on the route.
*3Remaining time and distance to the
destination:
Indicates the approximate remaining time and
distance to the destination or waypoint. This
indicator will appear when a destination or
waypoint is set and route guidance is started. When the vehicle is not driven on the suggested
route, the screen displays the direction to the
destination and the distance to the destination
from the current vehicle position.
“Switching estimated arrival time display”
(page 2-69)
*4Suggested route:
Appears in bold yellow during route guidance.
*5/Direction indicator:
Indicates the directional setting of the map.
Touch the icon to change the setting.
: North always pointing up.: Direction of the vehicle always pointing up.“Setting map orientation” (page 2-14)
*6Scale indicator:
Indicates the scale of the map. Touch the icon to
display the scale bar.
The map scale can be adjusted using the scale
bar.
“Operating with touch panel operation”
(page 2-7)
*7Arrow:
Indicates the distance to the next guide point and
the turning direction at that guide point.
*8Stored location (orange):
Displays the locations that are stored in the
Address Book. Icons can be changed according
to personal preferences.
“Storing location” (page 2-70)
*9Avoid Area (green or blue):
Displays the areas to avoid that are stored in the
Address Book with green or blue icons. During
Navigation2-5
MAP SETTINGS
Page 34 of 298
![NISSAN GT-R 2015 R35 Multi Function Display Owners Manual 3. Touch []or[] to change the direction of
the map.
: Rotates the map clockwise.
: Rotates the map counterclockwise.
INFO:
While driving, scrolling on the map is limited to a
specified distance.
CHANG](/img/5/423/w960_423-33.png "NISSAN GT-R 2015 R35 Multi Function Display Owners Manual 3. Touch []or[] to change the direction of
the map.
: Rotates the map clockwise.
: Rotates the map counterclockwise.
INFO:
While driving, scrolling on the map is limited to a
specified distance.
CHANG")
3. Touch []or[] to change the direction of
the map.
: Rotates the map clockwise.
: Rotates the map counterclockwise.
INFO:
While driving, scrolling on the map is limited to a
specified distance.
CHANGING SCALE OF MAP
Operating with center dial
1. Turn the center dial when the map screen is displayed. The map scale is displayed at the
right side of the screen.
2. Use the center dial to adjust the map scale.
&1Clockwise: Zoom in&2Counterclockwise: Zoom out
INFO:
Free zoom:
Depending on the setting, using the center dial
to change the map scale may adjust the scale
normally, or it may engage the free zoom (finer
scale adjustment in smaller steps) .
“Other navigation settings” (page 2-92)
Navigation2-9
Page 35 of 298
![NISSAN GT-R 2015 R35 Multi Function Display Owners Manual 2-10Navigation
Operating with touch panel opera-
tion
1. Touch [].
The scale is displayed.
2. Touch [ZOOM IN] or [ZOOM OUT] to change the scale.
INFO:
Free zoom:
Once the [Small Step Zoom by Dial] is](/img/5/423/w960_423-34.png "NISSAN GT-R 2015 R35 Multi Function Display Owners Manual 2-10Navigation
Operating with touch panel opera-
tion
1. Touch [].
The scale is displayed.
2. Touch [ZOOM IN] or [ZOOM OUT] to change the scale.
INFO:
Free zoom:
Once the [Small Step Zoom by Dial] is")
2-10Navigation
Operating with touch panel opera-
tion
1. Touch [].
The scale is displayed.
2. Touch [ZOOM IN] or [ZOOM OUT] to change the scale.
INFO:
Free zoom:
Once the [Small Step Zoom by Dial] is set to ON
in the setting screen, the scale can be changed
in smaller steps when [ZOOM IN] or [ZOOM
OUT] is pushed and held than when either
button is briefly pushed.
If briefly pushed, the operation returns to normal.
Setting by voice command
1. Push <
>located on the steering wheel.
2. After the tone sounds, speak a command.
To change the map scale:
“Zoom In <1 to 14>” (Alternate Command
Mode)
“Zoom Out <1 to 14>” (Alternate Command
Mode)
Map scale
Any required map scale (map coverage) be-
tween 320 miles (640 km) and 1/64 of a mile
(25 m) can be selected.
Scale level for 2D map and Birdview
TMmap
(3D) display:
Normal Map US Units Metric Units
320 miles 640 km
80 miles 160 km
32 miles 64 km8 miles 16 km
5 miles 10 km
2 miles 4 km
1 mile 2 km
1/2 mile 1 km
1/4 mile 500 m
1/8 mile 200 m
1/16 mile 100 m
1/32 mile 50 m
Shows build- ing footprint graphics 1/32 mile 50 m
1/64 mile 25 m
Page 36 of 298
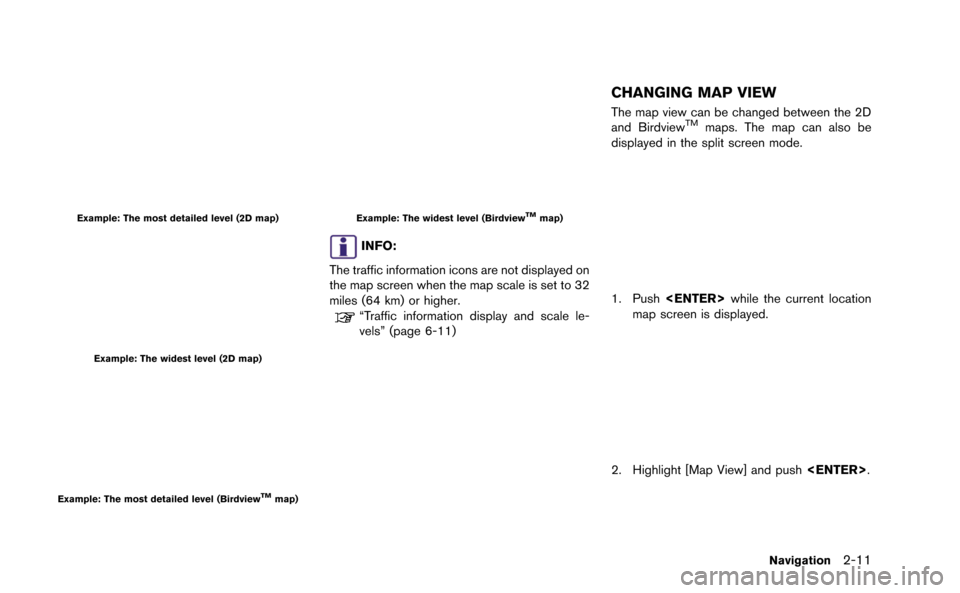
Example: The most detailed level (2D map)
Example: The widest level (2D map)
Example: The most detailed level (BirdviewTMmap)
Example: The widest level (BirdviewTMmap)
INFO:
The traffic information icons are not displayed on
the map screen when the map scale is set to 32
miles (64 km) or higher.
“Traffic information display and scale le-
vels” (page 6-11)
CHANGING MAP VIEW
The map view can be changed between the 2D
and BirdviewTMmaps. The map can also be
displayed in the split screen mode.
1. Push
map screen is displayed.
2. Highlight [Map View] and push
Navigation2-11
Page 37 of 298
![NISSAN GT-R 2015 R35 Multi Function Display Owners Manual 2-12Navigation
3. Highlight [Change View] and push<ENTER>.
4. Highlight the preferred map view and push <ENTER>. The indicator of the selected
map view illuminates.
5. The display automatically return](/img/5/423/w960_423-36.png "NISSAN GT-R 2015 R35 Multi Function Display Owners Manual 2-12Navigation
3. Highlight [Change View] and push<ENTER>.
4. Highlight the preferred map view and push <ENTER>. The indicator of the selected
map view illuminates.
5. The display automatically return")
2-12Navigation
3. Highlight [Change View] and push
4. Highlight the preferred map view and push
map view illuminates.
5. The display automatically returns to the map screen.
Available views
. [2D Map]:
Switches to the 2D map.
. [Birdview (3D)]:
Switches to the Birdview
TMmap.
. [Split: 2D Map]:
Changes to the split screen mode and both
halves display maps in 2D.
. [Split: Birdview Map]:
Changes to the split screen mode and the
left half displays the map in 2D and the right
half displays the map in Birdview
TM.
INFO:
. When the split screen mode is selected, the
map settings for the left screen can be
changed independently.
“Setting left screen display”
(page 2-16)
. If the split screen mode is selected, the
normal map scrolling and scale adjustment
are set in the right screen. However, if an
icon is touched before adjusting the map
direction or scale, then each screen can be
adjusted independently.
Split: 2D Map
Split: BirdviewTMMap
Other settings
The map view can also be set by performing the
following procedure.
1. Push
2. Highlight [Navigation] and push
3. Highlight [Map View] and push
4. Highlight [Change View] and push
Page 39 of 298
![NISSAN GT-R 2015 R35 Multi Function Display Owners Manual 2-14Navigation
.[Long Range]:
Sets the long range map view display on/off.
“Settings long range map view”
(page 2-15)
. [Map Color]:
Changes the map color.
“Setting map color ” (page 2-15)
. [](/img/5/423/w960_423-38.png "NISSAN GT-R 2015 R35 Multi Function Display Owners Manual 2-14Navigation
.[Long Range]:
Sets the long range map view display on/off.
“Settings long range map view”
(page 2-15)
. [Map Color]:
Changes the map color.
“Setting map color ” (page 2-15)
. [")
2-14Navigation
.[Long Range]:
Sets the long range map view display on/off.
“Settings long range map view”
(page 2-15)
. [Map Color]:
Changes the map color.
“Setting map color ” (page 2-15)
. [Birdview Angle]:
Changes the Birdview
TMangle.“Changing BirdviewTMangle”
(page 2-16)
. [Left Split Map Settings]:
Sets the map settings for the left screen of
the split map.
“Setting left screen display”
(page 2-16)
. [Show all Freeway Exits on Route]/[Auto.
Show Turn List on Freeway]:
Sets the display of the freeway exit informa-
tion on/off.
“Show exit information on freeways”
(page 2-51)
Other settings:
The orientation of the map can also be set by
performing the following procedure.
1. Push
2. Highlight [Navigation] and push
3. Highlight [Map View] and push
Setting map orientation
The map direction (orientation) can also be
changed in the 2D map. These settings are
available only in the 2D map or 2D/2D split map.
1. Highlight [Map Orientation] and push
2. Highlight the preferred map orientation andpush
selected map orientation illuminates.
3. Push