alarm NISSAN GT-R 2015 R35 Quick Reference Guide
[x] Cancel search | Manufacturer: NISSAN, Model Year: 2015, Model line: GT-R, Model: NISSAN GT-R 2015 R35Pages: 23, PDF Size: 1.23 MB
Page 8 of 23

6
NISSAN INTELLIGENT KEY® SYSTE M
The NISSAN Intelligent Key® system allows you to lock
or unlock the vehicle and open the trunk. It is important
to make sure the Intelligent Key is with you (that is, in
your pocket or purse).
The operating range of the Intelligent Key is within
31.5 in (80 cm) from each request switch.
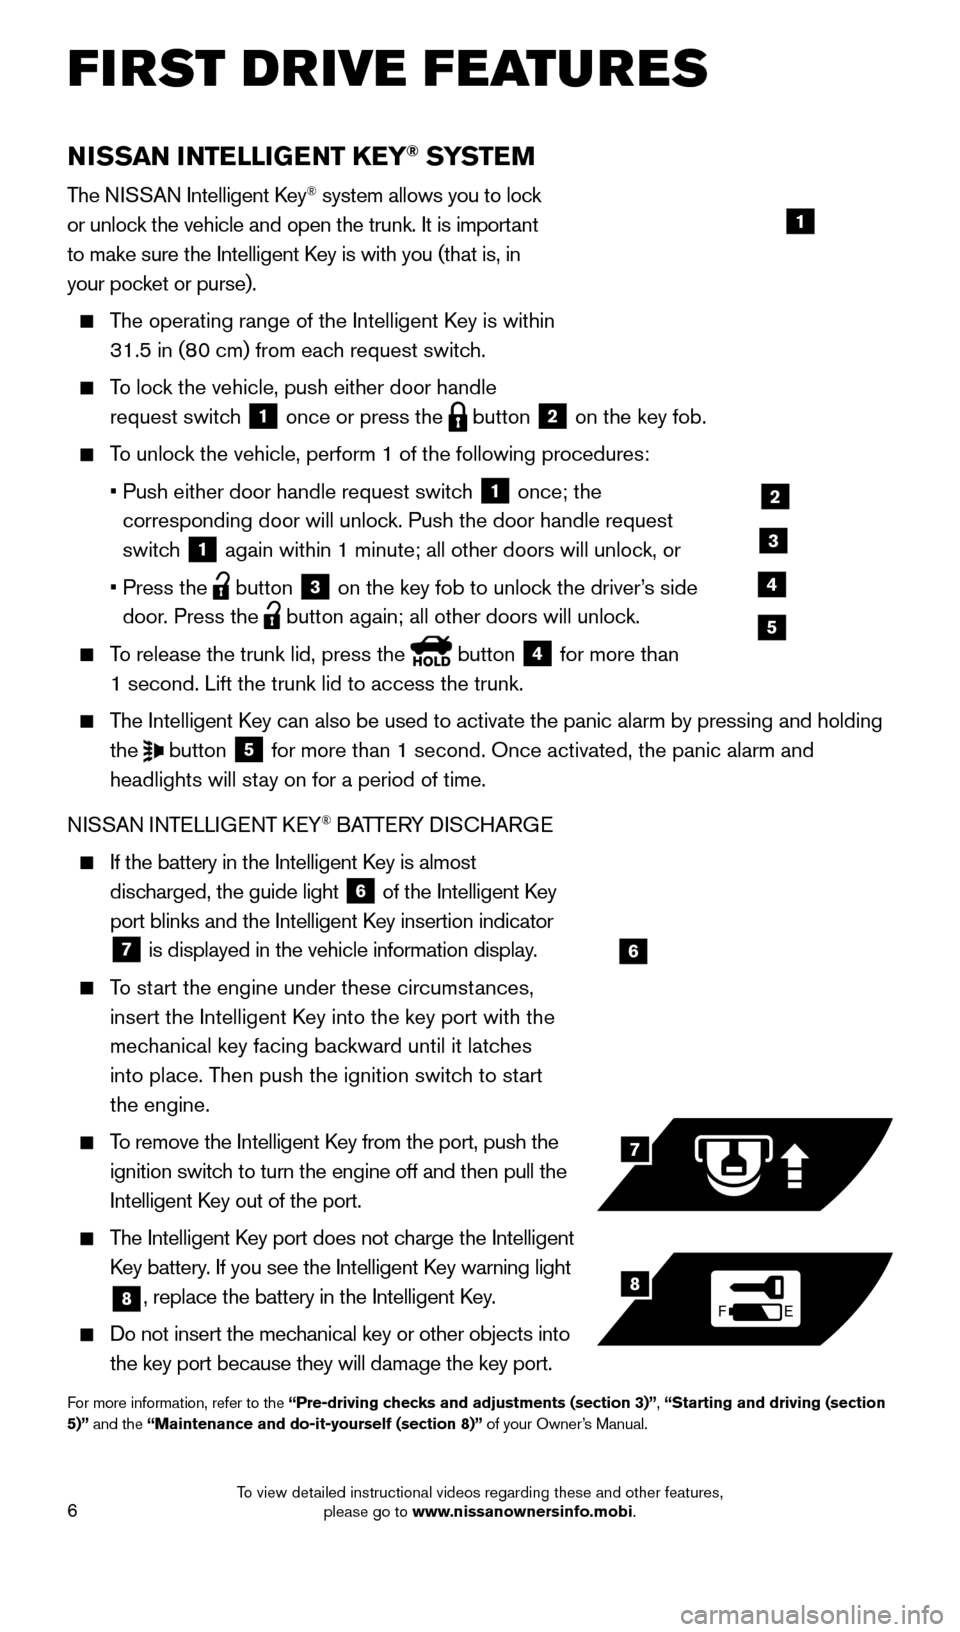
To lock the vehicle, push either door handle request switch
1 once or press the
button
2 on the key fob.
To unlock the vehicle, perform 1 of the following procedures:
•
Push either door handle request switc
h
1 once; the
corresponding door will unlock. Push the door handle request
switch
1 again within 1 minute; all other doors will unlock, or
•
Press the button
3 on the key fob to unlock the driver’s side
door. Press the button again; all other doors will unlock.
To release the trunk lid, press the button
4 for more than
1 second. Lift the trunk lid to access the trunk.
The Intelligent Key can also be used to activate the panic alarm by pressing and holding the
button
5 for more than 1 second. Once activated, the panic alarm and
headlights will stay on for a period of time.
NISSAN INTELLIGENT KEY
® BATTERY DISCHARGE
If the battery in the Intelligent K ey is almost
discharged, the guide light
6 of the Intelligent Key
port blinks and the Intelligent Key insertion indicator
7 is displayed in the vehicle information display.
To start the engine under these circumstances,
insert the Intelligent Key into the key port with the
mechanical key facing backward until it latches
into place. Then push the ignition switch to start
the engine.
To remove the Intelligent Key from the port, push the
ignition switch to turn the engine off and then pull the
Intelligent Key out of the port.
The Intelligent Key port does not charge the Intelligent
Key battery. If you see the Intelligent Key warning light
8, replace the battery in the Intelligent Key.
Do not insert the mechanical key or other objects into
the key port because they will damage the key port.
For more information, refer to the “Pre-driving checks and adjustments (section 3)”, “Starting and driving (section
5)” and the “Maintenance and do-it-yourself (section 8)” of your Owner’s Manual.
6
FE
7
8
FIRST DRIVE FEATURES
1
2
3
4
5
1655184_15b_GTR_QRGText-Insert_062414.indd 66/24/14 9:06 AM
To view detailed instructional videos regarding these and other features, please go to www.nissanownersinfo.mobi.
Page 20 of 23

18
Enter the name of the street. After finishing the
entry, touch the “List” key. A list of possible street
names is displayed.
Touch the correct name of the destination
from the list. You might need to touch the “UP”
or “DOWN” key to find the preferred street name.
The selected destination is displayed at the center
of the map. Touch the “Start” key after confirming
the location of the displayed destination. The
system sets the destination to the selected
location and starts calculating a route.
For more information, refer to the “Navigation (section 2)” of your Multi
Function Display Owner’s Manual.
SYSTEM GUIDE
HOMELINK® UNIVERSAL TRANSCEIVER
The HomeLink® Universal Transceiver can learn and consolidate the functions of up
to 3 different hand-held transmitters, operating items such as garage doors, property
gates, outdoor and indoor lights or alarm systems.
To program the HomeLink® Universal Transceiver:
•
P
osition the handheld transceiver 1-3 in (26-76 mm) away from the HomeLink surface,
keeping the HomeLink indicator light in view.
•
Press and hold the desired HomeLink button and the handheld transmitter \
button
simultaneously until the HomeLink indicator light flashes slowly and then ra\
pidly.
•
B
oth buttons may be released when the indicator light flashes rapidly.
HOMELINK
1655184_15b_GTR_QRGText-Insert_062414.indd 186/24/14 9:06 AM
To view detailed instructional videos regarding these and other features, please go to www.nissanownersinfo.mobi.