phone NISSAN JUKE 2018 Owners Manual
[x] Cancel search | Manufacturer: NISSAN, Model Year: 2018, Model line: JUKE, Model: NISSAN JUKE 2018Pages: 1672, PDF Size: 2.45 MB
Page 22 of 1672
ber”, then speak the digits. Up to 24
digits can be entered. Available special
characters are “star”, “pound”, “plus” and
“pause”. When finished, say “Dial” to
initiate the call. Say “Correction” at any
time in the process to correct a mis-
spoken or misinterpreted number or
character.
.RedialSpeak this command to dial the number
of the last outgoing call. The system will
display “Redialing (name/number)”. The
name of the phonebook entry will be
displayed if it available, otherwise the
number being redialed will be displayed.
.Call Back
Speak this command to dial the number
of the last incoming call. The system will
display “Calling back (name/number)” .
The name of the phonebook entry will be
displayed if it available, otherwise the
number being called back will be dis-
played.
Receiving a call
When a call is received by the phone connected
to the vehicle’s Bluetooth�ŠHands-Free Phone
System, the call information is displayed on
either the vehicle information display or both the
vehicle information display and the control panel
display.
Push the
Page 23 of 1672
.Use the text messaging feature after
stopping your vehicle in a safe
location. If you have to use the
feature while driving, exercise ex-
treme caution at all times so full
attention may be given to vehicle
operation.
. If you are unable to devote full
attention to vehicle operation while
using the text messaging feature,
pull off the road to a safe location
and stop your vehicle.
NOTE:
. This feature is automatically disabled if
the connected device does not support
the Message Access Profile (MAP) . See
the phone’s Owner’s Manual for details
and instructions.
. Many phones may require special per-
mission to enable text messaging.
Check the phone’s screen during Blue-
tooth
�Špairing. For some phones, you
may need to enable “Notifications”in
the phone’s Bluetooth
�Šmenu for text
messages to appear on the vehicle
audio system. See the phone’s Owner’s
Manual for details. Text message inte-
gration requires that the phone support MAP (Message Access Profile) for both
receiving and sending text messages.
Some phones may not support all text
messaging features. Refer to www.
nissanusa.com/bluetooth or www.
nissan.ca/bluetooth for compatibility
information, as well as your device’s
Owner’s Manual.
The system allows for the sending and receiving
of text messages through the vehicle interface.
Sending a text message:
1. Push the
Page 25 of 1672
.Text MessageSelect to turn on or off the vehicle’s text
messaging feature.
.New Text SoundSelect to adjust the volume of the sound
that plays when a new text is received by
a phone connected to the Bluetooth
�Š
Hands-Free Phone System. The setting
all the way to the left indicates that the
new text sound will be muted.
.Show Incoming TextSelect “Driver Only” to have incoming
text messages displayed only in the
vehicle information display. Select “Both”
to have incoming text messages dis-
played in both the vehicle information
display and the center display screen.
Select “None” to have no display of
incoming text messages.
.Edit Custom MessagesSelect to set a custom message that will
be available with the standard options
when sending a text message. To set a
custom message, send a text message to
your own phone number while the phone
is connected to the system. Three
custom messages can be set. Custom
messages can only be set while the
vehicle is stationary.
.Auto ReplySelect to turn on or off the Auto Reply
function. When enabled, the vehicle will
automatically send a predefined text message to the sender when a text
message is received while driving.
.Auto Reply Message
Select to choose the message that is
sent when the Auto Reply function is
enabled. Choose from “I’m Driving” or
one of the three custom messages
stored in the system.
.Vehicle Signature On/OffSelect to choose whether or not the
vehicle signature is added to outgoing
text messages from the vehicle. This
message cannot be changed or custo-
mized.
Page 163 of 1672
— Do not change or modify theIntelligent Key.
— Do not use a magnet key holder.
— Do not place the Intelligent Key near an electric appliance such
as a television set, personal
computer or cellular phone.
— Do not allow the Intelligent Key to come into contact with water
or salt water, and do not wash it
in a washing machine. This
could affect the system function.
. If an Intelligent Key is lost or stolen,
NISSAN recommends erasing the ID
code of that Intelligent Key. This will
prevent the Intelligent Key from
unauthorized use to unlock the
vehicle. For information regarding
the erasing procedure, it is recom-
mended you visit a NISSAN dealer.
Page 234 of 1672
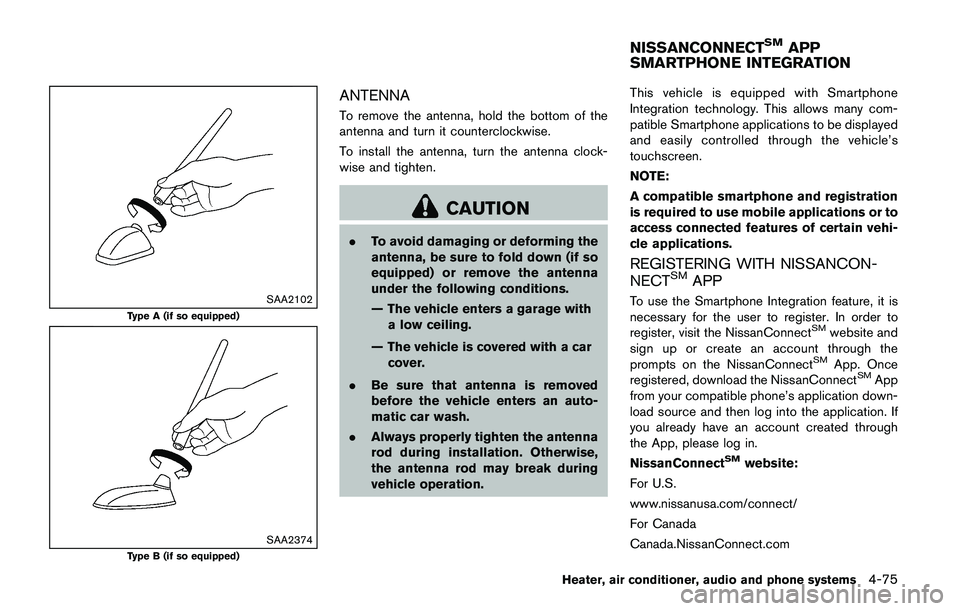
CAUTION
.Do not force the USB device into the
USB port. Inserting the USB device
tilted or up-side-down into the port
may damage the port. Make sure
that the USB device is connected
correctly into the USB port.
. Do not grab the USB port cover (if
so equipped) when pulling the USB
device out of the port. This could
damage the port and the cover.
. Do not leave the USB cable in a
place where it can be pulled unin-
tentionally. Pulling the cable may
damage the port.
Refer to your device manufacturer’s owner
information regarding the proper use and care
of the device.
Connecting iPod
�Š:
The USB connection port is located on the
lower part of the instrument panel. Connect the
iPod
�Šcable to the USB connector. See “USB
(Universal Serial Bus) connection port” (P.4-48) .
When the audio system operates, the system
will switch to the iPod
�Šmode automatically. The
battery of the iPod�Šis charged while the cable is connected to the vehicle.
Depending on the version of the iPod
�Š, the
display on the iPod�Šshows a NISSAN or
Accessory Attached screen when the connec-
tion is completed. When the iPod
�Šis connected
to the vehicle, the iPod�Šmusic library can only
be operated by the vehicle audio controls.
*iPod
�Šand iPhone�Šare a trademark of Apple
Inc., registered in the U.S. and other countries.
Compatibility:
The following models are compatible:
. iPod nano
�Š1G (Firmware version 1.3.1 -)
. iPod nano�Š2G (Firmware version 1.1.3 -)
. iPod nano�Š3G (Firmware version 1.0.0 -)
. iPod nano�Š4G (Firmware version 1.0.2 -)
. iPod nano�Š5G (Firmware version 1.0.1 -)
. iPod nano�Š6G (Firmware version 1.0 -)
. iPod nano�Š7G (Firmware version 1.0.0 -)
. iPod�Š5G (Firmware version 1.2.1 -)
. iPod classic�Š(Firmware version 1.0.0 -)
. iPod Touch�Š(iOS 1.1 -)
. iPod Touch�Š2G (iOS 2.1.1 -)
. iPod Touch�Š3G (iOS 3.1 -)
. iPod Touch�Š4G (iOS 4.1 -)
. iPod Touch�Š5G (iOS 6.0.0 -) .
iPhone
�Š(iOS 1.0.0 - 2.2.1)
. iPhone�Š3G (iOS 2.1 -)
. iPhone�Š3GS (iOS 3.0 -)
. iPhone�Š4/4S (iOS 4.0 -)
. iPhone�Š5 (iOS 6.0.0 -)
Operations attributable to firmware update by
Apple are not guaranteed.
iPod
�Šmain operation:
The system operates when the ignition switch is
in the ON or ACC position. Push the
Page 253 of 1672
CAUTION
.Do not force the USB device into the
USB port. Inserting the USB device
tilted or up-side-down into the port
may damage the port. Make sure
that the USB device is connected
correctly into the USB port.
. Do not grab the USB port cover (if
so equipped) when pulling the USB
device out of the port. This could
damage the port and the cover.
. Do not leave the USB cable in a
place where it can be pulled unin-
tentionally. Pulling the cable may
damage the port.
Refer to your device manufacturer’s owner
information regarding the proper use and care
of the device.
To connect an iPod
�Što the vehicle so that the
iPod�Šcan be controlled with the audio system
controls and display screen, use the USB port
located on the lower center of the instrument
panel. Connect the iPod
�Š-specific end of the
cable to the iPod�Šand the USB end of the cable
to the USB port on the vehicle. If your iPod�Š
supports charging via a USB connection, its battery will be charged while connected to the
vehicle with the ignition switch in the ACC or
ON position.
While connected to the vehicle, the iPod
�Šmay
only be able to be operated by the vehicle audio
controls.
To disconnect the iPod
�Šfrom the vehicle,
remove the USB end of the cable from the
USB port on the vehicle, then remove the cable
from the iPod
�Š.
iPod�Šis a trademark of Apple Inc., registered in
the U.S. and other countries.
Compatibility:
The following models are compatible:
. iPod Classic
�Š5th generation (firmware
version 1.3.0 or later)
. iPod Classic
�Š6th generation (firmware
version 2.0.1 or later)
. iPod Classic
�Š6th (6.1) generation (firmware
version 2.0.1 or later)
. iPod Classic
�Š6th (6.2) generation (firmware
version 2.0.4 or later)
. iPod Touch
�Š2nd generation (firmware ver-
sion 4.2.1 or later)*
. iPod Touch
�Š3rd generation (firmware ver-
sion 5.1.1 or later) .
iPod Touch
�Š4th generation (firmware ver-
sion 6.1.3 or later)
. iPod Touch
�Š5th generation (firmware ver-
sion 6.1.3 or later)
. iPod nano
�Š- 2nd generation (firmware
version 1.1.3 or later)
. iPod nano
�Š- 3rd generation (firmware
version 1.1.3 or later)
. iPod nano
�Š- 4th generation (firmware
version 1.0.4 or later)
. iPod nano
�Š- 5th generation (firmware
version 1.0.2 or later)
. iPod nano
�Š- 6th generation (firmware
version 1.2 or later)
. iPod nano
�Š- 7th generation (firmware
version 1.2 or later)
. iPhone
�Š3G (firmware version 4.2.1 or later)
. iPhone�Š3GS (firmware version 5.1.1or
later)
. iPhone
�Š4 (firmware version 6.1.3 or later)
. iPhone�Š4S (firmware version 6.1.3 or later)
. iPhone�Š5 (firmware version 6.1.3 or later)
* Some features of this iPod�Šmay not be fully
functional.
Make sure that your iPod
�Šfirmware is updated
to the version indicated above.
Heater, air conditioner, audio and phone systems4-69
Page 264 of 1672
When installing a car phone or a CB radio in
your vehicle, be sure to observe the following
precautions, otherwise the new equipment may
adversely affect the electronic control modules
and electronic control system harness.
Page 270 of 1672
ber”, then speak the digits. Up to 24
digits can be entered. Available special
characters are “star”, “pound”, “plus” and
“pause”. When finished, say “Dial” to
initiate the call. Say “Correction” at any
time in the process to correct a mis-
spoken or misinterpreted number or
character.
.RedialSpeak this command to dial the number
of the last outgoing call. The system will
display “Redialing (name/number)”. The
name of the phonebook entry will be
displayed if it available, otherwise the
number being redialed will be displayed.
.Call Back
Speak this command to dial the number
of the last incoming call. The system will
display “Calling back (name/number)” .
The name of the phonebook entry will be
displayed if it available, otherwise the
number being called back will be dis-
played.
Receiving a call
When a call is received by the phone connected
to the vehicle’s Bluetooth�ŠHands-Free Phone
System, the call information is displayed on
either the vehicle information display or both the
vehicle information display and the control panel
display.
Push the
Page 271 of 1672
.Use the text messaging feature after
stopping your vehicle in a safe
location. If you have to use the
feature while driving, exercise ex-
treme caution at all times so full
attention may be given to vehicle
operation.
. If you are unable to devote full
attention to vehicle operation while
using the text messaging feature,
pull off the road to a safe location
and stop your vehicle.
NOTE:
. This feature is automatically disabled if
the connected device does not support
the Message Access Profile (MAP) . See
the phone’s Owner’s Manual for details
and instructions.
. Many phones may require special per-
mission to enable text messaging.
Check the phone’s screen during Blue-
tooth
�Špairing. For some phones, you
may need to enable “Notifications”in
the phone’s Bluetooth
�Šmenu for text
messages to appear on the vehicle
audio system. See the phone’s Owner’s
Manual for details. Text message inte-
gration requires that the phone support MAP (Message Access Profile) for both
receiving and sending text messages.
Some phones may not support all text
messaging features. Refer to www.
nissanusa.com/bluetooth or www.
nissan.ca/bluetooth for compatibility
information, as well as your device’s
Owner’s Manual.
The system allows for the sending and receiving
of text messages through the vehicle interface.
Sending a text message:
1. Push the
Page 273 of 1672
.Text MessageSelect to turn on or off the vehicle’s text
messaging feature.
.New Text SoundSelect to adjust the volume of the sound
that plays when a new text is received by
a phone connected to the Bluetooth
�Š
Hands-Free Phone System. The setting
all the way to the left indicates that the
new text sound will be muted.
.Show Incoming TextSelect “Driver Only” to have incoming
text messages displayed only in the
vehicle information display. Select “Both”
to have incoming text messages dis-
played in both the vehicle information
display and the center display screen.
Select “None” to have no display of
incoming text messages.
.Edit Custom MessagesSelect to set a custom message that will
be available with the standard options
when sending a text message. To set a
custom message, send a text message to
your own phone number while the phone
is connected to the system. Three
custom messages can be set. Custom
messages can only be set while the
vehicle is stationary.
.Auto ReplySelect to turn on or off the Auto Reply
function. When enabled, the vehicle will
automatically send a predefined text message to the sender when a text
message is received while driving.
.Auto Reply Message
Select to choose the message that is
sent when the Auto Reply function is
enabled. Choose from “I’m Driving” or
one of the three custom messages
stored in the system.
.Vehicle Signature On/OffSelect to choose whether or not the
vehicle signature is added to outgoing
text messages from the vehicle. This
message cannot be changed or custo-
mized.