start stop button NISSAN LEAF 2016 1.G Quick Reference Guide
[x] Cancel search | Manufacturer: NISSAN, Model Year: 2016, Model line: LEAF, Model: NISSAN LEAF 2016 1.GPages: 35, PDF Size: 2.98 MB
Page 7 of 35

5
2
3
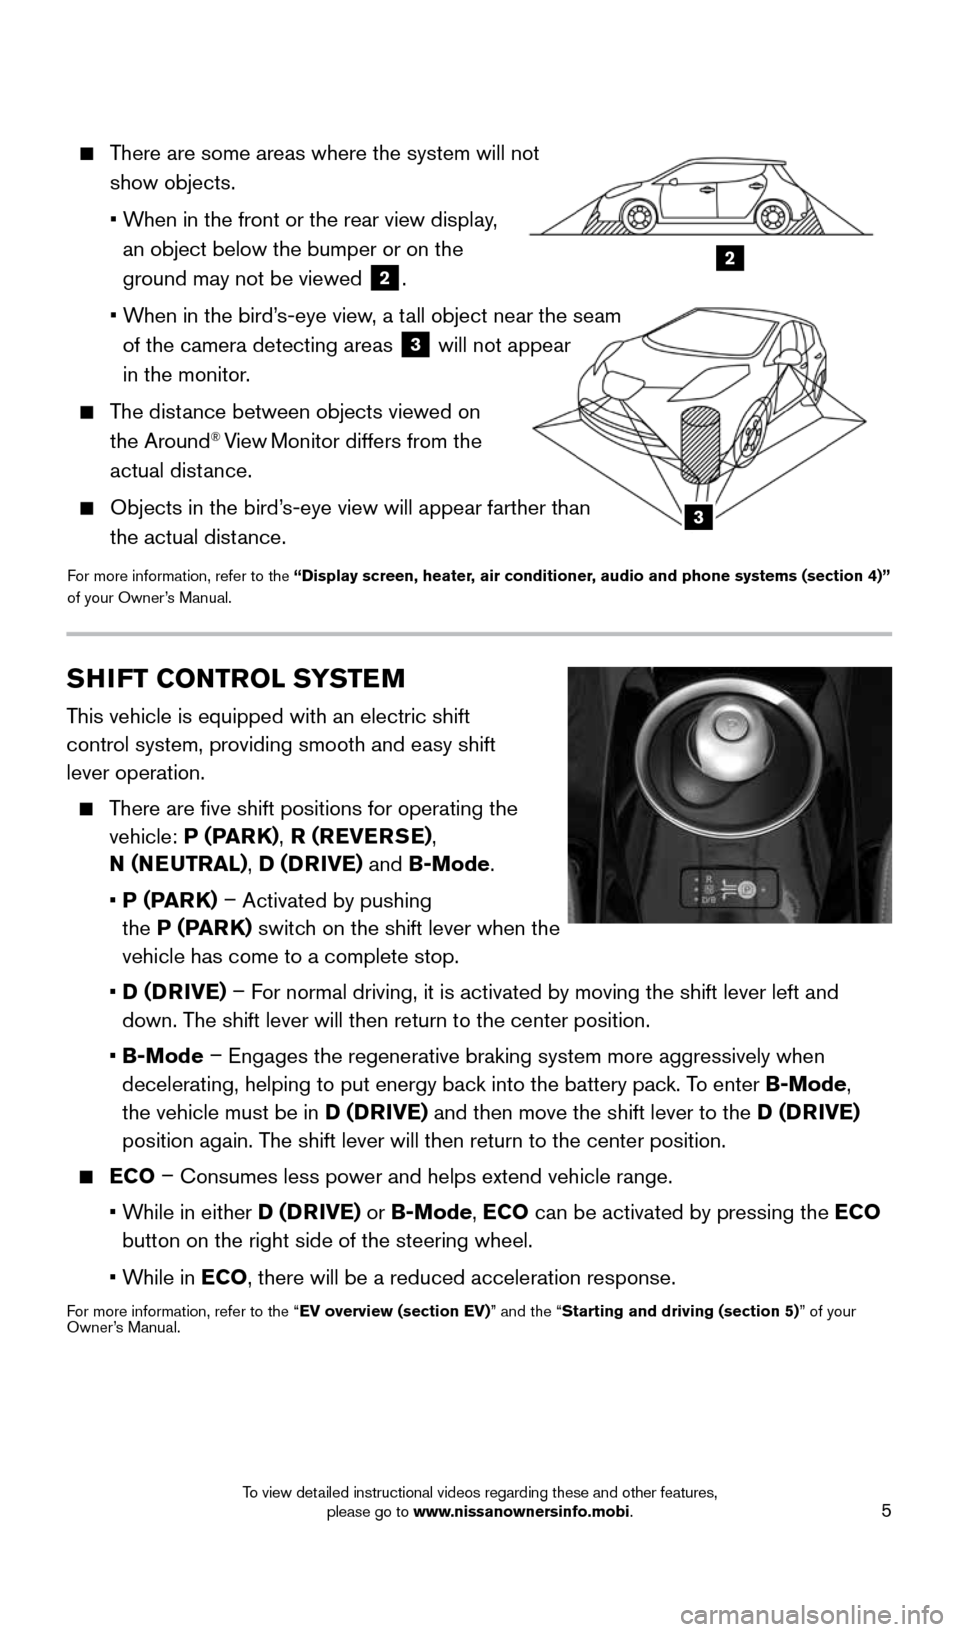
There are some areas where the system will not
show objects.
• When in the front or the rear view display,
an object below the bumper or on the
ground may not be viewed
2.
• When in the bird’s-eye view, a tall object near the seam
of the camera detecting areas
3 will not appear
in the monitor.
The distance between objects viewed on
the Around® View Monitor differs from the
actual distance.
Objects in the bird’s-eye view will appear farther than
the actual distance.
For more information, refer to the “Display screen, heater, air conditioner, audio and phone systems (section 4)”
of your Owner’s Manual.
SHIFT CONTROL SYSTEM
This vehicle is equipped with an electric shift
control system, providing smooth and easy shift
lever operation.
There are five shift positions for operating the
vehicle: P (PARK) , R (REVERSE) ,
N (NEUTRAL) , D (DRIVE) and B-Mode.
• P (PARK) – Activated by pushing
the P (PARK) switch on the shift lever when the
vehicle has come to a complete stop.
• D (DRIVE) – For normal driving, it is activated by moving the shift lever left and
down. The shift lever will then return to the center position.
• B-Mode – Engages the regenerative braking system more aggressively when
decelerating, helping to put energy back into the battery pack. To enter B-Mode,
the vehicle must be in D (DRIVE) and then move the shift lever to the D (DRIVE)
position again. The shift lever will then return to the center position.
ECO – Consumes less power and helps extend vehicle range.
• While in either D (DRIVE) or B-Mode, ECO can be activated by pressing the ECO
button on the right side of the steering wheel.
• While in ECO, there will be a reduced acceleration response.
For more information, refer to the “EV overview (section EV)” and the “Starting and driving (section 5)” of your
Owner’s Manual.
1996737_16a_Leaf_QRG_071015.indd 57/10/15 11:28 AM
To view detailed instructional videos regarding these and other features, please go to www.nissanownersinfo.mobi.
Page 13 of 35

11
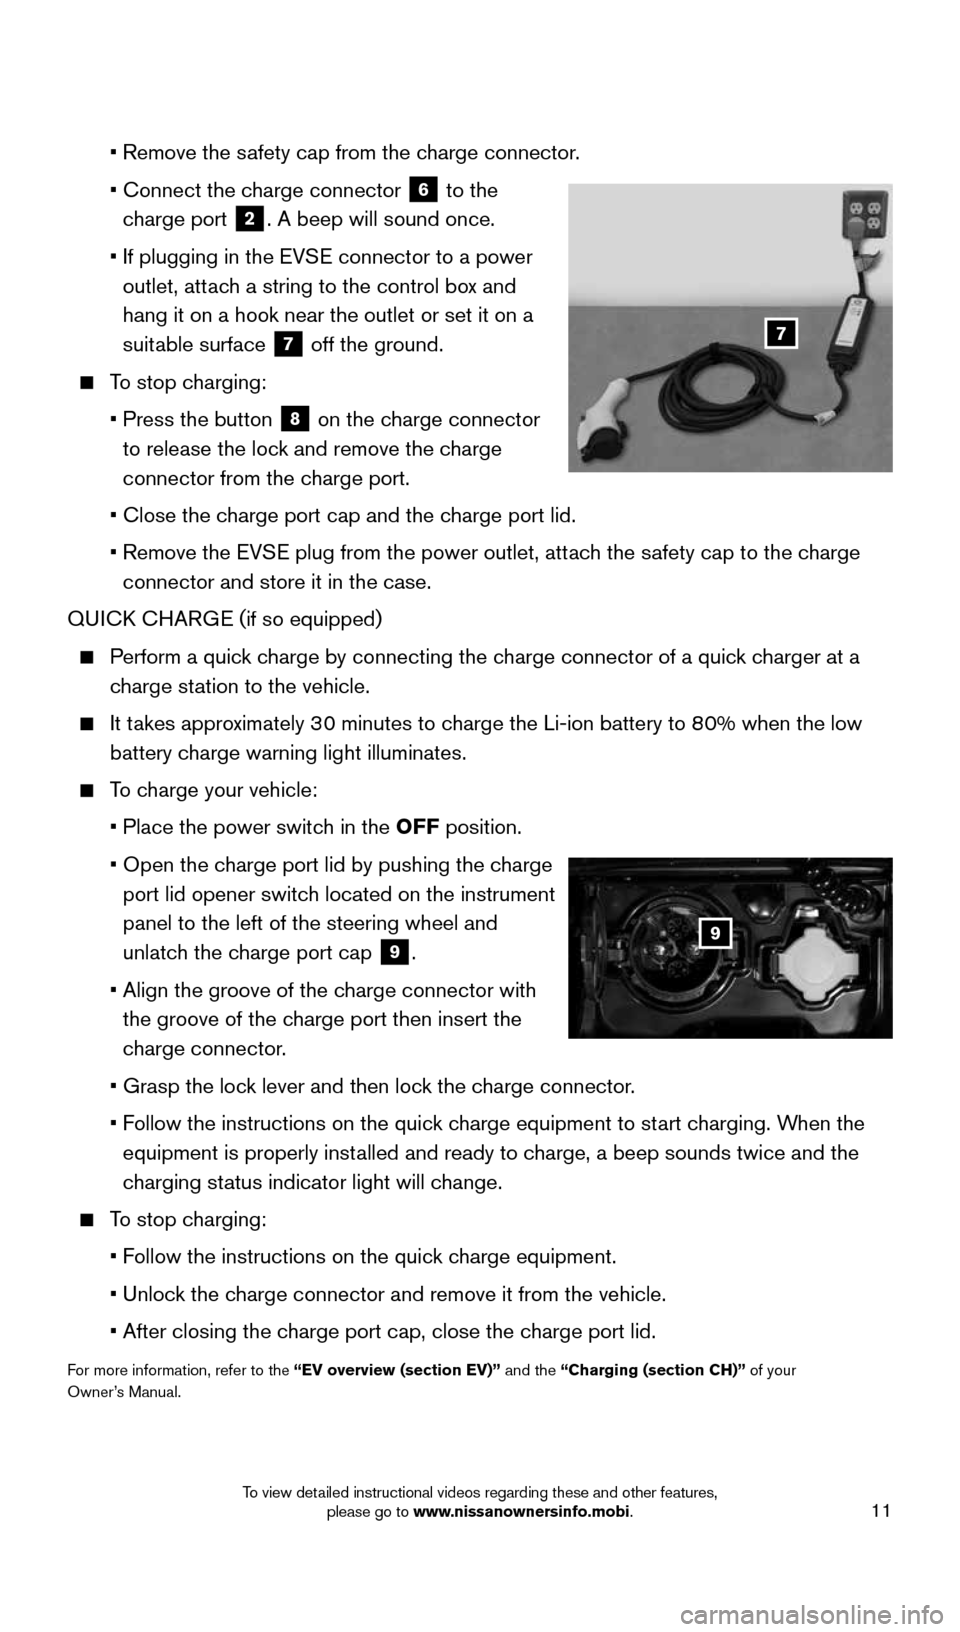
• Remove the safety cap from the charge connector.
• Connect the charge connector
6 to the
charge port 2. A beep will sound once.
• If plugging in the EVSE connector to a power
outlet, attach a string to the control box
and
hang it on a hook near the outlet or set it on a
suitable surface
7 off the ground.
To stop charging:
• Press the button
8 on the charge connector
to release the lock and remove the charge
connector from the charge port.
• Close the charge port cap and the charge port lid.
• Remove the EVSE plug from the power outlet, attach the safety cap to the charge
connector and store it in the case.
QUICK CHARGE (if so equipped)
Perform a quick charge by connecting the charge connector of a quick charger at a
charge station to the vehicle.
It takes approximately 30 minutes to charge the Li-ion battery to 80% when the low
battery charge warning light illuminates.
To charge your vehicle:
• Place the power switch in the OFF position.
• Open the charge port lid by pushing the charge
port lid opener switch located on the instrument
panel to the left of the steering wheel and
unlatch the charge port cap
9.
• Align the groove of the charge connector with
the groove of the charge port then insert the
charge connector.
• Grasp the lock lever and then lock the charge connector.
• Follow the instructions on the quick charge equipment to start charging. When the
equipment is properly installed and ready to charge, a beep sounds twice and the
charging status indicator light will change.
To stop charging:
• Follow the instructions on the quick charge equipment.
• Unlock the charge connector and remove it from the vehicle.
• After closing the charge port cap, close the charge port lid.
For more information, refer to the “EV overview (section EV)” and the “Charging (section CH)” of your
Owner’s Manual.
9
7
1996737_16a_Leaf_QRG_071015.indd 117/10/15 11:28 AM
To view detailed instructional videos regarding these and other features, please go to www.nissanownersinfo.mobi.
Page 14 of 35

12
TIRE PRESSURE MONITORING SYSTEM (TPMS)
WITH EASY FILL TIRE ALERT
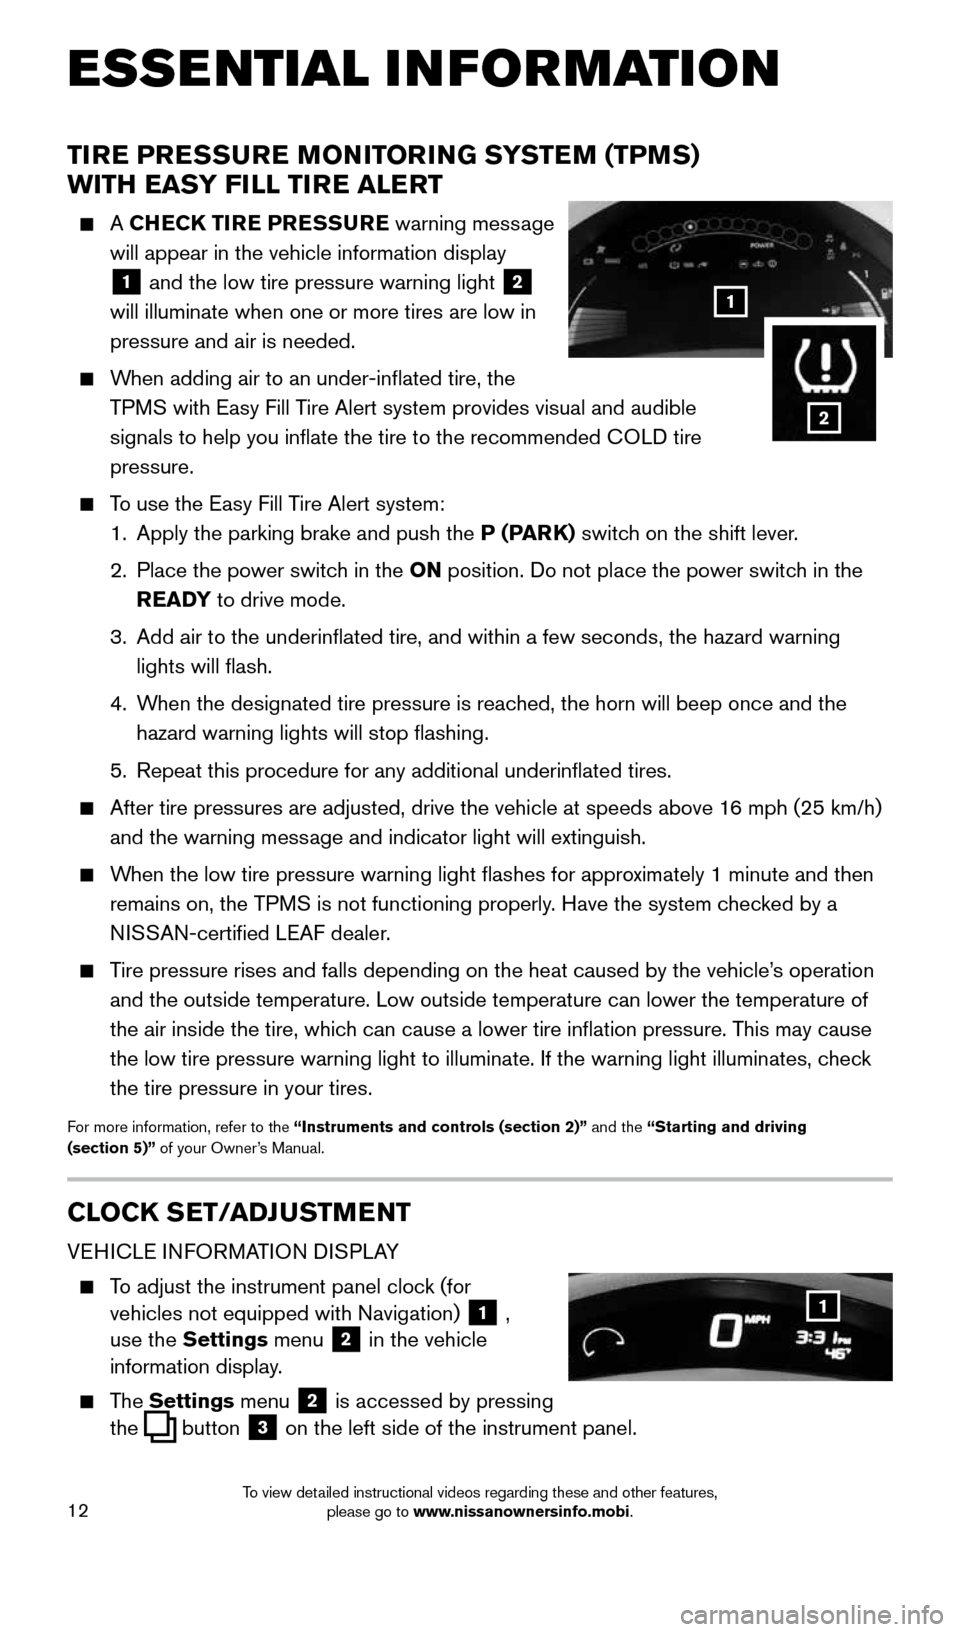
A CHECK TIRE PRESSURE warning message
will appear in the vehicle information display
1 and the low tire pressure warning light
2
will illuminate when one or more tires are low in
pressure and air is needed.
When adding air to an under-inflated tire, the
TPMS with Easy Fill Tire Alert system provides visual and audible
signals to help you inflate the tire to the recommended COLD tire
pressure.
To use the Easy Fill Tire Alert system:
1. Apply the parking brake and push the P (PARK) switch on the shift lever.
2. Place the power switch in the ON position. Do not place the power switch in the
READY to drive mode.
3. Add air to the underinflated tire, and within a few seconds, the hazar\
d warning
lights will flash.
4. When the designated tire pressure is reached, the horn will beep once and the
hazard warning lights will stop flashing.
5. Repeat this procedure for any additional underinflated tires.
After tire pressures are adjusted, drive the vehicle at speeds above 16 mph (25 km/h)
and the warning message and indicator light will extinguish.
When the low tire pressure warning light flashes for approximately 1 minute and then
remains on, the TPMS is not functioning properly. Have the system checked by a
NISSAN-certified LEAF dealer.
Tire pressure rises and falls depending on the heat caused by the vehicle\
’s operation
and the outside temperature. Low outside temperature can lower the tempe\
rature of
the air inside the tire, which can cause a lower tire inflation pressure. This may cause
the low tire pressure warning light to illuminate. If the warning light \
illuminates, check
the tire pressure in your tires.
For more information, refer to the “Instruments and controls (section 2)” and the “Starting and driving
(section 5)” of your Owner’s Manual.
CLOCK SET/ADJUSTMENT
VEHICLE INFORMATION DISPLAY
To adjust the instrument panel clock (for
vehicles not equipped with Navigation)
1 ,
use the Settings menu 2 in the vehicle
information display.
The Settings menu 2 is accessed by pressing
the
button
3 on the left side of the instrument panel.
1
ESSE NTIAL I N FOR MATION
1
2
1996737_16a_Leaf_QRG_071015.indd 127/10/15 11:28 AM
To view detailed instructional videos regarding these and other features, please go to www.nissanownersinfo.mobi.