clock reset NISSAN LEAF 2020 Owner´s Manual
[x] Cancel search | Manufacturer: NISSAN, Model Year: 2020, Model line: LEAF, Model: NISSAN LEAF 2020Pages: 596, PDF Size: 4.33 MB
Page 92 of 596

NOTE:
• Depending on the charging station, thelock mechanism established by local
standards may not be compatible with
your vehicle. It may not be possible for
the charge connector to lock to your
vehicle.
• When the power source is cut off while charging in AUTO mode, the connector
will be continuously locked for 5 min-
utes, then it will be released.
• When timer charging is set with AUTO mode, the connector will not lock until
charging is started.
• When the following system(s) are oper- ated individually or the 12-volt battery
is being charged, the charging connec-
tor lock will not lock:– Climate Ctrl. Timer
– Remote climate control (if so equipped)
– Li-ion battery warmer (if so equipped)
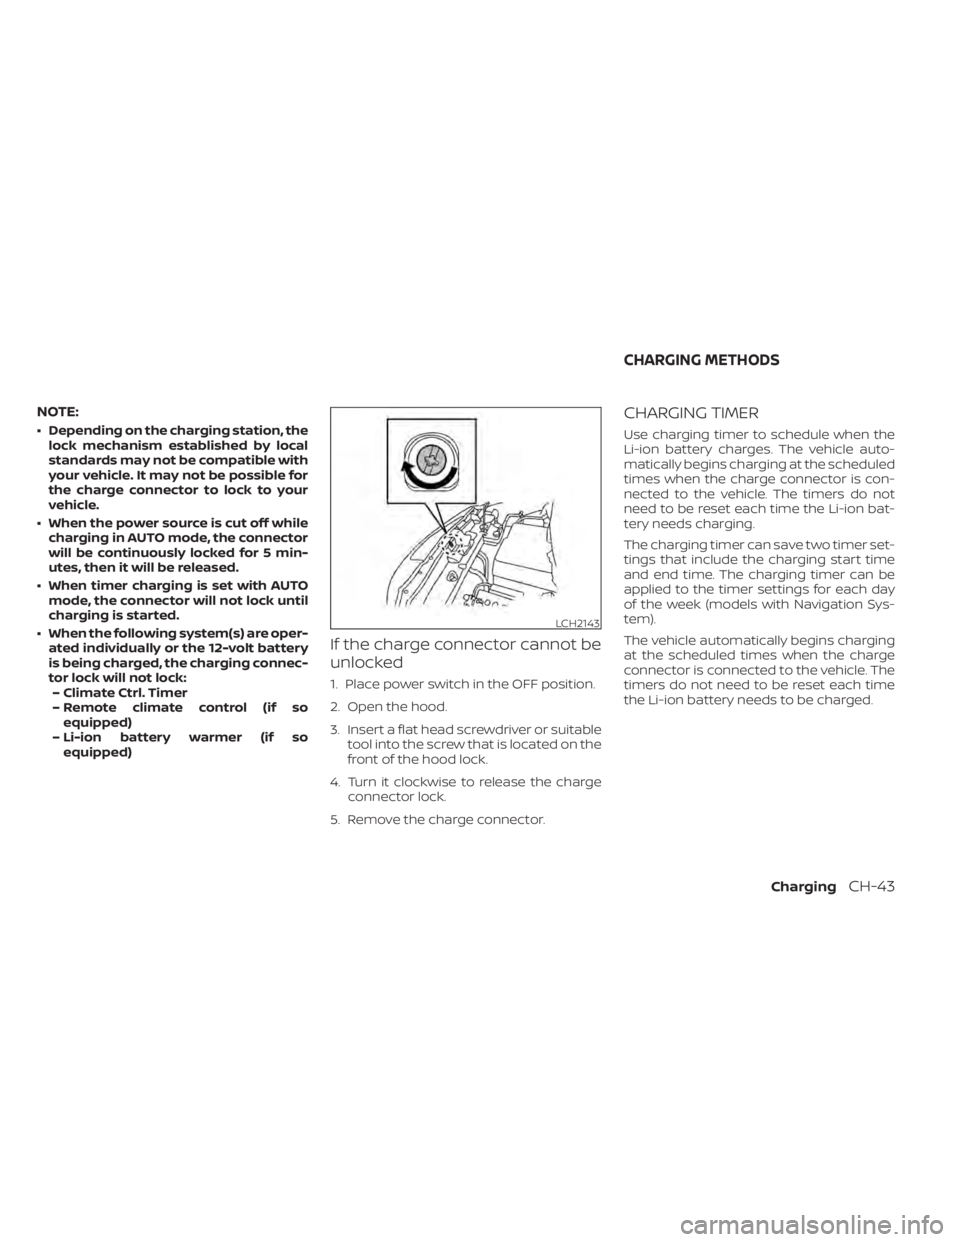
If the charge connector cannot be
unlocked
1. Place power switch in the OFF position.
2. Open the hood.
3. Insert a flat head screwdriver or suitable tool into the screw that is located on the
front of the hood lock.
4. Turn it clockwise to release the charge connector lock.
5. Remove the charge connector.
CHARGING TIMER
Use charging timer to schedule when the
Li-ion battery charges. The vehicle auto-
matically begins charging at the scheduled
times when the charge connector is con-
nected to the vehicle. The timers do not
need to be reset each time the Li-ion bat-
tery needs charging.
The charging timer can save two timer set-
tings that include the charging start time
and end time. The charging timer can be
applied to the timer settings for each day
of the week (models with Navigation Sys-
tem).
The vehicle automatically begins charging
at the scheduled times when the charge
connector is connected to the vehicle. The
timers do not need to be reset each time
the Li-ion battery needs to be charged.
LCH2143
CHARGING METHODS
ChargingCH-43
Page 199 of 596

HOW TO USE THE VEHICLE
INFORMATION DISPLAY
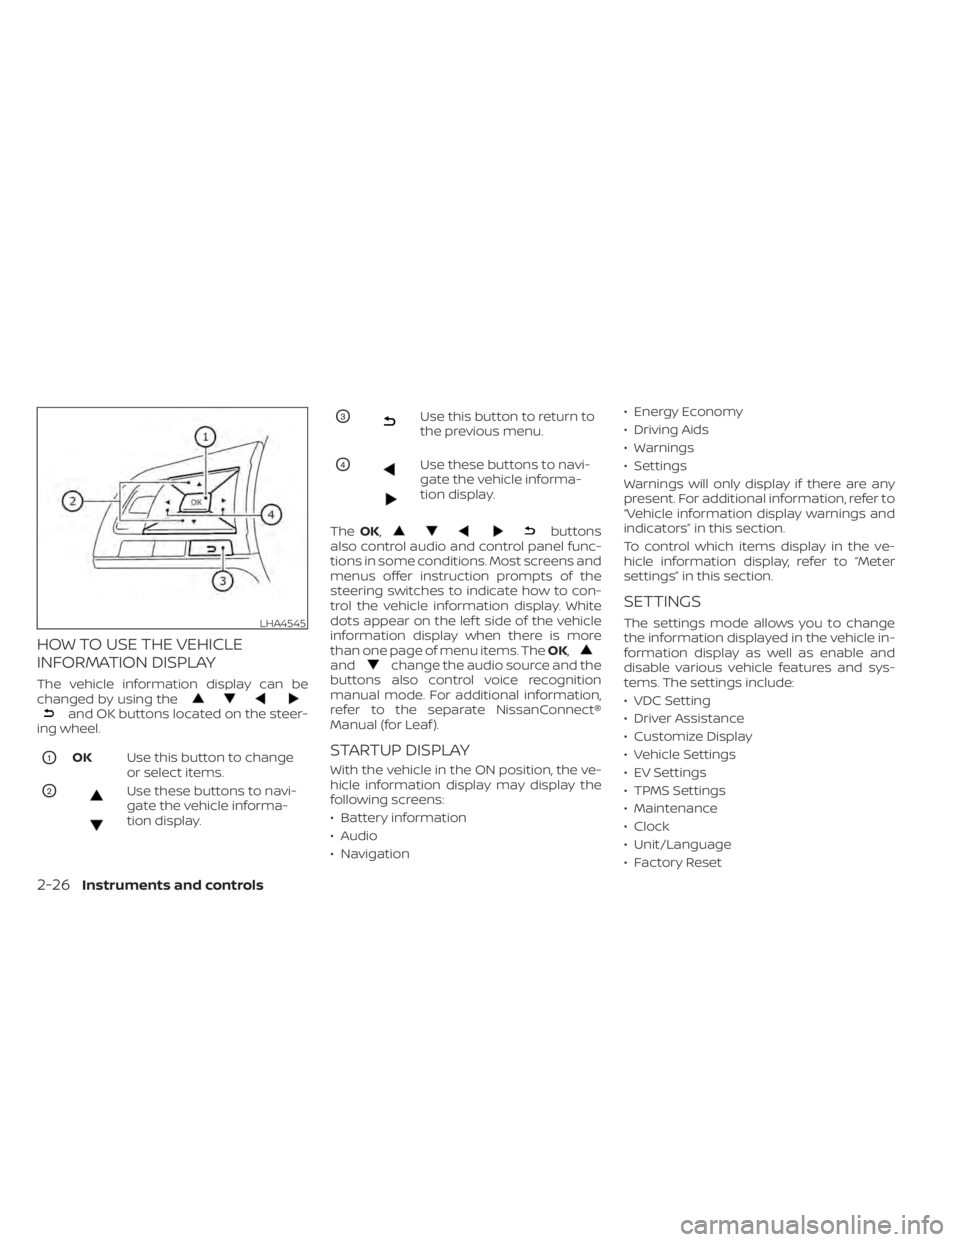
The vehicle information display can be
changed by using the
and OK buttons located on the steer-
ing wheel.
O1OK Use this button to change
or select items.
O2Use these buttons to navi-
gate the vehicle informa-
tion display.
O3Use this button to return to
the previous menu.
O4Use these buttons to navi-
gate the vehicle informa-
tion display.
The OK,
buttons
also control audio and control panel func-
tions in some conditions. Most screens and
menus offer instruction prompts of the
steering switches to indicate how to con-
trol the vehicle information display. White
dots appear on the lef t side of the vehicle
information display when there is more
than one page of menu items. The OK,
andchange the audio source and the
buttons also control voice recognition
manual mode. For additional information,
refer to the separate NissanConnect®
Manual (for Leaf ).
STARTUP DISPLAY
With the vehicle in the ON position, the ve-
hicle information display may display the
following screens:
• Battery information
• Audio
• Navigation • Energy Economy
• Driving Aids
• Warnings
• Settings
Warnings will only display if there are any
present. For additional information, refer to
“Vehicle information display warnings and
indicators” in this section.
To control which items display in the ve-
hicle information display, refer to “Meter
settings” in this section.
SETTINGS
The settings mode allows you to change
the information displayed in the vehicle in-
formation display as well as enable and
disable various vehicle features and sys-
tems. The settings include:
• VDC Setting
• Driver Assistance
• Customize Display
• Vehicle Settings
• EV Settings
• TPMS Settings
• Maintenance
• Clock
• Unit/Language
• Factory ResetLHA4545
2-26Instruments and controls
Page 205 of 596

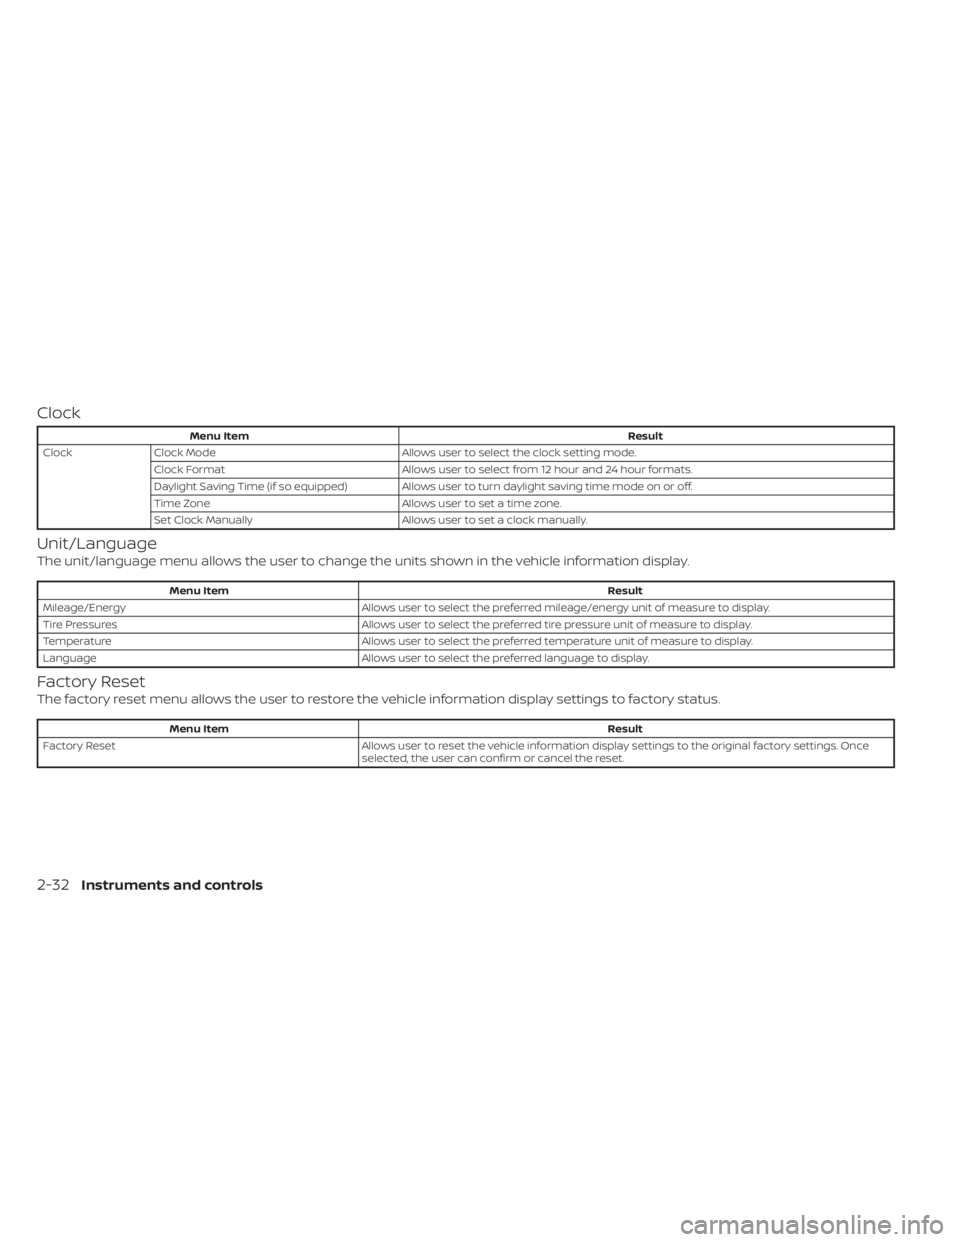
Clock
Menu ItemResult
Clock Clock Mode Allows user to select the clock setting mode.
Clock Format Allows user to select from 12 hour and 24 hour formats.
Daylight Saving Time (if so equipped) Allows user to turn daylight saving time mode on or off.
Time Zone Allows user to set a time zone.
Set Clock Manually Allows user to set a clock manually.
Unit/Language
The unit/language menu allows the user to change the units shown in the vehicle information display.
Menu Item Result
Mileage/Energy Allows user to select the preferred mileage/energy unit of measure to display.
Tire Pressures Allows user to select the preferred tire pressure unit of measure to display.
Temperature Allows user to select the preferred temperature unit of measure to display.
Language Allows user to select the preferred language to display.
Factory Reset
The factory reset menu allows the user to restore the vehicle information display settings to factory status.
Menu Item Result
Factory Reset Allows user to reset the vehicle information display settings to the original factory settings. Once
selected, the user can confirm or cancel the reset.
2-32Instruments and controls