navigation NISSAN LEAF 2022 Owner´s Manual
[x] Cancel search | Manufacturer: NISSAN, Model Year: 2022, Model line: LEAF, Model: NISSAN LEAF 2022Pages: 618, PDF Size: 4.3 MB
Page 94 of 618
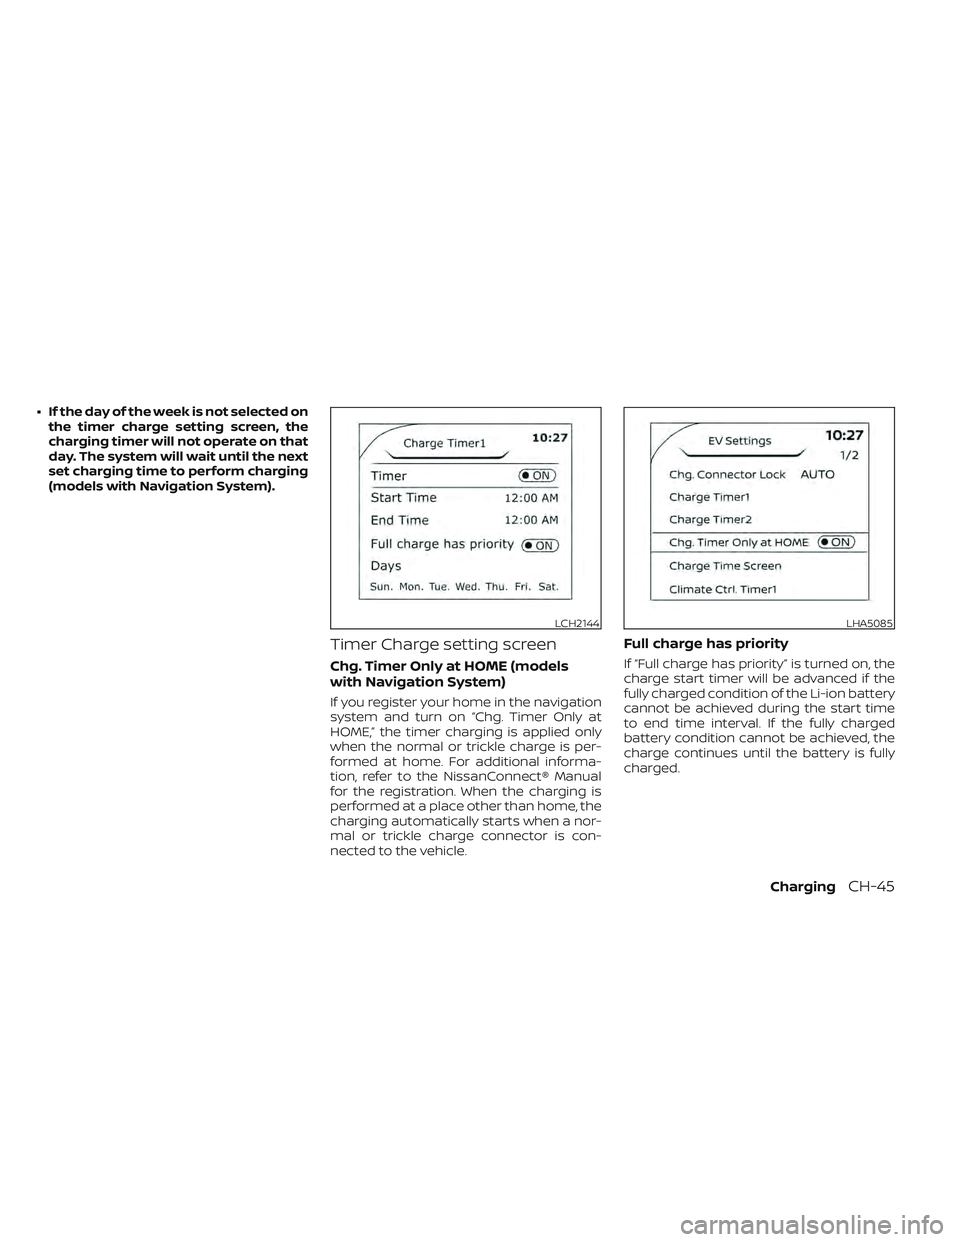
• If the day of the week is not selected onthe timer charge setting screen, the
charging timer will not operate on that
day. The system will wait until the next
set charging time to perform charging
(models with Navigation System).
Timer Charge setting screen
Chg. Timer Only at HOME (models
with Navigation System)
If you register your home in the navigation
system and turn on “Chg. Timer Only at
HOME,” the timer charging is applied only
when the normal or trickle charge is per-
formed at home. For additional informa-
tion, refer to the NissanConnect® Manual
for the registration. When the charging is
performed at a place other than home, the
charging automatically starts when a nor-
mal or trickle charge connector is con-
nected to the vehicle.
Full charge has priority
If “Full charge has priority” is turned on, the
charge start timer will be advanced if the
fully charged condition of the Li-ion battery
cannot be achieved during the start time
to end time interval. If the fully charged
battery condition cannot be achieved, the
charge continues until the battery is fully
charged.
LCH2144LHA5085
ChargingCH-45
Page 96 of 618
The current mode of the charge connector
lock (AUTO, LOCK or UNLOCK) is displayed.
For additional information, see “Charge
connector lock system” (P. CH-41).
When the OK button on the steering wheel
is pressed, the display will be switched to
the “EV Settings” menu. In the EV Settings,
the setting of the charging timer, Climate
Ctrl. timer and charge connector lock
mode can be changed. For additional infor-
mation, see “Vehicle information display”
(P. 2-26).
When the
button on the steering
wheel is pressed while the timer display is
shown, the display is switched to the ECO
Drive Report (if the vehicle was driven).
Either display will continue to be displayed
for another 30 seconds when the button is
operated. If the doors are locked af ter the
power switch was placed in the OFF posi-
tion, the display will turn off before the pre-
set time.
For models with Navigation System, the
day of the week is displayed with the time
(hour and minute) in each information
O1–
O3.
In addition to the above, note the following
conditions for the charging time
O1infor-
mation: • The charging time is displayed by the 10
minutes. If the estimated charging time is
longer than 24 hours, “Over 24h” is
displayed.
• When the charging is set to start imme- diately af ter connecting the charge con-
nector to the vehicle, the start time is
displayed as “Charge Now”.
• While being charged, the time when the charging has actually started is displayed
as the start time. The end time is dis-
played according to the estimated
charging time that was calculated based
on the electrical power being supplied.
• For models with Li-ion battery warmer, the charging system calculates the elec-
trical power used by the battery warmer
when the Li-ion battery temperature is
low, and longer charging time will be
displayed.
• When “Chg. Timer Only at HOME” is set to ON (models with Navigation System) in
the EV Settings, the start time is displayed
only when the power switch is placed in
the OFF position at home. If the power
switch is placed in the OFF position other
than at home, the immediate charge
mode is selected and “Charge Now” will
appear as the start time. • When “Full charge has priority” is set to ON
in the EV Settings and the Li-ion battery
cannot be charged to a full level within
the hours between the scheduled start
time and end time of the charging timer,
the charging time shows the time that
exceeds the scheduled hours in the
charging timer.
• If you need to confirm the estimated charging time depending on the avail-
able electrical power (supplied to the
charger), see the Estimated Charge Time
display. For additional information, see
“Meters and gauges” (P. 2-5).
NOTE:
• The displayed end time of charging is an estimation. The Li-ion battery may
not be charged to a full level by the
estimated end time.
• If the charging timer and the Climate Ctrl. timer are set to operate at the
same time, longer charging time will be
displayed or the Li-ion battery may not
be charged to a full level at the sched-
uled end time.
ChargingCH-47
Page 97 of 618
IMMEDIATE CHARGE
When a charging timer is not turned on,
charging automatically starts when a nor-
mal or trickle charge connector is con-
nected to the vehicle.
Use the immediate charge mode anytime
you want to start charging when a charg-
ing timer is turned on by performing the
following:
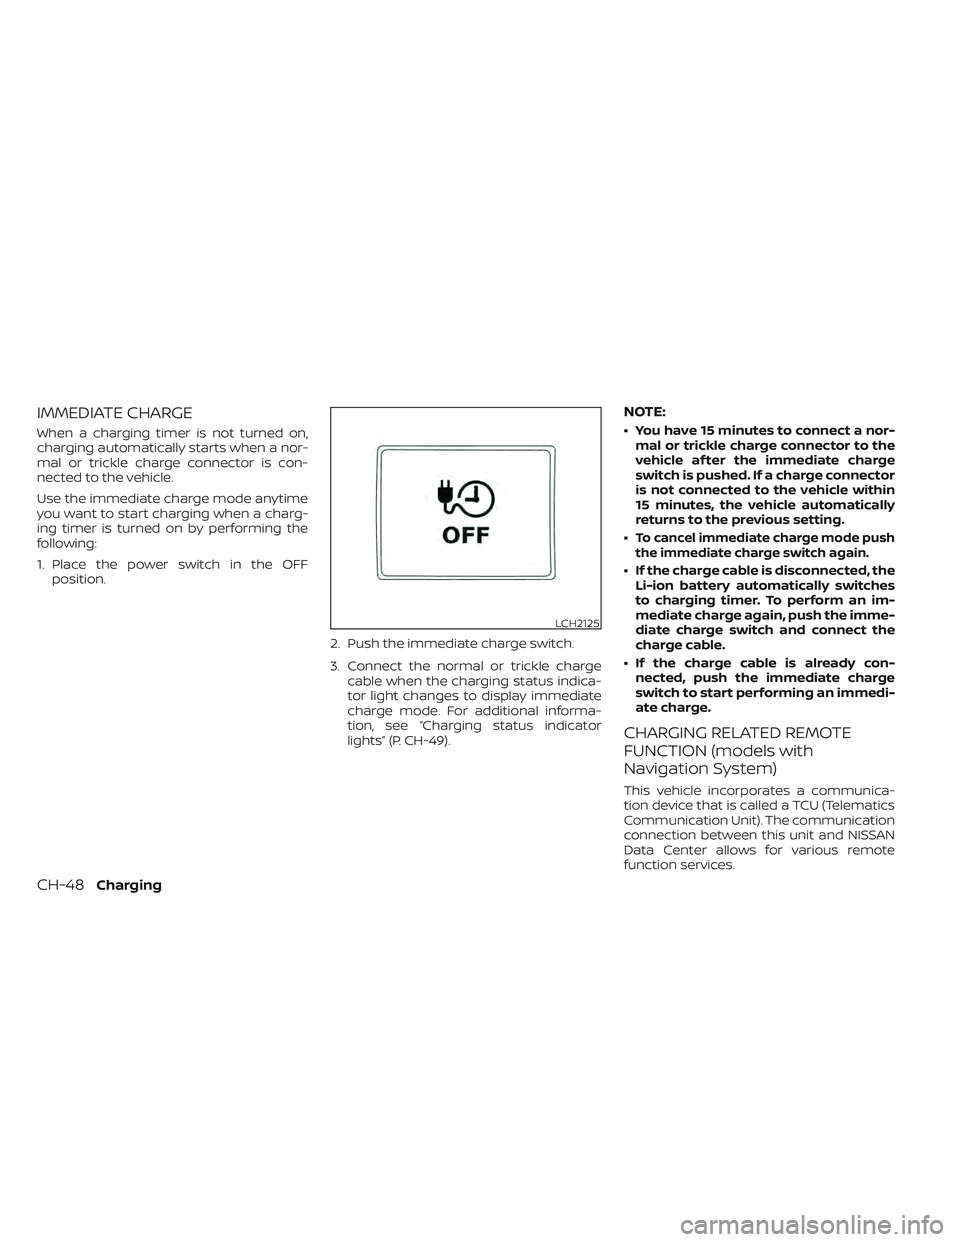
1. Place the power switch in the OFFposition.
2. Push the immediate charge switch.
3. Connect the normal or trickle chargecable when the charging status indica-
tor light changes to display immediate
charge mode. For additional informa-
tion, see “Charging status indicator
lights” (P. CH-49).
NOTE:
• You have 15 minutes to connect a nor-mal or trickle charge connector to the
vehicle af ter the immediate charge
switch is pushed. If a charge connector
is not connected to the vehicle within
15 minutes, the vehicle automatically
returns to the previous setting.
•
To cancel immediate charge mode push
the immediate charge switch again.
• If the charge cable is disconnected, the Li-ion battery automatically switches
to charging timer. To perform an im-
mediate charge again, push the imme-
diate charge switch and connect the
charge cable.
• If the charge cable is already con- nected, push the immediate charge
switch to start performing an immedi-
ate charge.
CHARGING RELATED REMOTE
FUNCTION (models with
Navigation System)
This vehicle incorporates a communica-
tion device that is called a TCU (Telematics
Communication Unit). The communication
connection between this unit and NISSAN
Data Center allows for various remote
function services.
LCH2125
CH-48Charging
Page 177 of 618
2 Instruments and controls
Cockpit.........................................2-2
Instrument Panel ................................2-4
Meters and Gauges .............................2-5
Speedometer and odometer .................2-5
Li-ion battery temperature gauge ............ 2-7
Power meter ................................. 2-7
Driving range .................................2-8
Li-ion battery available charge gauge ........2-9
Li-ion battery capacity level gauge ..........2-12
Outside air temperature .....................2-12
Clock ........................................ 2-12
ECO mode indicator ......................... 2-13
e-Pedal system indicator ....................2-13
Warning lights, indicator lights and audible
reminders ...................................... 2-14
Checking lights .............................. 2-15
Warning/Indicator lights (red) ...............2-15
Warning/Indicator lights (yellow) ............2-18
Warning/Indicator lights (other) .............2-24
Audible reminders ........................... 2-25
Vehicle information display .....................2-26
How to use the vehicle information
display ...................................... 2-26
Startup display .............................. 2-27
Settings ..................................... 2-27
Vehicle information display warnings
and indicators ............................... 2-34Warning information displays
(models with a navigation system)
..........2-42
Security systems ............................... 2-42
Vehicle security system .....................2-42
NISSAN Vehicle Immobilizer System .........2-44
Wiper and washer switch .......................2-45
Washer operation ........................... 2-46
Rear wiper operation ........................ 2-46
Rear window and outside mirror
(if so equipped) defroster switch ...............2-47
Headlight and turn signal switch ...............2-48
Headlight switch ............................ 2-48
LED Daytime Running Lights (DRL)
system (Type A) (if so equipped) .............2-53
LED Daytime Running Lights (DRL)
system (Type B) (if so equipped) .............
2-53
Instrument
brightness control ..............2-54
Turn signal switch ........................... 2-54
Fog light switch (if so equipped) ................2-55
Horn ........................................... 2-55
ECO switch ..................................... 2-56
Heated seat switches (if so equipped) ..........2-56
Heated steering wheel switch (if so equipped) . . 2-57
Emergency call (SOS) button (if so equipped) . . . 2-58
Charge port lid switch .......................... 2-58
Immediate Charge switch ......................2-59
Page 204 of 618
STARTUP DISPLAY
With the vehicle in the ON position, the ve-
hicle information display may display the
following screens:
• Battery information
• Audio
• Navigation (if so equipped)
• Energy Economy
• Driving Aids
• Warnings
• Settings
Warnings will only display if there are any
present. For additional information, see
“Vehicle information display warnings and
indicators” (P. 2-34).
To control which items display in the ve-
hicle information display, see “How to use
the vehicle information display” (P. 2-26).
SETTINGS
The settings mode allows you to change
the information displayed in the vehicle in-
formation display as well as enable and
disable various vehicle features and sys-
tems. The settings include:
• VDC Setting
• Driver Assistance
• Customize Display
• Vehicle Settings
• EV Settings
• TPMS Settings
• Maintenance
• Clock
• Unit/Language
• Factory Reset
VDC Setting
The VDC setting menu allows the user to the adjust the VDC settings.
Some menu items shown below may not be equipped on your vehicle.
Menu ItemExplanation
System Allows user to turn the Vehicle Dynamic Control (VDC) system on or off.
Instruments and controls2-27
Page 207 of 618
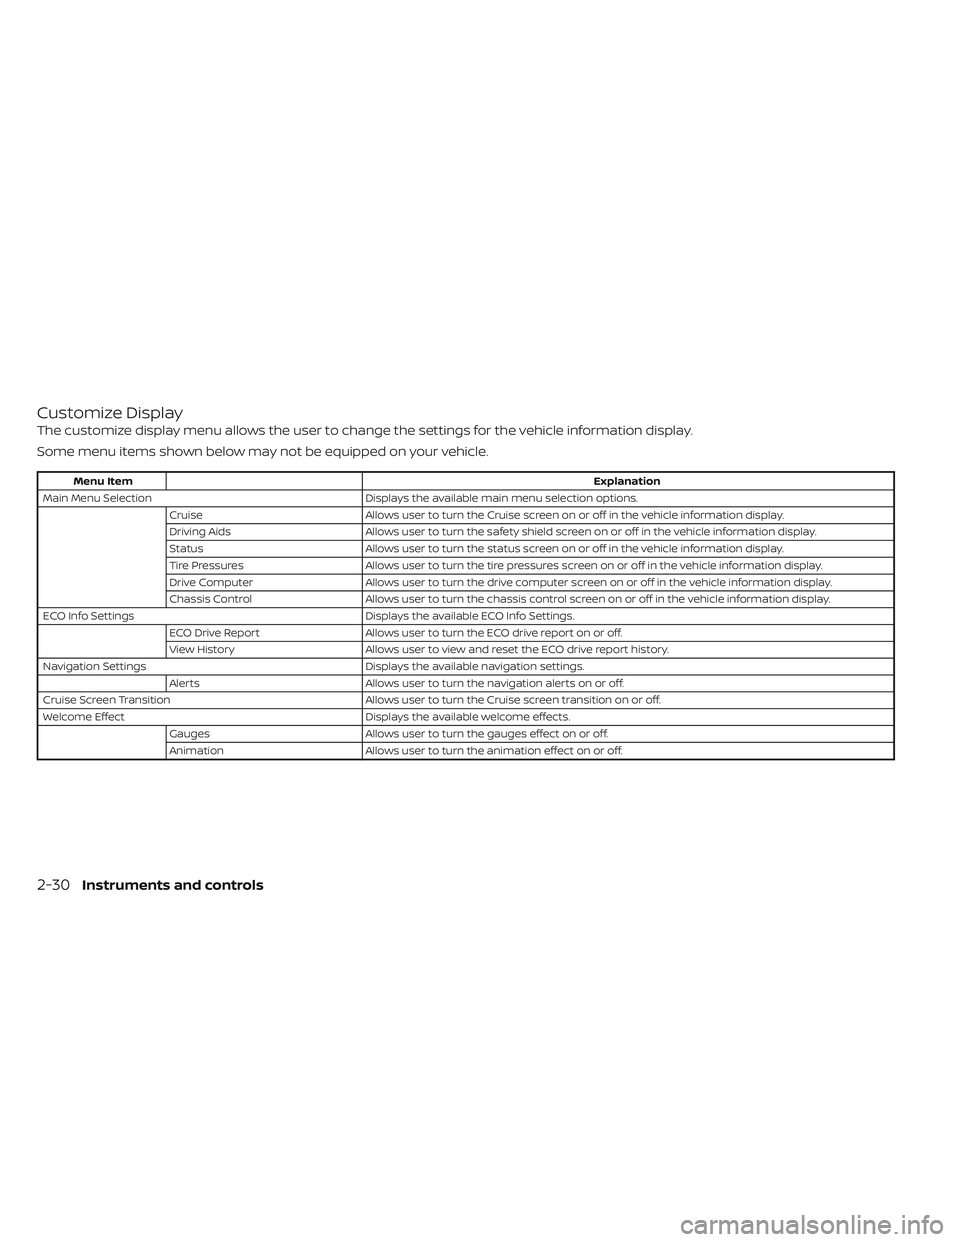
Customize Display
The customize display menu allows the user to change the settings for the vehicle information display.
Some menu items shown below may not be equipped on your vehicle.
Menu ItemExplanation
Main Menu Selection Displays the available main menu selection options.
Cruise Allows user to turn the Cruise screen on or off in the vehicle information display.
Driving Aids Allows user to turn the safety shield screen on or off in the vehicle information display.
Status Allows user to turn the status screen on or off in the vehicle information display.
Tire Pressures Allows user to turn the tire pressures screen on or off in the vehicle information display.
Drive Computer Allows user to turn the drive computer screen on or off in the vehicle information display.
Chassis Control Allows user to turn the chassis control screen on or off in the vehicle information display.
ECO Info Settings Displays the available ECO Info Settings.
ECO Drive Report Allows user to turn the ECO drive report on or off.
View History Allows user to view and reset the ECO drive report history.
Navigation Settings Displays the available navigation settings.
Alerts Allows user to turn the navigation alerts on or off.
Cruise Screen Transition Allows user to turn the Cruise screen transition on or off.
Welcome Effect Displays the available welcome effects.
Gauges Allows user to turn the gauges effect on or off.
Animation Allows user to turn the animation effect on or off.
2-30Instruments and controls
Page 219 of 618
WARNING INFORMATION DISPLAYS
(models with a navigation
system)
Low battery warning
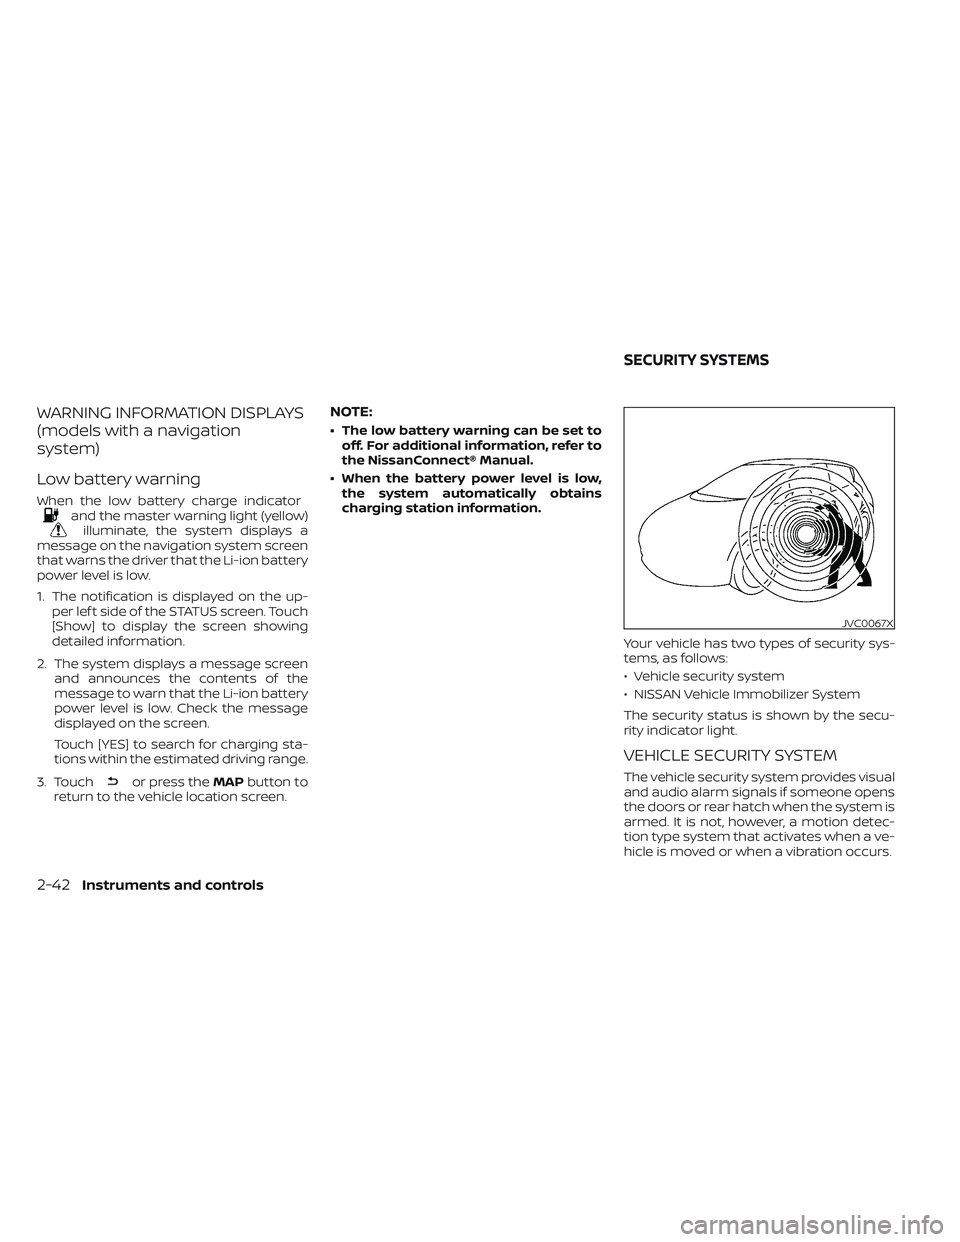
When the low battery charge indicatorand the master warning light (yellow)illuminate, the system displays a
message on the navigation system screen
that warns the driver that the Li-ion battery
power level is low.
1. The notification is displayed on the up- per lef t side of the STATUS screen. Touch
[Show] to display the screen showing
detailed information.
2. The system displays a message screen and announces the contents of the
message to warn that the Li-ion battery
power level is low. Check the message
displayed on the screen.
Touch [YES] to search for charging sta-
tions within the estimated driving range.
3. Touch
or press the MAPbutton to
return to the vehicle location screen.
NOTE:
• The low battery warning can be set to off. For additional information, refer to
the NissanConnect® Manual.
• When the battery power level is low, the system automatically obtains
charging station information.
Your vehicle has two types of security sys-
tems, as follows:
• Vehicle security system
• NISSAN Vehicle Immobilizer System
The security status is shown by the secu-
rity indicator light.
VEHICLE SECURITY SYSTEM
The vehicle security system provides visual
and audio alarm signals if someone opens
the doors or rear hatch when the system is
armed. It is not, however, a motion detec-
tion type system that activates when a ve-
hicle is moved or when a vibration occurs.
JVC0067X
SECURITY SYSTEMS
2-42Instruments and controls
Page 259 of 618
Lockout protection
When any door is open and the power door
lock switch is moved to the lock position, all
doors will lock. If the Intelligent Key is lef t in
the vehicle af ter all the doors are closed, all
doors will unlock automatically and a
chime will sound.
These functions help to prevent the Intelli-
gent Key from being accidentally locked
inside the vehicle.
AUTOMATIC DOOR LOCKS
• All doors lock automatically when the ve-hicle speed reaches 15 mph (24 km/h).
• All doors unlock automatically when the power switch is placed in the OFF
position.
CHILD SAFETY REAR DOOR LOCK
Child safety locks help prevent the rear
doors from being opened accidentally, es-
pecially when small children are in the
vehicle.
The child safety lock levers are located on
the edge of the rear doors.
When the lever is in the unlock position
O2,
the door can be opened from the outside
or the inside.
When the lever is in the LOCK position
O1,
the door can be opened only from the
outside.
WARNING
• Radio waves could adversely affect
electric medical equipment. Those
who use a pacemaker should contact
the electric medical equipment
manufacturer for the possible influ-
ences before use.
• The Intelligent Key transmits radio
waves when the buttons are pressed.
The FAA advises the radio waves may
affect aircraf t navigation and com-
munication systems. Do not operate
the Intelligent Key while on an air-
plane. Make sure the buttons are not
operated unintentionally when the
unit is stored for a flight.
• Never leave the Intelligent Key in the
vehicle when you leave the vehicle.
The Intelligent Key system can operate all
the door locks using the remote control
function or pushing the request switch on
the vehicle without taking the key out from
a pocket or purse. The operating environ-
ment and/or conditions may affect the In-
telligent Key system operation.
Be sure to read the following before using
the Intelligent Key system.
LPD2552
NISSAN INTELLIGENT KEY® SYSTEM
3-6Pre-driving checks and adjustments
Page 265 of 618
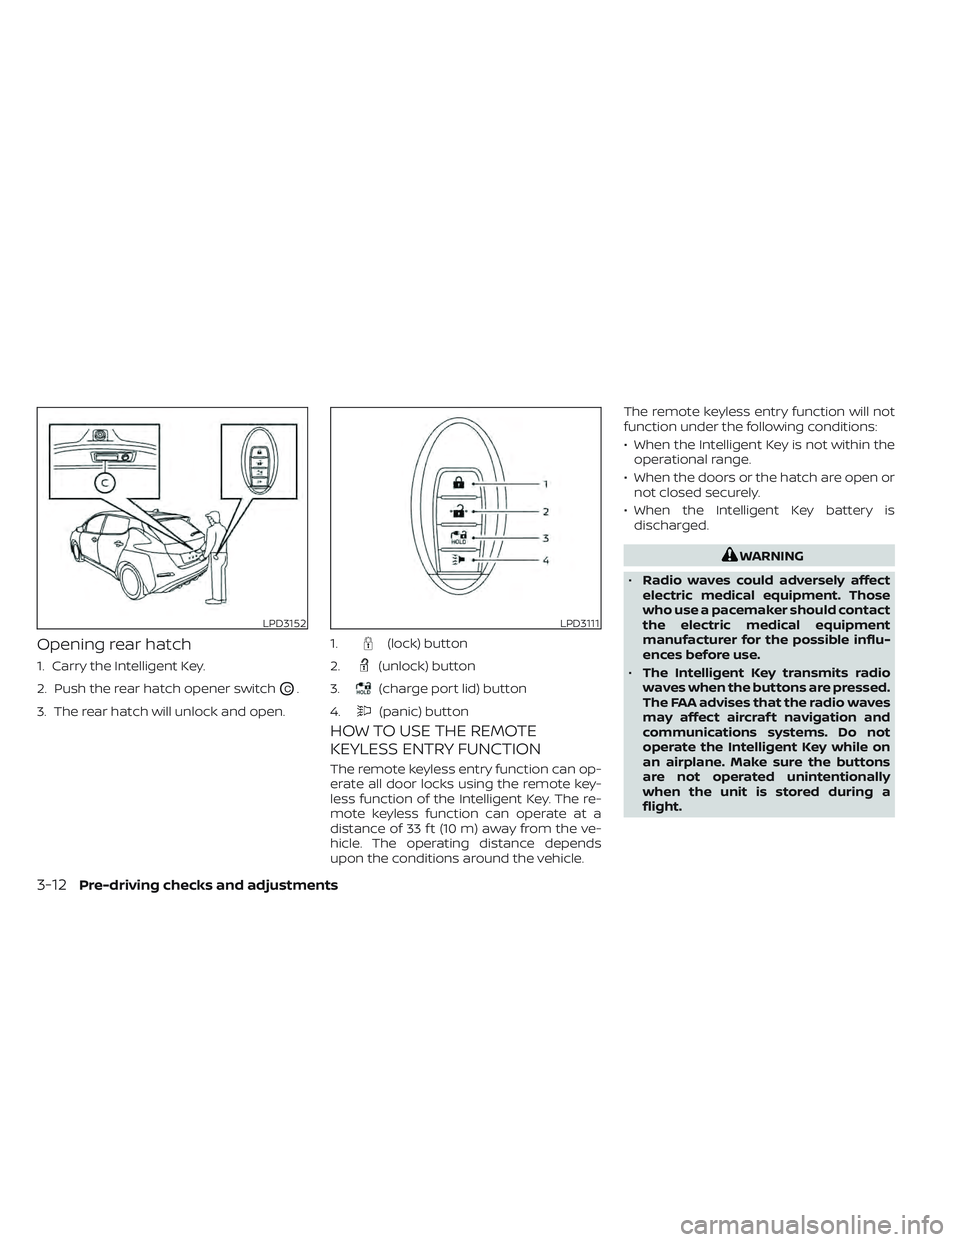
Opening rear hatch
1. Carry the Intelligent Key.
2. Push the rear hatch opener switch
OC.
3. The rear hatch will unlock and open.
HOW TO USE THE REMOTE
KEYLESS ENTRY FUNCTION
The remote keyless entry function can op-
erate all door locks using the remote key-
less function of the Intelligent Key. The re-
mote keyless function can operate at a
distance of 33 f t (10 m) away from the ve-
hicle. The operating distance depends
upon the conditions around the vehicle. The remote keyless entry function will not
function under the following conditions:
• When the Intelligent Key is not within the
operational range.
• When the doors or the hatch are open or not closed securely.
• When the Intelligent Key battery is discharged.
WARNING
• Radio waves could adversely affect
electric medical equipment. Those
who use a pacemaker should contact
the electric medical equipment
manufacturer for the possible influ-
ences before use.
• The Intelligent Key transmits radio
waves when the buttons are pressed.
The FAA advises that the radio waves
may affect aircraf t navigation and
communications systems. Do not
operate the Intelligent Key while on
an airplane. Make sure the buttons
are not operated unintentionally
when the unit is stored during a
flight.
LPD3152LPD3111
1.(lock) button
2.
(unlock) button
3.
(charge port lid) button
4.
(panic) button
3-12Pre-driving checks and adjustments
Page 280 of 618
4 Monitor, climate, audio, phone and
voice recognition systems
NissanConnect® Manual........................4-2
RearView Monitor (if so equipped) ...............4-3
RearView Monitor system operation ..........4-4
How to read the displayed lines ..............4-5
Difference between predicted and
actual distances .............................4-5
How to park with predicted course
lines ..........................................4-7
Adjusting the screen .........................4-8
How to turn on and off predicted
course lines ..................................4-9
RearView Monitor system limitations .........4-9
System maintenance ....................... 4-10
Intelligent Around View Monitor
(if so equipped) .................................. 4-11
Intelligent Around View Monitor system
operation ................................... 4-12
Difference between predicted and
actual distances ............................ 4-16
How to park with predicted course
lines ......................................... 4-17
How to switch the display ...................4-18
Adjusting the screen ........................ 4-19
Intelligent Around View Monitor system
limitations .................................. 4-20System maintenance
.......................4-22
Moving Object Detection (MOD)
(if so equipped) ................................. 4-23
MOD system operation ......................4-24
Turning MOD ON and OFF ...................4-26
MOD system limitations .....................4-26
System maintenance .......................4-27
Vents .......................................... 4-28
Heater and air conditioner (automatic) .........4-29
Displaying climate control system
status screen (models with navigation
system) ..................................... 4-30
Operating tips ............................... 4-30
In-cabin microfilter .......................... 4-31
Automatic climate control
(models without Navigation System) ........4-32
Automatic climate control
(models with Navigation System) ............4-35
Climate ctrl. timer ........................... 4-38
Antenna ........................................ 4-43
Car phone or CB radio .......................... 4-43
iPod®/iPhone® ................................. 4-44