brake NISSAN LEAF 2022 Owner´s Manual
[x] Cancel search | Manufacturer: NISSAN, Model Year: 2022, Model line: LEAF, Model: NISSAN LEAF 2022Pages: 618, PDF Size: 4.3 MB
Page 211 of 618

VEHICLE INFORMATION DISPLAY
WARNINGS AND INDICATORS
Some of the following warning messages
may not be equipped on your vehicle.
EV system operation for
discharged Intelligent Key
system indicator
This indicator appears when the Intelligent
Key battery is running out of power and
when the Intelligent Key system and ve-
hicle are not communicating normally.
If this indicator appears, touch the power
switch with the Intelligent Key while de-
pressing the brake pedal. For additional in-
formation, see “NISSAN Intelligent Key® bat-
tery discharge” (P. 5-12).
Key Battery Low
This indicator appears when the Intelligent
Key battery is running out of power.
If this indicator appears, replace the bat-
tery with a new one. For additional infor-
mation, see “NISSAN Intelligent Key® bat-
tery replacement” (P. 8-19).
Key System Error: See
Owner’s Manual
Af ter the power switch is placed in the ON
position, this warning appears for a period
of time and then turns off.
The Key System Error message warns of a
malfunction with the Intelligent Key sys-
tem. If the warning appears while the mo-
tor is stopped, it may be impossible to start
the motor.
If the warning appears while the motor is
running, you can drive the vehicle. However,
have it repaired as soon as possible. It is
recommended that you visit a NISSAN cer-
tified LEAF dealer for this service.
No Key Detected
This warning appears in either of the fol-
lowing conditions:
No key inside the vehicle:
This warning appears when the door is
closed with the Intelligent Key lef t outside
the vehicle and the power switch in the
ACC or ON position. Make sure that the
Intelligent Key is inside the vehicle.Unregistered Intelligent Key:
This warning appears when the power
switch is placed in the ON, ACC or READY to
drive position and the Intelligent Key can-
not be recognized by the system. You can-
not place the power switch in the READY to
drive position with an unregistered key. Use
an Intelligent Key that has been registered.
For additional information, see “NISSAN In-
telligent Key® system” (P. 3-6).
Brightness indicator
This indicator shows the brightness ad-
justment of the instrument panel. For addi-
tional information, see “Instrument bright-
ness control” (P. 2-54).
Chassis Control System Error: See
Owner’s Manual
This warning appears if the chassis control
is not functioning properly. Have the sys-
tem checked. It is recommended that you
visit a NISSAN certified LEAF dealer for this
service. For additional information, see
“Chassis control” (P. 5-166).
2-34Instruments and controls
Page 213 of 618
e—Pedal system failure! Press brake
pedal to slow or stop
This warning appears when the e-Pedal
system is malfunctioning. Have the system
checked. It is recommended that you visit a
NISSAN certified LEAF dealer for this
service.
Indicators for maintenance
These indicators appear when the cus-
tomer set distance comes for replacing
tires or other maintenance items. You can
set or reset the distance for replacing tires
and other maintenance items.
WARNING
The tire replacement indicator is not a
substitute for regular tire checks, in-
cluding tire pressure checks. For addi-
tional information, see “Changing
wheels and tires” (P. 8-34). Many factors
including tire inflation, alignment, driv-
ing habits and road conditions affect
tire wear and when tires should be re-
placed. Setting the tire replacement in-
dicator for a certain driving distance
does not mean your tires will last that
long. Use the tire replacement indicator
as a guide only and always perform regular tire checks. Failure to perform
regular tire checks, including tire pres-
sure checks could result in tire failure.
Serious vehicle damage could occur
and may lead to a collision, which could
result in serious personal injury or
death.
For scheduled maintenance items and in-
tervals, see “Maintenance and schedules.”
Headlight System Error: See Owner’s
Manual
This warning appears when the LED head-
lights are not functioning properly.
If this warning appears, have your system
checked. It is recommended that you visit a
NISSAN certified LEAF dealer for this
service.
Low battery charge
indicator
This light appears when the available Li-ion
battery charge is getting low. Charge as
soon as it is possible, preferably before the
Li-ion battery available charge gauge
reaches 0%.
NOTE:
The low battery charge indicator turns
off immediately before the Li-ion battery
is completely discharged and the vehicle
will stop. If the Li-ion battery becomes
completely discharged, the vehicle must
be charged in order to be driven.
Low outside air
temperature
The outside air temperature is displayed in
°F or °C in the range of −20°F to 140°F (−30°C
to 60°C).
The outside air temperature mode in-
cludes a low temperature warning feature.
If the outside air temperature is below 37°F
(3°C), the warning is displayed on the
screen.
The outside temperature sensor is located
in front side of the vehicle. The sensor may
be affected by road, wind directions and
other driving conditions. The display may
differ from the actual outside temperature
or the temperature displayed on various
signs or billboards.
2-36Instruments and controls
Page 214 of 618
Low Washer Fluid
This warning appears when the washer
tank fluid is at a low level. Add washer fluid
as necessary. For additional information,
see “Windshield-washer fluid” (P. 8-8).
Press Brake Pedal
This message may appear in the following
situations:
• The driver tries to release the electronicparking brake manually without depress-
ing the brake pedal.
• The vehicle is stopped on a steep hill; and there is a possibility of moving back-
wards, even if the electronic parking
brake is applied.
For additional information, see “Electronic
parking brake” (P. 5-19).
Press brake pedal to
operate e-Pedal switch
This indicator appears when trying to turn
the e-Pedal off without depressing the
brake pedal when the vehicle is stopped.
Depress the brake pedal before pulling the
e-Pedal switch.
Push brake and power
switch to drive
This indicator appears while the vehicle is
in the P (Park) position. This indicator
means that the EV system will start when
the power switch is pressed with the brake
pedal depressed.
Rear seat belt reminder
This warning appears for 65 seconds af ter
the power switch is placed in the ON posi-
tion and the EV system is started.
This warning shows the status of the rear
seat belts. When one of the rear seat belts is
buckled, the corresponding rear seat belt
warning will appear in gray. When one of
the rear seat belts is unbuckled, the rear
seat belt warning will appear red.
Af ter a change in buckle status, a chime will
sound and the warning will appear for an-
other 65 seconds.
Release Parking Brake
This warning appears when the vehicle
speed is above 4 mph (7 km/h) (models not
equipped with electronic parking brake) or
2 mph (4 km/h) (models equipped with
electronic parking brake) and the parking
brake is applied. Stop the vehicle and re-
lease the parking brake.
Reminder Turn OFF
Headlights
This warning appears when the power
switch is turned to the OFF position but the
headlight switch is still on. Turn off the
headlight switch.
Shif t to P range
This warning appears alternately with
door/rear hatch open warning when the
driver's door is opened with the shif t posi-
tion in any position other than the P (Park)
position. If this warning appears, push the P
(Park) position switch and place in the P
(Park) position.
For additional information, see “Door open”
(P. 2-35).
Shipping Mode On Push Storage Fuse
This warning may appear if the extended
storage switch is not pushed in. When this
warning appears, push in the extended
storage switch to turn off the warning.
For additional information, see “Extended
storage switch” (P. 8-19).
Instruments and controls2-37
Page 215 of 618
Tire Pressure Low - Add Air
This warning appears when the low tire
pressure warning light in the meter illumi-
nates and low tire pressure is detected. The
warning appears each time the power
switch is placed in the ON position as long
as the low tire pressure warning light re-
mains illuminated.
If this warning appears, stop the vehicle
and adjust the tire pressure to the recom-
mended COLD tire pressure shown on the
Tire and Loading Information label. For ad-
ditional information, see “Low tire pressure
warning light” (P. 2-20) and “Tire Pressure
Monitoring System (TPMS)” (P. 5-4).
T/M system malfunction Visit dealer
This warning appears if there is a malfunc-
tion in the electric shif t control system but
operation of the electric shif t control is still
possible. The master warning light (yellow)
also illuminates and the chime sounds.
When this occurs, check the shif t position
indicator by the shif t lever or in the vehicle
information display to make sure that
shif ting has been performed properly. It is
recommended that you contact a NISSAN
certified LEAF dealer as soon as possible.
When Parked Apply Parking
Brake
This warning appears if there is a malfunc-
tion in the electric shif t control system. This
warning appears when the parking brake
is not applied, even af ter the vehicle has
been parked. The master warning light
(red) also illuminates and the chime
sounds.
If the power switch cannot be placed in the
OFF position, apply the parking brake and
then place the power switch in the OFF
position. The warning turns off and the
chime stops.
If this warning appears, have your system
checked. It is recommended that you visit a
NISSAN certified LEAF dealer for this service.
Automatic Emergency
Braking with Pedestrian
Detection warning
indicator
This indicator appears along, with an au-
dible warning, when the system detects
the possibility of a forward collision.
For additional information, see “Automatic
Emergency Braking (AEB) with Pedestrian
Detection” (P. 5-125) and “Intelligent Forward
Collision Warning (I-FCW)” (P. 5-141).
Blind Spot Warning (BSW)
indicator
This indicator appears when the BSW/I-BSI
systems are engaged.
For additional information, see “Blind Spot
Warning (BSW)” (P. 5-36) or “Intelligent Blind
Spot Intervention (I-BSI)” (P. 5-45).
Cruise control indicator
This indicator shows the cruise control sys-
tem status.
When cruise control is activated, a green
circle will appear to indicate it is set. The
vehicle information display will also display
the speed the cruise control was set at. If
you accelerate past the set speed, the
speed will blink until you either cancel
cruise control or go back to the set speed. If
cruise control is on and canceled, the
speed will be displayed to show the speed
the vehicle will return to if the resume but-
ton is activated.
For additional information, see “Cruise con-
trol” (P. 5-65).
2-38Instruments and controls
Page 217 of 618
Not Available Bad Weather
This message may appear when the Steer-
ing Assist system is engaged.
When the wiper (HI) operates, the Steering
Assist system is automatically canceled.
The system will be available when the
above conditions no longer exist.
Not Available Parking Brake On
This message may appear when the Intel-
ligent Cruise Control (ICC) (with ProPILOT
Assist) system is engaged.
Under the following conditions, the ICC
(with ProPILOT Assist) system is automati-
cally canceled:
• The electronic parking brake is applied.
The above system cannot be used when
the electronic parking brake is activated.
Not Available Poor Road Conditions
This message may appear when the Intel-
ligent Cruise Control (ICC) (with ProPILOT
Assist) system, the ICC system, Intelligent
Blind Spot Intervention (I-BSI) or Intelligent
Lane Intervention (I-LI) is engaged.Under the following conditions, the ICC
(with ProPILOT Assist) system, ICC system,
Intelligent Blind Intervention (I-BSI) or Intel-
ligent Lane Intervention (I-LI) is automati-
cally canceled:
• When the VDC operates.
• When a wheel slips.
The above system cannot be used in some
situations (VDC operates and wheel slip.)
Not Available Seat Belt Not Fastened
This indicator appears when the ProPILOT
Assist system will not engage because the
driver’s seat belt is not fastened. For addi-
tional information, see “ProPILOT Assist”
(P. 5-92).
Not Available System Malfunction
This warning appears when one or more of
the following systems (if so equipped) are
not functioning properly:
• Intelligent Blind Spot Intervention (I-BSI)
• Blind Spot Warning (BSW)
• ProPILOT Assist
If one or more of these warning appears,
have the system checked. It is recom-
mended that you visit a NISSAN certified
LEAF dealer for this service.
Not Available Visibility is Impaired
This message may appear when the Intel-
ligent Cruise Control (ICC) (with ProPILOT
Assist) system is engaged.
Under the following conditions, the ICC
(with ProPILOT Assist) system is automati-
cally canceled:
• The camera area of the windshield is
fogged up or covered with dirt, water, ice,
snow, etc.
• Strong light, such as sunlight or high beams from oncoming vehicles, enters
the front camera
The system will be available when the
above conditions no longer exist.
If the warning message continues to ap-
pear, stop the vehicle in a safe location, turn
the EV system off and clean the windshield.
Parking Sensor
This indicator illuminates when the sensor
is activated. Pressing the OK button while
the sonar screen is displayed will dismiss
this message until the next time the sen-
sors are activated. The Parking Sensor sys-
tem will remain on, unless it is disabled in
the vehicle information display. For addi-
tional information, see “Rear Sonar System
(RSS) (P. 5-168).
2-40Instruments and controls
Page 230 of 618
If the ambient image sensor is damaged
due to an accident, it is recommended that
you visit a NISSAN certified LEAF dealer for
this service.
Battery saver system
• When the headlight switch is in theorposition while the power switch
is in the ON position, the lights will auto-
matically turn off 45 seconds af ter the
power switch has been placed in the OFF
position.
• When the headlight switch remains in the
orposition af ter the lights
automatically turn off, the lights will turn
on when the power switch is placed in the
ON position.
CAUTION
• When you turn on the headlight
switch again af ter the lights auto-
matically turn off, the lights will not
turn off automatically. Be sure to turn
the light switch to the OFF position
when you leave the vehicle for ex-
tended periods of time, otherwise
the battery will be discharged. •
Never leave the light switch on when
the power switch is in the OFF, ACC or
ON position for extended periods of
time even if the headlights turn off
automatically.
LED DAYTIME RUNNING LIGHTS
(DRL) SYSTEM (Type A) (if so
equipped)
The LED portion of the headlights auto-
matically illuminates at 100% intensity
when the power switch is in the READY to
drive position with the parking brake re-
leased. The LED DRL system operates with
the headlight switch in the OFF (if so
equipped) or
position. Turn headlight
switch to theposition for full illumina-
tion when driving at night.
If the parking brake is applied before the
power switch is in the READY to drive posi-
tion, the LED DRL system does not operate.
The LED DRL system illuminates once the
parking brake is released. The LED DRL sys-
tem will remain on until the power switch is
pushed to the OFF position.
WARNING
When the LED DRL system is active, tail
lights on your vehicle are not on. It is
necessary at dusk to turn on your
headlights. Failure to do so could cause
an accident injuring yourself and
others.
LED DAYTIME RUNNING LIGHTS
(DRL) SYSTEM (Type B) (if so
equipped)
The LED DRL automatically illuminate at
100% intensity when the power switch is in
the READY to drive position. The LED Day-
time Running Lights (DRL) operate with the
headlight switch in the OFF (if so equipped)
or
position. When you turn the head-
light switch to theposition for full
illumination, the LED lights switch from LED
DRL to the park function.
The LED DRL will remain on until the power
switch is placed in the OFF position.
It is necessary at dusk to turn the headlight
switch ON for interior controls and
switches to illuminate, as those remain
OFF while the switch is in the OFF position.
Instruments and controls2-53
Page 236 of 618
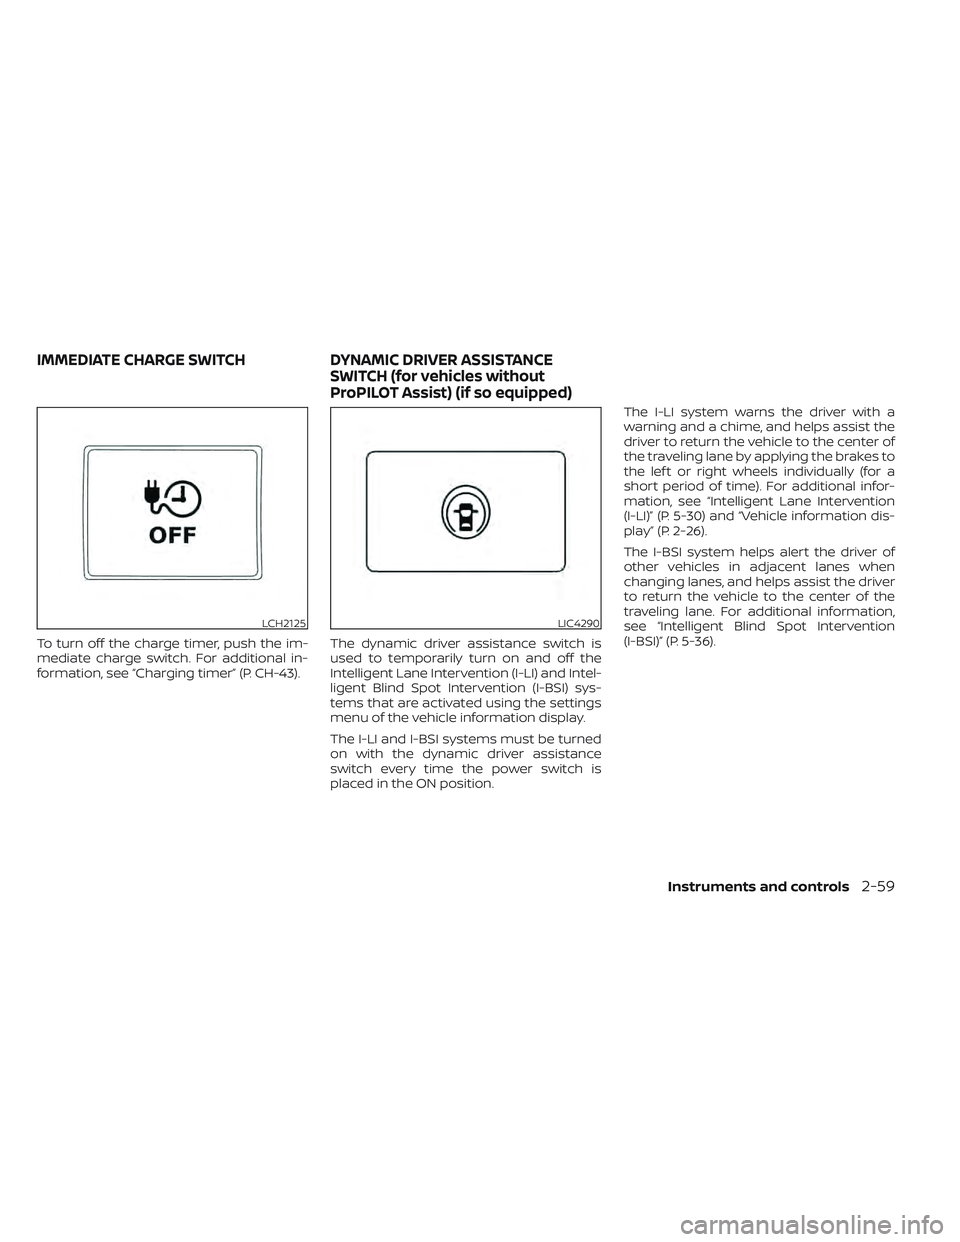
To turn off the charge timer, push the im-
mediate charge switch. For additional in-
formation, see “Charging timer” (P. CH-43).The dynamic driver assistance switch is
used to temporarily turn on and off the
Intelligent Lane Intervention (I-LI) and Intel-
ligent Blind Spot Intervention (I-BSI) sys-
tems that are activated using the settings
menu of the vehicle information display.
The I-LI and I-BSI systems must be turned
on with the dynamic driver assistance
switch every time the power switch is
placed in the ON position.The I-LI system warns the driver with a
warning and a chime, and helps assist the
driver to return the vehicle to the center of
the traveling lane by applying the brakes to
the lef t or right wheels individually (for a
short period of time). For additional infor-
mation, see “Intelligent Lane Intervention
(I-LI)” (P. 5-30) and “Vehicle information dis-
play ” (P. 2-26).
The I-BSI system helps alert the driver of
other vehicles in adjacent lanes when
changing lanes, and helps assist the driver
to return the vehicle to the center of the
traveling lane. For additional information,
see “Intelligent Blind Spot Intervention
(I-BSI)” (P. 5-36).
LCH2125LIC4290
IMMEDIATE CHARGE SWITCH
DYNAMIC DRIVER ASSISTANCE
SWITCH (for vehicles without
ProPILOT Assist) (if so equipped)
Instruments and controls2-59
Page 270 of 618
SymptomPossible causeAction to take
When opening the driver’s door
to get out of the vehicle The inside warning chime sounds continu-
ously. The power switch is pushed to the OFF
position while the driver's door is open.
Close the driver's door.
The power switch is in the ACC posi-
tion. Push the power switch to the OFF posi-
tion then close the driver's door.
When closing the door af ter
getting out of the vehicle The No Key Detected warning appears on
the display, the outside chime sounds
three times and the inside warning chime
sounds for a few seconds.
The power switch is in the ACC or ON
position.
Push the power switch to the OFF posi-
tion.
The Rear Door Alert warning message ap-
pears on the display, the horn sounds three
times twice, or a Check Rear Seat for All Ar-
ticles warning appears on the display. The Rear Door Alert is activated.
Check the back seat for all articles, press
the OK button to clear the Rear Door Alert
warning message.
The outside chime sounds continuously. The power switch is in the ACC or OFF
position, the electric shif t control sys-
tem has malfunctioned and the ve-
hicle cannot be placed in the P (Park)
position when the parking brake is not
applied.Make sure the parking brake is applied.
When closing the door with the
inside lock knob turned to
LOCK The outside chime sounds for a few sec-
onds and all the doors unlock.
The Intelligent Key is inside the vehicle
or cargo area.
Carry the Intelligent Key with you.
When pushing the request
switch or the
button on
the Intelligent Key to lock the
door The outside chime sounds for a few sec-
onds.
The Intelligent Key is inside the vehicle
or a cargo area.
Carry the Intelligent Key with you.
When pushing the power
switch in the READY to drive
position The EV system operation for discharged
Intelligent Key system indicator appears on
the display.
The Intelligent Key battery charge is
low.
For additional information, see “NISSAN
Intelligent Key® battery discharge” (P. 8-19).
The No Key Detected warning appears on
the display and the inside warning chime
sounds for a few seconds. The Intelligent Key is not in the vehicle. Carry the Intelligent Key with you.
When pushing the power
switch The Key System Error indicator appears on
the display. It warns of a malfunction with the In-
telligent Key system.It is recommended that you visit a NISSAN
certified LEAF dealer.
Pre-driving checks and adjustments3-17
Page 287 of 618
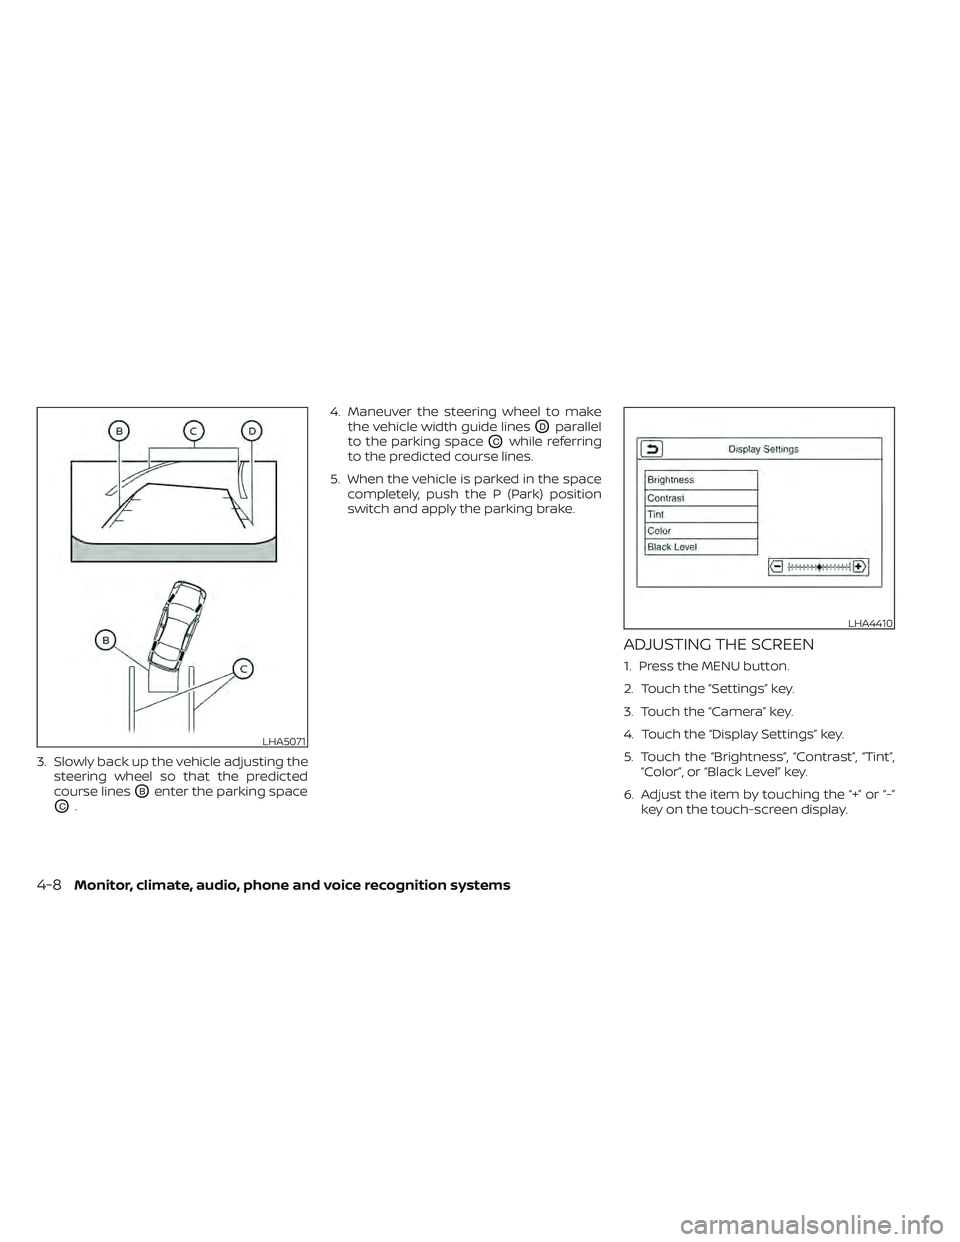
3. Slowly back up the vehicle adjusting thesteering wheel so that the predicted
course lines
OBenter the parking space
OC. 4. Maneuver the steering wheel to make
the vehicle width guide lines
ODparallel
to the parking space
OCwhile referring
to the predicted course lines.
5. When the vehicle is parked in the space completely, push the P (Park) position
switch and apply the parking brake.
ADJUSTING THE SCREEN
1. Press the MENU button.
2. Touch the ”Settings” key.
3. Touch the “Camera” key.
4. Touch the “Display Settings” key.
5. Touch the “Brightness”, “Contrast”, “Tint”,“Color”, or “Black Level” key.
6. Adjust the item by touching the “+” or “-” key on the touch-screen display.
LHA5071
LHA4410
4-8Monitor, climate, audio, phone and voice recognition systems
Page 288 of 618
NOTE:Do not adjust any of the display set-
tings of the RearView Monitor while
the vehicle is moving. Make sure the
parking brake is firmly applied.
HOW TO TURN ON AND OFF
PREDICTED COURSE LINES
To toggle ON and OFF the predicted course
lines while in the P (Park) position:
1. Touch the “Settings” key.
2. Touch the “Camera” key.
3. Touch the “Predicted Course Lines” keyto turn the feature ON or OFF.
Pressing the CAMERA button while the shif t
lever is in the R (Reverse) position can also
turn on and off the predicted course lines.
REARVIEW MONITOR SYSTEM
LIMITATIONS
WARNING
Listed below are the system limitations
for RearView Monitor. Failure to oper-
ate the vehicle in accordance with
these system limitations could result in
serious injury or death. •
The system cannot completely elimi-
nate blind spots and may not show
every object.
• Underneath the bumper and the cor-
ner areas of the bumper cannot be
viewed on the RearView Monitor be-
cause of its monitoring range limita-
tion. The system will not show small
objects below the bumper, and may
not show objects close to the bum-
per or on the ground.
• Objects viewed in the RearView
Monitor differ from actual distance
because a wide-angle lens is used.
• Objects in the RearView Monitor will
appear visually opposite compared
to when viewed in the rearview and
outside mirrors.
• Use the displayed lines as a refer-
ence. The lines are highly affected by
the number of occupants, fuel level,
vehicle position, road conditions and
road grade.
• Make sure that the rear hatch is se-
curely closed when backing up.
• Do not put anything on the rearview
camera. The rearview camera is in-
stalled above the license plate. •
When washing the vehicle with high
pressure water, be sure not to spray it
around the camera. Otherwise, water
may enter the camera unit causing
water condensation on the lens, a
malfunction, fire or an electric shock.
• Do not strike the camera. It is a preci-
sion instrument. Otherwise, it may
malfunction or cause damage result-
ing in a fire or an electric shock.
The following are operating limitations and
do not represent a system malfunction:
• When the temperature is extremely high or low, the screen may not clearly display
objects.
• When strong light directly shines on the camera, objects may not be displayed
clearly.
• Vertical lines may be seen in objects on the screen. This is due to strong reflected
light from the bumper.
• The screen may flicker under fluorescent light.
• The colors of objects on the RearView Monitor may differ somewhat from the
actual color of objects.
• Objects on the monitor may not be clear in a dark environment.
Monitor, climate, audio, phone and voice recognition systems4-9