audio NISSAN LEAF 2023 Owners Manual
[x] Cancel search | Manufacturer: NISSAN, Model Year: 2023, Model line: LEAF, Model: NISSAN LEAF 2023Pages: 612, PDF Size: 7.42 MB
Page 8 of 612
Table of
contentsIllustrated table of contents
EV Overview
Charging
Safety–Seats, seat belts and supplemental restraint system
Instruments and controls
Pre-driving checks and adjustments
Monitor, climate, audio, phone and voice recognition systems
Starting and driving
In case of emergency
Appearance and care
Do-it yourself
Maintenance and schedules
Technical and consumer information
Index
0
EV
CH
1
2
3
4
5
6
7
8
9
10
11
Page 15 of 612
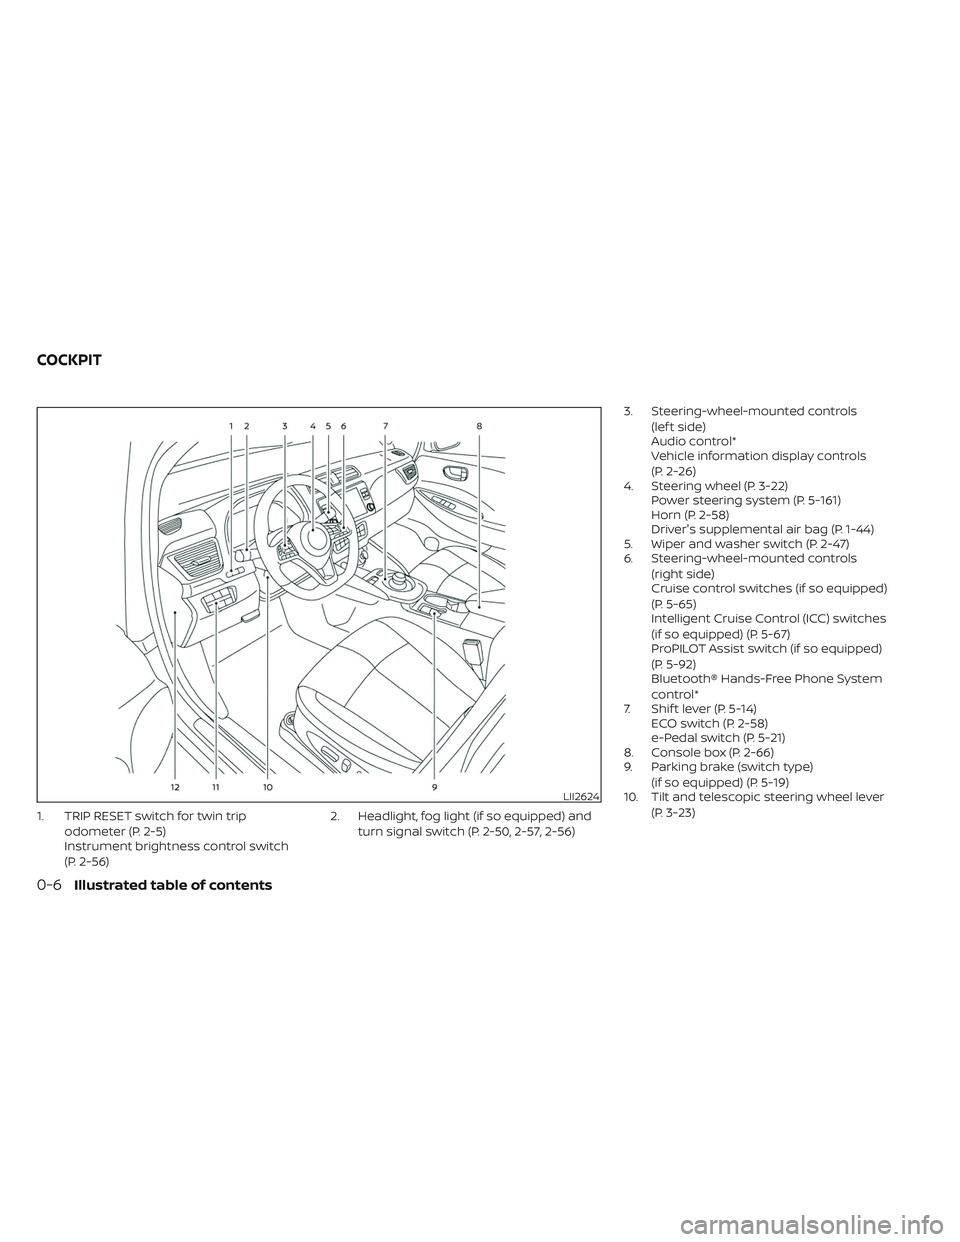
1. TRIP RESET switch for twin tripodometer (P. 2-5)
Instrument brightness control switch
(P. 2-56) 2. Headlight, fog light (if so equipped) and
turn signal switch (P. 2-50, 2-57, 2-56) 3. Steering-wheel-mounted controls
(lef t side)
Audio control*
Vehicle information display controls
(P. 2-26)
4. Steering wheel (P. 3-22) Power steering system (P. 5-161)
Horn (P. 2-58)
Driver's supplemental air bag (P. 1-44)
5. Wiper and washer switch (P. 2-47)
6. Steering-wheel-mounted controls
(right side)
Cruise control switches (if so equipped)
(P. 5-65)
Intelligent Cruise Control (ICC) switches
(if so equipped) (P. 5-67)
ProPILOT Assist switch (if so equipped)
(P. 5-92)
Bluetooth® Hands-Free Phone System
control*
7. Shif t lever (P. 5-14) ECO switch (P. 2-58)
e-Pedal switch (P. 5-21)
8. Console box (P. 2-66)
9. Parking brake (switch type)
(if so equipped) (P. 5-19)
10. Tilt and telescopic steering wheel lever
(P. 3-23)
LII2624
COCKPIT
0-6Illustrated table of contents
Page 25 of 612
The LEAF is an electric vehicle. Some of the
vehicle’s systems operate differently and
have different operating characteristics
than vehicles equipped with an internal
combustion engine. It is important to care-
fully review the entire owner's manual for
this reason. The main difference is the LEAF
is powered by electricity. The LEAF does not
require and it is not capable of using gaso-
line like a vehicle powered by a traditional
internal combustion engine. The LEAF uses
electricity stored in the lithium ion (Li-ion)
battery. The vehicle’s Li-ion battery must
be charged with electricity before the ve-
hicle can be driven. As the vehicle operates,
the Li-ion battery gradually discharges. If
the Li-ion battery becomes completely dis-
charged, the vehicle will not operate until it
is re-charged.
This vehicle uses two types of batteries.
One is the 12-volt battery that is the same
as the battery in vehicles powered by
gasoline engines, the other is the Li-ion
battery (high voltage).
The 12-volt battery provides power to the
vehicle systems and features such as the
audio system, supplemental restraint sys-
tems, headlights and windshield wipers.The Li-ion battery provides power to the
electric motor (traction motor) that moves
the vehicle.
The Li-ion battery also charges the 12-volt
battery.
The vehicle must be plugged in for the Li-
ion battery to be charged. Additionally, the
vehicle system can extend the vehicle
range by converting driving force into elec-
tricity that is stored in the Li-ion battery
while the vehicle is decelerating or being
driven downhill. This is called regenerative
braking. This vehicle is considered to be an
environmentally friendly vehicle because it
does not emit exhaust gases, such as car-
bon dioxide and nitrogen oxide.WARNING
Your vehicle contains a sealed Li-ion
high voltage battery. If the Li-ion bat-
tery is disposed of improperly, there is a
risk of severe burns and electrical
shock that may result in serious injury
or death and there is also a risk of envi-
ronmental damage.
CAUTION
To prevent damage to the Li-ion
battery:
• Do not expose the vehicle to extreme
ambient temperatures for extended
periods.
• Do not store the vehicle in tempera-
tures below −13°F (−25°C) for more
than seven days.
• Do not leave the vehicle for more
than 14 days where the Li-ion battery
available charge gauge reaches a
zero or near zero.
• Do not use the Li-ion battery for any
other purpose.
THE EV (Electric Vehicle) SYSTEM LI-ION BATTERY
EV-2EV Overview
Page 54 of 612
CAUTION
• To prevent damage to the charging
equipment:
– Do not close the charge port lid
without closing the charge port
cap.
– Do not subject the charging
equipment to impact.
– Do not store and use charging
equipment in locations where the
temperature is over 185°F (85°C) •
Make sure the charge port cap is
closed on the charge port when
charging is finished. If the charge
port lid is closed when the charge
port cap is open, water or foreign
materials may enter the charge port.
• Do not charge when a vehicle body
cover is in use. This may cause dam-
age to the charge connector.
• Do not attempt to perform a jump
start on the 12-volt battery at the
same time that the Li-ion battery is
being charged. Doing so may dam-
age the vehicle or charging equip-
ment and could cause an injury. For
additional information, see “Jump
starting” (P. 6-10). •
In normal charging (AC 220 - 240 volt)
and trickle charging (AC 110 - 120 volt)
using the EVSE (Electric Vehicle Sup-
ply Equipment) provided with the ve-
hicle, NISSAN recommends using an
AC 220 - 240 volt, 50A and an AC 110-
120 volt, 15A dedicated electrical cir-
cuit and outlet. The dedicated circuit
is used to help prevent circuit dam-
age or the circuit breaker from trip-
ping due to the high draw of charging
the Li-ion battery. If the dedicated
circuit is not used, the circuit may
cause adverse interference on MCB
(Moulded Circuit Board) and house-
hold electrical appliances such as
televisions and audio systems. If the
circuit is shared, and another electri-
cal device is being used at the same
time the vehicle is charging, the
breaker may trip. A qualified electri-
cian should install a dedicated circuit
if one is not already available.
NOTE:
• When charging the Li-ion battery, place the power switch in the OFF position.
When the power switch is in the ON
position, the Li-ion battery will not
start charging.
LCH2136
ChargingCH-3
Page 179 of 612
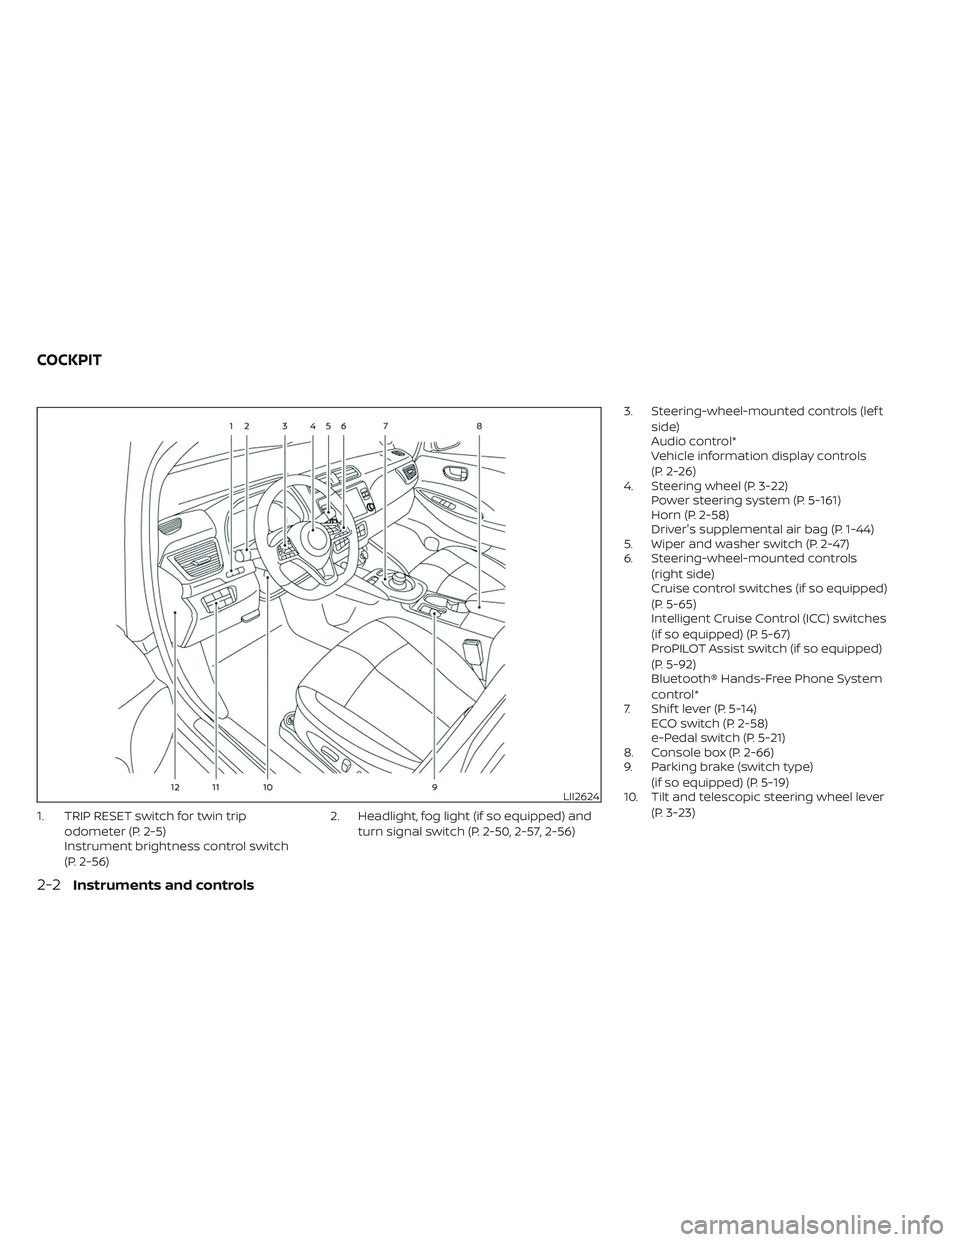
1. TRIP RESET switch for twin tripodometer (P. 2-5)
Instrument brightness control switch
(P. 2-56) 2. Headlight, fog light (if so equipped) and
turn signal switch (P. 2-50, 2-57, 2-56) 3. Steering-wheel-mounted controls (lef t
side)
Audio control*
Vehicle information display controls
(P. 2-26)
4. Steering wheel (P. 3-22) Power steering system (P. 5-161)
Horn (P. 2-58)
Driver's supplemental air bag (P. 1-44)
5. Wiper and washer switch (P. 2-47)
6. Steering-wheel-mounted controls
(right side)
Cruise control switches (if so equipped)
(P. 5-65)
Intelligent Cruise Control (ICC) switches
(if so equipped) (P. 5-67)
ProPILOT Assist switch (if so equipped)
(P. 5-92)
Bluetooth® Hands-Free Phone System
control*
7. Shif t lever (P. 5-14) ECO switch (P. 2-58)
e-Pedal switch (P. 5-21)
8. Console box (P. 2-66)
9. Parking brake (switch type)
(if so equipped) (P. 5-19)
10. Tilt and telescopic steering wheel lever
(P. 3-23)
LII2624
COCKPIT
2-2Instruments and controls
Page 204 of 612
HOW TO USE THE VEHICLE
INFORMATION DISPLAY
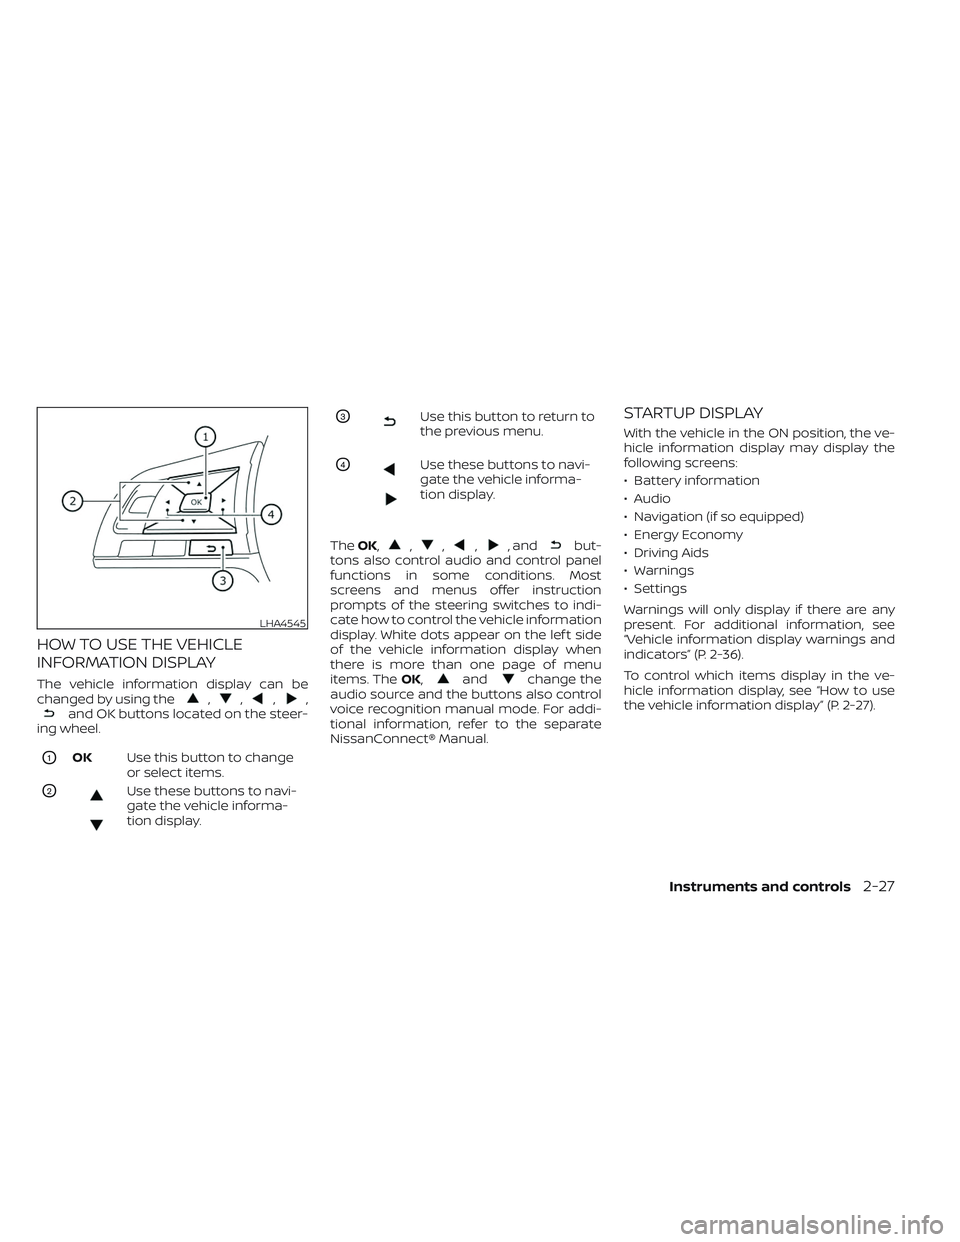
The vehicle information display can be
changed by using the,,,,and OK buttons located on the steer-
ing wheel.
O1OK Use this button to change
or select items.
O2Use these buttons to navi-
gate the vehicle informa-
tion display.
O3Use this button to return to
the previous menu.
O4Use these buttons to navi-
gate the vehicle informa-
tion display.
The OK,
,,,, andbut-
tons also control audio and control panel
functions in some conditions. Most
screens and menus offer instruction
prompts of the steering switches to indi-
cate how to control the vehicle information
display. White dots appear on the lef t side
of the vehicle information display when
there is more than one page of menu
items. The OK,
andchange the
audio source and the buttons also control
voice recognition manual mode. For addi-
tional information, refer to the separate
NissanConnect® Manual.
STARTUP DISPLAY
With the vehicle in the ON position, the ve-
hicle information display may display the
following screens:
• Battery information
• Audio
• Navigation (if so equipped)
• Energy Economy
• Driving Aids
• Warnings
• Settings
Warnings will only display if there are any
present. For additional information, see
“Vehicle information display warnings and
indicators” (P. 2-36).
To control which items display in the ve-
hicle information display, see “How to use
the vehicle information display” (P. 2-27).
LHA4545
Instruments and controls2-27
Page 221 of 612
WARNING INFORMATION DISPLAYS
(models with a navigation
system)
Low battery warning
When the low battery charge indicatorand the master warning light (yellow)illuminate, the system displays a
message on the navigation system screen
that warns the driver that the Li-ion battery
power level is low.
1. The notification is displayed on the up- per lef t side of the STATUS screen. Touch
[Show] to display the screen showing
detailed information.
2. The system displays a message screen and announces the contents of the
message to warn that the Li-ion battery
power level is low. Check the message
displayed on the screen.
Touch [YES] to search for charging sta-
tions within the estimated driving range.
3. Touch
or press the MAPbutton to
return to the vehicle location screen.
NOTE:
• The low battery warning can be set to off. For additional information, refer to
the NissanConnect® Manual.
• When the battery power level is low, the system automatically obtains
charging station information.
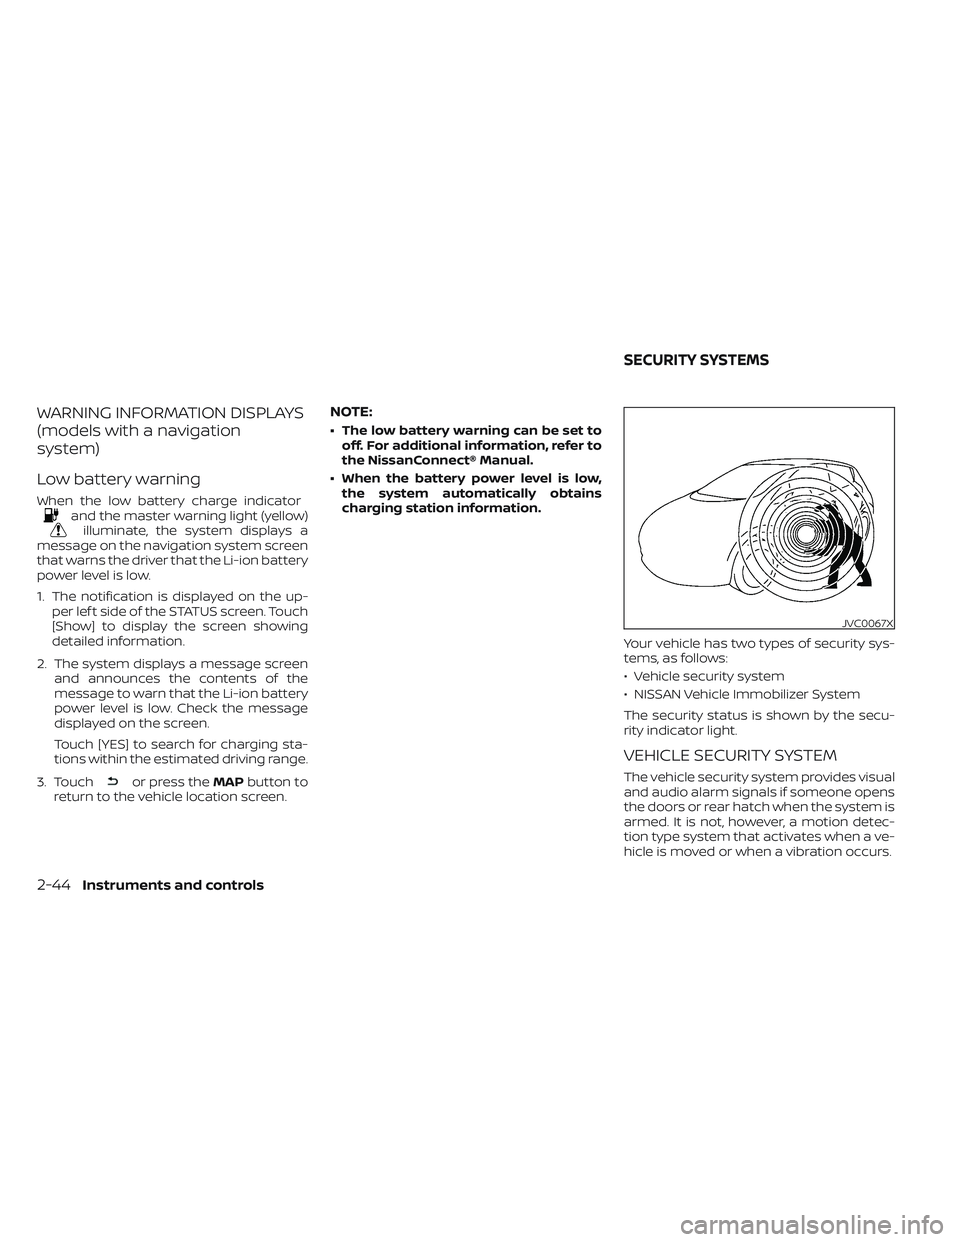
Your vehicle has two types of security sys-
tems, as follows:
• Vehicle security system
• NISSAN Vehicle Immobilizer System
The security status is shown by the secu-
rity indicator light.
VEHICLE SECURITY SYSTEM
The vehicle security system provides visual
and audio alarm signals if someone opens
the doors or rear hatch when the system is
armed. It is not, however, a motion detec-
tion type system that activates when a ve-
hicle is moved or when a vibration occurs.
JVC0067X
SECURITY SYSTEMS
2-44Instruments and controls
Page 241 of 612
CAUTION
• The outlet and plug may be hot dur-
ing or immediately af ter use.
• Do not use with accessories that ex-
ceed a 12-volt, 120W (10A) power
draw.
• Do not use double adapters or more
than one electrical accessory.
• Use the power outlet with the power
switch is in the ON or READY to Drive
position to avoid discharging the 12-
volt battery. •
Avoid using the power outlet when
the air conditioner, headlights or rear
window defroster are on.
• This power outlet is not designed for
use with a cigarette lighter unit.
• Push the plug in as far as it will go. If
good contact is not made, the plug
may overheat or the internal tem-
perature fuse may open.
• Before inserting or disconnecting a
plug, make sure that the electrical
accessory being used is turned OFF.
• When not in use, be sure to close the
cap. Do not allow water to contact
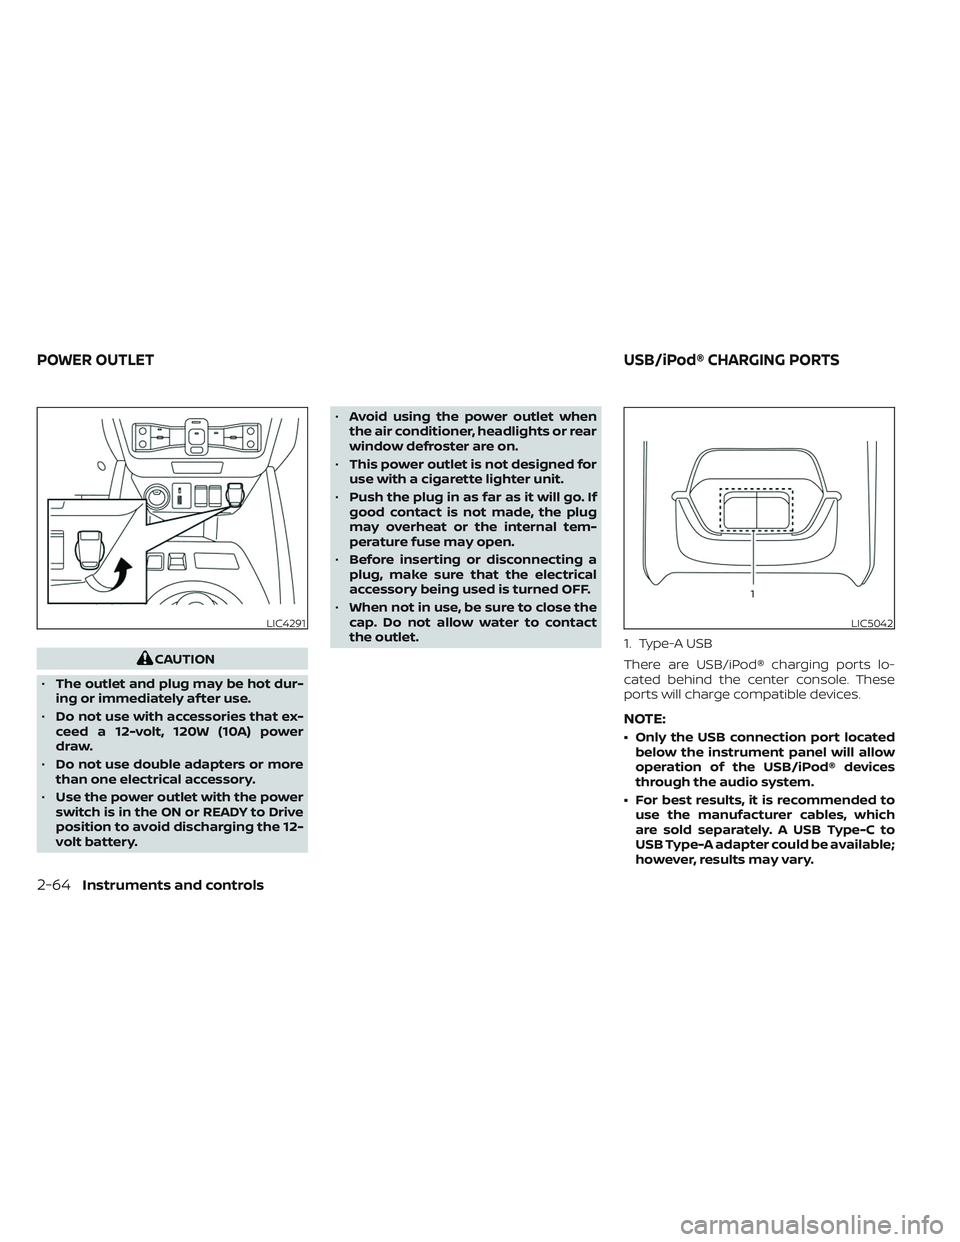
the outlet. 1. Type-A USB
There are USB/iPod® charging ports lo-
cated behind the center console. These
ports will charge compatible devices.
NOTE:
• Only the USB connection port located
below the instrument panel will allow
operation of the USB/iPod® devices
through the audio system.
• For best results, it is recommended to use the manufacturer cables, which
are sold separately. A USB Type-C to
USB Type-A adapter could be available;
however, results may vary.
LIC4291LIC5042
POWER OUTLET USB/iPod® CHARGING PORTS
2-64Instruments and controls
Page 264 of 612
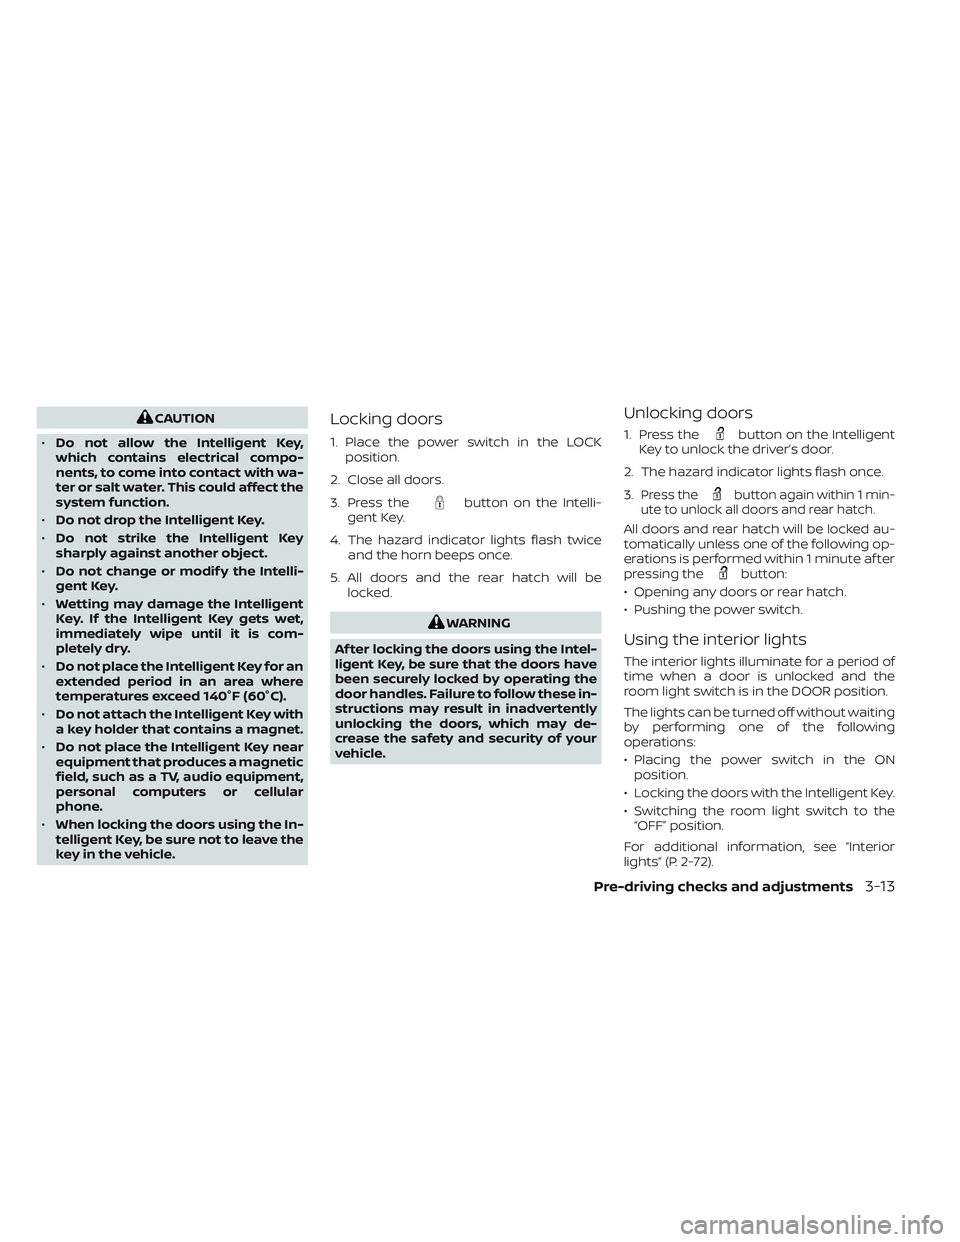
CAUTION
• Do not allow the Intelligent Key,
which contains electrical compo-
nents, to come into contact with wa-
ter or salt water. This could affect the
system function.
• Do not drop the Intelligent Key.
• Do not strike the Intelligent Key
sharply against another object.
• Do not change or modif y the Intelli-
gent Key.
• Wetting may damage the Intelligent
Key. If the Intelligent Key gets wet,
immediately wipe until it is com-
pletely dry.
• Do not place the Intelligent Key for an
extended period in an area where
temperatures exceed 140°F (60°C).
• Do not attach the Intelligent Key with
a key holder that contains a magnet.
• Do not place the Intelligent Key near
equipment that produces a magnetic
field, such as a TV, audio equipment,
personal computers or cellular
phone.
• When locking the doors using the In-
telligent Key, be sure not to leave the
key in the vehicle.Locking doors
1. Place the power switch in the LOCK position.
2. Close all doors.
3. Press the
button on the Intelli-
gent Key.
4. The hazard indicator lights flash twice and the horn beeps once.
5. All doors and the rear hatch will be locked.
WARNING
Af ter locking the doors using the Intel-
ligent Key, be sure that the doors have
been securely locked by operating the
door handles. Failure to follow these in-
structions may result in inadvertently
unlocking the doors, which may de-
crease the safety and security of your
vehicle.
Unlocking doors
1. Press thebutton on the Intelligent
Key to unlock the driver’s door.
2. The hazard indicator lights flash once.
3.
Press thebutton again within 1 min-
ute to unlock all doors and rear hatch.
All doors and rear hatch will be locked au-
tomatically unless one of the following op-
erations is performed within 1 minute af ter
pressing the
button:
• Opening any doors or rear hatch.
• Pushing the power switch.
Using the interior lights
The interior lights illuminate for a period of
time when a door is unlocked and the
room light switch is in the DOOR position.
The lights can be turned off without waiting
by performing one of the following
operations:
• Placing the power switch in the ON position.
• Locking the doors with the Intelligent Key.
• Switching the room light switch to the “OFF” position.
For additional information, see “Interior
lights” (P. 2-72).
Pre-driving checks and adjustments3-13
Page 278 of 612
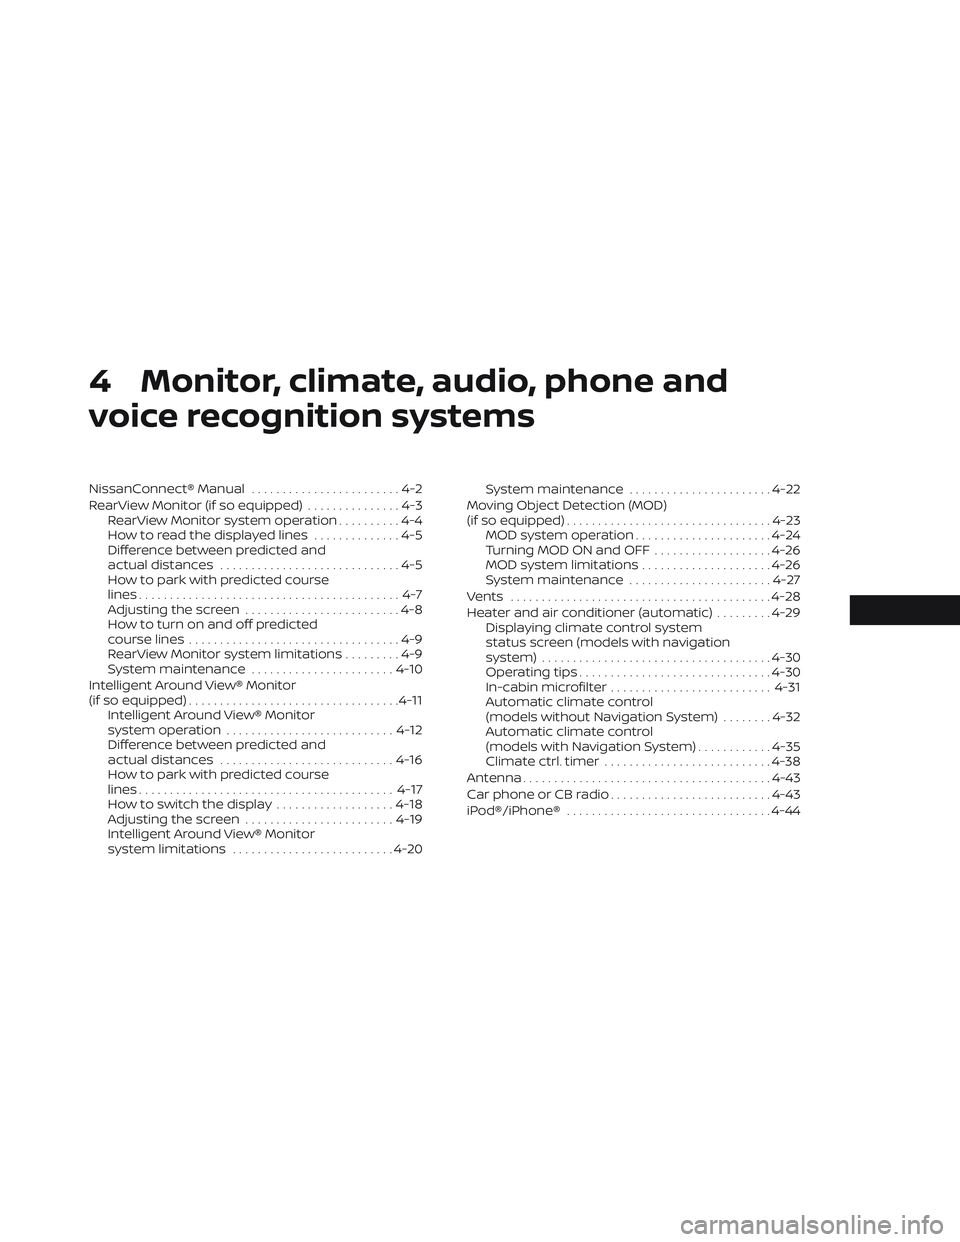
4 Monitor, climate, audio, phone and
voice recognition systems
NissanConnect® Manual........................4-2
RearView Monitor (if so equipped) ...............4-3
RearView Monitor system operation ..........4-4
How to read the displayed lines ..............4-5
Difference between predicted and
actual distances .............................4-5
How to park with predicted course
lines ..........................................4-7
Adjusting the screen .........................4-8
How to turn on and off predicted
course lines ..................................4-9
RearView Monitor system limitations .........4-9
System maintenance ....................... 4-10
Intelligent Around View® Monitor
(if so equipped) .................................. 4-11
Intelligent Around View® Monitor
system operation ........................... 4-12
Difference between predicted and
actual distances ............................ 4-16
How to park with predicted course
lines ......................................... 4-17
How to switch the display ...................4-18
Adjusting the screen ........................ 4-19
Intelligent Around View® Monitor
system limitations .......................... 4-20System maintenance
.......................4-22
Moving Object Detection (MOD)
(if so equipped) ................................. 4-23
MOD system operation ......................4-24
Turning MOD ON and OFF ...................4-26
MOD system limitations .....................4-26
System maintenance .......................4-27
Vents .......................................... 4-28
Heater and air conditioner (automatic) .........4-29
Displaying climate control system
status screen (models with navigation
system) ..................................... 4-30
Operating tips ............................... 4-30
In-cabin microfilter .......................... 4-31
Automatic climate control
(models without Navigation System) ........4-32
Automatic climate control
(models with Navigation System) ............4-35
Climate ctrl. timer ........................... 4-38
Antenna ........................................ 4-43
Car phone or CB radio .......................... 4-43
iPod®/iPhone® ................................. 4-44