Specification NISSAN MAXIMA 1999 A32 / 4.G Owners Manual
[x] Cancel search | Manufacturer: NISSAN, Model Year: 1999, Model line: MAXIMA, Model: NISSAN MAXIMA 1999 A32 / 4.GPages: 233, PDF Size: 1.96 MB
Page 1 of 233

ForewordWelcome to the growing family of new
NISSAN owners. This vehicle is delivered to
you with confidence. It was produced using
the latest techniques and strict quality control.
This manual was prepared to help you under-
stand the operation and maintenance of your
vehicle so that you may enjoy many miles of
driving pleasure. Please read through this
manual before operating your vehicle.
A separate Warranty Information and Main-
tenance Log Booklet explains details
about the warranties covering your vehicle
and vehicle maintenance schedules. Addi-
tionally, a separate Customer Care/Lemon
Law Booklet will explain how to resolve
any concerns you may have with your
vehicle, as well as clarify your rights under
your state's lemon law.
Your NISSAN dealer knows your vehicle best.
When you require any service or have any
questions, he will be glad to assist you with
the extensive resources available to him.READ FIRST Ð THEN DRIVE
SAFELYBefore driving your vehicle please read
your Owner's Manual carefully. This will
ensure familiarity with controls and main-
tenance requirements, assisting you in the
safe operation of your vehicle.
IMPORTANT SAFETY INFORMA-
TION
REMINDERS FOR SAFETY!Follow these important driving rules to
help ensure a safe and comfortable trip
for you and your passengers!
INever drive under the influence of
alcohol or drugs.
IAlways observe posted speed limits
and never drive too fast for condi-
tions.
IAlways use your seat belts and appro-
priate child restraint systems. Preteen
children should be seated in the rear
seat.
IAlways provide information about the
proper use of vehicle safety features
to all occupants of the vehicle.
IAlways review this Owner's Manual
for important safety information.
MODIFICATION OF YOUR
VEHICLEThis vehicle should not be modified. Modi-
fication could affect its performance,
safety or durability, and may even violate
governmental regulations. In addition,
damage or performance problems result-
ing from modification may not be covered
under NISSAN warranties.WHEN READING THE MANUALThis manual includes information for all
options available on this model. Therefore,
you may find some information that does
not apply to your vehicle.
All information, specifications and illustrations
in this manual are those in effect at the time of
printing. NISSAN reserves the right to change
specifications or design at any time without
notice.
Z
01.1.22/A32-D/V5.0
X
Page 115 of 233

When the CD/CHG button is pushed with the
compact disc loaded but the tape or the radio
playing, the tape or radio will automatically be
turned off and the compact disc will start to
play.
FF (Fast Forward), REW
(Rewind):
When the(fast forward) or
(rewind)
button is pushed while the compact disc is
being played, the compact disc will play while
fast forwarding or rewinding. When the button
is released, the compact disc will return to
normal play speed.
APS (Automatic Program
Search) FF, APS REW:
When the(APS FF) button is pushed
while the compact disc is being played, the
program next to the present one will start to
play from its beginning. Push several times to
skip through programs. The compact disc will
advance the number of times the button is
pushed. (When the last program on the com-
pact disc is skipped through, the first program
will be played.) When the
(APS REW)
button is pushed, the program being played
returns to its beginning. Push several times to
skip back through programs. The compact disc
will go back the number of times the button is
pushed.
PROG (Program):
When the PROG button is pushed while the
compact disc is being played, the play pattern
will change as follows:
no mark: All the programs will be played
repeatedly in sequence.
1: Only one program (the one being played
when the PROG button is pushed) will be
repeated.
RANDOM: Programs will be played at random,
not following the sequence on the compact
disc. The same program may be repeated
twice.
When the compact disc is ejected, the
play pattern will automatically change to
no mark.
CD EJECT:
When the CD EJECT button is pushed with the
compact disc loaded, the compact disc will be
ejected.
When this button is pushed while the compact
disc is being played, the compact disc will
come out and the system will turn off.
If the compact disc comes out and is not
removed, it will be pulled back into the slotto protect it. (without 8 cm diameter com-
pact discs)
CD IN indicator:
CD IN indicator appears on the display when
the CD is loaded with the system on.
ANTENNA
Manual antennaThe manual antenna cannot be shortened, but
can be removed. When you need to remove
the antenna, turn the antenna rod counter-
clockwise.
To install the antenna rod, turn the antenna nut
clockwise. Tighten the antenna rod to specifi-
cation using a suitable tool, such as an open-
end wrench. The antenna rod tightening speci-
fication is 3.4 to 3.6 N×m (30 to 32 in-lb). Do not
use pliers to tighten the antenna as they can
leave marks on the antenna surface. The
antenna rod cannot be hand tightened to the
proper specification.Always properly tighten the antenna rod
during installation or the antenna rod
may bend or break during vehicle
4-24
Heater, air conditioner and audio systems
Z
01.1.22/A32-D/V5.0
X
Page 168 of 233

6. Remove the drain plug with a wrench and
completely drain the oil.
If oil filter is to be changed, remove and
replace it at this time. See later in ªEngine
oilº for changing engine oil filter.Be careful not to burn yourself, as the
engine oil is hot.Waste oil must be disposed of properly.
Check your local regulations.
7. Clean and re-install the drain plug and new
washer. Securely tighten the drain plug with
a wrench.
Drain plug tightening torque:
22 to 29 ft-lb
(29 to 39 N×m)
Do not use excessive force.
8. Refill engine with recommended oil and
install the cap securely.
See ªCapacities and recommended
fuel/lubricantsº in the ª10. Technical and
consumer informationº section for drain and
refill capacity. The drain and refill capacitydepends on the oil temperature and drain
time. Use these specifications for reference
only. Always use the dipstick to determine
when the proper amount of oil is in the
engine.
9. Start the engine.
Check for leakage around the drain plug.
Correct as required.
10.Turn the engine off and wait more than 10
minutes. Check the oil level with the dip-
stick. Add engine oil if necessary.
11.Dispose of waste oil in the proper manner.
IProlonged and repeated contact with
used engine oil may cause skin can-
cer.
ITry to avoid direct skin contact with
used oil. If skin contact is made, wash
thoroughly with soap or hand cleaner
as soon as possible.
IKeep used engine oil out of reach of
children.
CHANGING ENGINE OIL FILTER1. Park the vehicle on a level surface and
apply the parking brake.
2. Turn the engine off.
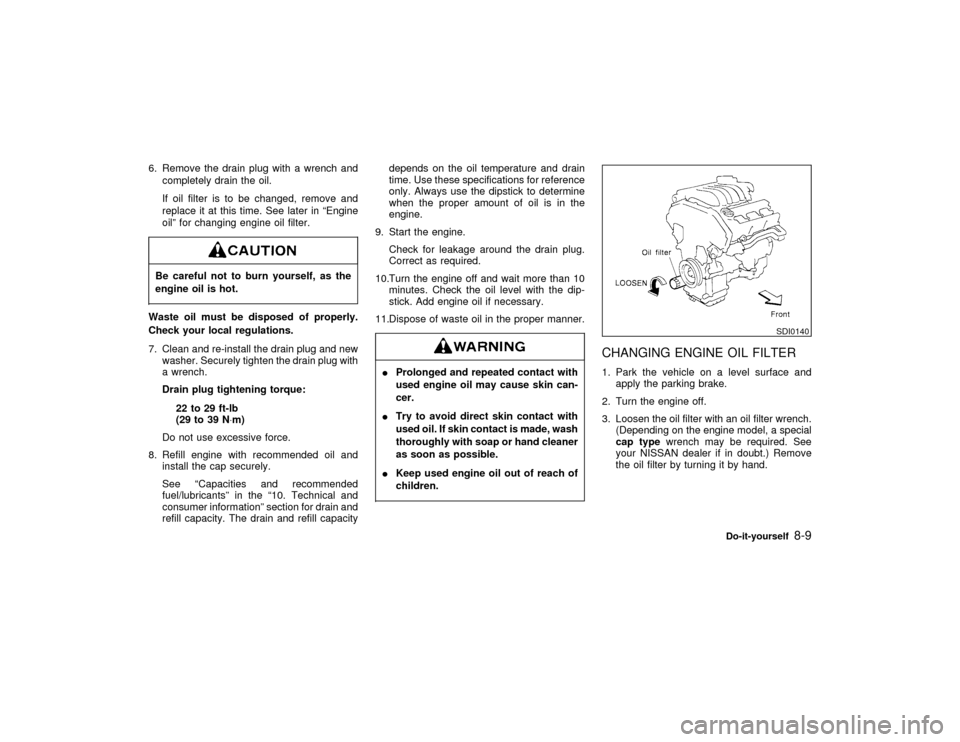
3. Loosen the oil filter with an oil filter wrench.
(Depending on the engine model, a special
cap typewrench may be required. See
your NISSAN dealer if in doubt.) Remove
the oil filter by turning it by hand.
SDI0140
Do-it-yourself
8-9
Z
01.1.22/A32-D/V5.0
X
Page 193 of 233

Tire wear and damageTires should be periodically inspected
for wear, cracking, bulging, or objects
caught in the tread. If excessive wear,
cracks, bulging, or deep cuts are found,
the tire should be replaced.
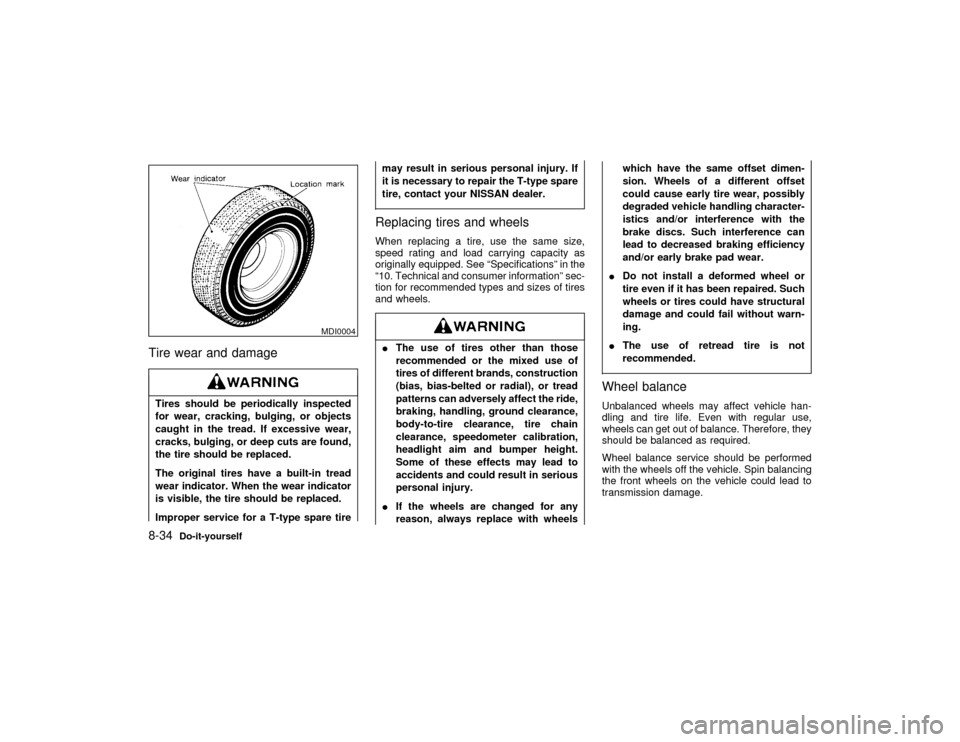
The original tires have a built-in tread
wear indicator. When the wear indicator
is visible, the tire should be replaced.
Improper service for a T-type spare tiremay result in serious personal injury. If
it is necessary to repair the T-type spare
tire, contact your NISSAN dealer.
Replacing tires and wheelsWhen replacing a tire, use the same size,
speed rating and load carrying capacity as
originally equipped. See ªSpecificationsº in the
ª10. Technical and consumer informationº sec-
tion for recommended types and sizes of tires
and wheels.IThe use of tires other than those
recommended or the mixed use of
tires of different brands, construction
(bias, bias-belted or radial), or tread
patterns can adversely affect the ride,
braking, handling, ground clearance,
body-to-tire clearance, tire chain
clearance, speedometer calibration,
headlight aim and bumper height.
Some of these effects may lead to
accidents and could result in serious
personal injury.
IIf the wheels are changed for any
reason, always replace with wheelswhich have the same offset dimen-
sion. Wheels of a different offset
could cause early tire wear, possibly
degraded vehicle handling character-
istics and/or interference with the
brake discs. Such interference can
lead to decreased braking efficiency
and/or early brake pad wear.
IDo not install a deformed wheel or
tire even if it has been repaired. Such
wheels or tires could have structural
damage and could fail without warn-
ing.
IThe use of retread tire is not
recommended.
Wheel balanceUnbalanced wheels may affect vehicle han-
dling and tire life. Even with regular use,
wheels can get out of balance. Therefore, they
should be balanced as required.
Wheel balance service should be performed
with the wheels off the vehicle. Spin balancing
the front wheels on the vehicle could lead to
transmission damage.
MDI0004
8-34
Do-it-yourself
Z
01.1.22/A32-D/V5.0
X
Page 206 of 233

10 Technical and consumer informationCapacities and recommended fuel/lubricants ......... 10-2
Fuel recommendation ............................................. 10-3
Engine oil and oil filter recommendation................. 10-5
Recommended SAE viscosity number.................... 10-6
Air conditioning system refrigerant and lubricant
recommendations .................................................... 10-6
Specifications .......................................................... 10-7
Engine ..................................................................... 10-7
Tires and wheels ..................................................... 10-8
Dimensions and weights ......................................... 10-8
When traveling or registering your vehicle in
another country ....................................................... 10-9
Vehicle identification ............................................... 10-9
Vehicle identification number (VIN) plate................ 10-9
Vehicle identification number
(Chassis number) .................................................... 10-9
Engine serial number ............................................ 10-10F.M.V.S.S. certification label ................................. 10-10
Emission control information label ........................ 10-10
Tire placard ........................................................... 10-11
Air conditioner specification label.......................... 10-11
Installing front license plate................................... 10-11
Vehicle loading information ................................... 10-12
Terms .................................................................... 10-12
Determining vehicle load capacity ........................ 10-12
Loading tips ........................................................... 10-13
Towing a trailer ..................................................... 10-13
Maximum load limits.............................................. 10-14
Towing safety ........................................................ 10-14
Uniform tire quality grading ................................... 10-17
Emission control system warranty ........................ 10-18
Reporting safety defects (US only) ....................... 10-18
Readiness for inspection/maintenance (I/M) test
(US only) ............................................................... 10-18
Z
01.1.22/A32-D/V5.0
X
Page 207 of 233

The following are approximate capacities. The actual refill capacities may be a little different. When refilling, follow the procedure
instructed in the ª8. Do-it-yourselfº section to determine the proper refill capacity.
Capacity (Approximate)
Recommended
specifications US
measureImp
measureLiter
Fuel 18-1/2 gal 15-3/8 gal 70 Unleaded gasoline with an octane rating of at least 91 AKI (RON 96)*1
Engine oil*6
Drain and refill
With oil filter change 4-1/4 qt 3-1/2 qt 4.0IAPI Certification Mark*2, *3
IAPI grade SG/SH, Energy Conserving II or API grade SJ, Energy Con-
serving*2, *3
IILSAC grade GF-II*2, *3 Without oil filter change 3-7/8 qt 3-1/4 qt 3.7
Cooling system
With reservoir 9 qt 7-1/2 qt 8.5
Genuine NISSAN anti-freeze coolant or equivalent
Reservoir 7/8 qt 3/4 qt 0.8
Manual transmission gear oil Ð Ð Ð API GL-4, Viscosity SAE 80W-90 only
Automatic transmission fluid
Refill to the proper oil level according to the instructions
in the ª8. Do-it-yourselfº section.Nissan Matic ªDº (Continental U.S. and Alaska) or Genuine Nissan Auto-
matic Transmission Fluid (Canada).*4
Power steering fluidType DEXRON
TMIII or equivalent
Brake and clutch fluidGenuine Nissan Brake Fluid*5 or equivalent DOT 3 (US FMVSS No. 116)
Multi-purpose grease Ð Ð Ð NLGI No. 2 (Lithium soap base)
Air conditioning system refrigerant Ð Ð Ð HFC-134a (R-134a)*7
Air conditioning system lubricants Ð Ð ÐNissan A/C System Oil
Type S or exact equivalent
*1: For additional information, see later in this paragraph for fuel recommendation.
*2: For additional information, see later in this paragraph for engine oil and oil filter recommendation.
*3: For additional information, see later in this paragraph for recommended SAE viscosity number.
*4: Dexron
TMIII/Mercon
TM
or equivalent may also be used. Outside the continental United States and Alaska contact a NISSAN dealer for more information regarding
suitable fluids, including recommended brand(s) of Dexron
TMIII/Mercon
TM
automatic transmission fluid.
*5: Available in mainland US through your NISSAN dealer.
*6: For additional information, see ªEngine oilº in the ª8. Do-it-yourselfº section for changing engine oil.
*7: For additional information, see ªVehicle identificationº in this section for air conditioner specification label.
CAPACITIES AND
RECOMMENDED
FUEL/LUBRICANTS10-2
Technical and consumer information
Z
01.1.22/A32-D/V5.0
X
Page 212 of 233

ENGINE
Model VQ30DE
Type Gasoline, 4-cycle
Cylinder arrangement 6-cylinder, V-slanted at 60É
Bore x Stroke in (mm) 3.66 x 2.886 (93.0 x 73.3)
Displacement cu in (cm
3) 182.33 (2,988)
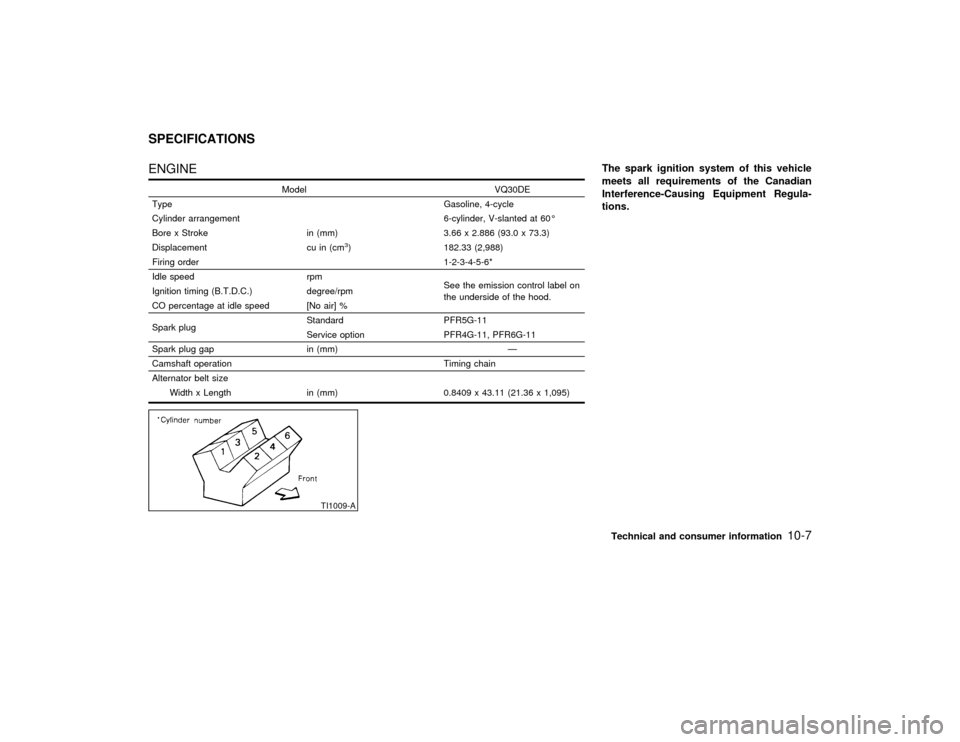
Firing order 1-2-3-4-5-6*
Idle speed rpm
See the emission control label on
the underside of the hood. Ignition timing (B.T.D.C.) degree/rpm
CO percentage at idle speed [No air] %
Spark plugStandard PFR5G-11
Service option PFR4G-11, PFR6G-11
Spark plug gap in (mm) Ð
Camshaft operation Timing chain
Alternator belt size
Width x Length in (mm) 0.8409 x 43.11 (21.36 x 1,095)
The spark ignition system of this vehicle
meets all requirements of the Canadian
Interference-Causing Equipment Regula-
tions.
TI1009-A
SPECIFICATIONS
Technical and consumer information
10-7
Z
01.1.22/A32-D/V5.0
X
Page 214 of 233

When planning to travel in another country,
you should first find out if the fuel available is
suitable for your vehicle's engine.
Using fuel with too low an octane rating may
cause engine damage. All gasoline vehicles
must be operated with unleaded engine gaso-
line. Therefore, avoid taking your vehicle to
areas where appropriate fuel is not available.
When transferring the registration of your
vehicle to another country, state, province
or district,it may be necessary to modify the
vehicle to meet local laws and regulations.
The laws and regulations for motor vehicle
emission control and safety standards vary
according to the country, state, province or
district; therefore, vehicle specifications may
differ.
When any vehicle is to be taken into an-
other country, state, province or district
and registered, its modifications, transpor-
tation, and registration are the responsibil-
ity of the user. NISSAN is not responsible
for any inconvenience that may result.
VEHICLE IDENTIFICATION
NUMBER (VIN) PLATEThe vehicle identification number plate is at-
tached as shown. This number is the identifi-
cation for your vehicle and is used in the
vehicle registration.
VEHICLE IDENTIFICATION
NUMBER (Chassis number)The number is stamped as shown.
STI0038
STI0040
WHEN TRAVELING OR
REGISTERING YOUR VEHICLE IN
ANOTHER COUNTRYVEHICLE IDENTIFICATION
Technical and consumer information
10-9
Z
01.1.22/A32-D/V5.0
X
Page 216 of 233

TIRE PLACARDThe cold tire pressure is shown on the tire
placard affixed to the center console lid.
AIR CONDITIONER
SPECIFICATION LABELThe air conditioner specification label is affixed
inside of the hood as shown.
Use the following steps to mount the license
plate:
1. Mount the license plate bracket with 0.24 in
(6 mm) diameter by 0.55 in (14 mm) long
tapping screws.
STI0043
STI0044
STI0104
INSTALLING FRONT LICENSE
PLATETechnical and consumer information
10-11
Z
01.1.22/A32-D/V5.0
X
Page 219 of 233

MAXIMUM LOAD LIMITS
Maximum trailer loadsNever allow the total trailer load to exceed
1,000 lb (454 kg). The total trailer load equals
trailer weight plus its cargo weight. Towing
loads greater than 1,000 lb (454 kg) or using
improper towing equipment could adversely
affect vehicle handling, braking and perfor-
mance.Vehicle damage and/or personal injury
resulting from improper towing proce-
dures is not covered by NISSAN warran-
ties. Information on trailer towing and
required towing equipment should be
obtained from dealers who specialize in
providing trailers or other towing
equipment.Tongue loadKeep the tongue load between 9 and 11% of
the total trailer load. If the tongue load be-
comes excessive, rearrange cargo to allow for
proper tongue load.
Maximum gross vehicle weight/
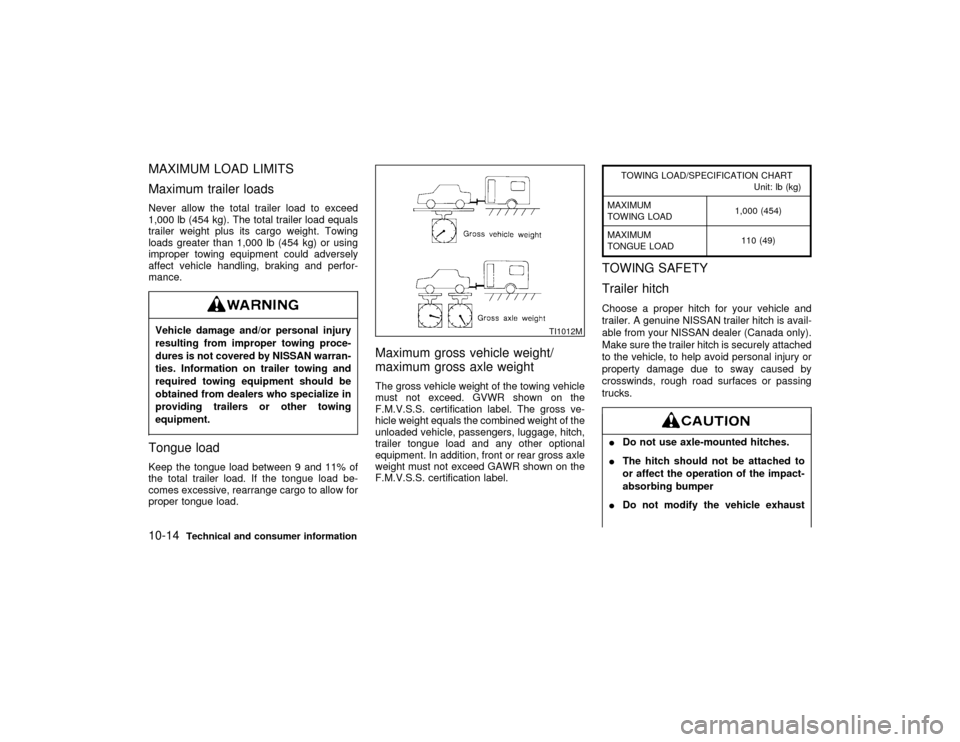
maximum gross axle weightThe gross vehicle weight of the towing vehicle
must not exceed. GVWR shown on the
F.M.V.S.S. certification label. The gross ve-
hicle weight equals the combined weight of the
unloaded vehicle, passengers, luggage, hitch,
trailer tongue load and any other optional
equipment. In addition, front or rear gross axle
weight must not exceed GAWR shown on the
F.M.V.S.S. certification label.
TOWING LOAD/SPECIFICATION CHART
Unit: lb (kg)
MAXIMUM
TOWING LOAD1,000 (454)
MAXIMUM
TONGUE LOAD110 (49)
TOWING SAFETY
Trailer hitchChoose a proper hitch for your vehicle and
trailer. A genuine NISSAN trailer hitch is avail-
able from your NISSAN dealer (Canada only).
Make sure the trailer hitch is securely attached
to the vehicle, to help avoid personal injury or
property damage due to sway caused by
crosswinds, rough road surfaces or passing
trucks.IDo not use axle-mounted hitches.
IThe hitch should not be attached to
or affect the operation of the impact-
absorbing bumper
IDo not modify the vehicle exhaust
TI1012M
10-14
Technical and consumer information
Z
01.1.22/A32-D/V5.0
X