engine NISSAN MAXIMA 2002 A33 / 5.G Owners Manual
[x] Cancel search | Manufacturer: NISSAN, Model Year: 2002, Model line: MAXIMA, Model: NISSAN MAXIMA 2002 A33 / 5.GPages: 247, PDF Size: 1.98 MB
Page 2 of 247
IMPORTANT INFORMATION
ABOUT THIS MANUALYou will see various symbols in this manual.
They are used in the following ways:
WARNING
This is used to indicate the presence of a
hazard that could cause death or serious
personal injury. To avoid or reduce the
risk, the procedures must be followed
precisely.
CAUTION
This is used to indicate the presence of a
hazard that could cause minor or moder-
ate personal injury or damage to your
vehicle. To avoid or reduce the risk, the
procedures must be followed carefully.If you see this symbol, it meansDo not do
thisorDo not let this happen.
CALIFORNIA PROPOSITION 65
WARNING
WARNING
Engine Exhaust, some of its constitu-
ents, and certain vehicle components
contain or emit chemicals known to State
of California to cause cancer and birth
defects or other reproductive harm.
2001 NISSAN MOTOR CO., LTD.
TOKYO, JAPANAll rights reserved. No part of this Owner's Manual may
be reproduced or stored in a retrieval system, or trans-
mitted in any form, or by any means, electronic, me-
chanical, photocopying, recording or otherwise, without
the prior written permission of Nissan Motor Co., Ltd.
SIC0697Z
01.9.21/A33-D/V5.0
X
Page 3 of 247
Welcome To The World Of NISSANYour new NISSAN is the result of our dedication
to produce the finest in safe, reliable and eco-
nomical transportation. Your vehicle is the prod-
uct of a successful worldwide company that
manufactures cars and trucks in over 17 coun-
tries and distributes them in 170 nations.
NISSAN vehicles are designed and manufac-
tured by Nissan Motor Co., Ltd. which was
founded in Tokyo, Japan in 1933, and NISSAN
affiliates world wide, collectively growing to be-
come the fifth largest automaker in the world. In
addition to cars and trucks, NISSAN also makes
forklift trucks, marine engines, boats and other
diversified products.
NISSAN has made a substantial and growing
investment in North America. NISSAN'S commit-
ment is nearly $4 billion dollars in capital invest-
ments in facilities across the continent. Some ofthe facilities include the Nissan Manufacturing
facility in Smyrna, Tennessee, vehicle styling
design at Nissan Design International in San
Diego, California, and engineering at Nissan
Technical Center North America in Farmington
Hills, Michigan. Additionally, NISSAN employs
nearly 18,000 people throughout the United
States, Canada, and Mexico. An additional
71,000 people work for the 1,500 NISSAN and
INFINITI dealers across North America.
NISSAN is also a substantial contributor to the
Canadian economy. Nissan Canada Inc., its sup-
pliers and over 140 dealers employ approxi-
mately 4,500 people. These include company
employees and the staffs of NISSAN dealers all
across Canada. In addition, many Canadians
work for companies that supply NISSAN and
NISSAN dealers with materials and services
ranging from operation of port facilities and trans-portation services to the supply of lubricants,
parts and accessories.
NISSAN pioneered the use of electronics and
computers in automobiles, and has led the indus-
try in improving both performance and fuel effi-
ciency through new engine designs and the use
of synthetic materials to reduce vehicle weight.
The company has also developed ways to build
quality into its vehicles at each stage of the
production process, both through extensive use
of automation and Ð most importantly Ð
through an awareness thatpeopleare the cen-
tral element in quality control.
From the time the parts arrived from our suppli-
ers until you took delivery of your new Nissan,
dozens of checks were made to ensure that only
the best job was being done in producing and
delivering your vehicle. NISSAN also takes great
care to ensure that when you take your NISSAN
to your dealer for maintenance, the service tech-
nician will perform his work according to the
quality standards that have been established by
the factory.
Safety has also been built into your NISSAN. As
you know, seat belts are an integral part of the
safety systems that will help protect you and your
passengers in the event of a sudden stop or an
accident. We urge you to use the seat belts every
time you drive the vehicle.
The NISSAN story of growth and achievement
reflects our major goal: to provide you, our
customer, with a vehicle that is built with quality
and craftsmanship Ð a product that we can be
proud to build and you can be proud to own.
WFW0002Z
01.9.21/A33-D/V5.0
X
Page 8 of 247
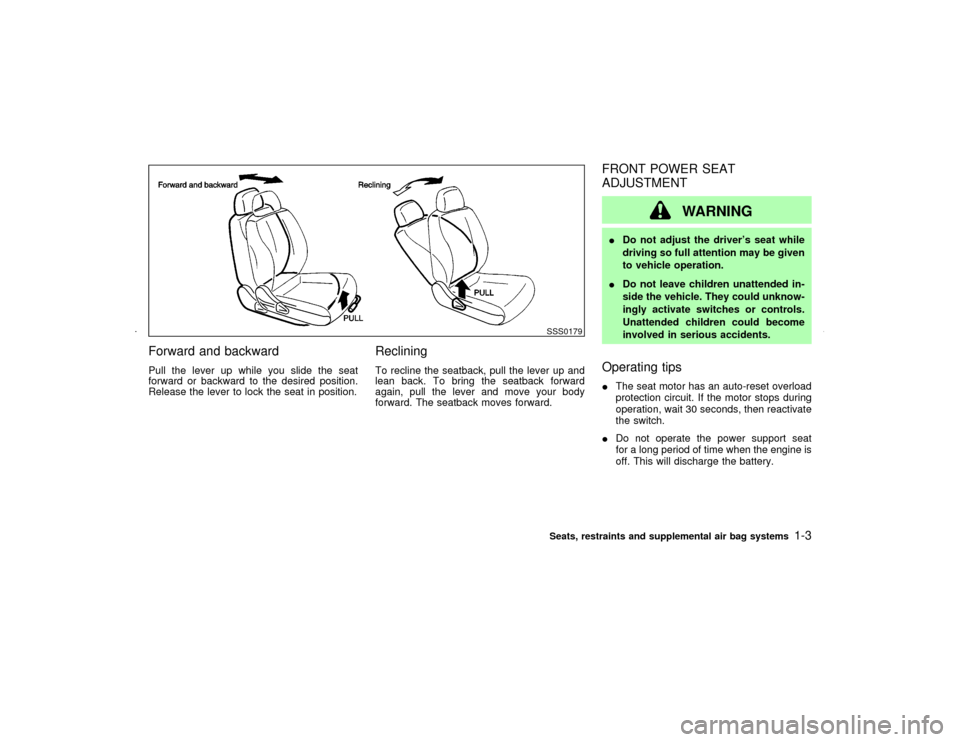
Forward and backwardPull the lever up while you slide the seat
forward or backward to the desired position.
Release the lever to lock the seat in position.
RecliningTo recline the seatback, pull the lever up and
lean back. To bring the seatback forward
again, pull the lever and move your body
forward. The seatback moves forward.
FRONT POWER SEAT
ADJUSTMENT
WARNING
IDo not adjust the driver's seat while
driving so full attention may be given
to vehicle operation.
IDo not leave children unattended in-
side the vehicle. They could unknow-
ingly activate switches or controls.
Unattended children could become
involved in serious accidents.Operating tipsIThe seat motor has an auto-reset overload
protection circuit. If the motor stops during
operation, wait 30 seconds, then reactivate
the switch.
IDo not operate the power support seat
for a long period of time when the engine is
off. This will discharge the battery.
SSS0179Seats, restraints and supplemental air bag systems
1-3
Z
01.9.21/A33-D/V5.0
X
Page 33 of 247
Vehicle Safety Standard 213 or Canadian
Motor Vehicle Safety Standard 213.
Icheck the child restraint in your vehicle to
be sure it is compatible with the vehicle's
seat and seat belt system. Choose a child
restraint that meets the guidelines of the
Society of Automotive Engineers recom-
mended practice J1819 for child restraint
installation.
Iif the child restraint is compatible with your
vehicle, place your child in the child re-
straint and check the various adjustments
to be sure the child restraint is compatible
with your child. Always follow all recom-
mended procedures.
All US states and Canadian provinces re-
quire that infants and small children be
restrained in approved child restraints at
all times while the vehicle is being oper-
ated.
WARNING
IImproper use of a child restraint can
result in increased injuries for both
the infant or child and other occu-
pants in the vehicle.IFollow all of the child restraint manu-
facturer's instructions for installation
and use. When purchasing a child
restraint, be sure to select one which
will fit your child and vehicle. It may
not be possible to properly install
some types of child restraints in your
vehicle.
IIf the child restraint is not anchored
properly, the risk of a child being
injured in a collision or a sudden stop
greatly increases.
IAdjustable seatbacks should be posi-
tioned to fit the child restraint, but as
upright as possible.
IAfter attaching the child restraint,
test it before you place the child in it.
Tilt it from side to side. Try to tug it
forward and check to see if the belt
holds the restraint in place. If the
restraint is not secure, tighten the
belt as necessary, or put the restraint
in another seat and test it again.
IFor a front facing child restraint,
check to make sure the shoulder beltdoes not go in front of the child's face
or neck. If it does, put the shoulder
belt behind the child restraint. If you
must install a front facing child re-
straint in the front seat, see instruc-
tions later in this section.
IWhen your child restraint is not in
use, store it in the trunk or keep it
secured with a seat belt to prevent it
from being thrown around in case of
a sudden stop or accident.
CAUTION
Remember that a child restraint left in a
closed vehicle can become very hot.
Check the seating surface and buckles
before placing your child in the child
restraint.
1-28
Seats, restraints and supplemental air bag systems
Z
01.9.21/A33-D/V5.0
X
Page 45 of 247

2 Instruments and controlsInstrument panel ....................................................... 2-2
Meters and gauges ................................................... 2-3
Speedometer and odometer ................................ 2-4
Tachometer .......................................................... 2-4
Engine coolant temperature gauge ...................... 2-5
Fuel gauge ........................................................... 2-5
Warning/indicator lights and audible reminders ........ 2-7
Checking bulbs ..................................................... 2-7
Warning lights....................................................... 2-7
Indicator lights .................................................... 2-10
Audible reminders .............................................. 2-11
Security systems ..................................................... 2-12
Vehivle security system ...................................... 2-12
Nissan Vehicle Immobilizer System .................. 2-13
Windshield wiper and washer switch ...................... 2-14
Rear window and outside mirror (if so equipped)
defogger switch ....................................................... 2-15
Headlight and turn signal switch ............................. 2-16
Xenon headlights................................................ 2-16
Headlight switch ................................................. 2-17
Turn signal switch .............................................. 2-19
Fog light switch (if so equipped) ............................. 2-19
Hazard warning flasher switch ................................ 2-19
Horn......................................................................... 2-20Heated seats (if so equipped) ................................. 2-20
Heated steering wheel (if so equipped) .................. 2-21
Traction control system (TCS) cancel switch
(if so equipped) ....................................................... 2-22
Power outlet ............................................................ 2-22
Cigarette lighter and ashtray (accessory) ............... 2-23
Storage .................................................................... 2-23
Trays................................................................... 2-23
Glasses case ...................................................... 2-24
Cup holder .......................................................... 2-24
Glove box ........................................................... 2-25
Console box ....................................................... 2-26
Cargo net (if so equipped) ................................. 2-26
Windows .................................................................. 2-27
Power windows .................................................. 2-27
Sunroof (if so equipped) ......................................... 2-29
Automatic sunroof .............................................. 2-29
Clock ....................................................................... 2-30
Adjusting the time............................................... 2-30
Trip computer .......................................................... 2-30
Interior light ............................................................. 2-32
Ceiling................................................................. 2-32
Personal light .......................................................... 2-33
Vanity mirror light (if so equipped) .......................... 2-34
Z
01.9.21/A33-D/V5.0
X
Page 48 of 247

23. Power outlet (P.2-22) or cigarette lighter
(accessory) (P.2-23)
24. Hazard warning flasher switch (P.2-19)
25. Tray (P.2-23) or ashtray (accessory)
(P.2-23)
26. Glove box (P.2-25)
See the page indicated in parentheses for
operating details.
*: Refer to the separate Navigation System
Owner's Manual.
1. Fuel gauge
2. Speedometer
3. Warning/Indicator lights
4. Tachometer
5. Engine coolant temperature gauge6. Warning/Indicator lights
7. Odometer (Total/Twin trip)
8. Reset knob for trip odometer
9. Trip computer
10.Warning/Indicator lights
SIC1737
METERS AND GAUGES
Instruments and controls
2-3
Z
01.9.21/A33-D/V5.0
X
Page 49 of 247

SPEEDOMETER AND ODOMETER
SpeedometerThe speedometer indicates vehicle speed.Odometer/Twin trip odometerThe odometer/twin trip odometer are displayed
when the ignition key is in the ON position.
The odometer records the total distance the
vehicle has been driven.
The twin trip odometer records the distance of
individual trips.Changing the display:
Pushing the reset knob changes the display as
follows:
TRIP A,TRIP B,TRIP A
Resetting the trip odometer:
Pushing the reset knob for more than 1 second
resets the trip odometer to zero.
TACHOMETERThe tachometer indicates engine speed in
revolutions per minute (r/min).
CAUTION
When engine speed approaches the red
zone, shift to a higher gear. Operating
the engine in the red zone may cause
serious engine damage.
SIC1227
SIC1249
2-4
Instruments and controls
Z
01.9.21/A33-D/V5.0
X
Page 50 of 247

ENGINE COOLANT
TEMPERATURE GAUGEThe gauge indicates the engine coolant tem-
perature.
The engine coolant temperature will vary with
the outside air temperature and driving condi-
tions.
CAUTION
If the gauge indicates engine coolant
temperature over the normal range, stop
the vehicle as soon as safely possible. If
the engine is overheated, continued op-
eration of the vehicle may seriously
damage the engine. See ªIf your vehicle
overheatsº in the ª6. In case of emer-
gencyº section for immediate action re-
quired.
FUEL GAUGEThe gauge indicates the approximate fuel level
in the tank.
The gauge may move slightly during braking,
turning, acceleration, or going up or down hill.
The gauge needle is designed to move to the
E (Empty) position when the ignition key is
turned to the OFF position.
Refill the fuel tank before the gauge regis-
ters Empty.
SIC0173
SIC1738
Instruments and controls
2-5
Z
01.9.21/A33-D/V5.0
X
Page 52 of 247

or
Anti-lock brake warning light
Low washer fluid warning light
High beam indicator light (Blue)
A/T check warning light (A/T models)
Seat belt warning light
Malfunction indicator lamp (MIL)
or
Brake warning light
Stop/tail warning light
Slip indicator light
Charge warning light
Supplemental air bag warning light
Traction control system indicator light
Door open warning light
Trunk lid open warning light
Turn signal/hazard indicator lights
Engine oil pressure warning light
Cruise main switch indicator light
Low fuel warning light
Cruise set indicator light
CHECKING BULBSApply the parking brake and turn the ignition
key to ON without starting the engine. The
following lights will come on:
,
or
,
,
The following lights come on briefly and then
go off:
,
or
,
,
,
If any light fails to come on, it may indicate a
burned-out bulb or an open circuit in the elec-trical system. Have the system repaired
promptly.
WARNING LIGHTS
or
Anti-lock brake
warning light
After turning the ignition key to the ON posi-
tion, the light will illuminate. The light will turn
off after about 2 seconds if the system is
operational.
If the light comes on while the engine isrunning, it may indicate that the anti-lock brake
system is not functioning properly. Have the
system checked by your NISSAN dealer.
If an abnormality occurs in the system, the
anti-lock function will cease but the ordinary
brakes will continue to operate normally.
If the light comes on while you are driving,
contact your NISSAN dealer for repair.
WARNING/INDICATOR LIGHTS
AND AUDIBLE REMINDERS
Instruments and controls
2-7
Z
01.9.21/A33-D/V5.0
X
Page 53 of 247
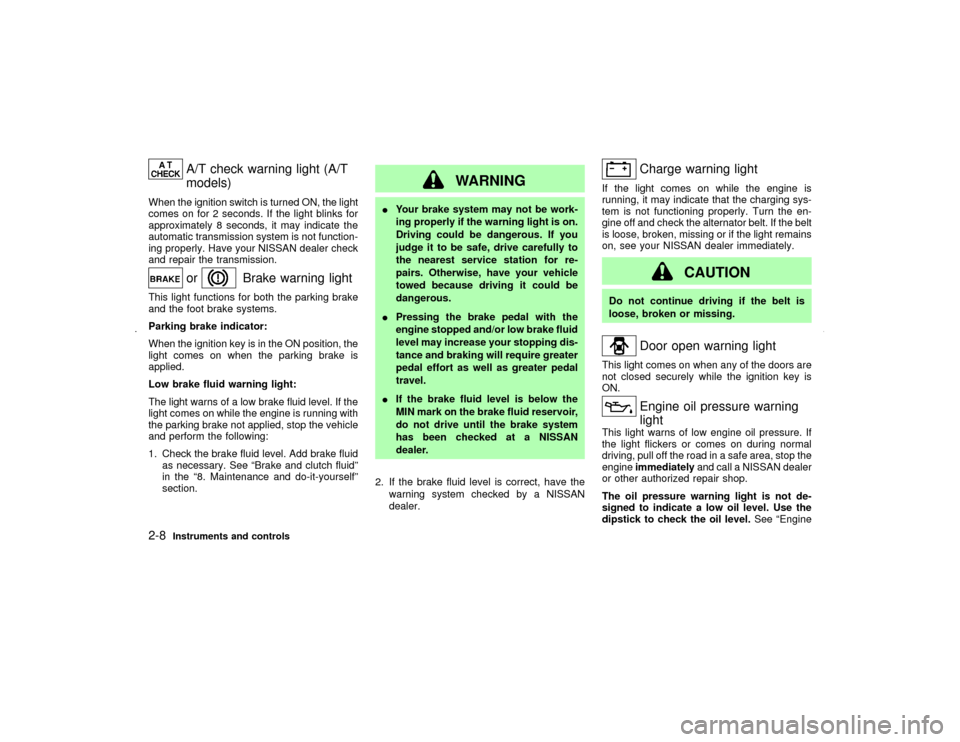
A/T check warning light (A/T
models)
When the ignition switch is turned ON, the light
comes on for 2 seconds. If the light blinks for
approximately 8 seconds, it may indicate the
automatic transmission system is not function-
ing properly. Have your NISSAN dealer check
and repair the transmission.
or
Brake warning light
This light functions for both the parking brake
and the foot brake systems.
Parking brake indicator:
When the ignition key is in the ON position, the
light comes on when the parking brake is
applied.
Low brake fluid warning light:
The light warns of a low brake fluid level. If the
light comes on while the engine is running with
the parking brake not applied, stop the vehicle
and perform the following:
1. Check the brake fluid level. Add brake fluid
as necessary. See ªBrake and clutch fluidº
in the ª8. Maintenance and do-it-yourselfº
section.
WARNING
IYour brake system may not be work-
ing properly if the warning light is on.
Driving could be dangerous. If you
judge it to be safe, drive carefully to
the nearest service station for re-
pairs. Otherwise, have your vehicle
towed because driving it could be
dangerous.
IPressing the brake pedal with the
engine stopped and/or low brake fluid
level may increase your stopping dis-
tance and braking will require greater
pedal effort as well as greater pedal
travel.
IIf the brake fluid level is below the
MIN mark on the brake fluid reservoir,
do not drive until the brake system
has been checked at a NISSAN
dealer.
2. If the brake fluid level is correct, have the
warning system checked by a NISSAN
dealer.
Charge warning light
If the light comes on while the engine is
running, it may indicate that the charging sys-
tem is not functioning properly. Turn the en-
gine off and check the alternator belt. If the belt
is loose, broken, missing or if the light remains
on, see your NISSAN dealer immediately.
CAUTION
Do not continue driving if the belt is
loose, broken or missing.
Door open warning light
This light comes on when any of the doors are
not closed securely while the ignition key is
ON.
Engine oil pressure warning
light
This light warns of low engine oil pressure. If
the light flickers or comes on during normal
driving, pull off the road in a safe area, stop the
engineimmediatelyand call a NISSAN dealer
or other authorized repair shop.
The oil pressure warning light is not de-
signed to indicate a low oil level. Use the
dipstick to check the oil level.See ªEngine
2-8
Instruments and controls
Z
01.9.21/A33-D/V5.0
X