tow NISSAN MAXIMA 2016 A36 / 8.G Quick Reference Guide
[x] Cancel search | Manufacturer: NISSAN, Model Year: 2016, Model line: MAXIMA, Model: NISSAN MAXIMA 2016 A36 / 8.GPages: 40, PDF Size: 6.29 MB
Page 8 of 40

6
NISSANCONNECTsm sERVICEs* (if so equipped)
NissanConnect Services combines personalized convenience, concierge settings\
and personal security features, adding innovation to your daily drive. Y\
our vehicle will
connect to the NissanConnect Services Data Center and NissanConnect Services
Response Center using the TCU (Telematics Control Unit) installed in your vehicle.
For more details on NissanConnect Services or to enroll your vehicle, please visit
www.NissanUSA.com/connect or call 855-426-6628.
Available services include:
Automatic Collision Notification – In the event of an air bag deplo\
yment, vehicle
information is sent to the emergency response center. The Emergency Response Agent
attempts to contact the vehicle occupant and sends appropriate emergency services.
Emergency Call – This service provides emergency assistance by connecting the
subscriber to a NissanConnect Services Specialist.
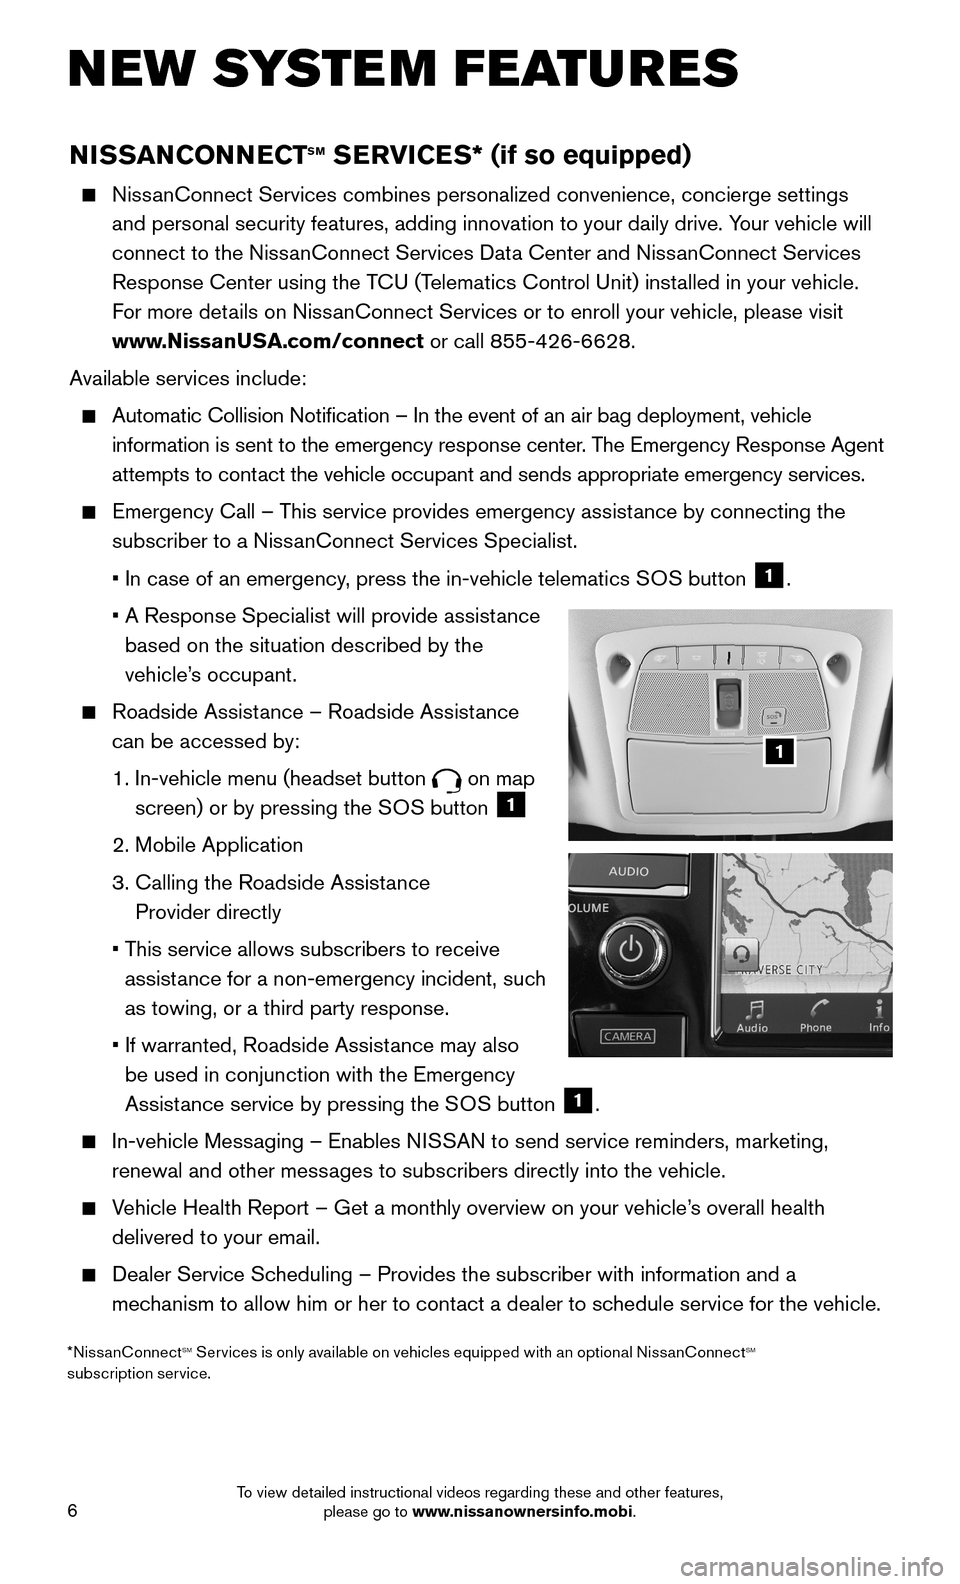
• In case of an emergency, press the in-vehicle telematics SOS button 1.
• A Response Specialist will provide assistance
based on the situation described by the
vehicle’s occupant.
Roadside Assistance – Roadside Assistance
can be accessed by:
1. In-vehicle menu (headset button on map
screen) or by pressing the SOS button 1
2. Mobile Application
3. Calling the Roadside Assistance
Provider directly
• This service allows subscribers to receive
assistance for a non-emergency incident, such
as towing, or a third party response.
• If warranted, Roadside Assistance may also
be used in conjunction with the Emergency
Assistance service by pressing the SOS button 1.
In-vehicle Messaging – Enables NISSAN to send service reminders, marketing,
renewal and other messages to subscribers directly into the vehicle.
Vehicle Health Report – Get a monthly overview on your vehicle’s overall health
delivered to your email.
Dealer Service Scheduling – Provides the subscriber with information and a
mechanism to allow him or her to contact a dealer to schedule service for the vehicle.
NEW SYSTEM FEATURES
1
*NissanConnectsm services is only available on vehicles equipped with an optional NissanConnectsm subscription service.
To view detailed instructional videos regarding these and other features, please go to www.nissanownersinfo.mobi.
Page 20 of 40

18
6
FOG LIGHT SWITCH
The headlights must be on and the low beams
selected for the fog lights to operate.
Turn the switch (inside collar) to the position
6 to turn the fog lights on.
Turn the switch (inside collar) to the OFF
position to turn the fog lights off.
LANE CHANGE SIGNAL
Move the lever up or down until the turn signal begins to flash but th\
e lever does not
latch to signal a lane change. Hold the lever until the lane change is completed.
Move the lever up or down until the turn signal begins to flash but th\
e lever does not
latch and release the lever. The turn signal will automatically flash 3 times.
Choose the appropriate method to signal a lane change based on the road and
traffic conditions.
For more information, refer to the “Instruments and controls (section 2)” of your Owner’s Manual.
WIPER AND WASHER SWITCH
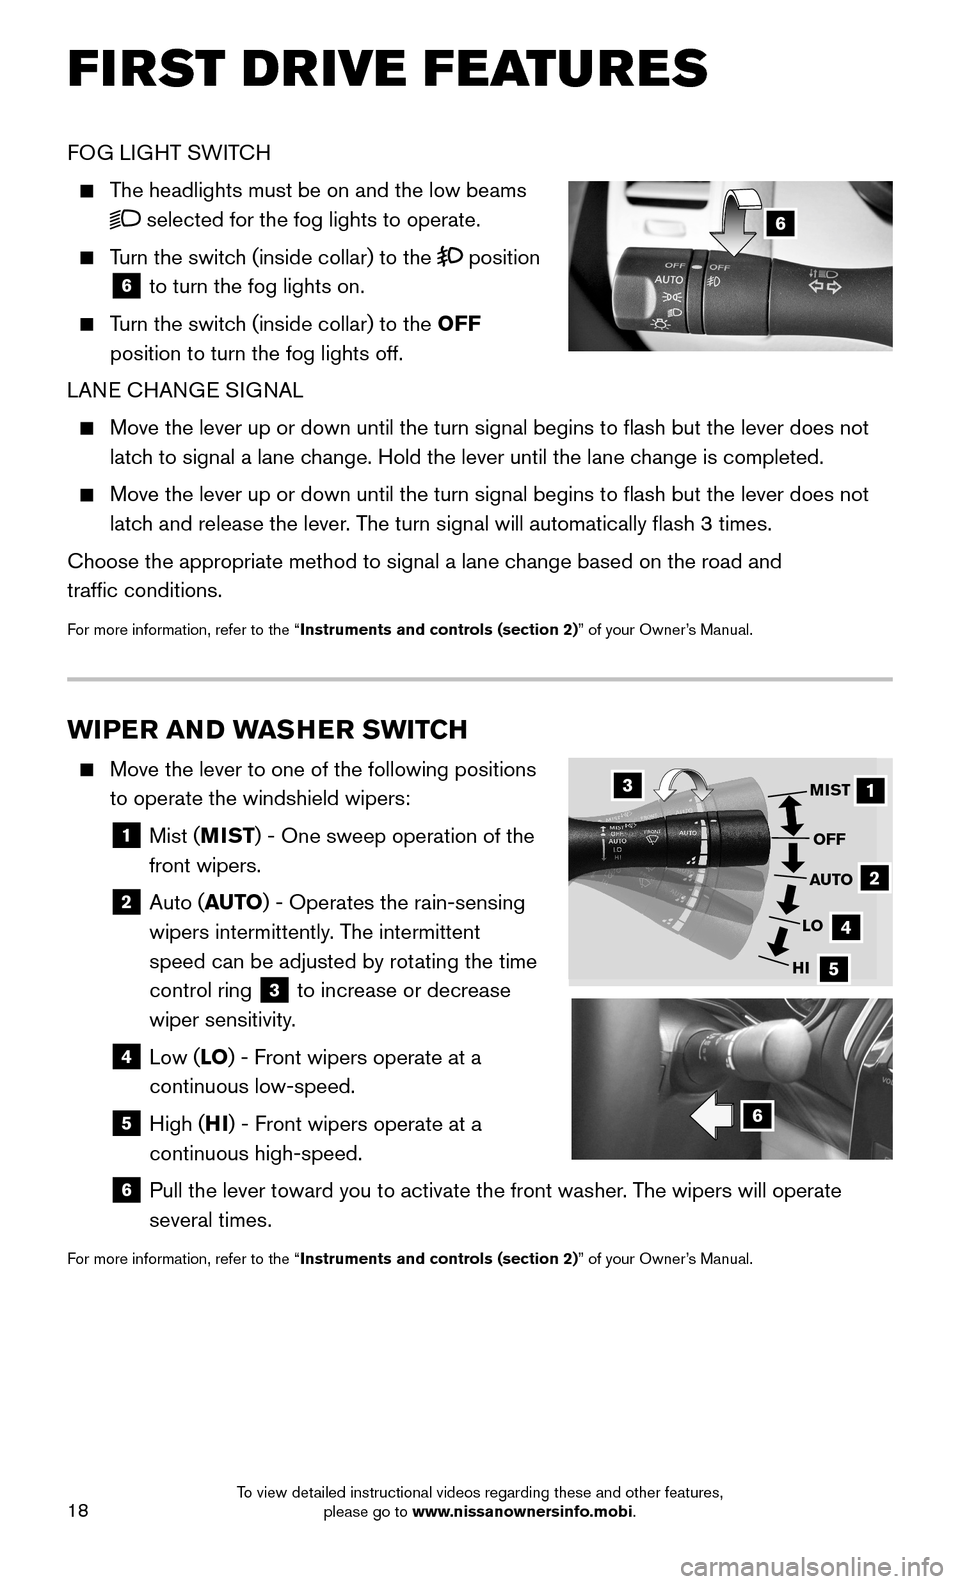
Move the lever to one of the following positions
to operate the windshield wipers:
1 Mist (MIST) - One sweep operation of the
front wipers.
2 Auto (AUTO) - Operates the rain-sensing
wipers intermittently. The intermittent
speed can be adjusted by rotating the time
control ring 3 to increase or decrease
wiper sensitivity.
4 Low (LO) - Front wipers operate at a
continuous low-speed.
5 High (HI) - Front wipers operate at a
continuous high-speed.
6 Pull the lever toward you to activate the front washer. The wipers will operate
several times.
For more information, refer to the “Instruments and controls (section 2)” of your Owner’s Manual.
1
2
4
5
MIST
OFF
AUTO
LO
HI
3
6
FIRST DRIVE FEATURES
To view detailed instructional videos regarding these and other features, please go to www.nissanownersinfo.mobi.
Page 21 of 40

19
MOONROOF/REAR SUNSHADE SWITCH (if so equipped)
OPENING/CLOSING THE MOONROOF
AND SUNSHADE
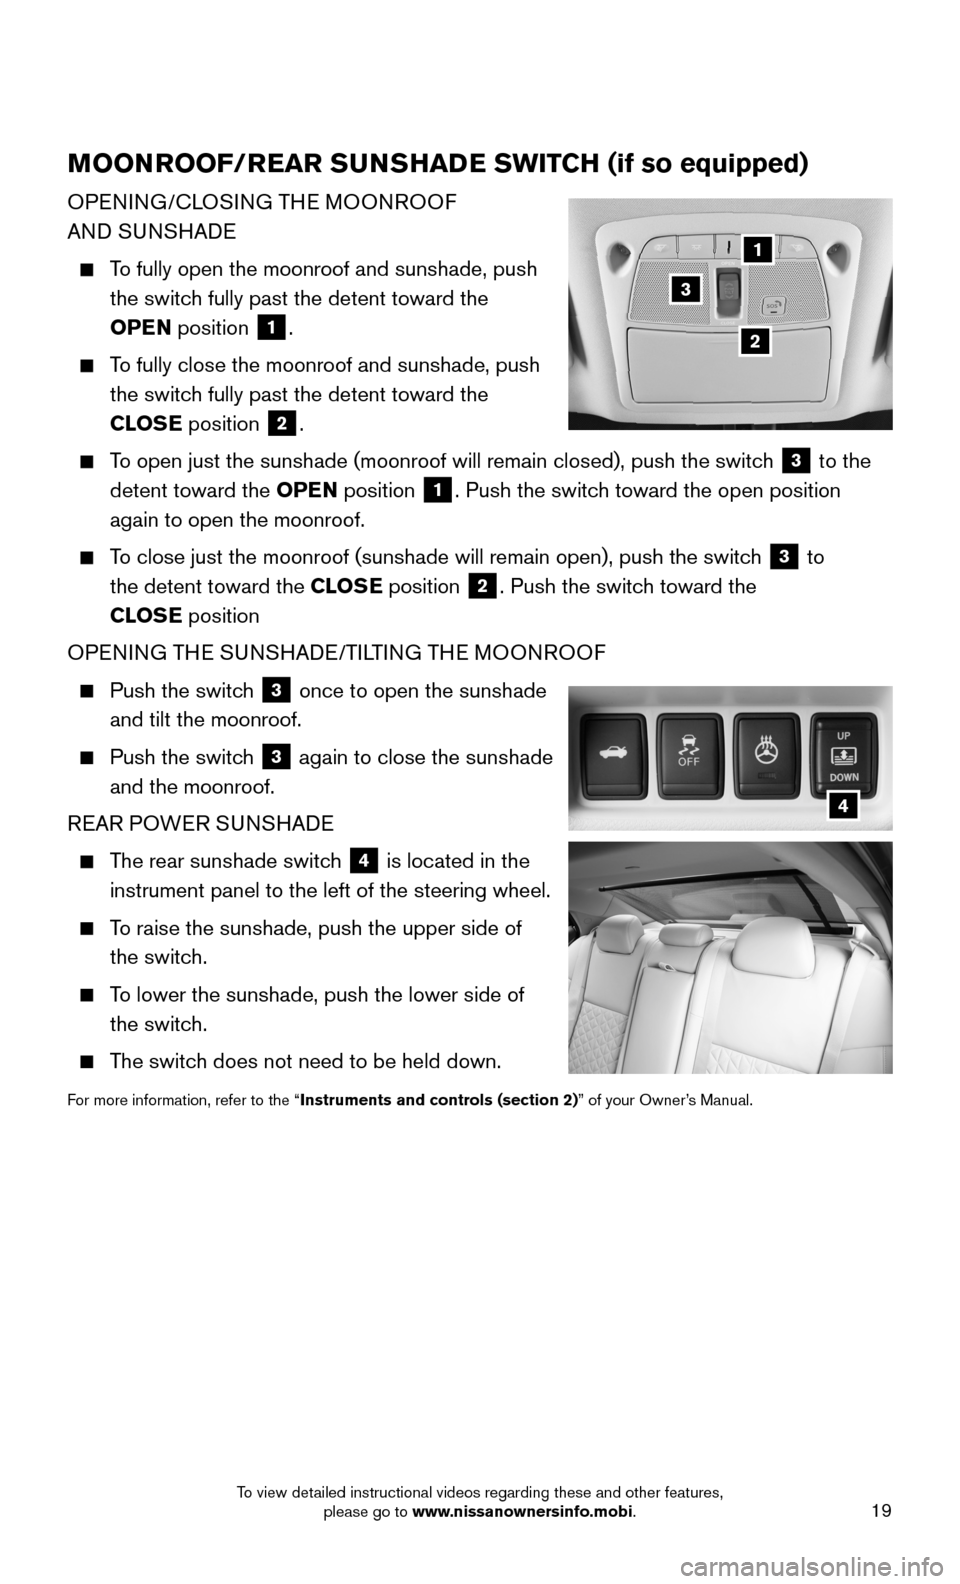
To fully open the moonroof and sunshade, push
the switch fully past the detent toward the
OPEN position 1.
To fully close the moonroof and sunshade, push
the switch fully past the detent toward the
CLOSE position 2.
To open just the sunshade (moonroof will remain closed), push the switc\
h 3 to the
detent toward the OPEN position 1. Push the switch toward the open position
again to open the moonroof.
To close just the moonroof (sunshade will remain open), push the switch 3 to
the detent toward the CLOSE position 2. Push the switch toward the
CLOSE position
OPENING THE SUNSHADE/TILTING THE MOONROOF
Push the switch 3 once to open the sunshade
and tilt the moonroof.
Push the switch 3 again to close the sunshade
and the moonroof.
REAR POWER SUNSHADE
The rear sunshade switch 4 is located in the
instrument panel to the left of the steering wheel.
To raise the sunshade, push the upper side of
the switch.
To lower the sunshade, push the lower side of
the switch.
The switch does not need to be held down.
For more information, refer to the “Instruments and controls (section 2)” of your Owner’s Manual.
4
1
2
3
To view detailed instructional videos regarding these and other features, please go to www.nissanownersinfo.mobi.
Page 35 of 40

33
SETTING A DESTINATION
You can set a destination with your Navigation System using the touch-screen display or
Voice Recognition.
Touch-screen Display
• Touch the Navi key on the Launch Bar.
• When a destination is set, touch the New Destination key and then select one of
the displayed options for choosing your destination.
Voice Recognition
• Press the button on the steering wheel, and after the tone, say “Navigation”. From
here, the system will give you the options available for setting a desti\
nation.
SETTING A DESTINATION USING POINTS OF INTEREST (POI)
Touch-screen Display
• Touch the Navi key on the Launch Bar, and if a destination is already set, touch the
New Destination key.
• Touch the Points of Interest key and then select one of the displayed options for
choosing your destination.
Voice Recognition
• Press the button on the steering wheel, and after the tone, say “Navigation” then
say “Points of Interest”. From here, the system will give you the options a\
vailable for
setting a POI.
NAVIGATION SWIPE TO METER
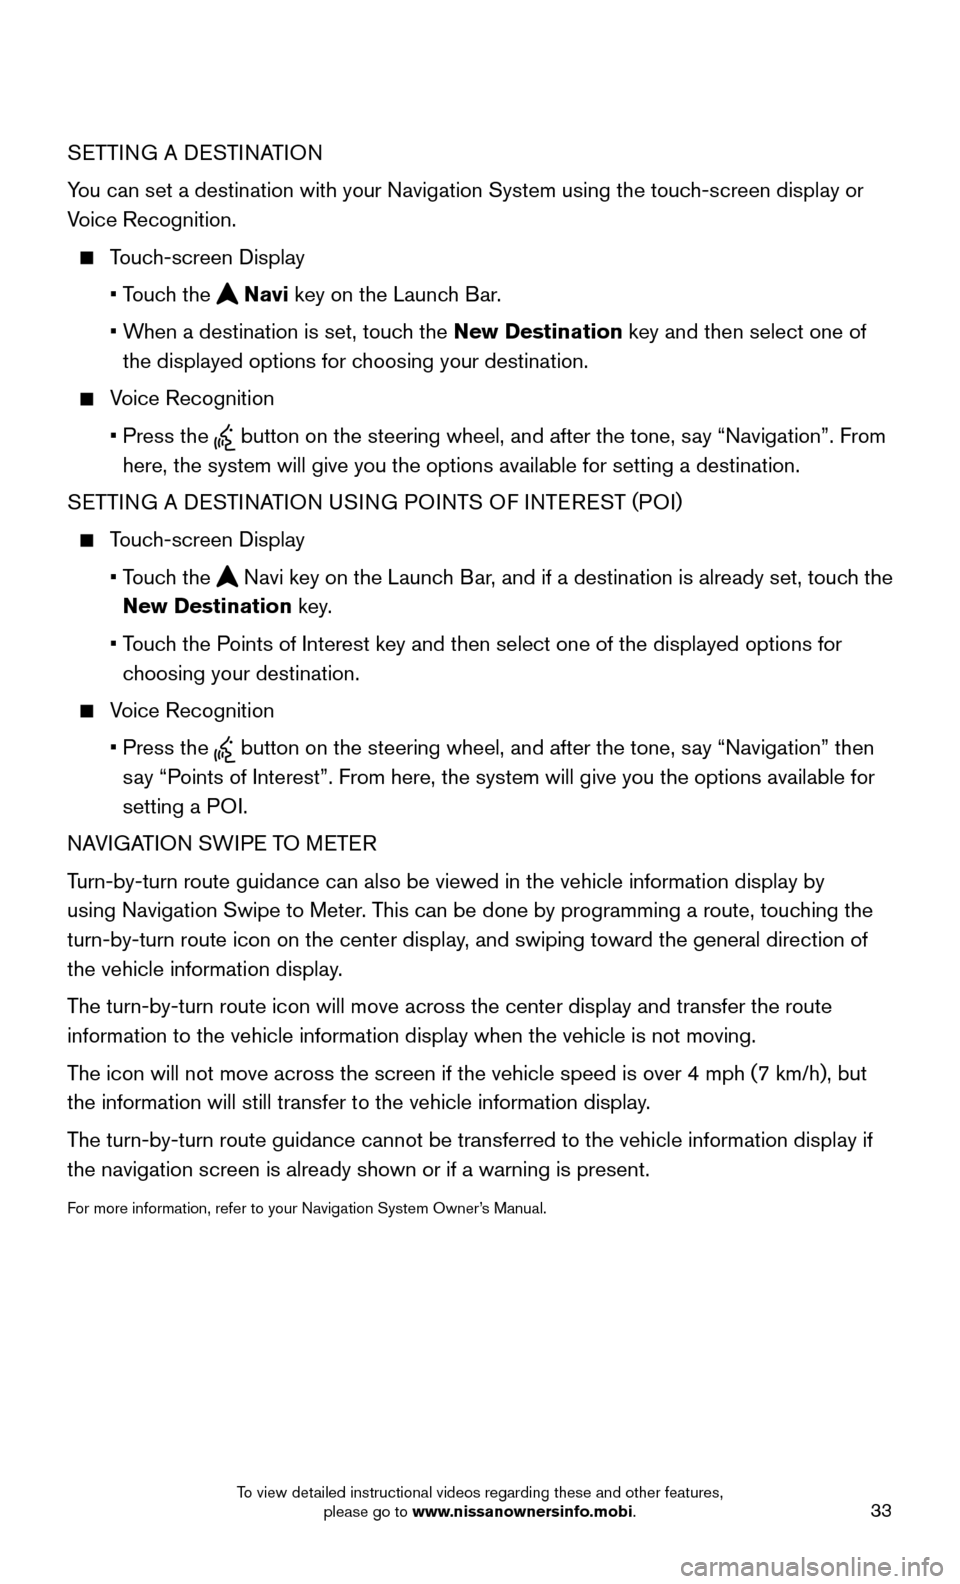
Turn-by-turn route guidance can also be viewed in the vehicle information\
display by
using Navigation Swipe to Meter. This can be done by programming a route, touching the
turn-by-turn route icon on the center display, and swiping toward the general direction of
the vehicle information display.
The turn-by-turn route icon will move across the center display and trans\
fer the route
information to the vehicle information display when the vehicle is not m\
oving.
The icon will not move across the screen if the vehicle speed is over 4 m\
ph (7 km/h), but
the information will still transfer to the vehicle information display.
The turn-by-turn route guidance cannot be transferred to the vehicle info\
rmation display if
the navigation screen is already shown or if a warning is present.
For more information, refer to your Navigation System Owner’s Manual.
To view detailed instructional videos regarding these and other features, please go to www.nissanownersinfo.mobi.