buttons NISSAN MAXIMA 2021 Owner´s Manual
[x] Cancel search | Manufacturer: NISSAN, Model Year: 2021, Model line: MAXIMA, Model: NISSAN MAXIMA 2021Pages: 476, PDF Size: 3.32 MB
Page 226 of 476
MANUAL OPERATION
Fan speed control
Press thefan speed control buttons
to manually control the fan speed.
Press the AUTO button to return to auto-
matic control of the fan speed.
Temperature control dial
The temperature control dial allows you to
adjust the temperature of the outlet air. To
lower the temperature, turn the dial to the
lef t. To increase the temperature, turn the
dial to the right. Temperature can be ad-
justed on the driver’s and passenger’s side.
Air recirculation
Press theair recirculation button to
recirculate interior air inside the vehicle.
The
indicator light on the button will
come on.
The air recirculation cannot be activated
when the air conditioner is in the
front
defrosting mode. When the outside temperature exceeds
70°F (21°C), the air conditioning system may
default to air recirculation mode automati-
cally to reduce overall power consumption.
To exit air recirculation mode, select the
fresh air intake button (the air recircu-
lation indicator will turn off, the fresh air
indicator will turn on) to enter fresh air
mode.
Fresh air intake
Press thefresh air intake button to
draw outside air into the passenger
compartment.
A/C (air conditioner) button
Start the engine, press thefan speed
control buttons to the desired position and
press the
button to turn on the air
conditioner. To turn off the air conditioner,
press the
button again.
The air conditioner cooling function op-
erates only when the engine is running.
Air flow control
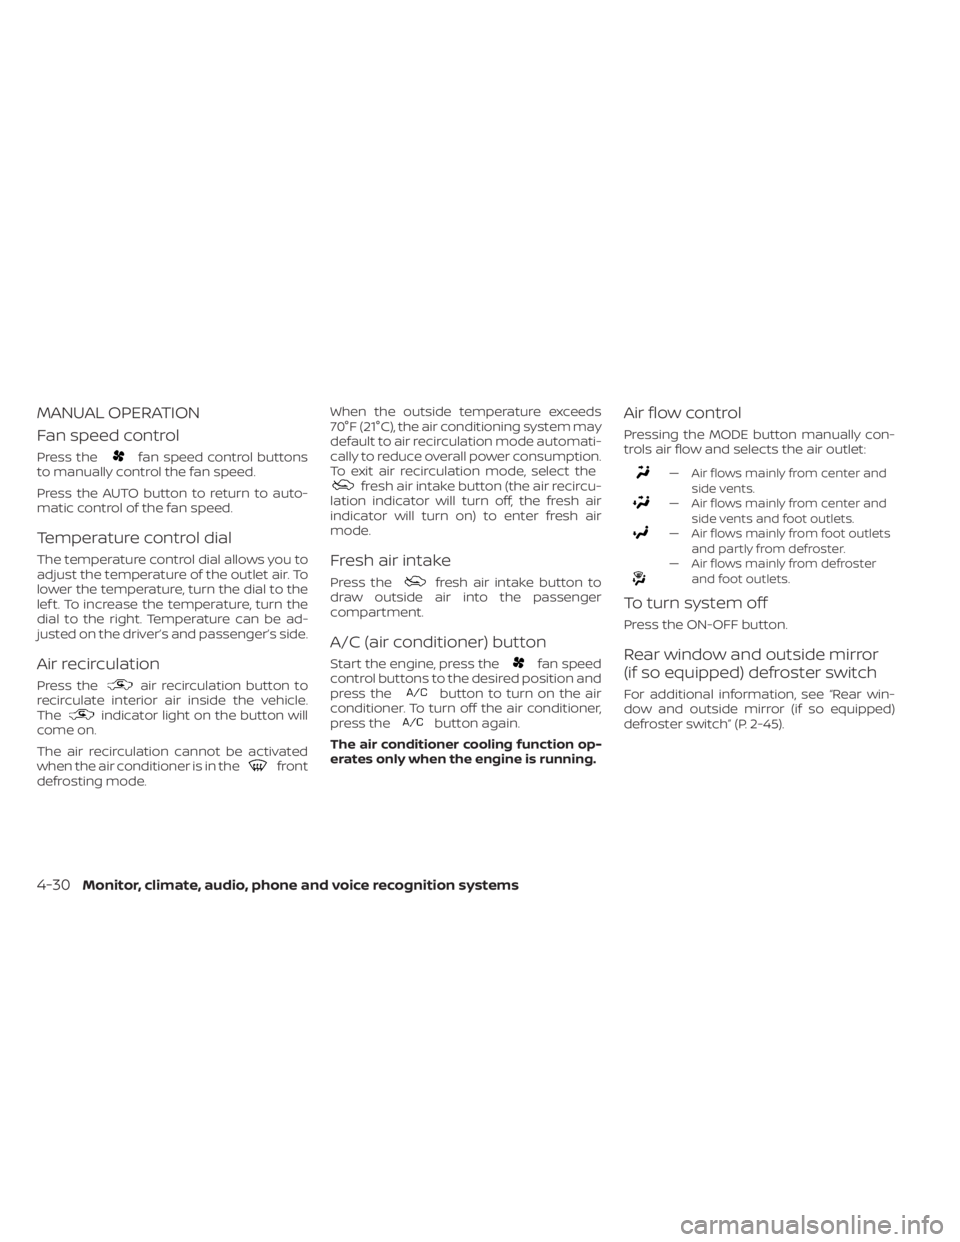
Pressing the MODE button manually con-
trols air flow and selects the air outlet:
— Air flows mainly from center and side vents.
— Air flows mainly from center andside vents and foot outlets.
— Air flows mainly from foot outletsand partly from defroster.
— Air flows mainly from defrosterand foot outlets.
To turn system off
Press the ON-OFF button.
Rear window and outside mirror
(if so equipped) defroster switch
For additional information, see “Rear win-
dow and outside mirror (if so equipped)
defroster switch” (P. 2-45).
4-30Monitor, climate, audio, phone and voice recognition systems
Page 257 of 476
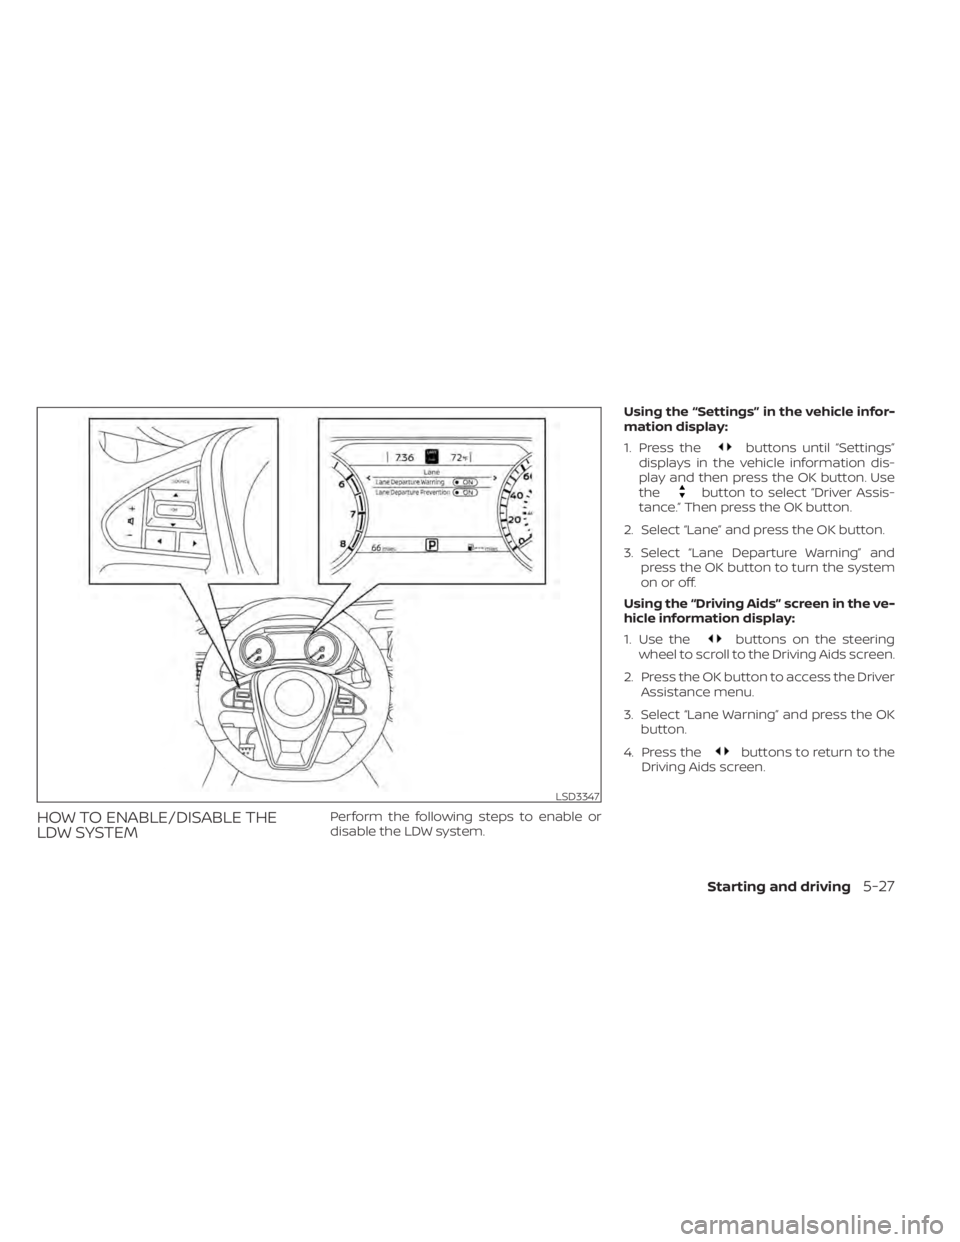
HOW TO ENABLE/DISABLE THE
LDW SYSTEMPerform the following steps to enable or
disable the LDW system.Using the “Settings” in the vehicle infor-
mation display:
1. Press the
buttons until “Settings”
displays in the vehicle information dis-
play and then press the OK button. Use
the
button to select “Driver Assis-
tance.” Then press the OK button.
2. Select “Lane” and press the OK button.
3. Select “Lane Departure Warning” and press the OK button to turn the system
on or off.
Using the “Driving Aids” screen in the ve-
hicle information display:
1. Use the
buttons on the steering
wheel to scroll to the Driving Aids screen.
2. Press the OK button to access the Driver Assistance menu.
3. Select “Lane Warning” and press the OK button.
4. Press the
buttons to return to the
Driving Aids screen.
LSD3347
Starting and driving5-27
Page 262 of 476
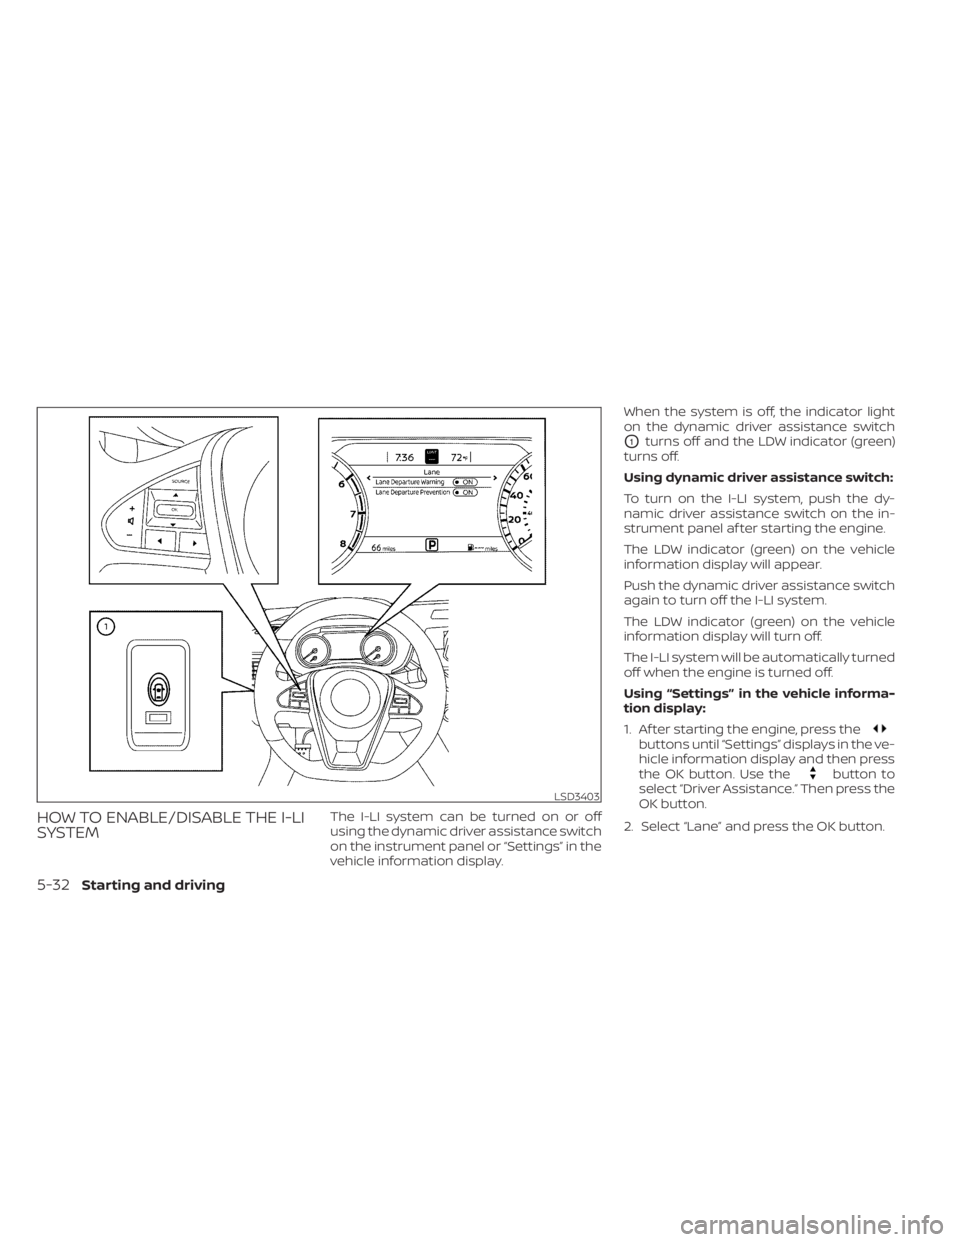
HOW TO ENABLE/DISABLE THE I-LI
SYSTEMThe I-LI system can be turned on or off
using the dynamic driver assistance switch
on the instrument panel or “Settings” in the
vehicle information display.When the system is off, the indicator light
on the dynamic driver assistance switch
O1turns off and the LDW indicator (green)
turns off.
Using dynamic driver assistance switch:
To turn on the I-LI system, push the dy-
namic driver assistance switch on the in-
strument panel af ter starting the engine.
The LDW indicator (green) on the vehicle
information display will appear.
Push the dynamic driver assistance switch
again to turn off the I-LI system.
The LDW indicator (green) on the vehicle
information display will turn off.
The I-LI system will be automatically turned
off when the engine is turned off.
Using “Settings” in the vehicle informa-
tion display:
1. Af ter starting the engine, press the
buttons until “Settings” displays in the ve-
hicle information display and then press
the OK button. Use the
button to
select “Driver Assistance.” Then press the
OK button.
2. Select “Lane” and press the OK button.
LSD3403
5-32Starting and driving
Page 263 of 476

3. Select “Lane Departure Prevention” andpress the OK button to turn the system
on or off.
Using “Driving Aids” screen in the vehicle
information display:
1. Use the
buttons on the steering
wheel to scroll to the Driving Aids screen.
2. Press the OK button to access the Driv- ing Aids menu.
3. Select “Lane” and press the OK button until “Lane Prevent” is displayed.
4. Press the
buttons to return to the
Driving Aids screen.
I-LI SYSTEM LIMITATIONS
WARNING
Listed below are the system limitations
for the I-LI system. Failure to follow the
warnings and instructions for proper
use of the I-LI system could result in
serious injury or death. •
The I-LI system may activate if you
change lanes without first activating
your turn signal or, for example, if a
construction zone directs traffic to
cross an existing lane marker. If this
occurs you may need to apply correc-
tive steering to complete your lane
change.
• Because the I-LI may not activate un-
der the road, weather, and lane
marker conditions described in this
section, it may not activate every
time your vehicle begins to leave its
lane and you will need to apply cor-
rective steering.
• When the I-LI system is operating,
avoid excessive or sudden steering
maneuvers. Otherwise, you could
lose control of the vehicle.
• The I-LI system will not operate at
speeds below approximately 37 mph
(60 km/h) or if it cannot detect lane
markers.
• Do not use the I-LI system under the
following conditions as it may not
function properly:
– During bad weather (rain, fog,
snow, etc.). –
When driving on slippery roads,
such as on ice or snow.
– When driving on winding or un-
even roads.
– When there is a lane closure due to
road repairs.
– When driving in a makeshif t or
temporary lane.
– When driving on roads where the
lane width is too narrow.
– When driving without normal tire
conditions (for example, tire wear,
low tire pressure, installation of
spare tire, tire chains, non-
standard wheels).
– When the vehicle is equipped with
nonoriginal brake parts or sus-
pension parts.
– When you are towing a trailer or
other vehicle.
– On roads where there are multiple
parallel lane markers; lane mark-
ers that are faded or not painted
clearly; yellow painted lane mark-
ers; non-standard lane markers;
or lane markers covered with wa-
ter, dirt, snow, etc.
– On roads where discontinued lane
markers are still detectable.
Starting and driving5-33
Page 268 of 476
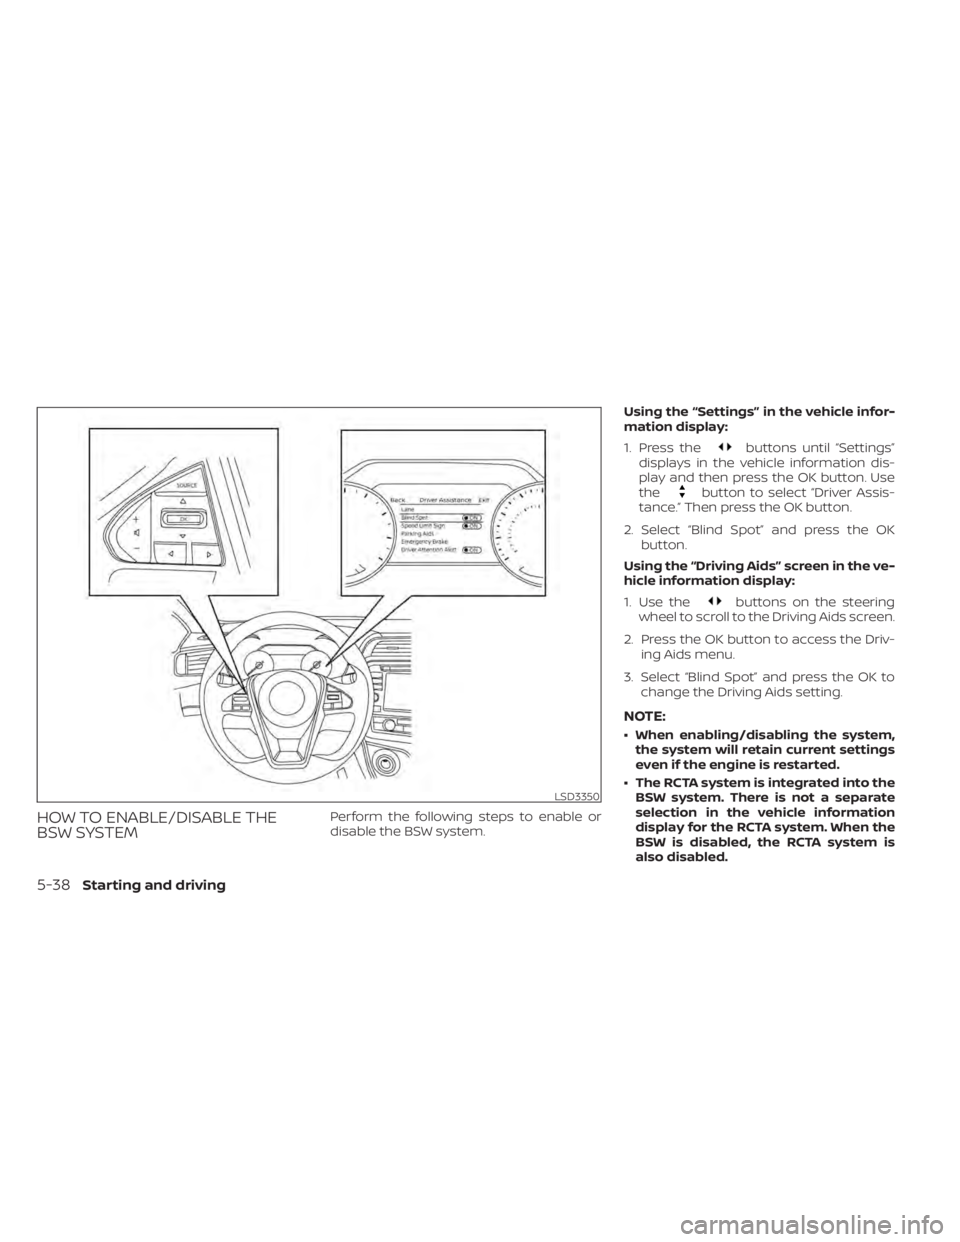
HOW TO ENABLE/DISABLE THE
BSW SYSTEMPerform the following steps to enable or
disable the BSW system.Using the “Settings” in the vehicle infor-
mation display:
1. Press the
buttons until “Settings”
displays in the vehicle information dis-
play and then press the OK button. Use
the
button to select “Driver Assis-
tance.” Then press the OK button.
2. Select “Blind Spot” and press the OK button.
Using the “Driving Aids” screen in the ve-
hicle information display:
1. Use the
buttons on the steering
wheel to scroll to the Driving Aids screen.
2. Press the OK button to access the Driv- ing Aids menu.
3. Select “Blind Spot” and press the OK to change the Driving Aids setting.
NOTE:
• When enabling/disabling the system,the system will retain current settings
even if the engine is restarted.
• The RCTA system is integrated into the BSW system. There is not a separate
selection in the vehicle information
display for the RCTA system. When the
BSW is disabled, the RCTA system is
also disabled.
LSD3350
5-38Starting and driving
Page 278 of 476
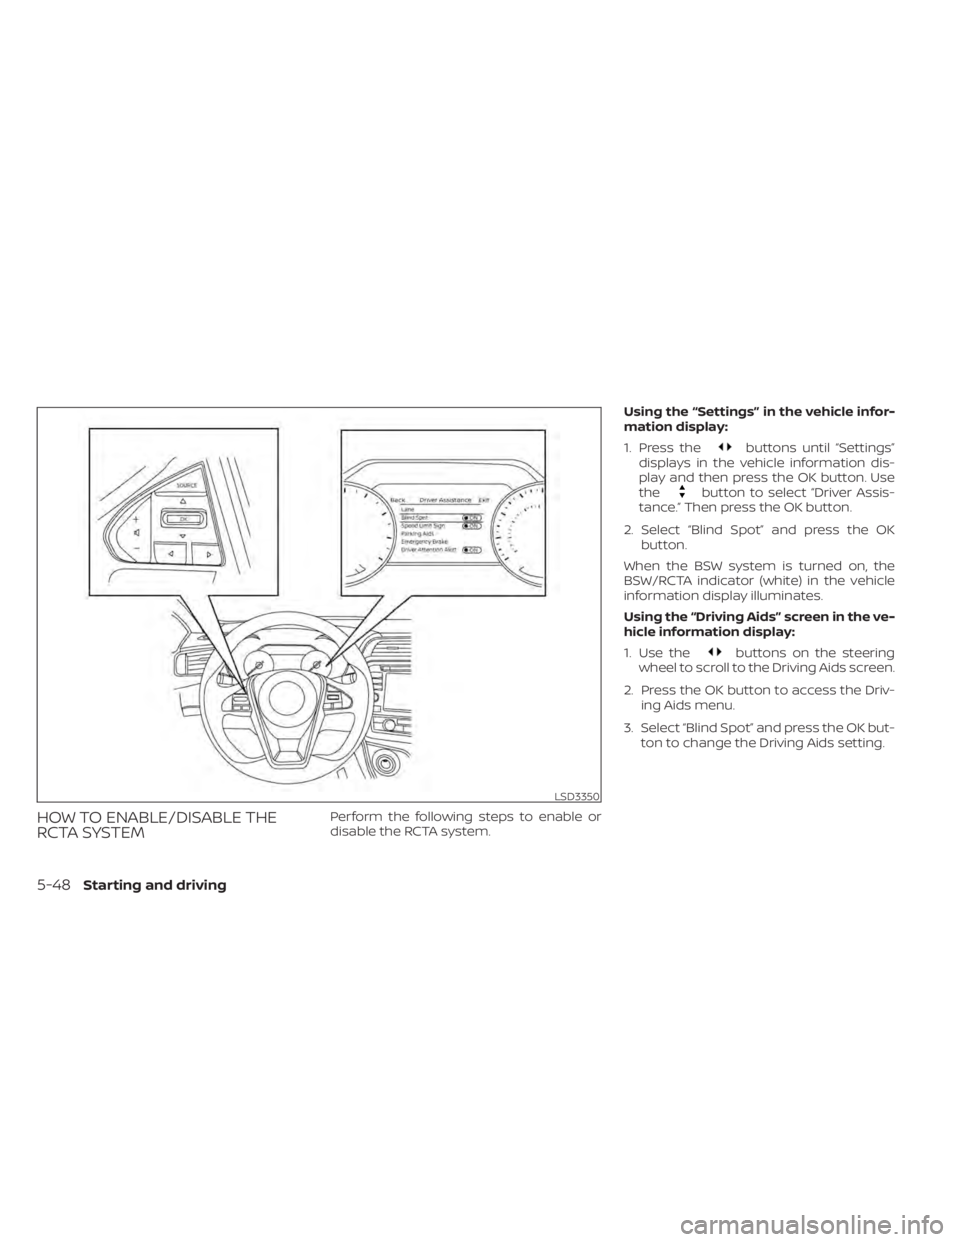
HOW TO ENABLE/DISABLE THE
RCTA SYSTEMPerform the following steps to enable or
disable the RCTA system.Using the “Settings” in the vehicle infor-
mation display:
1. Press the
buttons until “Settings”
displays in the vehicle information dis-
play and then press the OK button. Use
the
button to select “Driver Assis-
tance.” Then press the OK button.
2. Select “Blind Spot” and press the OK button.
When the BSW system is turned on, the
BSW/RCTA indicator (white) in the vehicle
information display illuminates.
Using the “Driving Aids” screen in the ve-
hicle information display:
1. Use the
buttons on the steering
wheel to scroll to the Driving Aids screen.
2. Press the OK button to access the Driv- ing Aids menu.
3. Select “Blind Spot” and press the OK but- ton to change the Driving Aids setting.
LSD3350
5-48Starting and driving
Page 293 of 476
This message will disappear af ter about 6
seconds, or can be dismissed by pushing
the OK button and then
buttons.
Cruise control status will continue to dis-
play in the upper right corner of the vehicle
information display while the system is on.
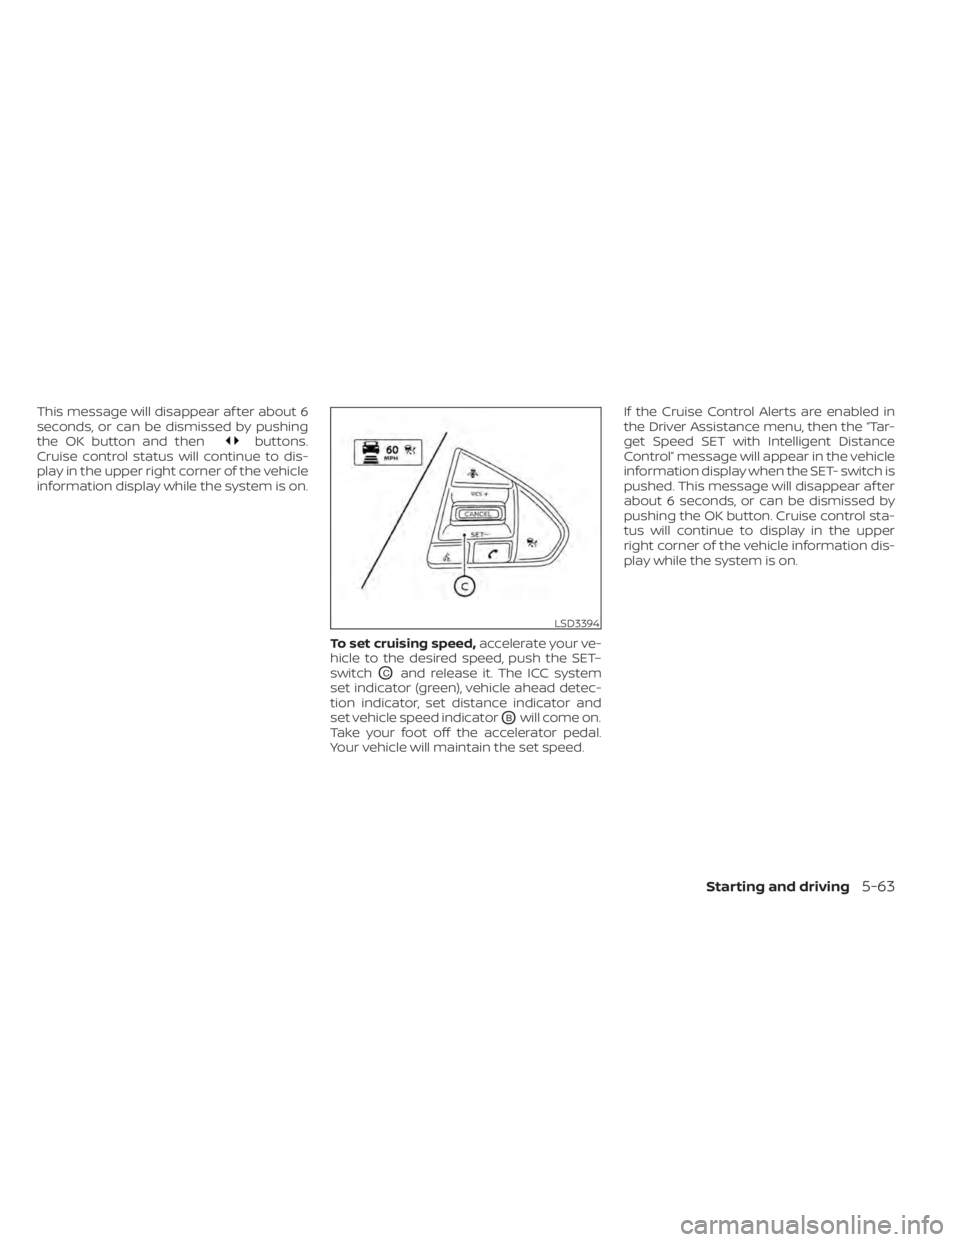
To set cruising speed,accelerate your ve-
hicle to the desired speed, push the SET–
switch
OCand release it. The ICC system
set indicator (green), vehicle ahead detec-
tion indicator, set distance indicator and
set vehicle speed indicator
OBwill come on.
Take your foot off the accelerator pedal.
Your vehicle will maintain the set speed. If the Cruise Control Alerts are enabled in
the Driver Assistance menu, then the “Tar-
get Speed SET with Intelligent Distance
Control” message will appear in the vehicle
information display when the SET- switch is
pushed. This message will disappear af ter
about 6 seconds, or can be dismissed by
pushing the OK button. Cruise control sta-
tus will continue to display in the upper
right corner of the vehicle information dis-
play while the system is on.
LSD3394
Starting and driving5-63
Page 348 of 476

While the vehicle is moving the audible alert
will stop af ter 3 seconds when an obstacle
is detected by only the corner sensor and
distance does not change. The audible
alert will also stop when the obstacle
moves away from the vehicle. At any time
the lef t side button of the steering wheel (
buttons) is available to cancel the au-
dible alert.
When the object is detected, the indicator
(green) appears and blinks and the tone
sounds intermittently. When the vehicle
moves closer to the object, the color of the
indicator turns yellow and the rate of the
blinking increases. When the vehicle is very
close to the object, the indicator stops
blinking and turns red, and the tone
sounds continuously. When the corner of the vehicle moves
closer to an object, the corner sonar indi-
cator
OAappears.The system indicators
OAwill appear when
the vehicle moves closer to an object.
LSD2428LSD2137
5-118Starting and driving
Page 399 of 476

3. Replace the battery with a new one.Recommended battery: CR2032 or
equivalent.• Do not touch the internal circuit and electric terminals as doing so could
cause a malfunction.
• Hold the battery by the edges. Holding the battery across the contact points
will seriously deplete the storage
capacity.
• Make sure that the + side faces the bottom of the lower part.
4. Close the lid securely as illustrated with
OCandOD.
5. Operate the buttons to check the operation.
It is recommended that you visit a NISSAN
dealer if you need assistance for
replacement. FCC Notice:
For USA:
This device complies with Part 15 of the
FCC Rules. Operation is subject to the fol-
lowing two conditions: (1) This device
may not cause harmful interference, and
(2) this device must accept any interfer-
ence received, including interference
that may cause undesired operation.
Note:
Changes or modifications not expressly
approved by the party responsible for
compliance could void the user’s author-
ity to operate the equipment.
For Canada:
This device complies with Industry
Canada licence-exempt RSS standard(s).
Operation is subject to the following two
conditions: (1) this device may not cause
interference, and (2) this device must ac-
cept any interference, including interfer-
ence that may cause undesired opera-
tion of the device.
HEADLIGHTS
For additional information on headlight
bulb replacement, refer to the instructions
outlined in this section.
Replacing the LED headlight bulb
If LED headlight bulb replacement is re-
quired, it is recommended that you visit a
NISSAN dealer for this service.
FRONT PARK/TURN SIGNAL/SIDE
MARKER LIGHT
If park, turn signal or side marker light bulb
replacement is required, it is recom-
mended that you visit a NISSAN dealer for
this service.
FOG LIGHTS (if so equipped)
For additional information on fog light bulb
replacement, refer to the instructions out-
lined in this section.
Replacing the LED fog light bulb
If LED fog light bulb replacement is re-
quired, it is recommended that you visit a
NISSAN dealer for this service.
LIGHTS
Do-it-yourself8-23