traction control NISSAN MICRA 2016 Owner´s Manual
[x] Cancel search | Manufacturer: NISSAN, Model Year: 2016, Model line: MICRA, Model: NISSAN MICRA 2016Pages: 299, PDF Size: 3.54 MB
Page 87 of 299
Operation
The MIL will come on in one of two ways:● MIL on steady — An emission control system
malfunction has been detected. Check the
fuel-filler cap. If the LOOSE FUEL CAP
warning message is displayed in the odom-
eter, and the fuel-filler cap is loose or miss-
ing, tighten or install the cap and continue to
drive the vehicle. The
light should turn
off after a few driving trips. If the
light
does not turn off after a few driving trips,
have the vehicle inspected by a NISSAN
dealer. You do not need to have your vehicle
towed to the dealer.
● MIL blinking — An engine misfire has been
detected which may damage the emission
control system. To reduce or avoid emission
control system damage:
– do not drive at speeds above 45 mph (72 km/h);
– avoid hard acceleration or deceleration;
– avoid steep uphill grades;
– if possible, reduce the amount of cargo being hauled. The MIL may stop blinking and come on steady.
Have the vehicle inspected by a NISSAN dealer.
You do not need to have your vehicle towed to the
dealer.
CAUTION
Continued vehicle operation without hav-
ing the emission control system checked
and repaired as necessary could lead to
poor driveability, reduced fuel economy,
and possible damage to the emission con-
trol system.
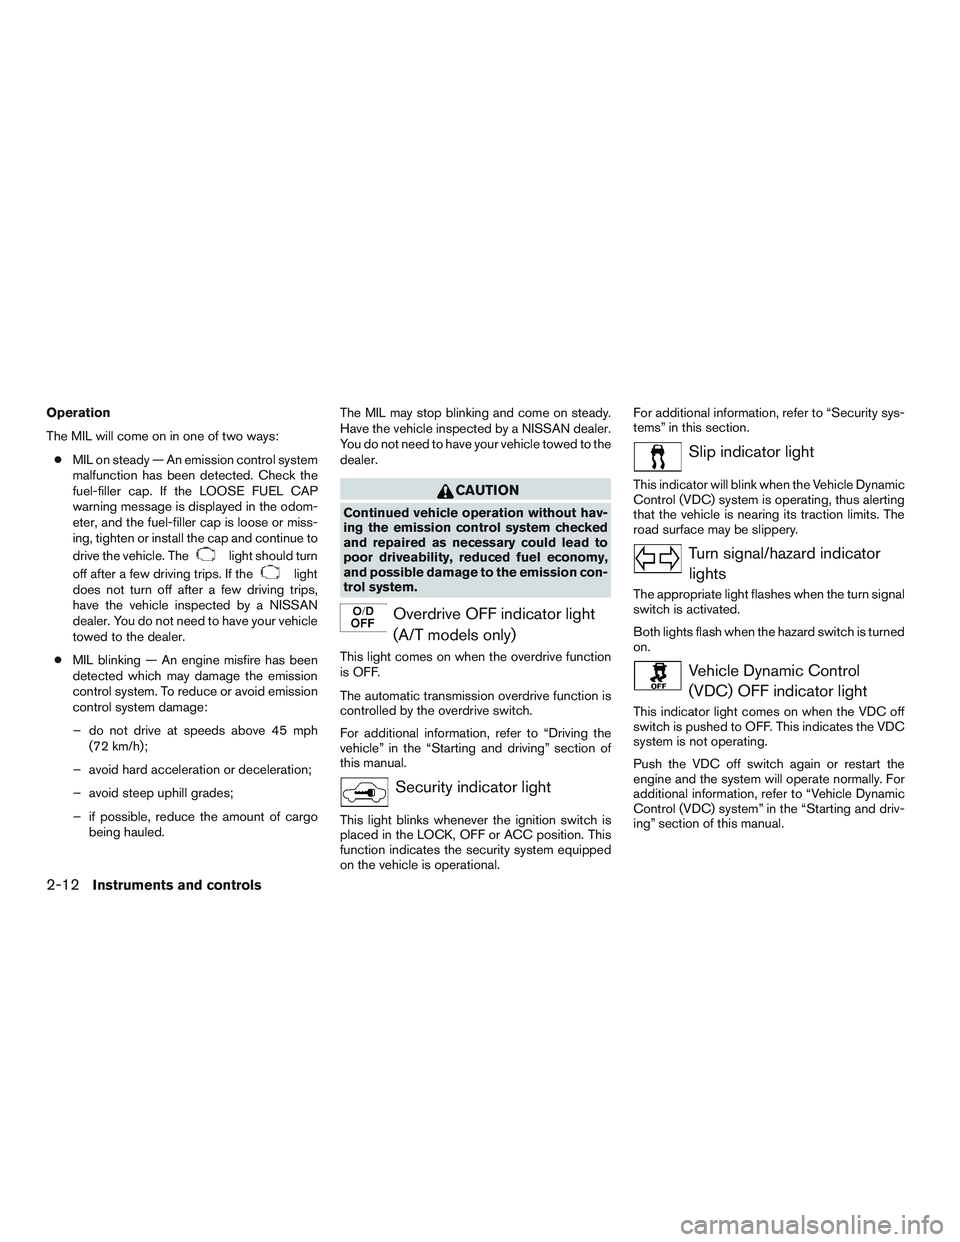
Overdrive OFF indicator light
(A/T models only)
This light comes on when the overdrive function
is OFF.
The automatic transmission overdrive function is
controlled by the overdrive switch.
For additional information, refer to “Driving the
vehicle” in the “Starting and driving” section of
this manual.
Security indicator light
This light blinks whenever the ignition switch is
placed in the LOCK, OFF or ACC position. This
function indicates the security system equipped
on the vehicle is operational. For additional information, refer to “Security sys-
tems” in this section.
Slip indicator light
This indicator will blink when the Vehicle Dynamic
Control (VDC) system is operating, thus alerting
that the vehicle is nearing its traction limits. The
road surface may be slippery.
Turn signal/hazard indicator
lights
The appropriate light flashes when the turn signal
switch is activated.
Both lights flash when the hazard switch is turned
on.
Vehicle Dynamic Control(VDC) OFF indicator light
This indicator light comes on when the VDC off
switch is pushed to OFF. This indicates the VDC
system is not operating.
Push the VDC off switch again or restart the
engine and the system will operate normally. For
additional information, refer to “Vehicle Dynamic
Control (VDC) system” in the “Starting and driv-
ing” section of this manual.
2-12Instruments and controls
Page 152 of 299
USB (Universal Serial Bus)
Connection Port (if so equipped)
WARNING
Do not connect, disconnect or operate the
USB device while driving. Doing so can be
a distraction. If distracted you could lose
control of your vehicle and cause an acci-
dent or serious injury.
CAUTION
●Do not force the USB device into the
USB port. Inserting the USB device
tilted or up-side-down into the port may
damage the port. Make sure that the
USB device is connected correctly into
the USB port.
● Do not grab the USB port cover (if so
equipped) when pulling the USB device
out of the port. This could damage the
port and the cover.
● Do not leave the USB cable in a place
where it can be pulled unintentionally.
Pulling the cable may damage the port.
The vehicle is not equipped with a USB device.
USB devices should be purchased separately as
necessary. This system cannot be used to format USB de-
vices. To format a USB device, use a personal
computer.
In some jurisdictions, the USB device for the front
seats plays only sound without images for regu-
latory reasons, even when the vehicle is parked.
This system supports various USB memory de-
vices, USB hard drives and iPod® players. Some
USB devices may not be supported by this sys-
tem.
● Partitioned USB devices may not play cor-
rectly.
● Some characters used in other languages
(Chinese, Japanese, etc.) may not appear
properly in the display. Using English lan-
guage characters with a USB device is rec-
ommended.
General notes for USB use: ● Refer to your device manufacturer’s owner
information regarding the proper use and
care of the device.
Notes for iPod® use (if so equipped):
iPod® is a trademark of Apple Inc., registered in
the U.S. and other countries. ●
Improperly plugging in the iPod® may cause
a checkmark to be displayed on and off
(flickering) . Always make sure that the
iPod® is connected properly.
● An iPod® nano (1st Generation) may remain
in fast forward or rewind mode if it is con-
nected during a seek operation. In this case,
please manually reset the iPod®.
● An iPod® nano (2nd Generation) will con-
tinue to fast-forward or rewind if it is discon-
nected during a seek operation.
● An incorrect song title may appear when the
Play Mode is changed while using an iPod®
nano (2nd Generation) .
● Audiobooks may not play in the same order
as they appear on an iPod®.
● Large video files cause slow responses in an
iPod®. The vehicle center display may mo-
mentarily black out, but will soon recover.
● If an iPod® automatically selects large video
files while in the shuffle mode, the vehicle
center display may momentarily black out,
but will soon recover.
Display screen, heater, air conditioner, audio and phone systems4-31
Page 163 of 299
For additional information about the USB con-
nection port, refer to “USB (Universal Serial Bus)
connection port” in this section.
EJECT button
When the
button is pressed with a com-
pact disc loaded, the compact disc will eject and
the last source will be played.
Additional features
For additional information about the iPod® player
available with this system, refer to “iPod® player
operation” in this section.
For additional information about the USB inter-
face available with this system, refer to “USB
(Universal Serial Bus) connection port” in this
section.
USB (Universal Serial Bus)
CONNECTION PORT (if so equipped)
Connecting a device to the USB
connection port
WARNING
Do not connect, disconnect, or operate the
USB device while driving. Doing so can be
a distraction. If distracted you could lose
control of your vehicle and cause an acci-
dent or serious injury.
CAUTION
● To avoid damage and loss of function
when using a USB device, note the fol-
lowing precautions.
● Do not force the USB device into the
USB port. Inserting the USB device
tilted or up-side-down into the port may
damage the port. Make sure that the
USB device is connected correctly into
the USB port.
● Do not grab the USB port cover (if so
equipped) when pulling the USB device
out of the port. This could damage the
port and the cover.
● Do not leave the USB cable in a place
where it can be pulled unintentionally.
Pulling the cable may damage the port.
Refer to your device manufacturer’s owner infor-
mation regarding the proper use and care of the
device.
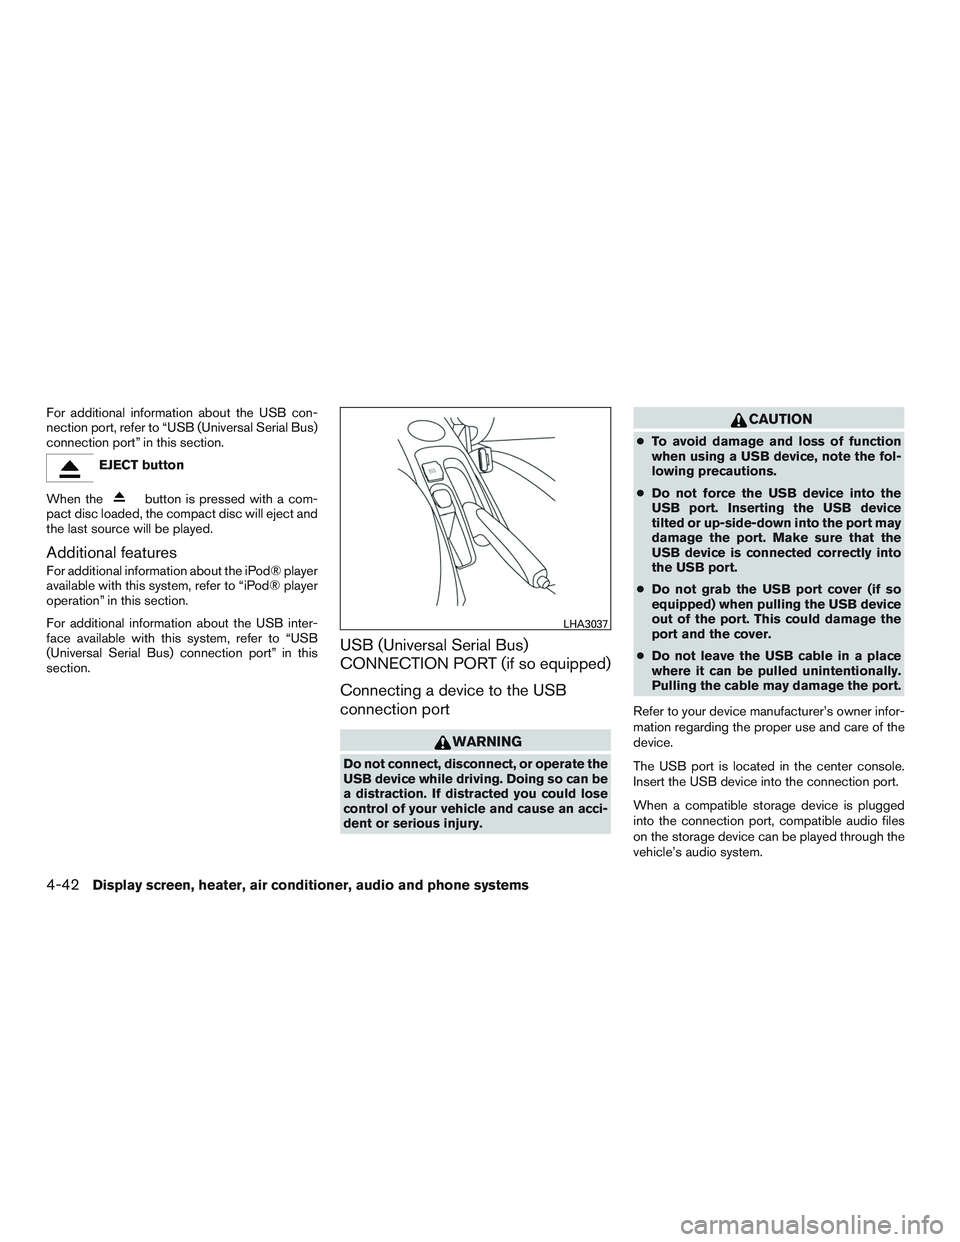
The USB port is located in the center console.
Insert the USB device into the connection port.
When a compatible storage device is plugged
into the connection port, compatible audio files
on the storage device can be played through the
vehicle’s audio system.
LHA3037
4-42Display screen, heater, air conditioner, audio and phone systems
Page 165 of 299
iPod®* PLAYER OPERATION (if so
equipped)
Connecting iPod®
WARNING
Do not connect, disconnect or operate the
USB device while driving. Doing so can be
a distraction. If distracted you could lose
control of your vehicle and cause an acci-
dent or serious injury.
CAUTION
●Do not force the USB device into the
USB port. Inserting the USB device
tilted or up-side-down into the port may
damage the port. Make sure that the
USB device is connected correctly into
the USB port.
● Do not grab the USB port cover (if so
equipped) when pulling the USB device
out of the port. This could damage the
port and the cover.
● Do not leave the USB cable in a place
where it can be pulled unintentionally.
Pulling the cable may damage the port.
Refer to your device manufacturer’s owner infor-
mation regarding the proper use and care of the
device.
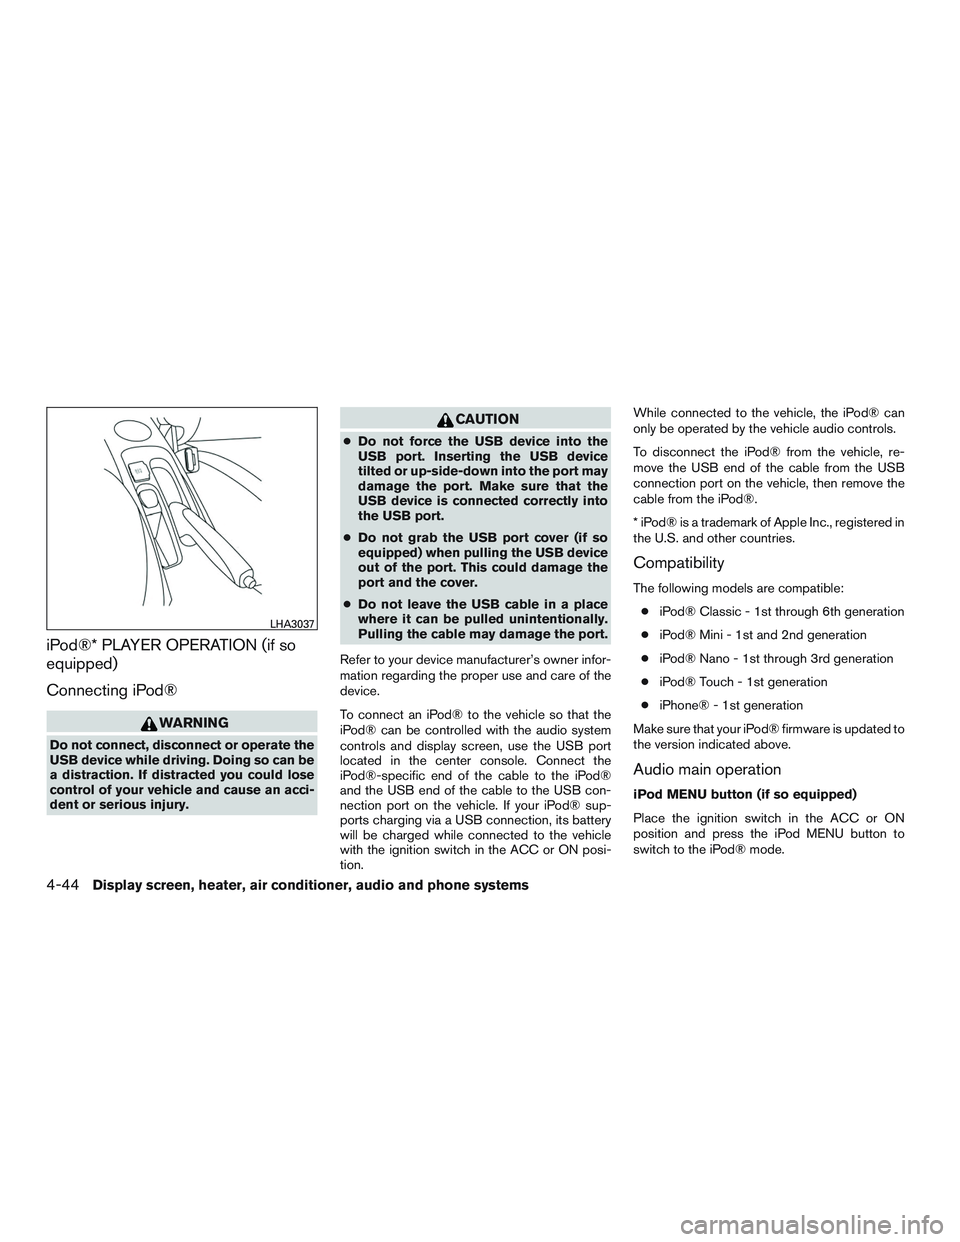
To connect an iPod® to the vehicle so that the
iPod® can be controlled with the audio system
controls and display screen, use the USB port
located in the center console. Connect the
iPod®-specific end of the cable to the iPod®
and the USB end of the cable to the USB con-
nection port on the vehicle. If your iPod® sup-
ports charging via a USB connection, its battery
will be charged while connected to the vehicle
with the ignition switch in the ACC or ON posi-
tion. While connected to the vehicle, the iPod® can
only be operated by the vehicle audio controls.
To disconnect the iPod® from the vehicle, re-
move the USB end of the cable from the USB
connection port on the vehicle, then remove the
cable from the iPod®.
* iPod® is a trademark of Apple Inc., registered in
the U.S. and other countries.
Compatibility
The following models are compatible:
● iPod® Classic - 1st through 6th generation
● iPod® Mini - 1st and 2nd generation
● iPod® Nano - 1st through 3rd generation
● iPod® Touch - 1st generation
● iPhone® - 1st generation
Make sure that your iPod® firmware is updated to
the version indicated above.
Audio main operation
iPod MENU button (if so equipped)
Place the ignition switch in the ACC or ON
position and press the iPod MENU button to
switch to the iPod® mode.
LHA3037
4-44Display screen, heater, air conditioner, audio and phone systems
Page 202 of 299
The Vehicle Dynamic Control (VDC) system uses
various sensors to monitor driver inputs and ve-
hicle motion. Under certain driving conditions,
the VDC System helps to perform the following
functions:● Controls brake pressure to reduce wheel
slip on one slipping drive wheel so power is
transferred to a non slipping drive wheel on
the same axle.
● Controls brake pressure and engine output
to reduce drive wheel slip based on vehicle
speed (traction control function) .
● Controls brake pressure at individual wheels
and engine output to help the driver maintain
control of the vehicle in the following condi-
tions:
– understeer (vehicle tends to not follow the steered path despite increased steer-
ing input)
– oversteer (vehicle tends to spin due to certain road or driving conditions)
The VDC system can help the driver to maintain
control of the vehicle, but it cannot prevent loss of
vehicle control in all driving situations.
When the VDC system operates, the
indi-
cator in the instrument panel flashes so note the
following: ●
The road may be slippery or the system may
determine some action is required to help
keep the vehicle on the steered path.
● You may feel a pulsation in the brake pedal
and hear a noise or vibration from under the
hood. This is normal and indicates that the
VDC system is working properly.
● Adjust your speed and driving to the road
conditions.
For additional information, refer to “Vehicle Dy-
namic Control (VDC) OFF switch” in the ”Instru-
ments and controls” section of this manual.
If a malfunction occurs in the system, the
andindicator lights come on in the instru-
ment panel. The VDC system automatically turns
off when these indicator lights are on.
The VDC OFF switch is used to turn off the VDC
system. The
indicator illuminates to indi-
cate the VDC system is off.
When the VDC switch is used to turn off the
system, the VDC system still operates to prevent
one drive wheel from slipping by transferring
power to a non slipping drive wheel. The
indicator flashes if this occurs. All other VDC
functions are off and the
indicator will not
flash. The VDC system is automatically reset to on
when the ignition switch is placed in the off
position then back to the on position.
The computer has a built in diagnostic feature
that tests the system each time you start the
engine and move the vehicle forward or in reverse
at a slow speed. When the self-test occurs, you
may hear a clunk noise and/or feel a pulsation in
the brake pedal. This is normal and is not an
indication of a malfunction.
WARNING
●
The VDC system is designed to help the
driver maintain stability but does not
prevent accidents due to abrupt steer-
ing operation at high speeds or by care-
less or dangerous driving techniques.
Reduce vehicle speed and be especially
careful when driving and cornering on
slippery surfaces and always drive
carefully.
VEHICLE DYNAMIC CONTROL (VDC)
SYSTEM
Starting and driving5-23
Page 288 of 299
DOT (Department of Transportation) Quality
Grades: All passenger car tires must conform to
federal safety requirements in addition to these
grades.
Quality grades can be found where applicable on
the tire sidewall between tread shoulder and
maximum section width. For example:
Treadwear 200 Traction AA Temperature A
Treadwear
The treadwear grade is a comparative rating
based on the wear rate of the tire when tested
under controlled conditions on a specified gov-
ernment test course. For example, a tire graded
150 would wear one and one-half (1 1/2) times
as well on the government course as a tire graded
100. The relative performance of tires depends
upon the actual conditions of their use, however,
and may depart significantly from the norm due to
variations in driving habits, service practices and
differences in road characteristics and climate.
Traction AA, A, B and C
The traction grades, from highest to lowest, are
AA, A, B, and C. Those grades represent the
tire’s ability to stop on wet pavement as mea-
sured under controlled conditions on specified
government test surfaces of asphalt and con-
crete. A tire marked C may have poor traction
performance.WARNING
The traction grade assigned to this tire is
based on straight-ahead braking traction
tests, and does not include acceleration,
cornering, hydroplaning, or peak traction
characteristics.
Temperature A, B and C
The temperature grades are A (the highest) , B,
and C, representing the tire’s resistance to the
generation of heat, and its ability to dissipate heat
when tested under controlled conditions on a
specified indoor laboratory test wheel. Sustained
high temperature can cause the material of the
tire to degenerate and reduce tire life, and exces-
sive temperature can lead to sudden tire failure.
The grade C corresponds to a level of perfor-
mance which all passenger car tires must meet
under the Federal Motor Safety Standard No.
109. Grades B and A represent higher levels of
performance on the laboratory test wheel than
the minimum required by law.
WARNING
The temperature grade for this tire is es-
tablished for a tire that is properly inflated
and not overloaded. Excessive speed,
under-inflation, or excessive loading, ei-
ther separately or in combination, can
cause heat build-up and possible tire
failure.
UNIFORM TIRE QUALITY GRADING
Technical and consumer information9-17