child seat NISSAN PATHFINDER 1996 R50 / 2.G Owners Manual
[x] Cancel search | Manufacturer: NISSAN, Model Year: 1996, Model line: PATHFINDER, Model: NISSAN PATHFINDER 1996 R50 / 2.GPages: 223, PDF Size: 1.71 MB
Page 1 of 223

Foreword
Welcome to the growing family of new NISSAN owners. This vehicle has been delivered to you with confidence. Your vehicle has been produced
using the latest techniques and strict quality control.
This manual has been prepared to help you understand the operation and maintenance of your vehicle so that you may enjoy many miles of driving
pleasure. Please read through this manual before operating your vehicle.
A separate ªWarranty Informationº explains details about the warranties covering your vehicle.
Remember that your NISSAN dealer knows your vehicle best. When you require any service or have any questions about your vehicle, he will be
glad to assist you with the extensive resources available to him.
IMPORTANT SAFETY INFORMATION
REMINDERS FOR SAFETY!
Follow these five important driving rules to help ensure a safe and
complete trip for you and your passengers!
INEVER drive under the influence of alcohol or drugs.
IALWAYS observe posted speed limits and never drive too fast
for conditions.
IALWAYS use your seat belts and appropriate child restraint
systems.
IALWAYS provide information about the proper use of vehicle
safety features to all occupants of the vehicle.
IALWAYS review this Owner's Manual for important safety
information.
NOTES ON THE INFORMATION CONTAINED IN THIS
OWNER'S MANUAL
This owner's manual contains descriptions and operating instruc-
tions for all systems, features and optional equipment that might
appear in any model of this vehicle built for any destination in
North America, including the continental United States, Canada
and Hawaii. Therefore, you may very well find information in this
manual that does not apply to your vehicle.
For descriptions specified for 4-wheel drive models, a
mark is
placed at the beginning of the applicable sections/items.
Z01.2.1/R50-DX
Page 40 of 223

2 Pre-driving checks and adjustments
Key ......................................................................... 2-2
Door locks .............................................................. 2-2
Multi-remote control system (If so equipped) ......... 2-4
Battery replacement ................................................ 2-6
Spare tire carrier .................................................... 2-7
Back door locks ....................................................... 2-8
Rear window locks .................................................. 2-8
Hood release .......................................................... 2-9
Glove box lock ..................................................... 2-10
Fuel filler lid lock .................................................. 2-10
Fuel filler cap ....................................................... 2-11
Front seats ........................................................... 2-12
Rear seats ............................................................ 2-15
Supplemental restraint system
(Supplemental air bag system) ............................ 2-18Warning labels ...................................................... 2-22
Supplemental air bag warning light ..................... 2-22
Seat belts ............................................................. 2-24
Child restraints for infants and
small children ....................................................... 2-30
Tilting steering wheel ........................................... 2-36
Sun visor ............................................................... 2-37
Outside mirror control .......................................... 2-37
Outside mirrors .................................................... 2-38
Inside mirror ......................................................... 2-38
Luggage net .......................................................... 2-39
Luggage side finisher hook ................................... 2-39
Luggage hooks........................................................ 2-40
Luggage rack ........................................................ 2-41
Z01.2.1/R50-DX
Page 52 of 223
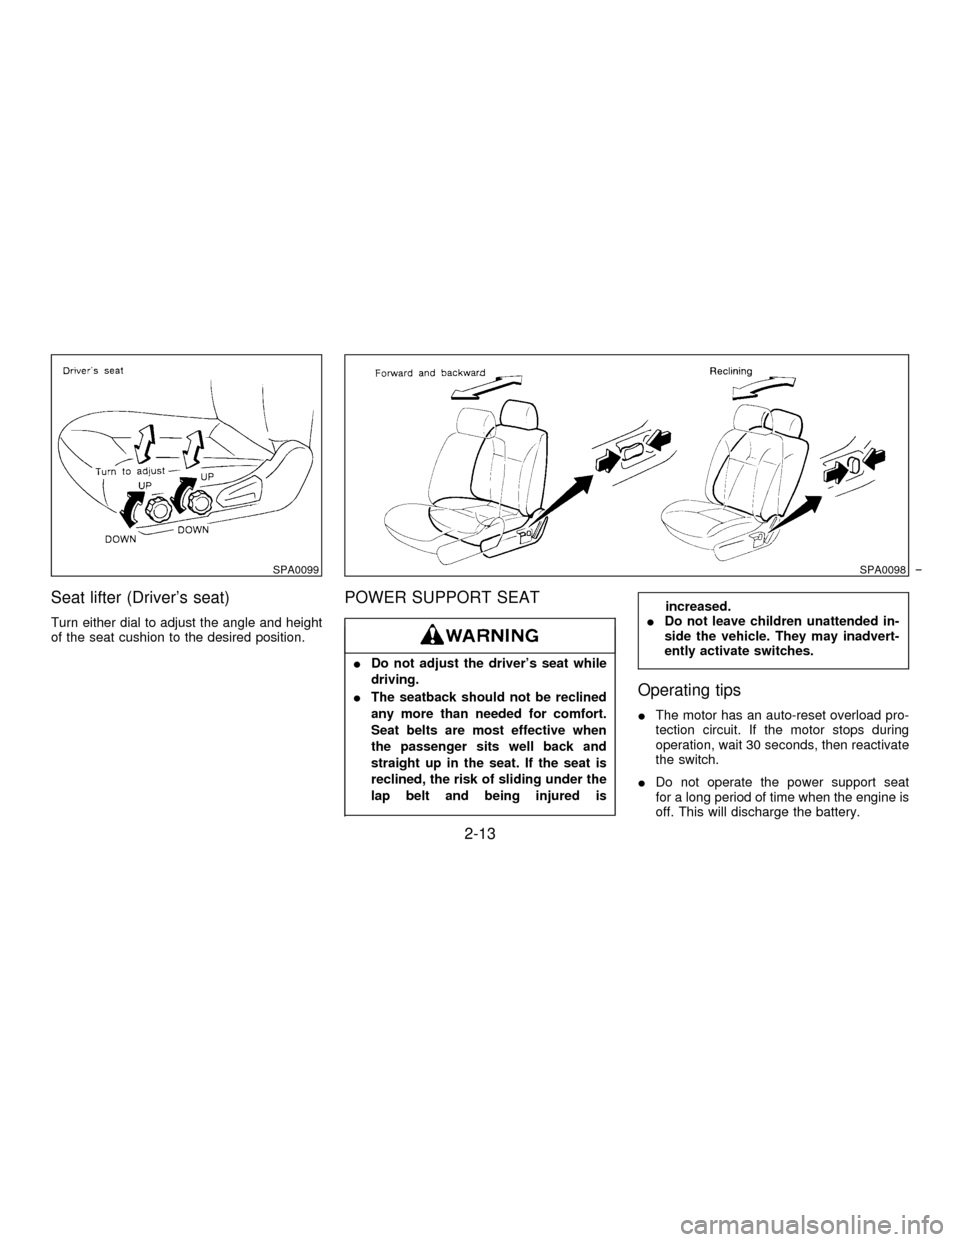
Seat lifter (Driver's seat)
Turn either dial to adjust the angle and height
of the seat cushion to the desired position.
POWER SUPPORT SEAT
IDo not adjust the driver's seat while
driving.
IThe seatback should not be reclined
any more than needed for comfort.
Seat belts are most effective when
the passenger sits well back and
straight up in the seat. If the seat is
reclined, the risk of sliding under the
lap belt and being injured is
increased.
IDo not leave children unattended in-
side the vehicle. They may inadvert-
ently activate switches.
Operating tips
IThe motor has an auto-reset overload pro-
tection circuit. If the motor stops during
operation, wait 30 seconds, then reactivate
the switch.
IDo not operate the power support seat
for a long period of time when the engine is
off. This will discharge the battery.
SPA0099SPA0098
2-13
Z01.2.1/R50-DX
Page 59 of 223
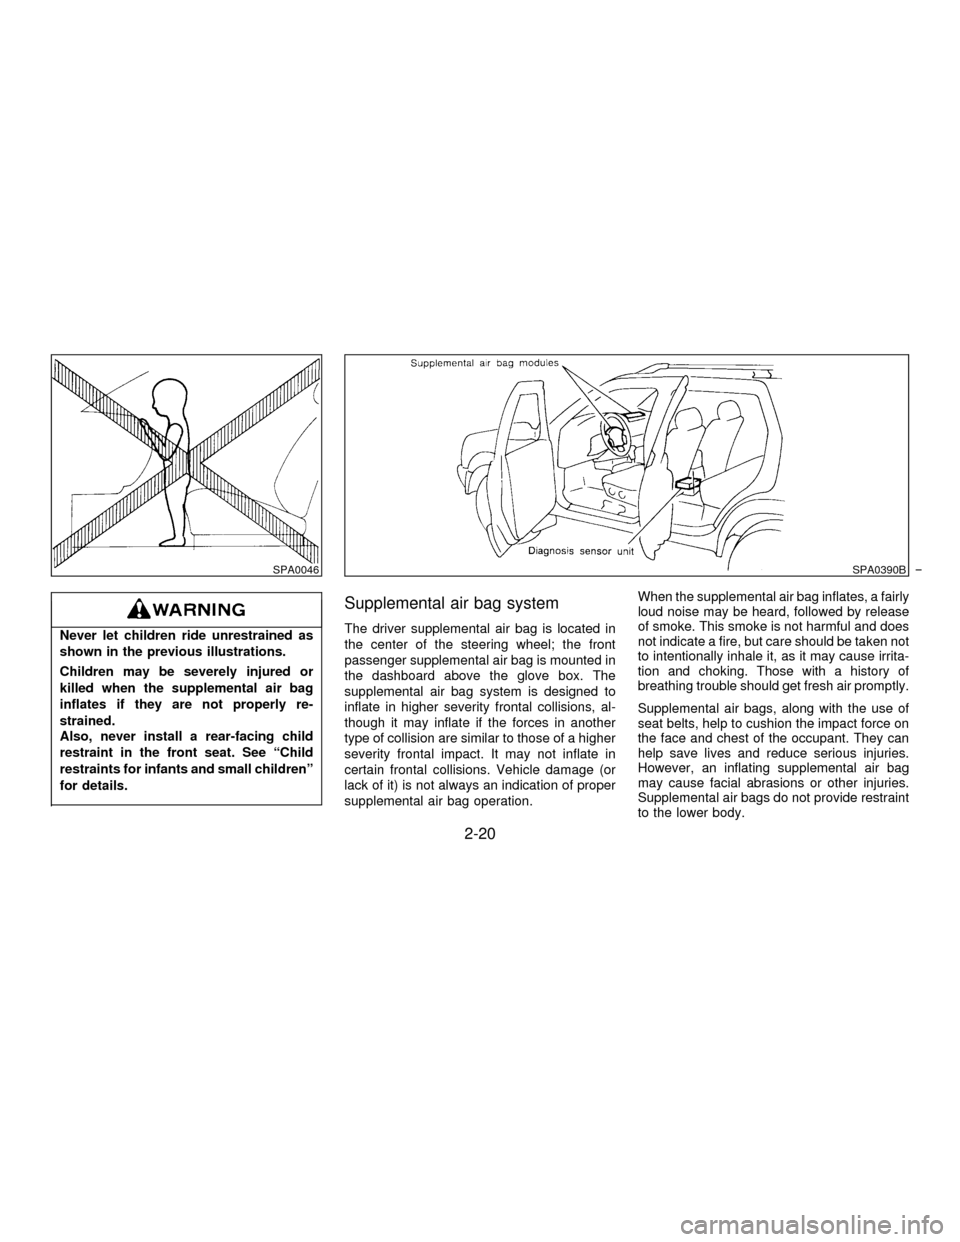
Never let children ride unrestrained as
shown in the previous illustrations.
Children may be severely injured or
killed when the supplemental air bag
inflates if they are not properly re-
strained.
Also, never install a rear-facing child
restraint in the front seat. See ªChild
restraints for infants and small childrenº
for details.
Supplemental air bag system
The driver supplemental air bag is located in
the center of the steering wheel; the front
passenger supplemental air bag is mounted in
the dashboard above the glove box. The
supplemental air bag system is designed to
inflate in higher severity frontal collisions, al-
though it may inflate if the forces in another
type of collision are similar to those of a higher
severity frontal impact. It may not inflate in
certain frontal collisions. Vehicle damage (or
lack of it) is not always an indication of proper
supplemental air bag operation.When the supplemental air bag inflates, a fairly
loud noise may be heard, followed by release
of smoke. This smoke is not harmful and does
not indicate a fire, but care should be taken not
to intentionally inhale it, as it may cause irrita-
tion and choking. Those with a history of
breathing trouble should get fresh air promptly.
Supplemental air bags, along with the use of
seat belts, help to cushion the impact force on
the face and chest of the occupant. They can
help save lives and reduce serious injuries.
However, an inflating supplemental air bag
may cause facial abrasions or other injuries.
Supplemental air bags do not provide restraint
to the lower body.
SPA0046SPA0390B
2-20
Z01.2.1/R50-DX
Page 63 of 223

PRECAUTIONS ON SEAT BELT
USAGE
Your chances of being injured or killed in an
accident and/or the severity of injury may be
greatly reduced if you are wearing your seat
belt and it is properly adjusted. NISSAN
strongly encourages you and all of your pas-
sengers to buckle up every time you drive,
even if your seating position includes a supple-
mental air bag.
Some states, provinces or territories re-
quire that seat belts be worn at all times
when a vehicle is being driven.
IEvery person who drives or rides in
this vehicle should use a seat belt at
all times. Children should be in ap-
propriate child restraints.
IThe belt should be adjusted properly
and to a snug fit. Failure to do so will
reduce the effectiveness of the entire
restraint system and increase the
chance or severity of injury in an
accident.
IDo not wear the belt inside out ortwisted. Be sure the seat belt tongue
is securely fastened to the proper
buckle.
IDo not allow more than one person to
use the same belt.
IAll seat belt assemblies including re-
tractors and attaching hardware
should be inspected by your NISSAN
dealer after any collision. NISSAN
recommends that all seat belt assem-
blies in use during a collision be
replaced unless the collision was mi-
nor and the belts show no damage
and continue to operate properly.
Seat belt assemblies not in use dur-
ing a collision should also be in-
spected and replaced if either dam-
age or improper operation is noted.
INever carry more people in the ve-
hicle than there are seat belts.
If the seat belt warning lamp glows con-
tinuously while the ignition is turned
ªONº with all doors closed and all seat
belts fastened, it may indicate a mal-
function in the system. Have the system
checked by your NISSAN dealer.Be sure to observe the following cau-
tions when using seat belts. Failure to
do so could increase the chance and/or
severity of injury in an accident.
IAlways route the shoulder belt over
your shoulder and across your chest.
Never run the belt under your arm or
across your neck. The belt should be
away from your face and neck, but
not falling off your shoulder.
IPosition the lap belt as low as pos-
sible AROUND THE HIPS, NOT THE
WAIST.
ISerious injury or death can occur if
the seat belt is not worn properly.
CHILD SAFETY
Children need adults to help protect them.
All U.S. states and provinces of Canada re-
quire the use of approved child restraints for
infants and small children. (See ªChild re-
straints for infants and small childrenº later in
this section.)
In addition, there are many types of child
restraints available for larger children which
should be used for maximum protection.
SEAT BELTS
2-24
Z01.2.1/R50-DX
Page 64 of 223
Infant or small child
NISSAN recommends that infants or small
children be placed in child restraints that com-
ply with Federal Motor Vehicle Safety Stan-
dards or Canadian Motor Vehicle Safety Stan-
dards. You should choose a child restraint that
fits your vehicle and always follow the manu-
facturer's instructions for installation and use.
Children
Children who are too large for child restraints
should be seated and restrained by the seat
belts which are provided.
NISSAN recommends that children sit in the
rear seat if possible. According to accident
statistics, children are safer when properly
restrained in the rear seat than in the front
seat.
If the child's seating position has a shoulder
belt that fits close to the face or neck, the use
of a booster seat (commercially available) may
help overcome this. The booster seat should
raise the child so that the shoulder belt is
properly positioned across the top, middle
portion of the shoulder and the lap belt is low
on the hips. The booster seat should fit the
vehicle seat and have a label certifying that it
complies with Federal Motor Vehicle Safety
Standards or Canadian Motor Vehicle SafetyStandards. Once the child has grown so the
shoulder belt is no longer on or near the face
and neck, use the shoulder belt without the
booster seat.
Never let a child stand or kneel on any seat
and do not allow a child in the cargo areas
while the vehicle is moving.
Pregnant women
NISSAN recommends that pregnant women
use seat belts. Contact your doctor for specific
recommendations. The lap belt should be
worn snug and positioned as low as possible
around the hips, not the waist.
Injured persons
NISSAN recommends that injured persons
use seat belts, depending on the injury. Check
with your doctor for specific recommendations.3-POINT TYPE WITH RETRACTOR
Every person who drives or rides in this
vehicle should wear a seat belt at all
times.
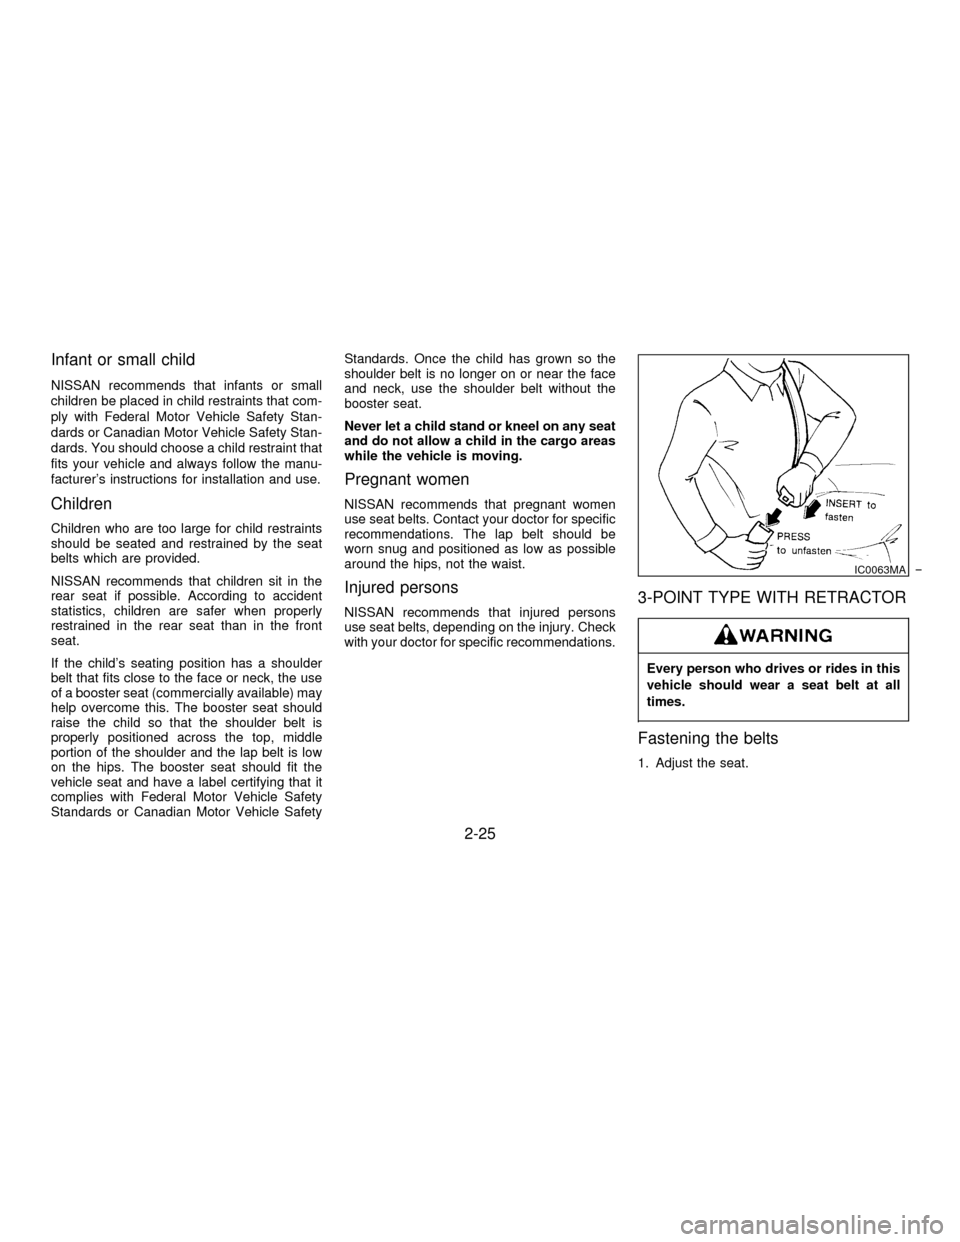
Fastening the belts
1. Adjust the seat.
IC0063MA
2-25
Z01.2.1/R50-DX
Page 65 of 223
The seatback should not be reclined any
more than needed for comfort. Seat
belts are most effective when the pas-
senger sits well back and straight up in
the seat. If the seat is reclined, the risk of
sliding under the lap belt and being
injured is increased.
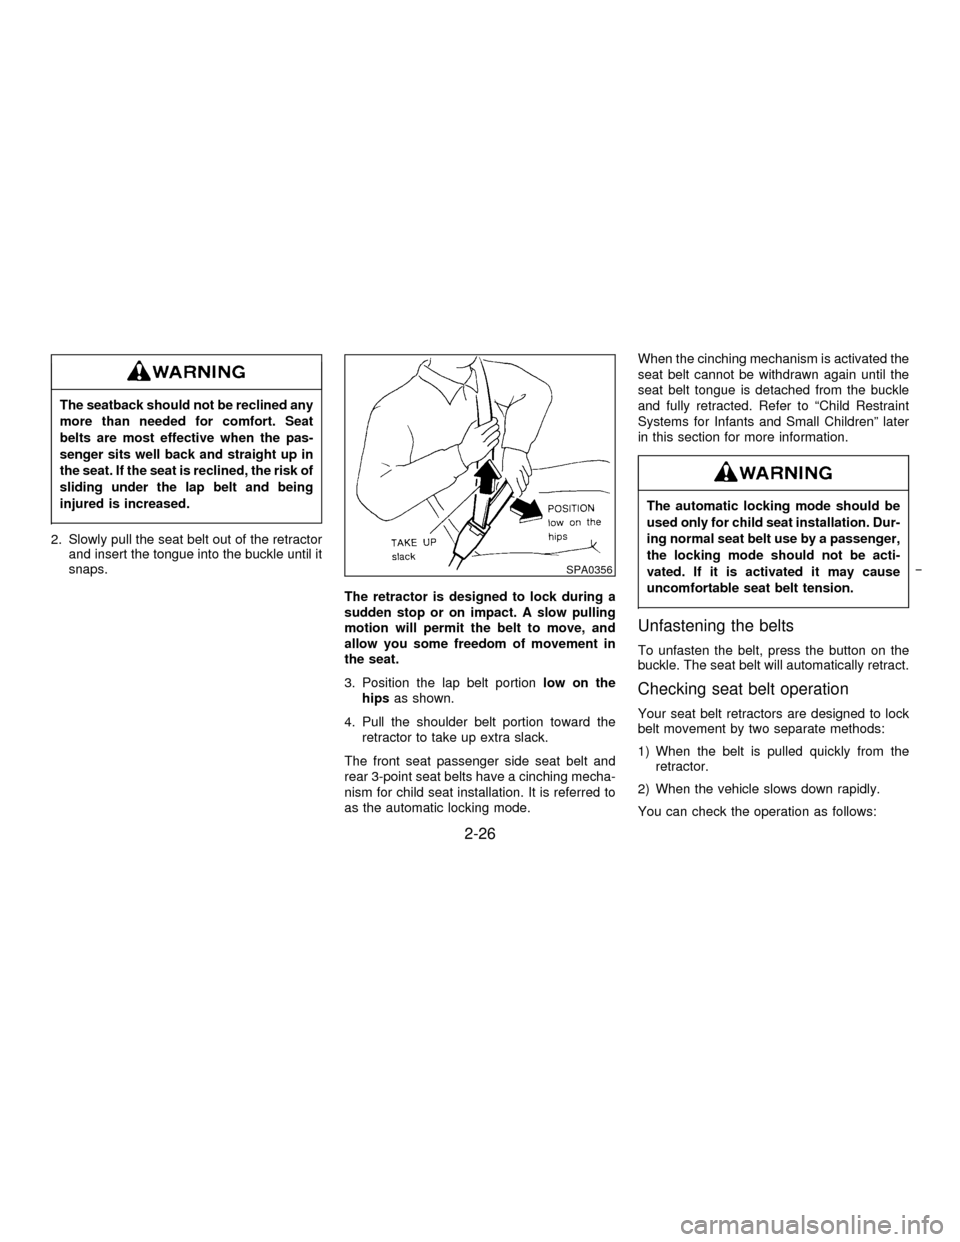
2. Slowly pull the seat belt out of the retractor
and insert the tongue into the buckle until it
snaps.
The retractor is designed to lock during a
sudden stop or on impact. A slow pulling
motion will permit the belt to move, and
allow you some freedom of movement in
the seat.
3. Position the lap belt portionlow on the
hipsas shown.
4. Pull the shoulder belt portion toward the
retractor to take up extra slack.
The front seat passenger side seat belt and
rear 3-point seat belts have a cinching mecha-
nism for child seat installation. It is referred to
as the automatic locking mode.When the cinching mechanism is activated the
seat belt cannot be withdrawn again until the
seat belt tongue is detached from the buckle
and fully retracted. Refer to ªChild Restraint
Systems for Infants and Small Childrenº later
in this section for more information.
The automatic locking mode should be
used only for child seat installation. Dur-
ing normal seat belt use by a passenger,
the locking mode should not be acti-
vated. If it is activated it may cause
uncomfortable seat belt tension.
Unfastening the belts
To unfasten the belt, press the button on the
buckle. The seat belt will automatically retract.
Checking seat belt operation
Your seat belt retractors are designed to lock
belt movement by two separate methods:
1) When the belt is pulled quickly from the
retractor.
2) When the vehicle slows down rapidly.
You can check the operation as follows:
SPA0356
2-26
Z01.2.1/R50-DX
Page 69 of 223

SEAT BELT MAINTENANCE
ITo clean the belt webbings,apply a mild
soap solution or any solution recommended
for cleaning upholstery or carpets. Then
brush the webbing, wipe it with a cloth and
allow it to dry in the shade. Do not allow the
belts to retract until they are completely dry.
IPeriodically check to see that the belt
and the metal componentssuch as buck-
les, tongues, retractors, flexible wires and
anchors work properly. If loose parts, dete-
rioration, cuts or other damage on the web-
bing is found, the entire belt assembly
should be replaced.Infants and small children should al-
ways be placed in an appropriate child
restraint while riding in the vehicle. Fail-
ure to use a child restraint can result in
serious injury or death.
Children and infants should never be
carried on your lap. It is not possible for
even the strongest adult to resist the
forces of a severe accident. The child
could be crushed between the adult and
parts of the vehicle. Also, do not put the
same seat belt around both your child
and yourself. In general, child restraints
are designed to be installed with a lap
belt or the lap portion of a three-point
type seat belt.
Nissan recommends that the child re-
straint be installed in the rear seat. Ac-
cording to accident statistics, children
are safer when properly restrained in the
rear seat than in the front seat.
An improperly installed child restraint
could lead to serious injury or death inan accident.Child restraints specially designed for infants
and small children are offered by several
manufacturers. When selecting any child re-
straint, keep the following points in mind:
1) Choose only a restraint with a label certify-
ing that it complies with Federal Motor
Vehicle Safety Standard 213 or Canadian
Motor Vehicle Safety Standard 213.
2) Check the child restraint in your vehicle to
be sure it is compatible with the vehicle's
seat belt system.
3) If the child restraint is compatible with your
vehicle, place your child in the child re-
straint and check the various adjustments
to be sure the child restraint is compatible
with your child. Always follow all recom-
mended procedures.
INever install a rear-facing child re-
straint in the front seat. A rear-facing
child restraint must only be used in
the rear seat. See ªInstallation on
front passenger seatº for details.
IFollow all of the child restraint manu-
facturer's instructions for installation
CHILD RESTRAINTS FOR
INFANTS AND SMALL CHILDREN
2-30
Z01.2.1/R50-DX
Page 70 of 223
and use. When purchasing a child
restraint, be sure to select one which
will fit your child and vehicle. It may
not be possible to properly install
some types of child restraints in your
vehicle.
Improper use of a child restraint can
result in increased injuries for both
the infant or child and other occu-
pants in the vehicle.
IWhen your child restraint is not in
use, store it in the trunk or keep it
secured with a seat belt to prevent it
from being thrown forward in case of
a sudden stop or accident.
IAfter attaching a child restraint, test
the restraint before you place the
child in it. Tilt it from side to side. Try
to tug it forward and check to see if
the belt holds it in place. If the re-
straint is not secure, tighten the belt
as necessary, or put the restraint in
another seat and test it again.
IIf the child restraint is not anchored
properly, the risk of a child being
injured in a collision or a sudden stop
greatly increases.IAdjustable seatbacks should be posi-
tioned to fit the child restraint, but as
upright as possible.
IRemember that a child restraint left in
a closed vehicle can become very
hot. Check the seating surface and
buckles before placing your child in
the child restraint.
IAll U.S. states and provinces of
Canada require that infants and small
children be restrained in approved
child restraints at all times while the
vehicle is being operated.
IFor a front facing child restraint, if the
seat position where it is installed has
a 3-point type lap/shoulder belt,
check to make sure the shoulder belt
does not go in front of the child's face
or neck. If it does, put the shoulder
belt behind the child restraint.
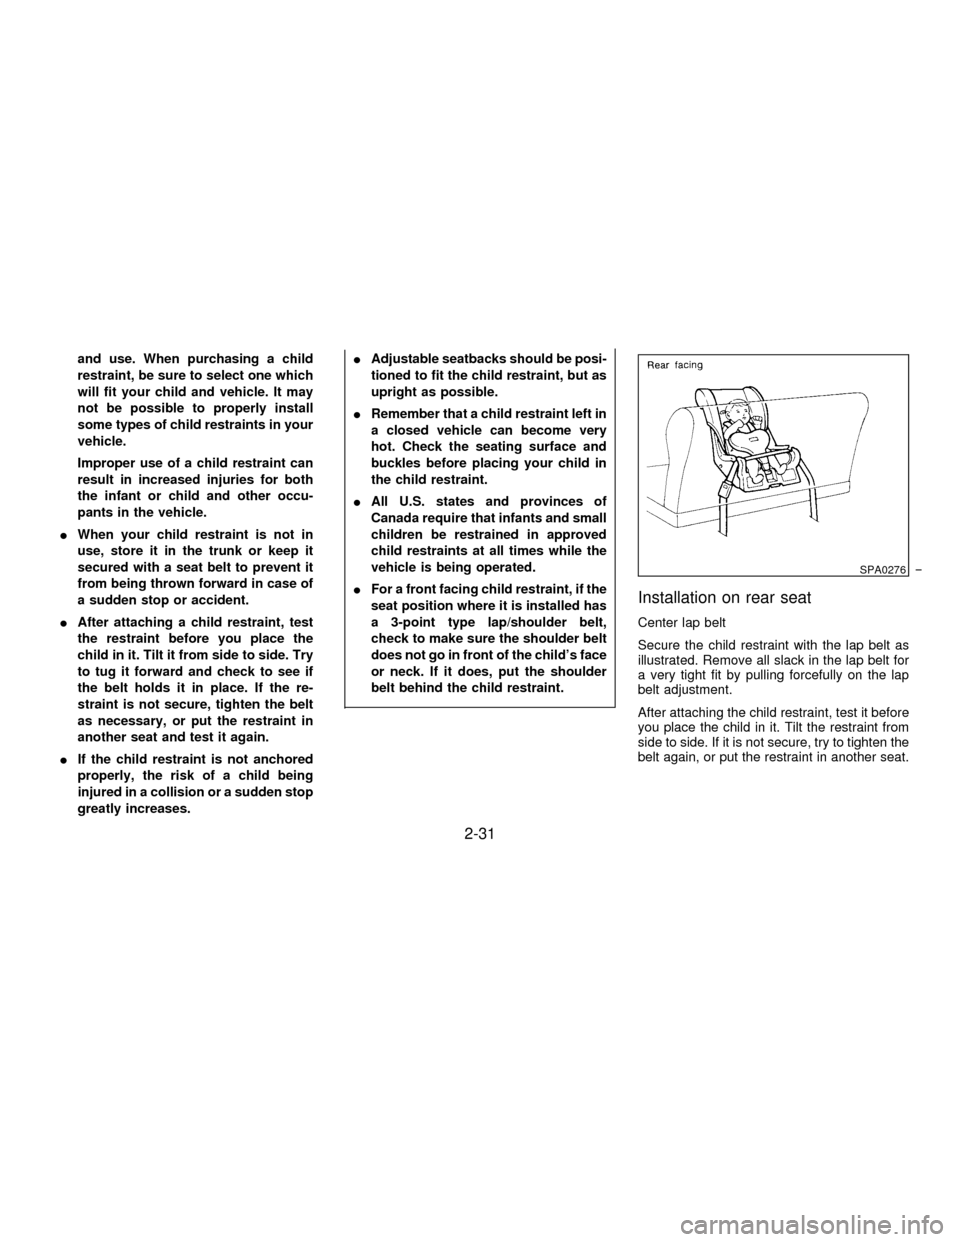
Installation on rear seat
Center lap belt
Secure the child restraint with the lap belt as
illustrated. Remove all slack in the lap belt for
a very tight fit by pulling forcefully on the lap
belt adjustment.
After attaching the child restraint, test it before
you place the child in it. Tilt the restraint from
side to side. If it is not secure, try to tighten the
belt again, or put the restraint in another seat.
SPA0276
2-31
Z01.2.1/R50-DX
Page 71 of 223
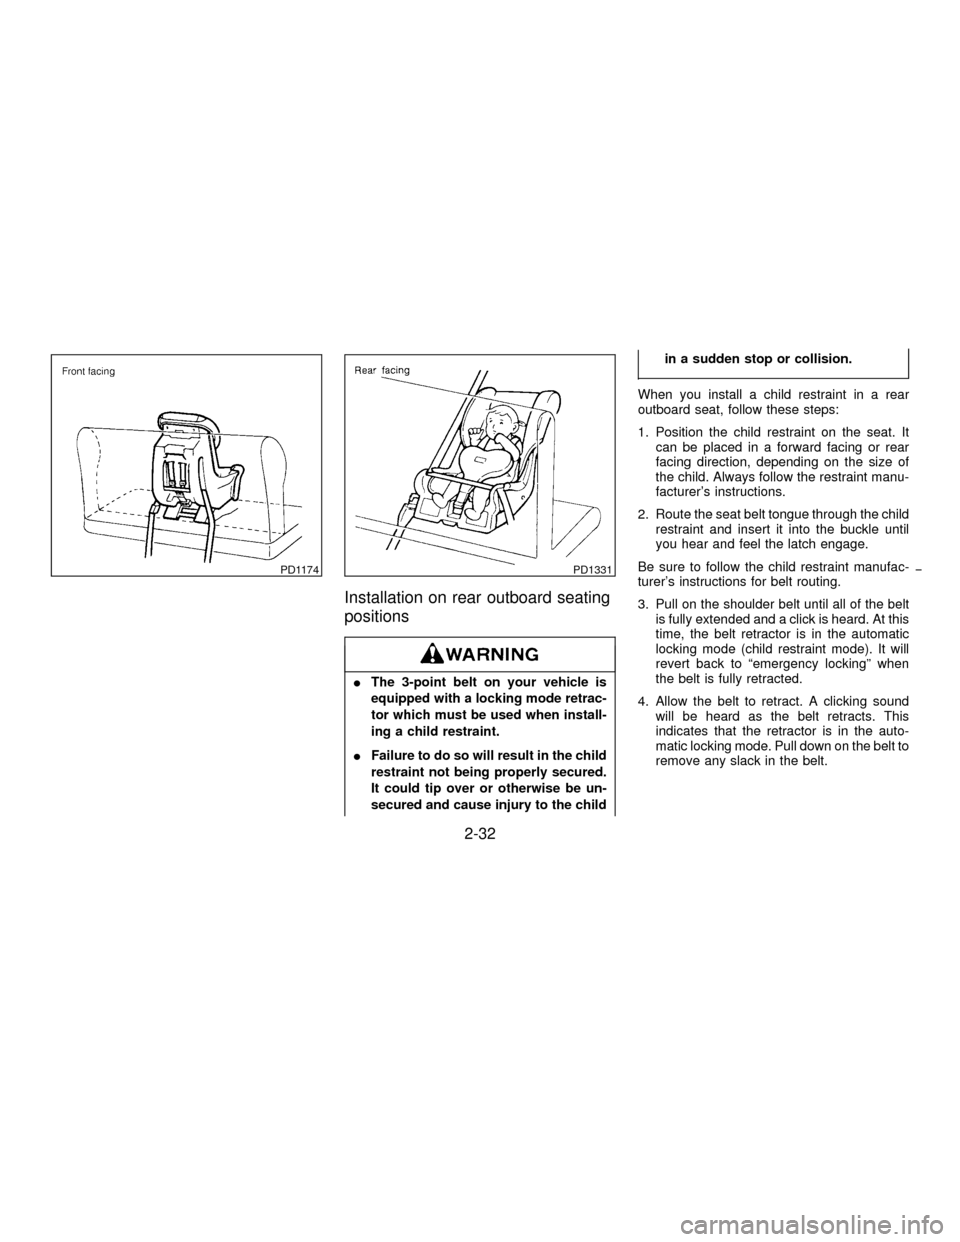
Installation on rear outboard seating
positions
IThe 3-point belt on your vehicle is
equipped with a locking mode retrac-
tor which must be used when install-
ing a child restraint.
IFailure to do so will result in the child
restraint not being properly secured.
It could tip over or otherwise be un-
secured and cause injury to the childin a sudden stop or collision.
When you install a child restraint in a rear
outboard seat, follow these steps:
1. Position the child restraint on the seat. It
can be placed in a forward facing or rear
facing direction, depending on the size of
the child. Always follow the restraint manu-
facturer's instructions.
2. Route the seat belt tongue through the child
restraint and insert it into the buckle until
you hear and feel the latch engage.
Be sure to follow the child restraint manufac-
turer's instructions for belt routing.
3. Pull on the shoulder belt until all of the belt
is fully extended and a click is heard. At this
time, the belt retractor is in the automatic
locking mode (child restraint mode). It will
revert back to ªemergency lockingº when
the belt is fully retracted.
4. Allow the belt to retract. A clicking sound
will be heard as the belt retracts. This
indicates that the retractor is in the auto-
matic locking mode. Pull down on the belt to
remove any slack in the belt.
PD1174PD1331
2-32
Z01.2.1/R50-DX