check engine light NISSAN PATHFINDER 2002 R50 / 2.G User Guide
[x] Cancel search | Manufacturer: NISSAN, Model Year: 2002, Model line: PATHFINDER, Model: NISSAN PATHFINDER 2002 R50 / 2.GPages: 288, PDF Size: 2.49 MB
Page 160 of 288
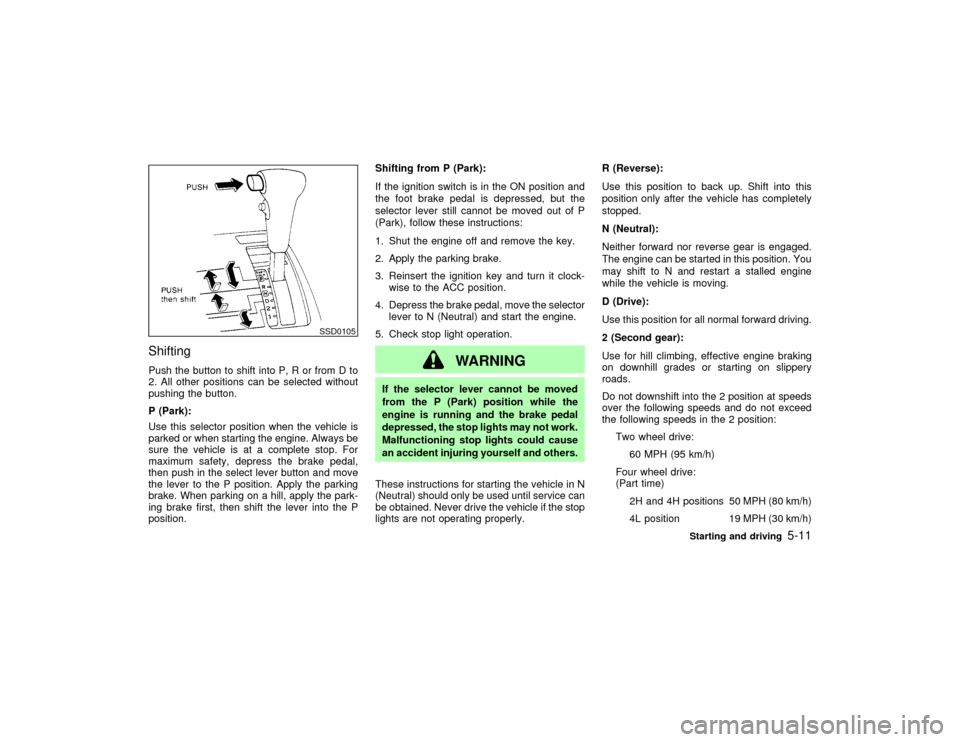
ShiftingPush the button to shift into P, R or from D to
2. All other positions can be selected without
pushing the button.
P (Park):
Use this selector position when the vehicle is
parked or when starting the engine. Always be
sure the vehicle is at a complete stop. For
maximum safety, depress the brake pedal,
then push in the select lever button and move
the lever to the P position. Apply the parking
brake. When parking on a hill, apply the park-
ing brake first, then shift the lever into the P
position.Shifting from P (Park):
If the ignition switch is in the ON position and
the foot brake pedal is depressed, but the
selector lever still cannot be moved out of P
(Park), follow these instructions:
1. Shut the engine off and remove the key.
2. Apply the parking brake.
3. Reinsert the ignition key and turn it clock-
wise to the ACC position.
4. Depress the brake pedal, move the selector
lever to N (Neutral) and start the engine.
5. Check stop light operation.
WARNING
If the selector lever cannot be moved
from the P (Park) position while the
engine is running and the brake pedal
depressed, the stop lights may not work.
Malfunctioning stop lights could cause
an accident injuring yourself and others.
These instructions for starting the vehicle in N
(Neutral) should only be used until service can
be obtained. Never drive the vehicle if the stop
lights are not operating properly.R (Reverse):
Use this position to back up. Shift into this
position only after the vehicle has completely
stopped.
N (Neutral):
Neither forward nor reverse gear is engaged.
The engine can be started in this position. You
may shift to N and restart a stalled engine
while the vehicle is moving.
D (Drive):
Use this position for all normal forward driving.
2 (Second gear):
Use for hill climbing, effective engine braking
on downhill grades or starting on slippery
roads.
Do not downshift into the 2 position at speeds
over the following speeds and do not exceed
the following speeds in the 2 position:
Two wheel drive:
60 MPH (95 km/h)
Four wheel drive:
(Part time)
2H and 4H positions 50 MPH (80 km/h)
4L position 19 MPH (30 km/h)
SSD0105
Starting and driving
5-11
Z
01.9.21/R50-D/V5
X
Page 162 of 288
Shift lock releaseIf the battery charge is low, the select lever
may not be moved from the P position even
with the brake pedal depressed and the select
lever button pushed.
To move the select lever, remove the shift lock
cover using a flat-bladed screwdriver, and
push the shift lock release button and select
lever button. The select lever can be moved to
N (Neutral).
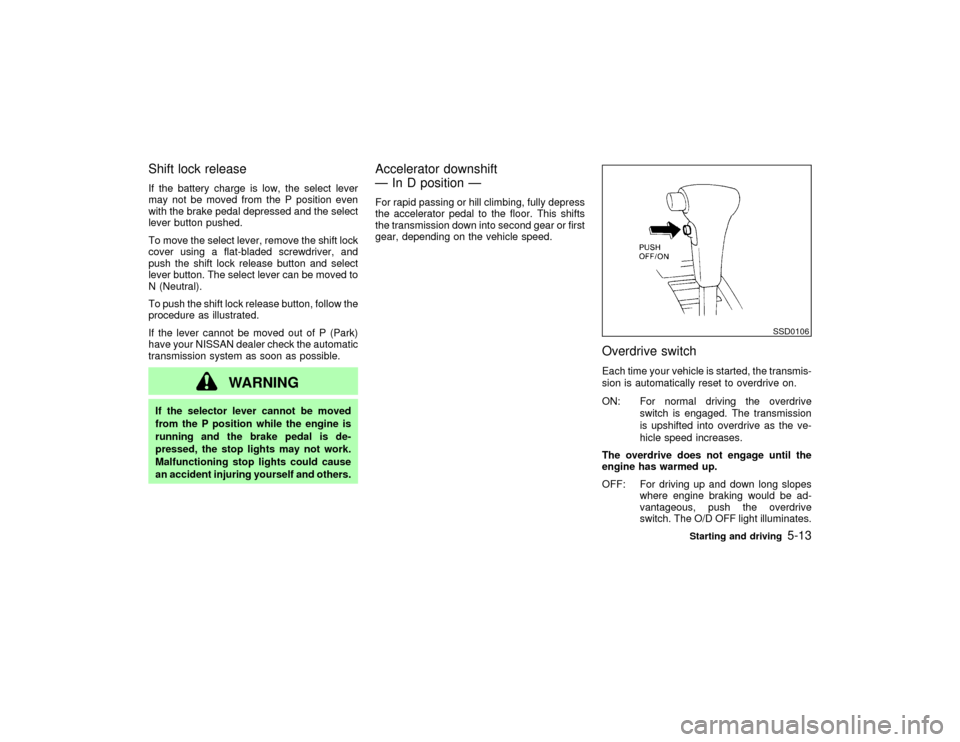
To push the shift lock release button, follow the
procedure as illustrated.
If the lever cannot be moved out of P (Park)
have your NISSAN dealer check the automatic
transmission system as soon as possible.
WARNING
If the selector lever cannot be moved
from the P position while the engine is
running and the brake pedal is de-
pressed, the stop lights may not work.
Malfunctioning stop lights could cause
an accident injuring yourself and others.
Accelerator downshift
Ð In D position ÐFor rapid passing or hill climbing, fully depress
the accelerator pedal to the floor. This shifts
the transmission down into second gear or first
gear, depending on the vehicle speed.
Overdrive switchEach time your vehicle is started, the transmis-
sion is automatically reset to overdrive on.
ON: For normal driving the overdrive
switch is engaged. The transmission
is upshifted into overdrive as the ve-
hicle speed increases.
The overdrive does not engage until the
engine has warmed up.
OFF: For driving up and down long slopes
where engine braking would be ad-
vantageous, push the overdrive
switch. The O/D OFF light illuminates.
SSD0106
Starting and driving
5-13
Z
01.9.21/R50-D/V5
X
Page 163 of 288
When cruising at a low speed or
climbing a gentle slope, you may feel
uncomfortable shift shocks as the
transmission shifts between 3rd and
overdrive repeatedly. In this case,
press the overdrive switch. The O/D
OFF indicator light comes on at this
time.
When driving conditions change, press the
overdrive switch again. The O/D OFF indicator
light goes out.
Remember not to drive at high speeds for
extended periods of time with the O/D OFF
light illuminated. This reduces the fuel
economy.
Fail-safeWhen the Fail-safe operation occurs, the next
time the key is turned to the ON position, the
O/D OFF light will blink for approximately 8
seconds after coming on for 2 seconds. While
the vehicle can be driven under these circum-
stances please note that the gears in the
automatic transmission will be locked in third
gear.
If the vehicle is driven under extreme con-
ditions, such as excessive wheel spinning
and subsequent hard braking, the Fail-safe
system may be activated. This will occureven if all electrical circuits are functioning
properly. In this case, turn the ignition key
OFF and wait for 3 seconds. Then turn the
key back to the ON position. The vehicle
should return to its normal operating con-
dition. If it does not return to its normal
operating condition have your NISSAN
dealer check the transmission and repair if
necessary.
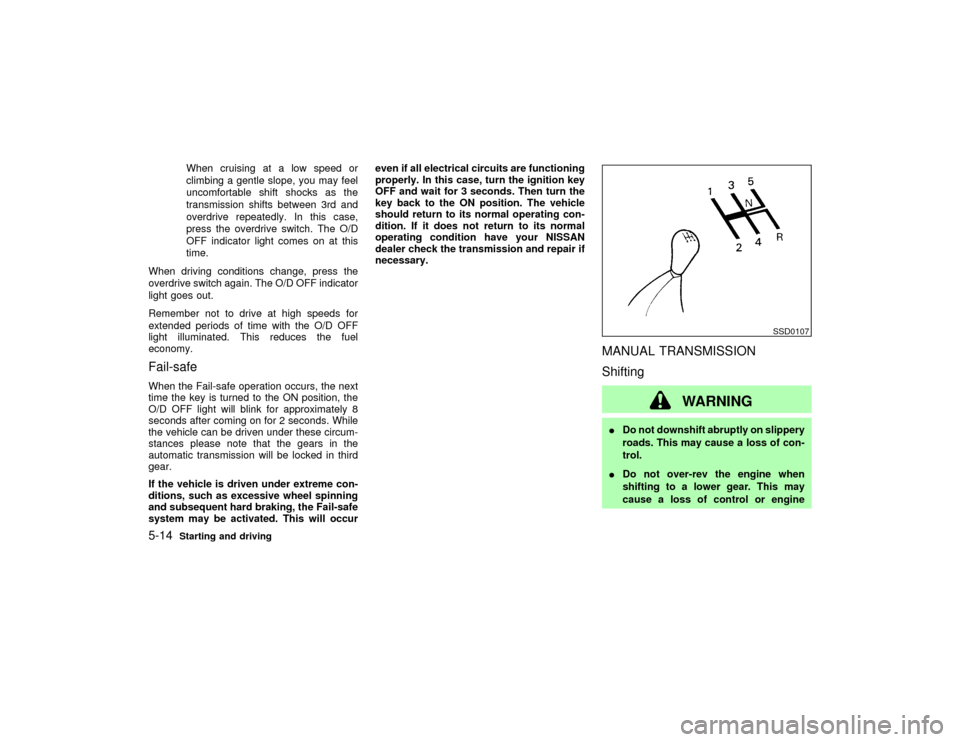
MANUAL TRANSMISSION
Shifting
WARNING
IDo not downshift abruptly on slippery
roads. This may cause a loss of con-
trol.
IDo not over-rev the engine when
shifting to a lower gear. This may
cause a loss of control or engine
SSD0107
5-14
Starting and driving
Z
01.9.21/R50-D/V5
X
Page 166 of 288
WARNING
Do not use the cruise control when driv-
ing under the following conditions:
Iit is not possible to keep the vehicle
at a set speed.
Iin heavy traffic or in traffic that varies
in speed.
Ion winding or hilly roads.
Ion slippery roads (rain, snow, ice,
etc.)
Iin very windy areas.
Doing so could cause a loss of vehicle
control and result in an accident.
CAUTION
On manual transmission models, do not
shift into N (Neutral) without depressing
the clutch pedal when the cruise control
is set. Should this occur, depress the
clutch pedal and turn the main switch offimmediately. Failure to do so may cause
engine damage.
PRECAUTIONS ON CRUISE
CONTROLIIf the cruise control system malfunctions, it
cancels automatically. The SET indicator
light in the instrument panel then blinks to
warn the driver.
IIf the SET indicator light blinks, turn the
cruise control main switch off and have the
system checked by your NISSAN dealer.
IThe SET indicator light may blink when the
cruise control main switch is turned on
while pushing the RES/ACCEL, COAST/
SET, or CANCEL switch (located on the
steering wheel). To properly set the cruise
control system, perform the preceding
steps in the order indicated.
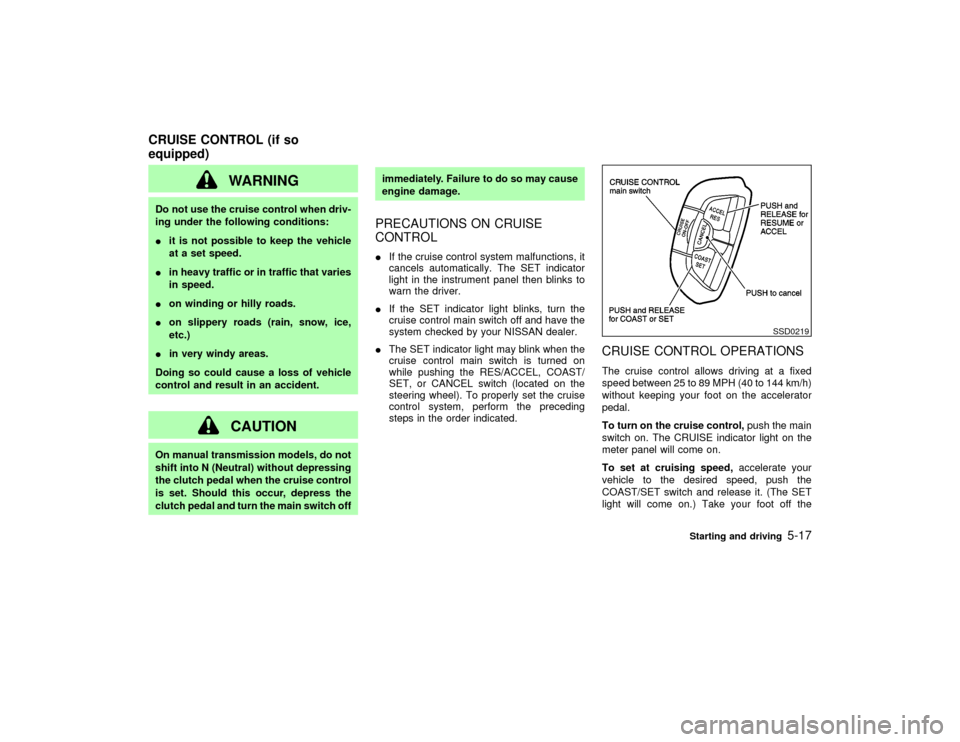
CRUISE CONTROL OPERATIONSThe cruise control allows driving at a fixed
speed between 25 to 89 MPH (40 to 144 km/h)
without keeping your foot on the accelerator
pedal.
To turn on the cruise control,push the main
switch on. The CRUISE indicator light on the
meter panel will come on.
To set at cruising speed,accelerate your
vehicle to the desired speed, push the
COAST/SET switch and release it. (The SET
light will come on.) Take your foot off the
SSD0219
CRUISE CONTROL (if so
equipped)
Starting and driving
5-17
Z
01.9.21/R50-D/V5
X
Page 178 of 288
this occurs, move the 4WD shift switch to the
4H or 4LO position.
The 4WD warning light comes on when the
key switch is turned to ON. It turns off soon
after the engine is started.
If any malfunction occurs in the 4WD system
when the key switch is ON, the warning light
will either remain illuminated or blink.
If the 4WD warning light comes on, the 4WD
indicator light goes out.
High-temperature transfer case oil makes the
warning light blink rapidly (about twice per
second). If the warning light blinks rapidly
during operation, stop the vehicle in a safe
place immediately. Then if the light goes off
after a while, you can continue driving.
A large difference between the diameters of
front and rear wheels will make the warning
light blink slowly (about once per two sec-
onds). Change the 4WD shift switch into 2WD
and do not drive fast.
CAUTION
IIf the warning light comes on or
blinks slowly during operation or rap-idly after stopping the vehicle for a
while, have your vehicle checked by
an authorized NISSAN dealer as soon
as possible.
IShifting between 4H and 4LO is not
recommended when the 4WD warn-
ing light turns on.
IWhen the warning light comes on, the
2WD mode may be engaged even if
the 4WD shift switch is in AUTO or
4H. Be especially careful when driv-
ing. If corresponding parts are mal-
functioning, the 4WD mode will not
be engaged even if the 4WD shift
switch is shifted.
IDo not drive on dry hard surface
roads in the 4H or 4LO position.
If the 4WD warning light turns on
when you are driving on dry hard
surface roads
Iin the AUTO or 4H position, shift
the 4WD shift switch to 2WD.
Iin the 4LO position, stop the ve-hicle, move the automatic transmis-
sion lever to the N position, and shift
the 4WD shift switch to 2WD.
IIf the warning light is still on after the
above operation, have your vehicle
checked by an authorized NISSAN
dealer as soon as possible.
IThe transfer case may be damaged if
you continue driving with the warning
light blinking rapidly.
Starting and driving
5-29
Z
01.9.21/R50-D/V5
X
Page 182 of 288
conditions are hazardous and extra care is
required while driving.
If a tire slips on rough roads for more than
10 seconds, the ABS brake warning light
may come on. Turn OFF the ignition key,
restart the engine and drive the vehicle at
speeds above 20 MPH (30 km/h). If the
warning light does not go out, have the
vehicle checked at a NISSAN dealer.Self-test featureThe anti-lock brake system consists of elec-
tronic sensors, electric pumps, and hydraulic
solenoids controlled by a computer. The com-
puter has a built-in diagnostic feature that tests
the system each time you start the engine and
move the vehicle at a low speed in forward or
reverse. When the self-test occurs, you may
hear a clunk noise and/or feel a pulsation in
the brake pedal. This is normal and is not an
indication of any malfunction. If the computer
senses any malfunction, it switches the anti-
lock brake system OFF and turns on the ABS
brake warning light in the dashboard. The
brake system will then behave normally, but
without anti-lock assistance.
If the light comes on during the self check, or
while you are driving, you should take your
vehicle to your NISSAN dealer for repair at
your earliest convenience.
WARNING
The anti-lock brake system is a sophis-
ticated device, but it cannot prevent ac-
cidents resulting from careless or dan-
gerous driving techniques. It can help
maintain vehicle control during braking
on slippery surfaces, but remember that
the stopping distance on slippery sur-
faces will be longer than on normal
surfaces, even with the anti-lock sys-
tem. Stopping distances may also be
longer on rough, gravel or snow covered
roads, or if you are using tire chains.
Always maintain a safe distance from
the vehicle in front of you. Ultimately,
the responsibility for safety of self and
others rests in the hands of the driver.
Tire type and condition of tires may also
affect braking effectiveness.
IWhen replacing tires, install the
specified size of tires on all four
wheels.
IWhen installing a spare tire, make
sure it is the proper size and type asspecified on the tire placard. See
ªTire placardº in the ª9. Technical
and consumer informationº section
for tire placard location information.
Starting and driving
5-33
Z
01.9.21/R50-D/V5
X
Page 210 of 288

8 Maintenance and do-it-yourselfMaintenance requirements ........................................ 8-2
General maintenance ................................................ 8-2
Explanation of general maintenance items .......... 8-2
Interior maintenance............................................. 8-3
Maintenance precautions .......................................... 8-5
Engine compartment check locations ....................... 8-7
Engine cooling system .............................................. 8-9
Checking engine coolant level ............................. 8-9
Changing engine coolant ................................... 8-10
Engine oil ................................................................ 8-13
Checking engine oil level ................................... 8-13
Changing engine oil ........................................... 8-14
Changing engine oil filter ................................... 8-15
Automatic transmission fluid ................................... 8-16
Temperature conditions for checking ................. 8-17
Power steering fluid ................................................ 8-18
Brake and clutch fluid ............................................. 8-18
Brake fluid .......................................................... 8-18
Clutch fluid.......................................................... 8-19
Window washer fluid ............................................... 8-20
Window washer fluid reservoir ........................... 8-20
Battery ..................................................................... 8-21
Jump starting ...................................................... 8-21
Drive belts ............................................................... 8-22Spark plugs ............................................................. 8-23
Replacing spark plugs ........................................ 8-23
Air cleaner ............................................................... 8-23
Windshield wiper blades ......................................... 8-24
Cleaning ............................................................. 8-24
Replacing............................................................ 8-24
Parking brake and brake pedal ............................... 8-25
Checking parking brake ..................................... 8-25
Checking brake pedal ........................................ 8-26
Brake booster ..................................................... 8-26
Clutch pedal ............................................................ 8-27
Checking clutch pedal ........................................ 8-27
Fuses....................................................................... 8-27
Engine compartment .......................................... 8-27
Passenger compartment .................................... 8-28
Keyfob battery replacement ............................... 8-29
Lights ....................................................................... 8-30
Headlights........................................................... 8-31
Wheels and tires ..................................................... 8-34
Tire pressure ...................................................... 8-34
Types of tires...................................................... 8-35
Tire chains .......................................................... 8-36
Changing wheels and tires ................................. 8-37
Clutch housing drain............................... 8-40Z
01.9.21/R50-D/V5
X
Page 212 of 288

Wheel nuts*:
When checking the tires, make sure no nuts
are missing, and check for any loose nuts.
Tighten if necessary.
Tire rotation*:
Tires should be rotated every 7,500 miles
(12,000 km). However, the timing for tire rota-
tion may vary according to your driving habits
and road surface conditions.
Wheel alignment and balance:
If the vehicle should pull to either side while
driving on a straight and level road, or if you
detect uneven or abnormal tire wear, there
may be a need for wheel alignment.
If the steering wheel or seat vibrates at normal
highway speeds, wheel balancing may be
needed.
For additional information regarding tires, refer
to ªImportant Tire Safety Informationº in the
Warranty Information Booklet (US) or ªTire
Safety Informationº in the Warranty Informa-
tion booklet (Canada).
Windshield:Clean the windshield on a regu-
lar basis. Check the windshield at least every
six months for cracks or other damage. Have a
damaged windshield repaired by a qualified
repair facility.Windshield wiper blades*:
Check for cracks or wear if they do not wipe
properly.
Doors and engine hood:
Check that all doors and the engine hood,
operate properly. Also ensure that all latches
lock securely. Lubricate hinges, latches, rollers
and links if necessary. Make sure that the
secondary latch keeps the hood from opening
when the primary latch is released.
When driving in areas using road salt or other
corrosive materials, check lubrication fre-
quently.
Inside the vehicleLights*:
Clean the headlights on a regular basis. Make
sure that the headlights, stop lights, tail lights,
turn signal lights, and other lights are all oper-
ating properly and installed securely. Also
check headlight aim.INTERIOR MAINTENANCEThe maintenance items listed here should be
checked on a regular basis, such as when
performing periodic maintenance, cleaning the
vehicle, etc.Warning lights and chimes:
Make sure that all warning lights and chimes
are operating properly.
Windshield wiper and washer*:
Check that the wipers and washer operate
properly and that the wipers do not streak.
Windshield defroster:
Check that the air comes out of the defroster
outlets properly and in sufficient quantity when
operating the heater or air conditioner.
Steering wheel:
Check for changes in the steering conditions,
such as excessive freeplay, hard steering or
strange noises.
Seats:
Check seat position controls such as seat
adjusters, seatback recliner, etc. to ensure
they operate smoothly and that all latches lock
securely in every position. Check that the head
restraints move up and down smoothly and
that the locks (if so equipped) hold securely in
all latched positions.
Seat belts:
Check that all parts of the seat belt system
(e.g. buckles, anchors, adjusters and retrac-
Maintenance and do-it-yourself
8-3
Z
01.9.21/R50-D/V5
X
Page 225 of 288
CAUTION
Be careful not to burn yourself, as the
engine oil may be hot.
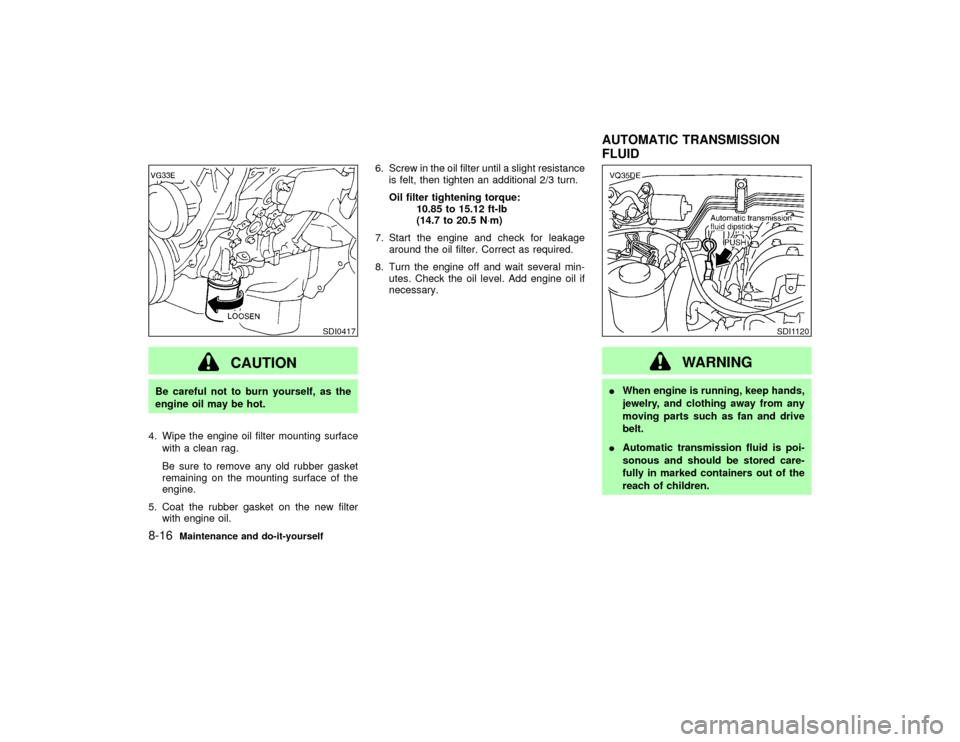
4. Wipe the engine oil filter mounting surface
with a clean rag.
Be sure to remove any old rubber gasket
remaining on the mounting surface of the
engine.
5. Coat the rubber gasket on the new filter
with engine oil.6. Screw in the oil filter until a slight resistance
is felt, then tighten an additional 2/3 turn.
Oil filter tightening torque:
10.85 to 15.12 ft-lb
(14.7 to 20.5 N×m)
7. Start the engine and check for leakage
around the oil filter. Correct as required.
8. Turn the engine off and wait several min-
utes. Check the oil level. Add engine oil if
necessary.
WARNING
IWhen engine is running, keep hands,
jewelry, and clothing away from any
moving parts such as fan and drive
belt.
IAutomatic transmission fluid is poi-
sonous and should be stored care-
fully in marked containers out of the
reach of children.
SDI0417
SDI1120
AUTOMATIC TRANSMISSION
FLUID
8-16
Maintenance and do-it-yourself
Z
01.9.21/R50-D/V5
X
Page 229 of 288
WINDOW WASHER FLUID
RESERVOIR
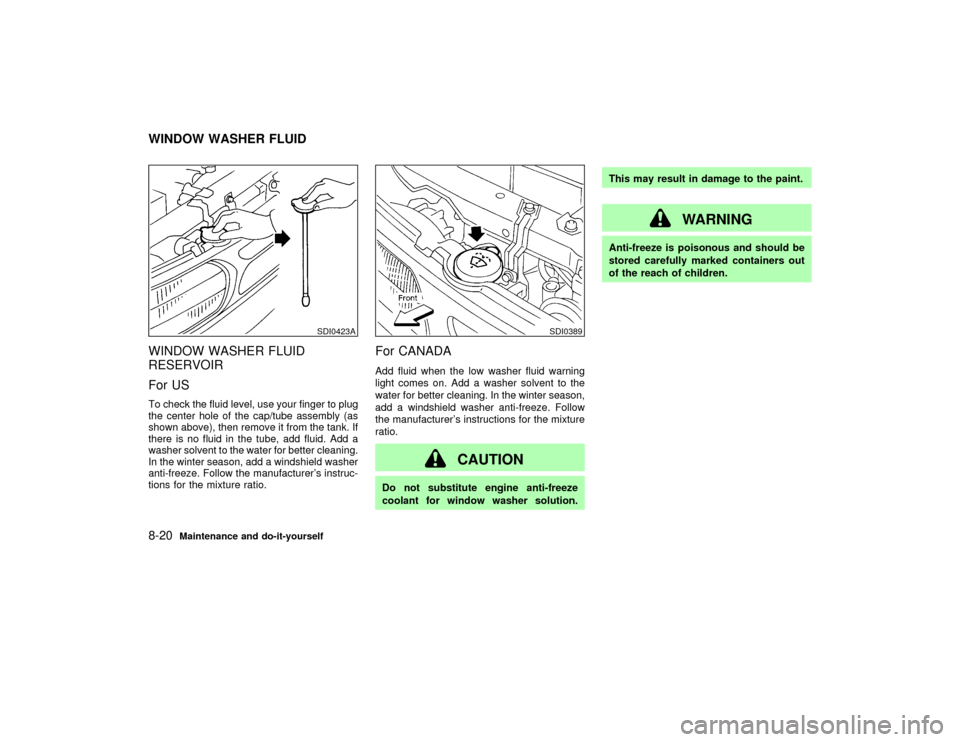
For USTo check the fluid level, use your finger to plug
the center hole of the cap/tube assembly (as
shown above), then remove it from the tank. If
there is no fluid in the tube, add fluid. Add a
washer solvent to the water for better cleaning.
In the winter season, add a windshield washer
anti-freeze. Follow the manufacturer's instruc-
tions for the mixture ratio.
For CANADAAdd fluid when the low washer fluid warning
light comes on. Add a washer solvent to the
water for better cleaning. In the winter season,
add a windshield washer anti-freeze. Follow
the manufacturer's instructions for the mixture
ratio.
CAUTION
Do not substitute engine anti-freeze
coolant for window washer solution.This may result in damage to the paint.
WARNING
Anti-freeze is poisonous and should be
stored carefully marked containers out
of the reach of children.
SDI0423A
SDI0389
WINDOW WASHER FLUID8-20
Maintenance and do-it-yourself
Z
01.9.21/R50-D/V5
X