fuel NISSAN PATHFINDER 2002 R50 / 2.G Owners Manual
[x] Cancel search | Manufacturer: NISSAN, Model Year: 2002, Model line: PATHFINDER, Model: NISSAN PATHFINDER 2002 R50 / 2.GPages: 288, PDF Size: 2.49 MB
Page 4 of 288

Welcome To The World Of NISSANYour new NISSAN is the result of our dedication
to produce the finest in safe, reliable and eco-
nomical transportation. Your vehicle is the prod-
uct of a successful worldwide company that
manufactures cars and trucks in over 17 coun-
tries and distributes them in 170 nations.
NISSAN vehicles are designed and manufac-
tured by Nissan Motor Co., Ltd. which was
founded in Tokyo, Japan in 1933, and NISSAN
affiliates world wide, collectively growing to be-
come the fifth largest automaker in the world. In
addition to cars and trucks, NISSAN also makes
forklift trucks, marine engines, boats and other
diversified products.
NISSAN has made a substantial and growing
investment in North America. NISSAN'S commit-
ment is nearly $4 billion dollars in capital invest-
ments in facilities across the continent. Some ofthe facilities include the Nissan Manufacturing
facility in Smyrna, Tennessee, vehicle styling
design at Nissan Design International in San
Diego, California, and engineering at Nissan
Technical Center North America in Farmington
Hills, Michigan. Additionally, NISSAN employs
nearly 18,000 people throughout the United
States, Canada, and Mexico. An additional
71,000 people work for the 1,500 NISSAN and
INFINITI dealers across North America.
NISSAN is also a substantial contributor to the
Canadian economy. Nissan Canada Inc., its sup-
pliers and over 140 dealers employ approxi-
mately 4,500 people. These include company
employees and the staffs of NISSAN dealers all
across Canada. In addition, many Canadians
work for companies that supply NISSAN and
NISSAN dealers with materials and services
ranging from operation of port facilities and trans-portation services to the supply of lubricants,
parts and accessories.
NISSAN pioneered the use of electronics and
computers in automobiles, and has led the indus-
try in improving both performance and fuel effi-
ciency through new engine designs and the use
of synthetic materials to reduce vehicle weight.
The company has also developed ways to build
quality into its vehicles at each stage of the
production process, both through extensive use
of automation and Ð most importantly Ð
through an awareness thatpeopleare the cen-
tral element in quality control.
From the time the parts arrived from our suppli-
ers until you took delivery of your new Nissan,
dozens of checks were made to ensure that only
the best job was being done in producing and
delivering your vehicle. NISSAN also takes great
care to ensure that when you take your NISSAN
to your dealer for maintenance, the service tech-
nician will perform his work according to the
quality standards that have been established by
the factory.
Safety has also been built into your NISSAN. As
you know, seat belts are an integral part of the
safety systems that will help protect you and your
passengers in the event of a sudden stop or an
accident. We urge you to use the seat belts every
time you drive the vehicle.
The NISSAN story of growth and achievement
reflects our major goal: to provide you, our
customer, with a vehicle that is built with quality
and craftsmanship Ð a product that we can be
proud to build and you can be proud to own.
WFW0002
Z
01.9.21/R50-D/V5
X
Page 53 of 288

2 Instruments and controlsInstrument panel ....................................................... 2-2
Meters and gauges ................................................... 2-3
Speedometer and odometer ................................ 2-3
Tachometer .......................................................... 2-4
Engine coolant temperature gauge ...................... 2-4
Fuel gauge ........................................................... 2-5
Compass and outside temperature display (if so
equipped) .................................................................. 2-6
Outside temperature display ................................ 2-6
Compass display .................................................. 2-7
Warning/indicator lights and audible reminders ........ 2-9
Checking bulbs ..................................................... 2-9
Warning lights....................................................... 2-9
Indicator lights .................................................... 2-13
Audible reminders .............................................. 2-15
Security systems ..................................................... 2-15
Vehicle security system ...................................... 2-15
Nissan vehicle immobilizer system .................... 2-17
Windshield wiper and washer switch ...................... 2-18
Rear window wiper and washer switch................... 2-18
Glass hatch and outside mirror (if so equipped)
defogger switch ...................................................... 2-19
Headlight and turn signal switch ............................. 2-19
Headlight switch ................................................. 2-20Turn signal switch .............................................. 2-22
Fog light switch (if so equipped) ............................. 2-23
Front fog light switch .......................................... 2-23
Hazard warning flasher switch ................................ 2-23
Horn......................................................................... 2-24
Heated seats (if so equipped) ................................. 2-24
Clock ....................................................................... 2-25
Adjusting the time............................................... 2-25
Power outlet (if so equipped) .................................. 2-25
Cigarette lighter and ashtray (if so equipped) ........ 2-26
Storage .................................................................... 2-27
Tray .................................................................... 2-27
Coin box (if so equipped) ................................... 2-27
Glasses case ...................................................... 2-28
Cup holders ........................................................ 2-28
Glove box ........................................................... 2-29
Console box ....................................................... 2-30
Luggage hooks ................................................... 2-32
Cargo net............................................................ 2-33
Tonneau cover (if so equipped) ......................... 2-33
Luggage rack (if so equipped) ........................... 2-34
Windows .................................................................. 2-35
Power windows .................................................. 2-35
Sunroof (if so equipped) ......................................... 2-36
Z
01.9.21/R50-D/V5
X
Page 58 of 288
the vehicle as soon as safely possible. If
the engine is overheated, continued op-
eration of the vehicle may seriously
damage the engine. See ªIf your vehicle
overheatsº in the ª6. In case of emer-
gencyº section for immediate action re-
quired.
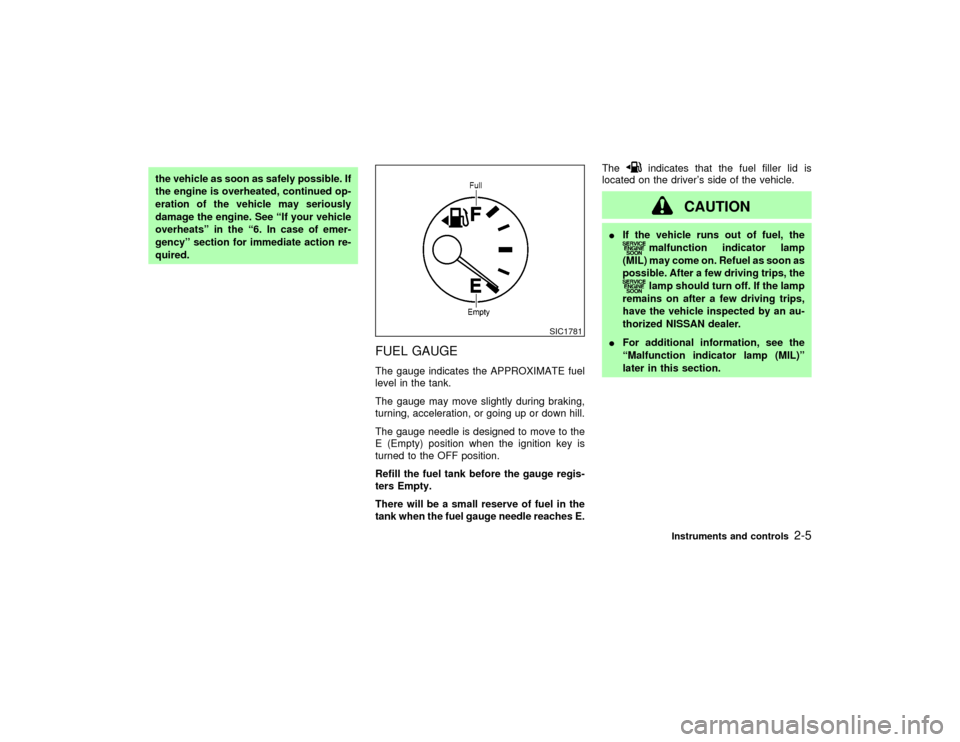
FUEL GAUGEThe gauge indicates the APPROXIMATE fuel
level in the tank.
The gauge may move slightly during braking,
turning, acceleration, or going up or down hill.
The gauge needle is designed to move to the
E (Empty) position when the ignition key is
turned to the OFF position.
Refill the fuel tank before the gauge regis-
ters Empty.
There will be a small reserve of fuel in the
tank when the fuel gauge needle reaches E.The
indicates that the fuel filler lid is
located on the driver's side of the vehicle.
CAUTION
IIf the vehicle runs out of fuel, the
malfunction indicator lamp
(MIL) may come on. Refuel as soon as
possible. After a few driving trips, thelamp should turn off. If the lamp
remains on after a few driving trips,
have the vehicle inspected by an au-
thorized NISSAN dealer.
IFor additional information, see the
ªMalfunction indicator lamp (MIL)º
later in this section.
SIC1781
Instruments and controls
2-5
Z
01.9.21/R50-D/V5
X
Page 62 of 288
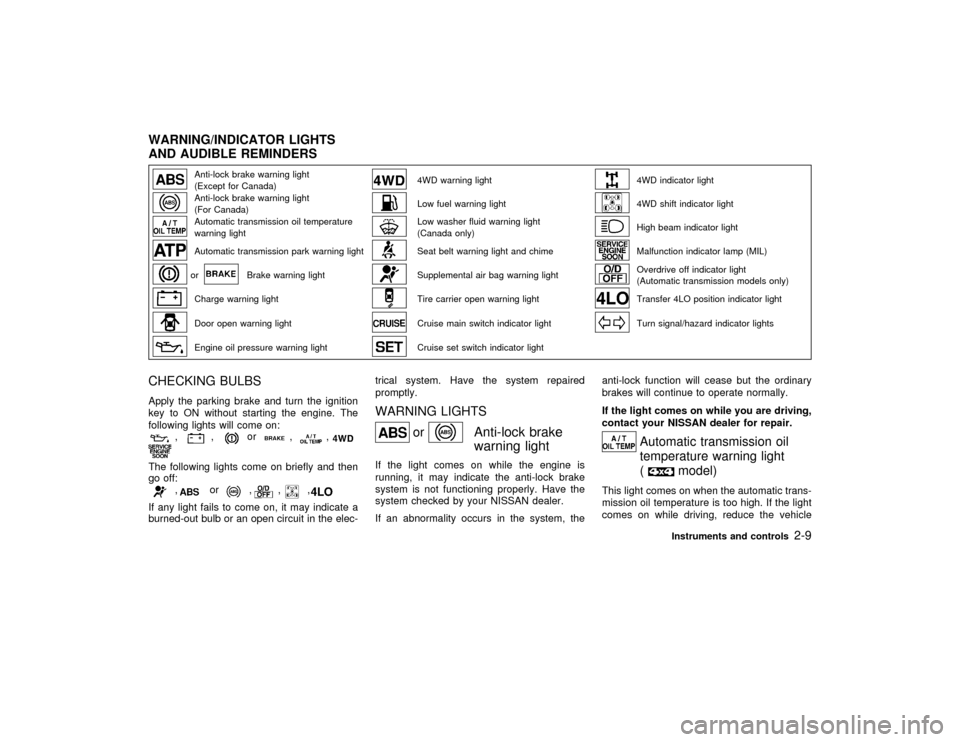
Anti-lock brake warning light
(Except for Canada)
4WD warning light
4WD indicator light
Anti-lock brake warning light
(For Canada)
Low fuel warning light
4WD shift indicator light
Automatic transmission oil temperature
warning light
Low washer fluid warning light
(Canada only)
High beam indicator light
Automatic transmission park warning light
Seat belt warning light and chime
Malfunction indicator lamp (MIL)
or
Brake warning light
Supplemental air bag warning light
Overdrive off indicator light
(Automatic transmission models only)
Charge warning light
Tire carrier open warning light
Transfer 4LO position indicator light
Door open warning light
Cruise main switch indicator light
Turn signal/hazard indicator lights
Engine oil pressure warning light
Cruise set switch indicator light
CHECKING BULBSApply the parking brake and turn the ignition
key to ON without starting the engine. The
following lights will come on:
,
,
or
,
,
The following lights come on briefly and then
go off:
,
or
,
,
,
If any light fails to come on, it may indicate a
burned-out bulb or an open circuit in the elec-trical system. Have the system repaired
promptly.
WARNING LIGHTS
or
Anti-lock brake
warning light
If the light comes on while the engine is
running, it may indicate the anti-lock brake
system is not functioning properly. Have the
system checked by your NISSAN dealer.
If an abnormality occurs in the system, theanti-lock function will cease but the ordinary
brakes will continue to operate normally.
If the light comes on while you are driving,
contact your NISSAN dealer for repair.
Automatic transmission oil
temperature warning light
(
model)
This light comes on when the automatic trans-
mission oil temperature is too high. If the light
comes on while driving, reduce the vehicle
WARNING/INDICATOR LIGHTS
AND AUDIBLE REMINDERS
Instruments and controls
2-9
Z
01.9.21/R50-D/V5
X
Page 65 of 288
4WD warning light (model)
The four wheel drive warning light comes on
when the key switch is turned to ON. It turns off
soon after the engine is started.
If the engine or vehicle is not functioning
properly, the warning light will either remain
illuminated or blink. See ª4WD warning lightº in
the ª5. Starting and drivingº section.
CAUTION
IIf the warning light comes on or
blinks during operation, have your
vehicle checked by an authorized
NISSAN dealer as soon as possible.
IDo not drive on dry hard surface
roads in the 4H or 4LO position. If the
4WD warning light turns on when you
are driving on dry hard surface roads
Iin the AUTO or 4H position, shift
the 4WD shift switch to 2WD.
Iin the 4LO position, stop the ve-
hicle, move the automatic trans-
mission lever to the N position,and shift the 4WD shift switch to
2WD.
If the warning light is still on after the
above operation, have your vehicle
checked by an authorized NISSAN
dealer as soon as possible.
Low fuel warning light
This light comes on when the fuel in the tank is
getting low. Refuel as soon as it is convenient,
preferably before the fuel gauge reaches E.
There will be a small reserve of fuel remain-
ing in the tank when the fuel gauge needle
reaches E.
Low washer fluid warning
light (Canada only)
This light comes on when the washer fluid in
the washer tank is at a low level. Add washer
fluid as necessary. See ªWindow washer fluidº
in the ª8. Maintenance and do-it-yourselfº sec-
tion.
Seat belt warning light and
chime
The light and chime remind you to fasten seatbelts. The light illuminates whenever the igni-
tion key is turned to ON, and will remain
illuminated until the driver's seat belt is fas-
tened. At the same time, the chime will sound
for about six seconds unless the driver's seat
belt is securely fastened.
See ªSeat beltsº in the ª1. Seats, restraints and
supplemental air bag systemsº section for pre-
cautions on seat belt usage.
Supplemental air bag warning
light
After turning the ignition key to the ON posi-
tion, the supplemental air bag light will illumi-
nate. The supplemental air bag warning light
will turn off after about 7 seconds if the supple-
mental front air bag and supplemental side air
bag systems and pre-tensioner seat belt are
operational.
If any of the following conditions occur, the
supplemental air bag and pre-tensioner seat
belt need servicing and your vehicle must be
taken to your nearest authorized NISSAN
dealer.
IThe supplemental air bag warning light
remains on after approximately 7 seconds.
IThe supplemental air bag light flashes in-
termittently.
2-12
Instruments and controls
Z
01.9.21/R50-D/V5
X
Page 66 of 288
IThe supplemental air bag light does not
come on at all.
Unless checked and repaired, the supplemen-
tal restraint system and/or the pre-tensioner
seat belt may not function properly. For addi-
tional information, see ªSupplemental restraint
systemº in the ª1. Seats, restraints and supple-
mental air bag systemsº section.
WARNING
If the supplemental air bag warning light
is on, it could mean that the supplemen-
tal front air bag system, supplemental
side air bag system (if so equipped)
and/or pre-tensioner seat belt may not
operate in an accident.
Tire carrier open warning light
(if so equipped)
This light comes on when the tire carrier is not
closed securely while the ignition key is ON.
INDICATOR LIGHTS
Cruise main switch indicator
light (if so equipped)
The light comes on when the main switch is
turned on.
Cruise set switch indicator
light (if so equipped)
The light comes on while the vehicle speed is
controlled by the cruise control system. If the
light blinks while the engine is running, it may
indicate the cruise control system is not func-
tioning properly. Have the system checked by
your NISSAN dealer.
4WD indicator light
(
model)
This light comes on when the transfer shift
control lever is in the 4H or 4L position.
4WD shift indicator light
(
model)
The light should turn off within 1 second after
turning the ignition switch to ON.
While the engine is running, the 4WD shift
indicator light will illuminate the position se-
lected by the 4WD shift switch.The 4WD shift indicator light may blink
while shifting from one drive mode to the
other.
High beam indicator light
(Blue)
This light comes on when the headlight high
beam is on, and goes out when the low beams
are selected.
Malfunction indicator lamp
(MIL)
If the Malfunction indicator lamp comes on
steady or blinks while the engine is running, it
may indicate a potential emission control mal-
function.
The Malfunction indicator lamp may also come
on steady if the fuel filler cap is loose or
missing, or if the vehicle runs out of fuel.
Check to make sure the fuel filler cap is
installed and closed tightly, and that the ve-
hicle has at least 3 US gallons (14 liters) of fuel
in the fuel tank.
After a few driving trips, the
lamp should
turn off if no other potential emission control
system malfunction exists.
Operation
The Malfunction indicator lamp will come on in
one of two ways:
Instruments and controls
2-13
Z
01.9.21/R50-D/V5
X
Page 67 of 288
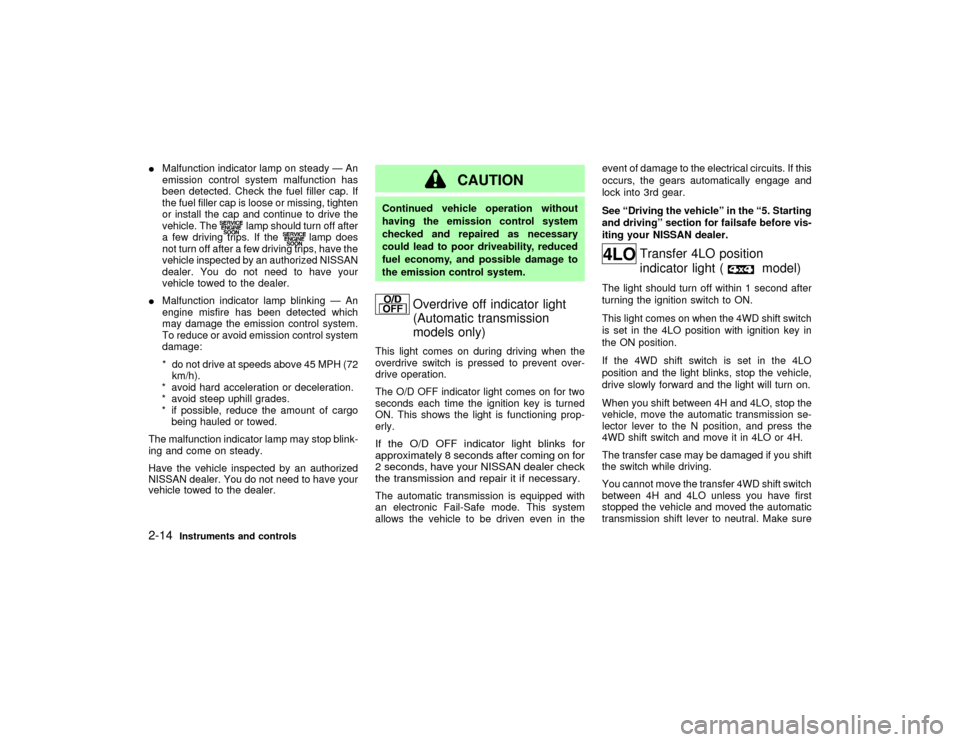
IMalfunction indicator lamp on steady Ð An
emission control system malfunction has
been detected. Check the fuel filler cap. If
the fuel filler cap is loose or missing, tighten
or install the cap and continue to drive the
vehicle. The
lamp should turn off after
a few driving trips. If the
lamp does
not turn off after a few driving trips, have the
vehicle inspected by an authorized NISSAN
dealer. You do not need to have your
vehicle towed to the dealer.
IMalfunction indicator lamp blinking Ð An
engine misfire has been detected which
may damage the emission control system.
To reduce or avoid emission control system
damage:
* do not drive at speeds above 45 MPH (72
km/h).
* avoid hard acceleration or deceleration.
* avoid steep uphill grades.
* if possible, reduce the amount of cargo
being hauled or towed.
The malfunction indicator lamp may stop blink-
ing and come on steady.
Have the vehicle inspected by an authorized
NISSAN dealer. You do not need to have your
vehicle towed to the dealer.
CAUTION
Continued vehicle operation without
having the emission control system
checked and repaired as necessary
could lead to poor driveability, reduced
fuel economy, and possible damage to
the emission control system.
Overdrive off indicator light
(Automatic transmission
models only)
This light comes on during driving when the
overdrive switch is pressed to prevent over-
drive operation.
The O/D OFF indicator light comes on for two
seconds each time the ignition key is turned
ON. This shows the light is functioning prop-
erly.If the O/D OFF indicator light blinks for
approximately 8 seconds after coming on for
2 seconds, have your NISSAN dealer check
the transmission and repair it if necessary.The automatic transmission is equipped with
an electronic Fail-Safe mode. This system
allows the vehicle to be driven even in theevent of damage to the electrical circuits. If this
occurs, the gears automatically engage and
lock into 3rd gear.
See ªDriving the vehicleº in the ª5. Starting
and drivingº section for failsafe before vis-
iting your NISSAN dealer.
Transfer 4LO position
indicator light (
model)
The light should turn off within 1 second after
turning the ignition switch to ON.
This light comes on when the 4WD shift switch
is set in the 4LO position with ignition key in
the ON position.
If the 4WD shift switch is set in the 4LO
position and the light blinks, stop the vehicle,
drive slowly forward and the light will turn on.
When you shift between 4H and 4LO, stop the
vehicle, move the automatic transmission se-
lector lever to the N position, and press the
4WD shift switch and move it in 4LO or 4H.
The transfer case may be damaged if you shift
the switch while driving.
You cannot move the transfer 4WD shift switch
between 4H and 4LO unless you have first
stopped the vehicle and moved the automatic
transmission shift lever to neutral. Make sure
2-14
Instruments and controls
Z
01.9.21/R50-D/V5
X
Page 100 of 288

3 Pre-driving checks and adjustmentsKeys .......................................................................... 3-2
Doors ......................................................................... 3-2
Locking with key ................................................... 3-3
Front window open/close with key ....................... 3-3
Locking with inside lock knob............................... 3-3
Locking with power door lock switch (if so
equipped).............................................................. 3-4
Child safety rear door lock ................................... 3-4
Remote keyless entry system ................................... 3-5
How to use remote keyless entry system ............ 3-5
Battery replacement ............................................. 3-8
Hood .......................................................................... 3-9
Rear door ................................................................ 3-10
Key operation ..................................................... 3-10
Spare tire carrier (if so equipped) ........................... 3-10Glass hatch ............................................................. 3-11
Key operation ..................................................... 3-11
Fuel filler lid ............................................................. 3-12
Opener operation ............................................... 3-12
Fuel filler cap ...................................................... 3-12
Steering wheel ........................................................ 3-14
Tilt operation....................................................... 3-14
Sun visors ............................................................... 3-14
Using the sun visors ........................................... 3-14
Mirrors ..................................................................... 3-15
Inside mirror ....................................................... 3-15
Outside mirrors ................................................... 3-15
Automatic seat positioner (if so equipped) ............. 3-16
Automatic seat positioner operation ................... 3-16
Cancel switch ..................................................... 3-18
Z
01.9.21/R50-D/V5
X
Page 111 of 288
gases to be drawn into the vehicle. See
ªPrecautions when starting and drivingº
in the ª5. Starting and drivingº section
for exhaust gas.
CAUTION
Do not open the glass hatch unless the
wiper is in the stowed position.
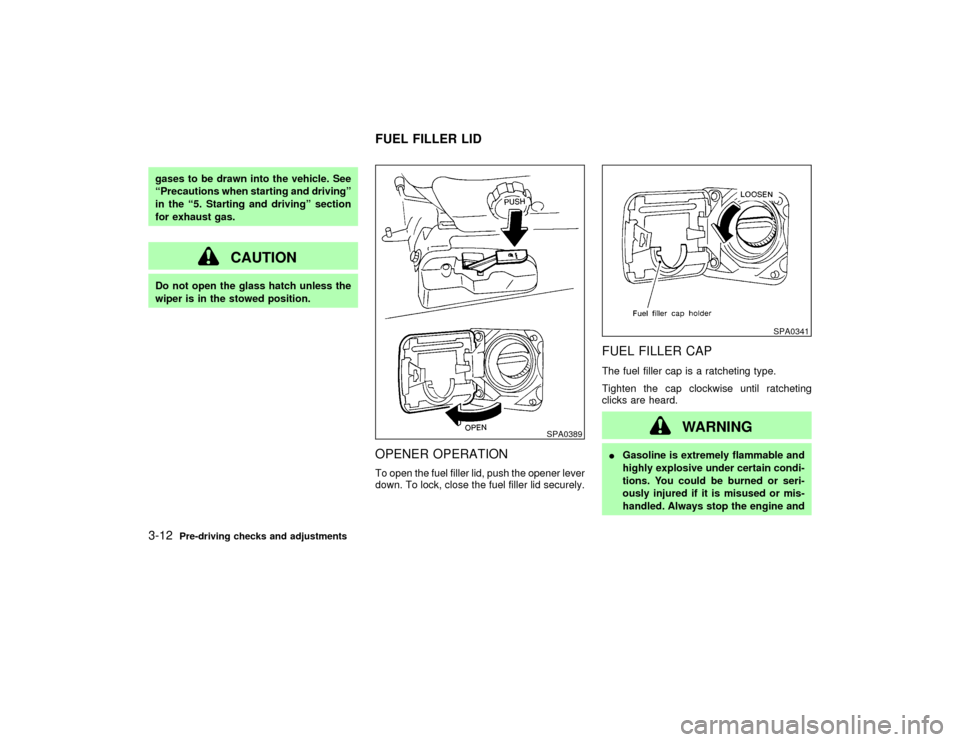
OPENER OPERATIONTo open the fuel filler lid, push the opener lever
down. To lock, close the fuel filler lid securely.
FUEL FILLER CAPThe fuel filler cap is a ratcheting type.
Tighten the cap clockwise until ratcheting
clicks are heard.
WARNING
IGasoline is extremely flammable and
highly explosive under certain condi-
tions. You could be burned or seri-
ously injured if it is misused or mis-
handled. Always stop the engine and
SPA0389
SPA0341
FUEL FILLER LID
3-12
Pre-driving checks and adjustments
Z
01.9.21/R50-D/V5
X
Page 112 of 288
do not smoke or allow open flames or
sparks near the vehicle when refuel-
ing.
IFuel may be under pressure. Turn the
cap one-half turn, and wait for any
hissing sound to stop to prevent fuel
from spraying out and possible per-
sonal injury. Then remove the cap.
IDo not attempt to top off the fuel tank
after the fuel pump nozzle shuts off
automatically. Continued refueling
may cause fuel over-flow, resulting in
fuel spray and possibly a fire.
IOnly use an original equipment type
fuel filler cap as a replacement. It has
a built-in safety valve needed for
proper operation of the fuel system
and emission control system. An in-
correct cap can result in a serious
malfunction and possible injury. It
could also cause the malfunction in-
dicator lamp to come on.
INever pour fuel into the throttle body
to attempt to start your vehicle.
CAUTION
IIf fuel is spilled on the vehicle body,
flush it away with water to avoid paint
damage.
ITighten until the fuel filler cap clicks.
Failure to tighten the fuel filler cap
properly may cause the
mal-
function indicator lamp (MIL) to illu-
minate. If the
lamp illuminates
because the fuel filler cap is loose or
missing, tighten or install the cap and
continue to drive the vehicle. The
lamp should turn off after a few
driving trips. If the
lamp does
not turn off after a few driving trips,
have the vehicle inspected by an au-
thorized NISSAN dealer.
IFor additional information, see the
ªMalfunction indicator lamp (MIL)º in
the ª2. Instruments and controlsº
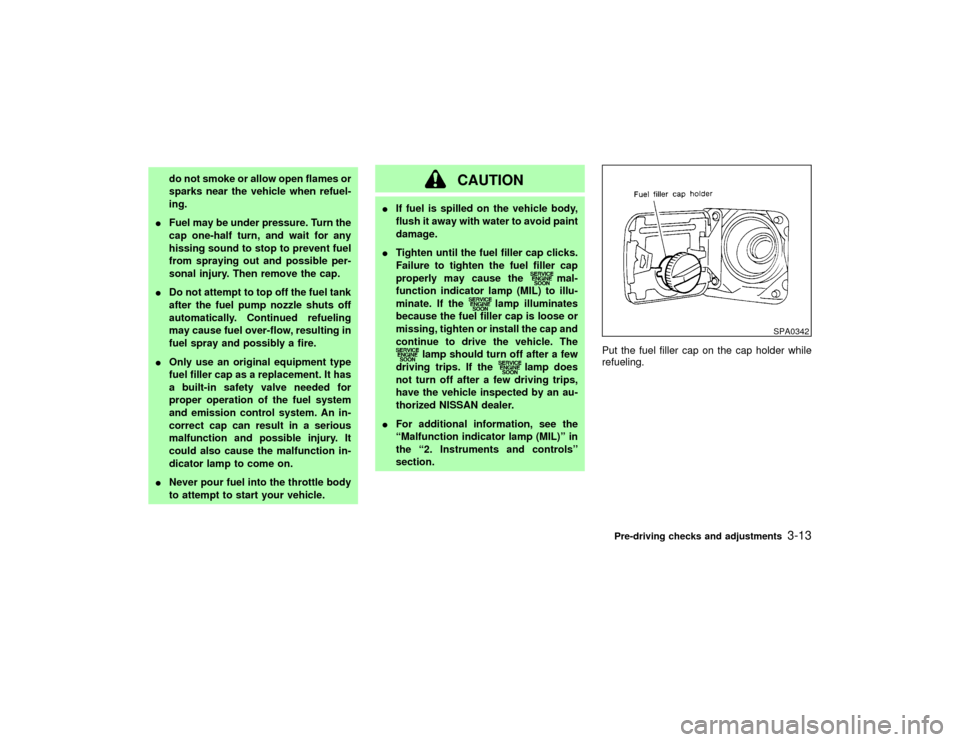
section.Put the fuel filler cap on the cap holder while
refueling.
SPA0342
Pre-driving checks and adjustments
3-13
Z
01.9.21/R50-D/V5
X