oil temperature NISSAN PATHFINDER 2002 R50 / 2.G Owners Manual
[x] Cancel search | Manufacturer: NISSAN, Model Year: 2002, Model line: PATHFINDER, Model: NISSAN PATHFINDER 2002 R50 / 2.GPages: 288, PDF Size: 2.49 MB
Page 62 of 288
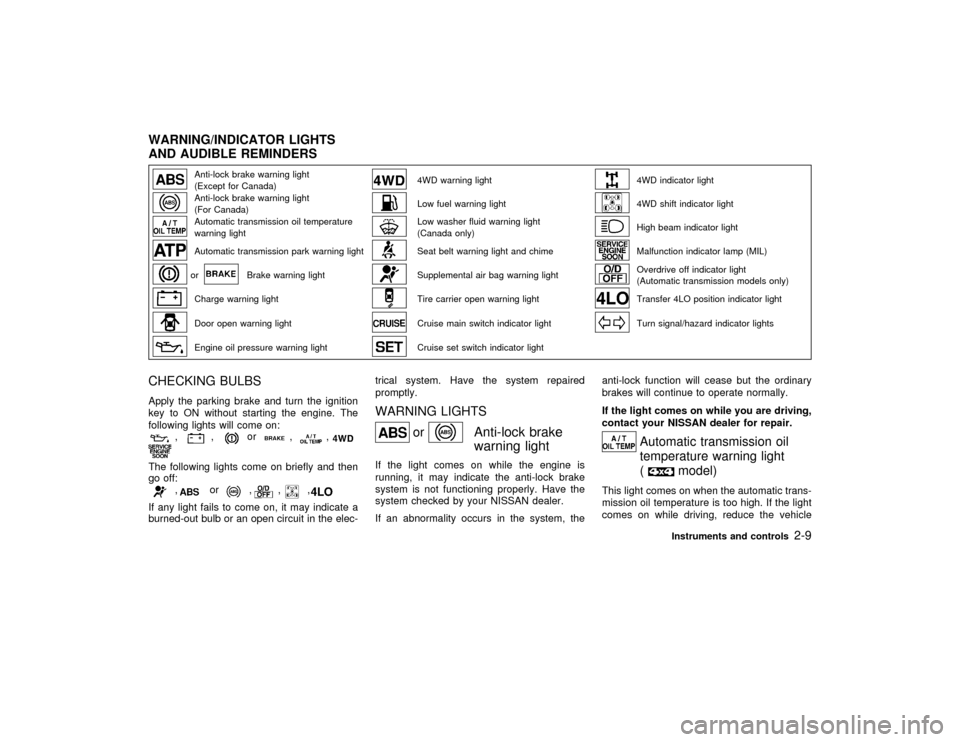
Anti-lock brake warning light
(Except for Canada)
4WD warning light
4WD indicator light
Anti-lock brake warning light
(For Canada)
Low fuel warning light
4WD shift indicator light
Automatic transmission oil temperature
warning light
Low washer fluid warning light
(Canada only)
High beam indicator light
Automatic transmission park warning light
Seat belt warning light and chime
Malfunction indicator lamp (MIL)
or
Brake warning light
Supplemental air bag warning light
Overdrive off indicator light
(Automatic transmission models only)
Charge warning light
Tire carrier open warning light
Transfer 4LO position indicator light
Door open warning light
Cruise main switch indicator light
Turn signal/hazard indicator lights
Engine oil pressure warning light
Cruise set switch indicator light
CHECKING BULBSApply the parking brake and turn the ignition
key to ON without starting the engine. The
following lights will come on:
,
,
or
,
,
The following lights come on briefly and then
go off:
,
or
,
,
,
If any light fails to come on, it may indicate a
burned-out bulb or an open circuit in the elec-trical system. Have the system repaired
promptly.
WARNING LIGHTS
or
Anti-lock brake
warning light
If the light comes on while the engine is
running, it may indicate the anti-lock brake
system is not functioning properly. Have the
system checked by your NISSAN dealer.
If an abnormality occurs in the system, theanti-lock function will cease but the ordinary
brakes will continue to operate normally.
If the light comes on while you are driving,
contact your NISSAN dealer for repair.
Automatic transmission oil
temperature warning light
(
model)
This light comes on when the automatic trans-
mission oil temperature is too high. If the light
comes on while driving, reduce the vehicle
WARNING/INDICATOR LIGHTS
AND AUDIBLE REMINDERS
Instruments and controls
2-9
Z
01.9.21/R50-D/V5
X
Page 63 of 288
speed as soon as safely possible until the light
turns off.
CAUTION
Continued vehicle operation when the
A/T oil temperature warning light is on
may damage the automatic trans-
mission.
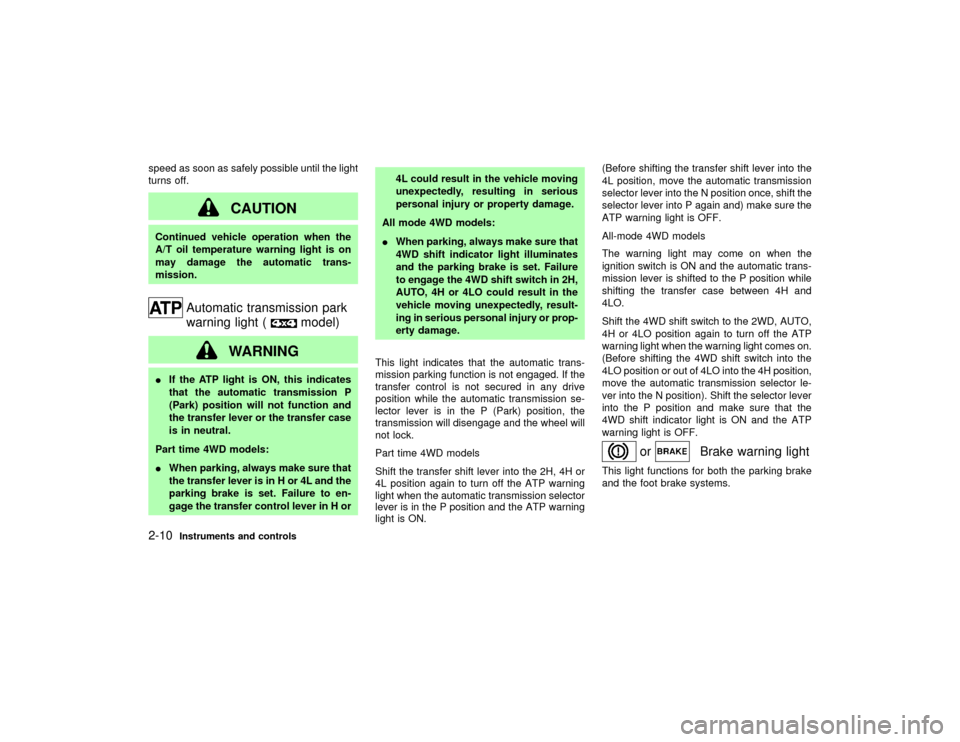
Automatic transmission park
warning light (
model)
WARNING
IIf the ATP light is ON, this indicates
that the automatic transmission P
(Park) position will not function and
the transfer lever or the transfer case
is in neutral.
Part time 4WD models:
IWhen parking, always make sure that
the transfer lever is in H or 4L and the
parking brake is set. Failure to en-
gage the transfer control lever in H or4L could result in the vehicle moving
unexpectedly, resulting in serious
personal injury or property damage.
All mode 4WD models:
IWhen parking, always make sure that
4WD shift indicator light illuminates
and the parking brake is set. Failure
to engage the 4WD shift switch in 2H,
AUTO, 4H or 4LO could result in the
vehicle moving unexpectedly, result-
ing in serious personal injury or prop-
erty damage.
This light indicates that the automatic trans-
mission parking function is not engaged. If the
transfer control is not secured in any drive
position while the automatic transmission se-
lector lever is in the P (Park) position, the
transmission will disengage and the wheel will
not lock.
Part time 4WD models
Shift the transfer shift lever into the 2H, 4H or
4L position again to turn off the ATP warning
light when the automatic transmission selector
lever is in the P position and the ATP warning
light is ON.(Before shifting the transfer shift lever into the
4L position, move the automatic transmission
selector lever into the N position once, shift the
selector lever into P again and) make sure the
ATP warning light is OFF.
All-mode 4WD models
The warning light may come on when the
ignition switch is ON and the automatic trans-
mission lever is shifted to the P position while
shifting the transfer case between 4H and
4LO.
Shift the 4WD shift switch to the 2WD, AUTO,
4H or 4LO position again to turn off the ATP
warning light when the warning light comes on.
(Before shifting the 4WD shift switch into the
4LO position or out of 4LO into the 4H position,
move the automatic transmission selector le-
ver into the N position). Shift the selector lever
into the P position and make sure that the
4WD shift indicator light is ON and the ATP
warning light is OFF.
or
Brake warning light
This light functions for both the parking brake
and the foot brake systems.
2-10
Instruments and controls
Z
01.9.21/R50-D/V5
X
Page 178 of 288
this occurs, move the 4WD shift switch to the
4H or 4LO position.
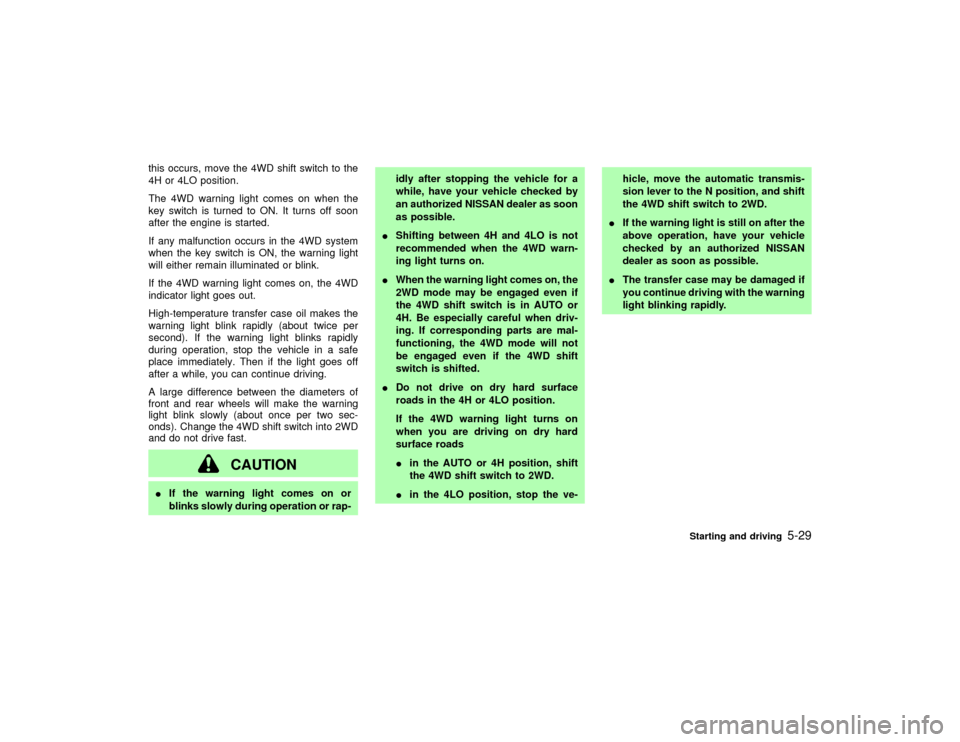
The 4WD warning light comes on when the
key switch is turned to ON. It turns off soon
after the engine is started.
If any malfunction occurs in the 4WD system
when the key switch is ON, the warning light
will either remain illuminated or blink.
If the 4WD warning light comes on, the 4WD
indicator light goes out.
High-temperature transfer case oil makes the
warning light blink rapidly (about twice per
second). If the warning light blinks rapidly
during operation, stop the vehicle in a safe
place immediately. Then if the light goes off
after a while, you can continue driving.
A large difference between the diameters of
front and rear wheels will make the warning
light blink slowly (about once per two sec-
onds). Change the 4WD shift switch into 2WD
and do not drive fast.
CAUTION
IIf the warning light comes on or
blinks slowly during operation or rap-idly after stopping the vehicle for a
while, have your vehicle checked by
an authorized NISSAN dealer as soon
as possible.
IShifting between 4H and 4LO is not
recommended when the 4WD warn-
ing light turns on.
IWhen the warning light comes on, the
2WD mode may be engaged even if
the 4WD shift switch is in AUTO or
4H. Be especially careful when driv-
ing. If corresponding parts are mal-
functioning, the 4WD mode will not
be engaged even if the 4WD shift
switch is shifted.
IDo not drive on dry hard surface
roads in the 4H or 4LO position.
If the 4WD warning light turns on
when you are driving on dry hard
surface roads
Iin the AUTO or 4H position, shift
the 4WD shift switch to 2WD.
Iin the 4LO position, stop the ve-hicle, move the automatic transmis-
sion lever to the N position, and shift
the 4WD shift switch to 2WD.
IIf the warning light is still on after the
above operation, have your vehicle
checked by an authorized NISSAN
dealer as soon as possible.
IThe transfer case may be damaged if
you continue driving with the warning
light blinking rapidly.
Starting and driving
5-29
Z
01.9.21/R50-D/V5
X
Page 210 of 288

8 Maintenance and do-it-yourselfMaintenance requirements ........................................ 8-2
General maintenance ................................................ 8-2
Explanation of general maintenance items .......... 8-2
Interior maintenance............................................. 8-3
Maintenance precautions .......................................... 8-5
Engine compartment check locations ....................... 8-7
Engine cooling system .............................................. 8-9
Checking engine coolant level ............................. 8-9
Changing engine coolant ................................... 8-10
Engine oil ................................................................ 8-13
Checking engine oil level ................................... 8-13
Changing engine oil ........................................... 8-14
Changing engine oil filter ................................... 8-15
Automatic transmission fluid ................................... 8-16
Temperature conditions for checking ................. 8-17
Power steering fluid ................................................ 8-18
Brake and clutch fluid ............................................. 8-18
Brake fluid .......................................................... 8-18
Clutch fluid.......................................................... 8-19
Window washer fluid ............................................... 8-20
Window washer fluid reservoir ........................... 8-20
Battery ..................................................................... 8-21
Jump starting ...................................................... 8-21
Drive belts ............................................................... 8-22Spark plugs ............................................................. 8-23
Replacing spark plugs ........................................ 8-23
Air cleaner ............................................................... 8-23
Windshield wiper blades ......................................... 8-24
Cleaning ............................................................. 8-24
Replacing............................................................ 8-24
Parking brake and brake pedal ............................... 8-25
Checking parking brake ..................................... 8-25
Checking brake pedal ........................................ 8-26
Brake booster ..................................................... 8-26
Clutch pedal ............................................................ 8-27
Checking clutch pedal ........................................ 8-27
Fuses....................................................................... 8-27
Engine compartment .......................................... 8-27
Passenger compartment .................................... 8-28
Keyfob battery replacement ............................... 8-29
Lights ....................................................................... 8-30
Headlights........................................................... 8-31
Wheels and tires ..................................................... 8-34
Tire pressure ...................................................... 8-34
Types of tires...................................................... 8-35
Tire chains .......................................................... 8-36
Changing wheels and tires ................................. 8-37
Clutch housing drain............................... 8-40Z
01.9.21/R50-D/V5
X
Page 213 of 288

tors) operate properly and smoothly, and are
installed securely. Check the belt webbing for
cuts, fraying, wear or damage.
Accelerator pedal:
Check the pedal for smooth operation and
make sure the pedal does not catch or require
uneven effort. Keep the floor mats away from
the pedal.
Clutch pedal*:
Make sure the pedal operates smoothly and
check that it has the proper free travel.
Brakes:
Check that the brakes do not pull the vehicle to
one side when applied.
Brake pedal and booster*:
Check the pedal for smooth operation and
make sure it has the proper distance under it
when depressed fully. Check the brake
booster function. Be certain to keep floormats
away from the pedal.
Parking brake*:
Check that the lever has the proper travel and
confirm that your vehicle is held securely on a
fairly steep hill with only the parking brake
applied.Automatic transmission P (Park) position
mechanism:
On a fairly steep hill check that your vehicle is
held securely with the selector lever in the P
position without applying any brakes.
Under the hood and vehicleThe maintenance items listed here should be
checked periodically e.g. each time you check
the engine oil or refuel.
Windshield washer fluid*:
Check that there is adequate fluid in the tank.
Engine oil level*:
Check the level after parking the vehicle on a
level spot and turning off the engine. (Be sure
to wait a few minutes to allow the oil to drain
back into the sump.)
Brake and clutch fluid levels*:
Make sure that the brake and clutch fluid level
is between the MAX and MIN lines on the
reservoir.
Power steering fluid level* and lines:
Check the level when the fluid is cold and the
engine is turned off. Check the lines for proper
attachment, leaks, cracks, etc.Automatic transmission fluid level*:
Check the level after putting the selector lever
in P (Park) with the engine idling.
Engine coolant level*:
Check the coolant level when the engine is
cold.
Radiator and hoses:
Check the front of the radiator and clean off
any dirt, insects, leaves, etc., that may have
accumulated. Make sure the hoses have no
cracks, deformation, rot or loose connections.
Engine drive belts*:
Make sure that no belt is frayed, worn, cracked
or oily.
Battery*:
Check the fluid level in each cell. It should be
between the MAX and MIN lines.
Vehicles operated in high temperatures or
under severe conditions require frequent
checks of the battery fluid level.
Exhaust system:
Make sure there are no loose supports, cracks
or holes. If the sound of the exhaust seems
unusual or there is a smell of exhaust fumes,
immediately locate the trouble and correct it.
8-4
Maintenance and do-it-yourself
Z
01.9.21/R50-D/V5
X
Page 222 of 288
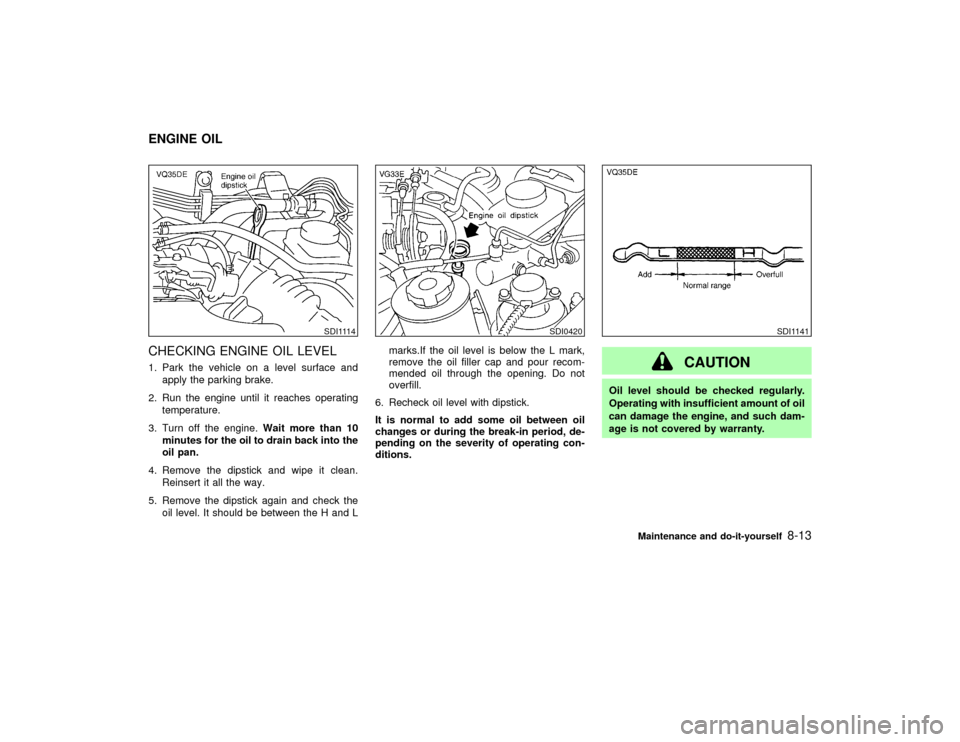
CHECKING ENGINE OIL LEVEL1. Park the vehicle on a level surface and
apply the parking brake.
2. Run the engine until it reaches operating
temperature.
3. Turn off the engine.Wait more than 10
minutes for the oil to drain back into the
oil pan.
4. Remove the dipstick and wipe it clean.
Reinsert it all the way.
5. Remove the dipstick again and check the
oil level. It should be between the H and Lmarks.If the oil level is below the L mark,
remove the oil filler cap and pour recom-
mended oil through the opening. Do not
overfill.
6. Recheck oil level with dipstick.
It is normal to add some oil between oil
changes or during the break-in period, de-
pending on the severity of operating con-
ditions.
CAUTION
Oil level should be checked regularly.
Operating with insufficient amount of oil
can damage the engine, and such dam-
age is not covered by warranty.
SDI1114
SDI0420
SDI1141
ENGINE OIL
Maintenance and do-it-yourself
8-13
Z
01.9.21/R50-D/V5
X
Page 223 of 288
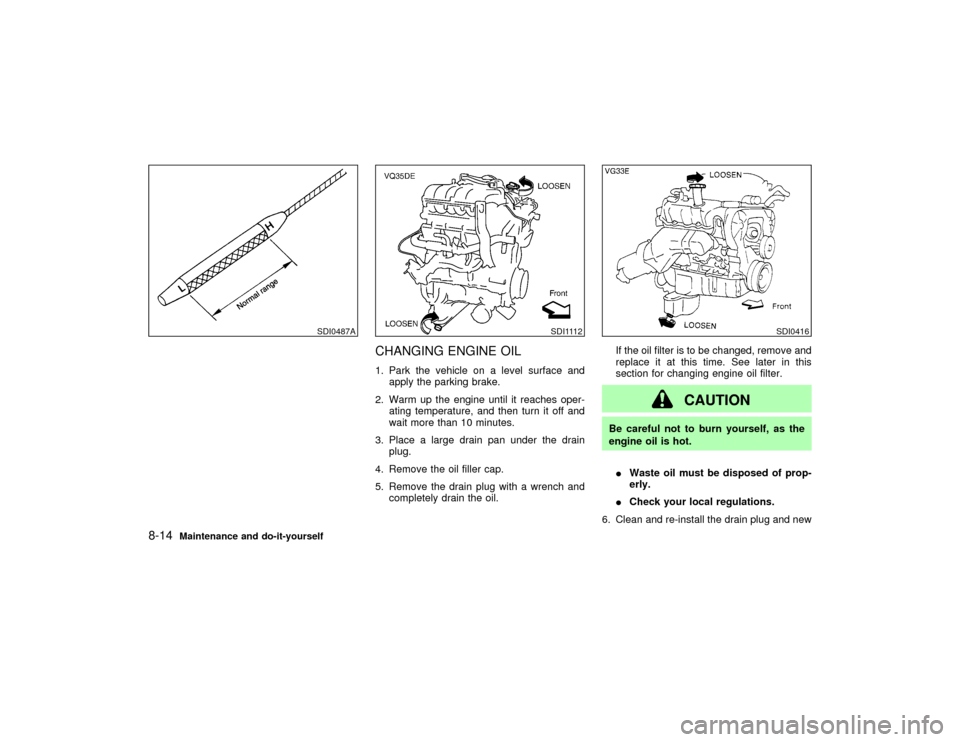
CHANGING ENGINE OIL1. Park the vehicle on a level surface and
apply the parking brake.
2. Warm up the engine until it reaches oper-
ating temperature, and then turn it off and
wait more than 10 minutes.
3. Place a large drain pan under the drain
plug.
4. Remove the oil filler cap.
5. Remove the drain plug with a wrench and
completely drain the oil.If the oil filter is to be changed, remove and
replace it at this time. See later in this
section for changing engine oil filter.
CAUTION
Be careful not to burn yourself, as the
engine oil is hot.
IWaste oil must be disposed of prop-
erly.
ICheck your local regulations.
6. Clean and re-install the drain plug and new
SDI0487A
SDI1112
SDI0416
8-14
Maintenance and do-it-yourself
Z
01.9.21/R50-D/V5
X
Page 224 of 288
washer. Securely tighten the drain plug with
a wrench. Do not use excessive force.
Drain plug tightening torque:
22 to 29 ft-lb (29 to 39 N×m)
7. Refill engine with recommended oil through
the oil filler opening, then install the oil filler
cap securely.
See ªCapacities and recommended
fuel/lubricantsº in the ª9. Technical and
consumer informationº section for drain and
refill capacity.
The drain and refill capacity depends on the
oil temperature and drain time. Use these
specifications for reference only. Always
use the dipstick to determine when the
proper amount of oil is in the engine.
8. Start the engine.
Check for leakage around the drain plug.
Correct as required.
9. Turn the engine off and wait more than 10
minutes. Check the oil level with the dip-
stick. Add engine oil if necessary.
WARNING
IProlonged and repeated contact withused engine oil may cause skin can-
cer.
ITry to avoid direct skin contact with
used oil. If skin contact is made, wash
thoroughly with soap or hand cleaner
as soon as possible.
IKeep used engine oil out of reach of
children.
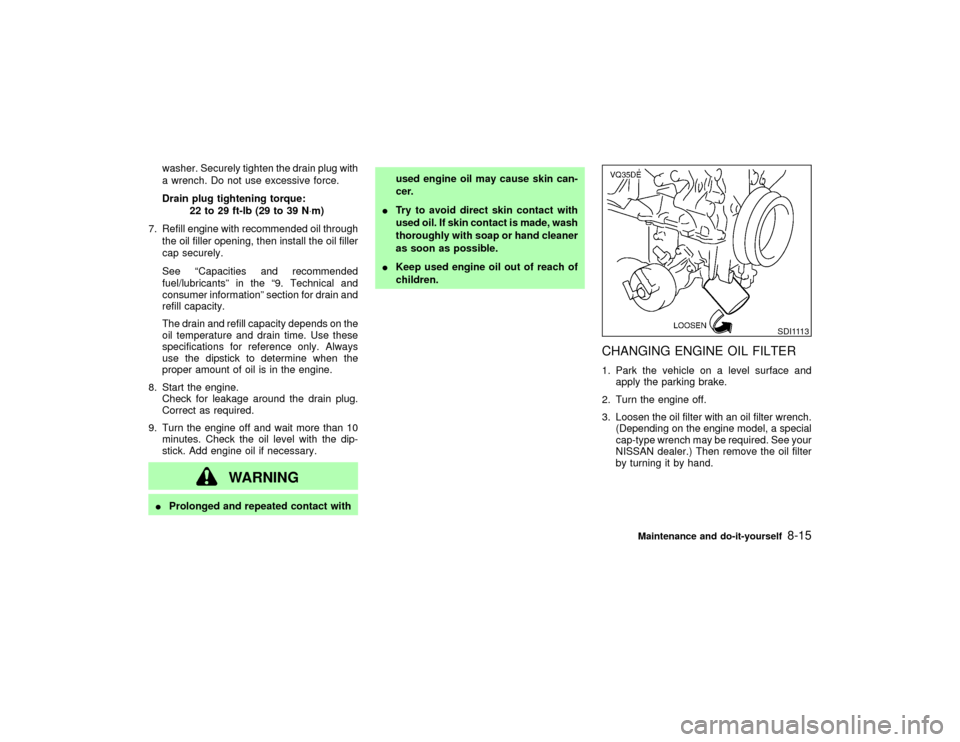
CHANGING ENGINE OIL FILTER1. Park the vehicle on a level surface and
apply the parking brake.
2. Turn the engine off.
3. Loosen the oil filter with an oil filter wrench.
(Depending on the engine model, a special
cap-type wrench may be required. See your
NISSAN dealer.) Then remove the oil filter
by turning it by hand.
SDI1113
Maintenance and do-it-yourself
8-15
Z
01.9.21/R50-D/V5
X
Page 254 of 288

Capacity (Approximate)
Recommended specifications
US
measureImp
measureLiter
Manual transmissionÐ Ð Ð API GL-4 Viscosity SAE 75W-85 only
Differential gear oil (exc. LSD)Ð Ð Ð API GL-5*1
Limited-slip differential (LSD) gear oil Ð Ð ÐOnly LSD gear oil:
API GL-5 and SAE 80W-90*2 approved for Nissan LSD*3
Automatic transmission fluid
Refill to the proper oil level according to the instruc-
tions in the ª8. Maintenance and do-it-yourselfº sec-
tion.Nissan Matic ªDº (Continental U.S. and Alaska) or Canada
NISSAN Automatic Transmission Fluid.*6
Power steering fluidGenuine Nissan PSF II or equivalent*7
All-mode 4WD transfer fluidNissan Matic ªDº (Continental U.S. and Alaska) or Canada
NISSAN Automatic Transmission Fluid.*8
Transfer fluidNissan Matic ªCº*6 or API GL-4*1
Brake and clutch fluidGenuine Nissan Brake Fluid*4 or equivalent
DOT 3 (U.S. F.M.V.S.S. No. 116)
Propeller shaft greaseÐ Ð Ð NLGI No. 2 (Molybdenum disulphide lithium soap base)
Multi-purpose greaseÐ Ð Ð NLGI No. 2 (Lithium soap base)
Air conditioning system refrigerantÐ Ð Ð HFC-134a (R-134a)*5
Air conditioning system lubricantsÐ Ð Ð Nissan A/C System Oil Type S or exact equivalent*5
*1: For further details, see recommended SAE viscosity number chart.
*2: SAE 90 is acceptable in temperatures above 0ÉF (þ18ÉC).
*3: Contact your NISSAN dealer for a list of approved oils.
*4: Available in mainland U.S. through your NISSAN dealer.
*5: See ªVehicle identificationº later in this section for air conditioner specification label.
*6: Never mix Nissan Matic ªCº and API GL-4 oil.
*7: Genuine Nissan PSF, Canada NISSAN Automatic Transmission Fluid, DEXRON
TMIII/MERCON
TM
or equivalent ATF may also be used.
*8: Outside the continental U.S. and Alaska contact an authorized NISSAN dealer for more information regarding suitable fluids, including recommended brand(s) of
DEXRON
TMIII/MERCON
TM
Automatic Transmission Fluid.
Technical and consumer information
9-3
Z
01.9.21/R50-D/V5
X
Page 257 of 288

ENGINE OIL AND OIL FILTER
RECOMMENDATION
Selecting the correct oilIt is essential to choose the correct quality, and
viscosity oil to ensure satisfactory engine life
and performance. Nissan recommends the
use of a low friction oil (energy conserving oil)
in order to improve fuel economy and con-
serve energy. Oils which do not have the
specified quality label should not be used as
they could cause engine damage.
Only those engine oils with the American Pe-
troleum Institute (API) CERTIFICATIONMARK on the front of the container should be
used. This type of oil supersedes the existing
API SG, SH, or SJ and Energy Conserving I &
II categories.
If you cannot find engine oil with the API
CERTIFICATION MARK, use an API grade
SG/SH, Energy ConservingI&IIorAPIgrade
SJ, Energy Conserving oil. An oil with a single
designation SG or SH, or in combination with
other categories (for example, SG/CC or
SG/CD) may also be used if one with the API
CERTIFICATION MARK cannot be found. An
ILSAC grade GF-I & GF-II oil can also be used.
Mineral based or synthetic type oils may beused in your NISSAN vehicle. These oils must
however, meet the API quality and SAE vis-
cosity ratings specified for your vehicle. Do not
mix mineral based and synthetic type oils in
the engine at the same time.
Oil additivesNISSAN does not recommend the use of oil
additives. The use of an oil additive is not
necessary when the proper oil type is used
and maintenance intervals are followed.
Oil which may contain foreign matter or has
been previously used should not be used.Oil viscosityThe engine oil viscosity or thickness changes
with temperature. Because of this, it is impor-
tant that the engine oil viscosity be selected
based on the temperatures at which the ve-
hicle will be operated before the next oil
change. The chart recommended SAE viscos-
ity number shows the recommended oil vis-
cosities for the expected ambient tempera-
tures. Choosing an oil viscosity other than that
recommended could cause serious engine
damage.Selecting the correct oil filterYour new vehicle is equipped with a high-
quality genuine Nissan oil filter. When replac-
STI0293
9-6
Technical and consumer information
Z
01.9.21/R50-D/V5
X