automatic transmission NISSAN PATHFINDER 2008 R51 / 3.G Quick Reference Guide
[x] Cancel search | Manufacturer: NISSAN, Model Year: 2008, Model line: PATHFINDER, Model: NISSAN PATHFINDER 2008 R51 / 3.GPages: 36, PDF Size: 3.11 MB
Page 5 of 36
tURN iN g the eN gi Ne OFF
Shift the transmission into P (Park).
Turn the ignition knob to the LOCK position.
An audible warning chime will sound when exiting the vehicle if the ignition knob is
not completely turned to the OFF position.
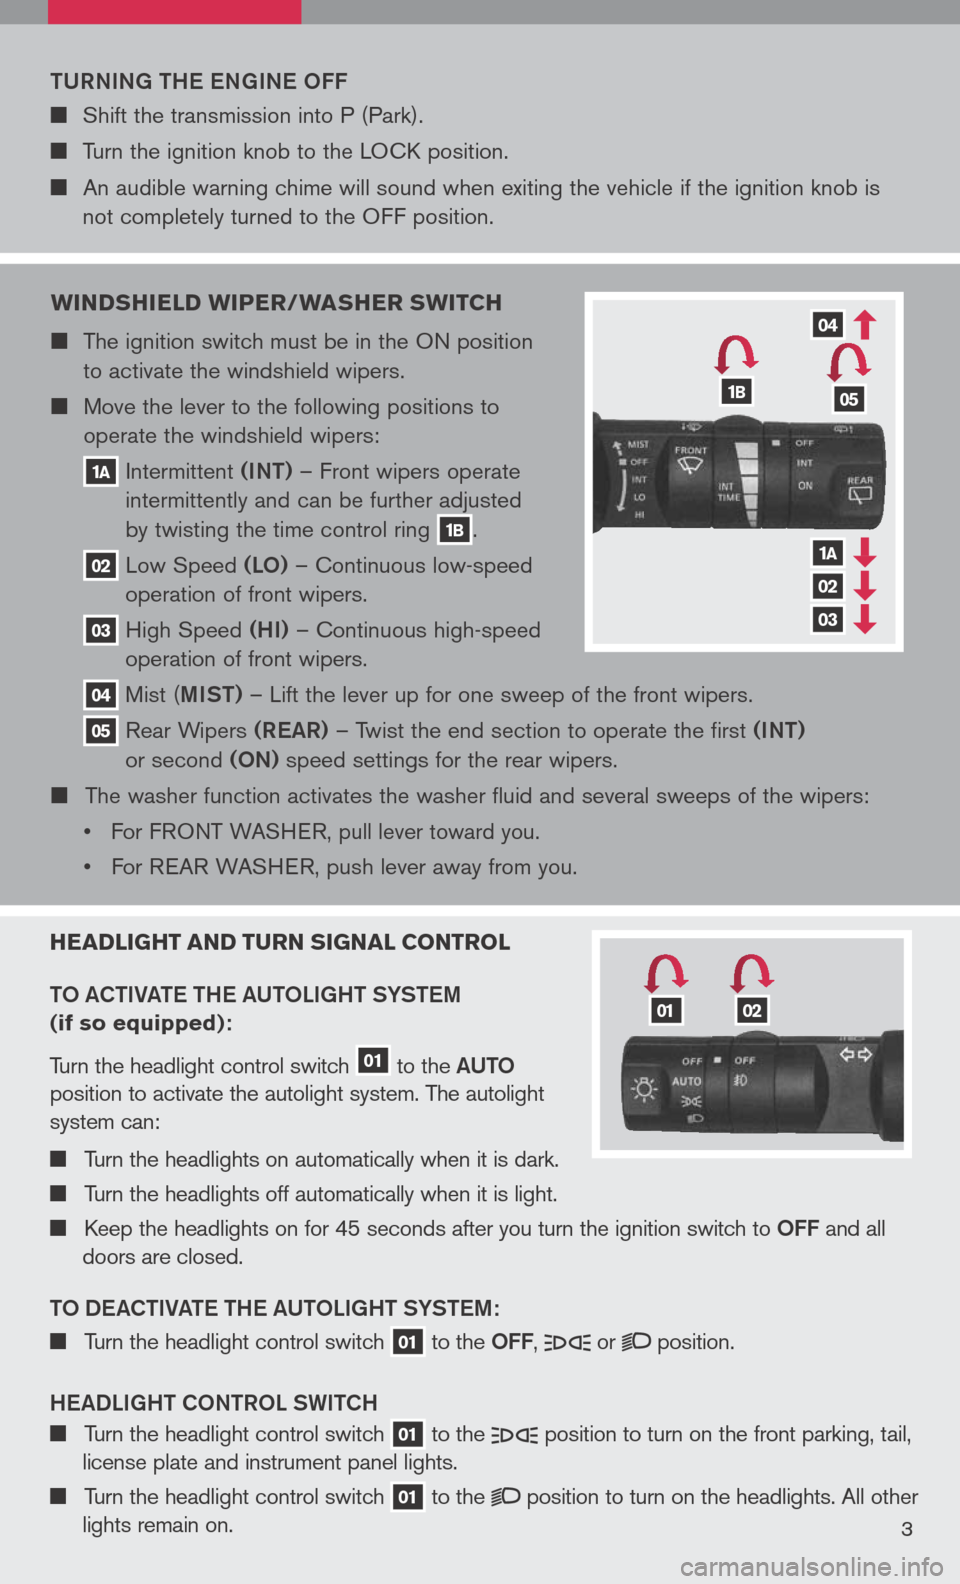
W indshield W iper/Washer sW itch
The ignition switch must be in the ON position
to activate the windshield wipers.
Move the lever to the following positions to
operate the windshield wipers:
1a Intermittent (iNt) – Front wipers operate
intermittently and can be further adjusted
by twisting the time control ring 1b.
02 Low Speed (LO) – Continuous low-speed
operation of front wipers.
03 High Speed (hi) – Continuous high-speed
operation of front wipers.
04 Mist ( miSt) – Lift the lever up for one sweep of the front wipers.
05 Rear Wipers (ReaR) – Twist the end section to operate the first (iNt)
or second (ON) speed settings for the rear wipers.
The washer function activates the washer fluid and several sweeps of the wipers:
• For F
RONT WASHER, pull lever toward you.
• For REAR WASHER, push lever away from you.
headlight and turn signal control
t O aC ti Vate the a U tOL ight SYStem
(if so equipped):
Turn the headlight control switch 01 to the aU tO
position to activate the autolight system. The autolight
system can:
Turn the headlights on automatically when it is dark.
Turn the headlights off automatically when it is light.
Keep the headlights on for 45 seconds after you turn the ignition switch to OFF and all
doors are closed.
t O D eaCti Vate the a U tOL ight SYStem:
Turn the headlight control switch 01 to the OFF, or position.
hea DLight CON tROL SW itCh
Turn the headlight control switch 01 to the position to turn on the front parking, tail,
license plate and instrument panel lights.
Turn the headlight control switch 01 to the position to turn on the headlights. All other
lights remain on.3
1b05
04
03
02
1a
0102
Page 12 of 36
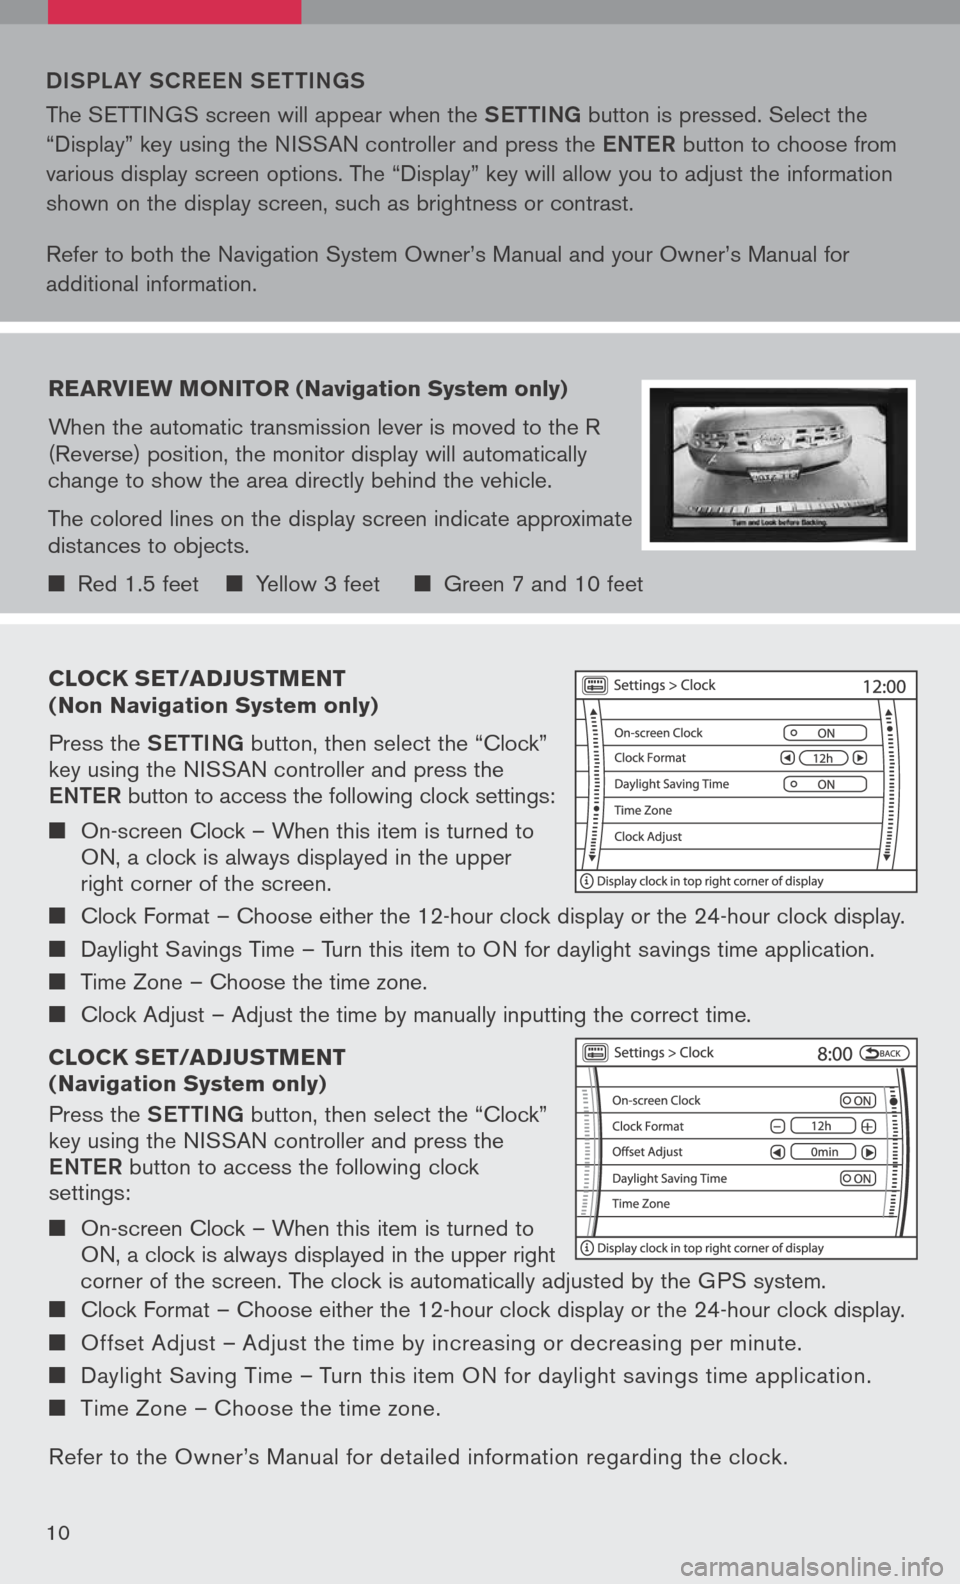
clock set/ad Just Ment
( n on navigation system only)
Press the Setti Ng button, then select the “Clock” key using the NISSAN controller and press the
eN te R button to access the following clock settings:
On-screen Clock – When this item is turned to ON, a clock is always displayed in the upper right corner of the screen.
Clock Format – Choose either the 12-hour clock display or the 24-hour clock display.
Daylight Savings Time – Turn this item to ON for daylight savings time application.
Time Zone – Choose the time zone.
Clock Adjust – Adjust the time by manually inputting the correct time.
clock set/ad Just Ment
( n avigation system only)
Press the Setti Ng button, then select the “Clock” key using the NISSAN controller and press the
eNte R button to access the following clock settings:
On-screen Clock – When this item is turned to ON, a clock is always displayed in the upper right
corner of the screen. The clock is automatically adjusted by the GPS system.
Clock Format – Choose either the 12-hour clock display or the 24-hour clock display.
Offset Adjust – Adjust the time by increasing or decreasing per minute.
Daylight Saving Time – Turn this item ON for daylight savings time application.
Time Zone – Choose the time zone.
Refer to the Owner’s Manual for detailed information regarding the clock.
DiSPL aY SCR eeN S etti Ng S
The SETTINGS screen will appear when the Setti Ng button is pressed. Select the
“Display” key using the NISSAN controller and press the eNte R button to choose from
various display screen options. The “Display” key will allow you to adjust the information
shown on the display screen, such as brightness or contrast.
Refer to both the Navigation System Owner’s Manual and your Owner’s Manual for
additional information.
rearvie W Monitor (n avigation system only)
When the automatic transmission lever is moved to the R (Reverse) position, the monitor display will automatically change to show the area directly behind the vehicle.
The colored lines on the display screen indicate approximate distances to objects.
Red 1.5 feet Yellow 3 feet Green 7 and 10 feet
10
Page 13 of 36
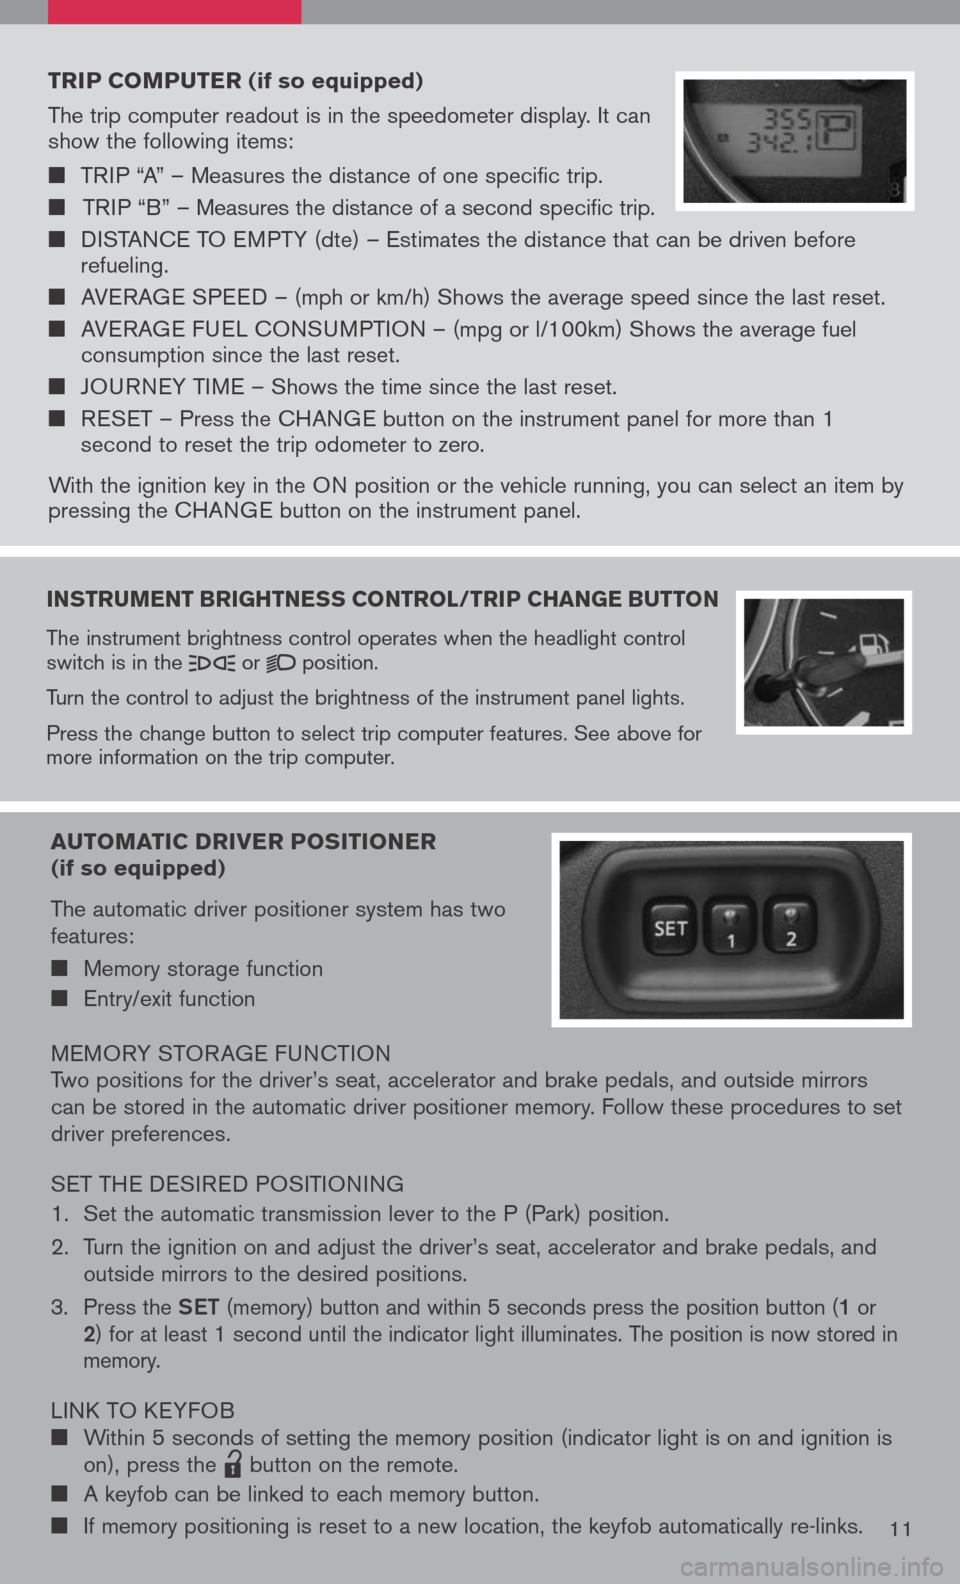
instruMent brightness control /trip change button
The instrument brightness control operates when the headlight control switch is in the or position.
Turn the control to adjust the brightness of the instrument panel lights.
Press the change button to select trip computer features. See above for more information on the trip computer.
trip coMputer (if so equipped)
The trip computer readout is in the speedometer display. It can show the following items:
TRIP “A” – Measures the distance of one specific trip.
TRIP “B” – Measures the distance of a second specific trip.
DISTANCE TO EMPTY (dte) – Estimates the distance that can be driven before refueling.
AVERAGE SPEED – (mph or km/h) Shows the average speed since the last reset.
AVERAGE FUEL CONSUMPTION – (mpg or l/100km) Shows the average fuel consumption since the last reset.
JOURNEY TIME – Shows the time since the last reset.
RESET – Press the CHANGE button on the instrument panel for more than 1 second to reset the trip odometer to zero.
With the ignition key in the ON position or the vehicle running, you can select an item by pressing the CHANGE button on the instrument panel.
auto Matic driver positioner (if so equipped)
The automatic driver positioner system has two features:
Memory storage function
Entry/exit function
MEMORY STOR AGE FUNCTIONTwo positions for the driver’s seat, accelerator and brake pedals, and outside mirrors can be stored in the automatic driver positioner memory. Follow these procedures to set driver preferences.
SET THE DESIRED POSITIONING
1. Set the automatic transmission lever to the P (Park) position.
2. Turn the ignition on and adjust the driver’s seat, accelerator and brake pedals, and
outside mirrors to the desired positions.
3. Press the Set (memory) button and within 5 seconds press the position button (1 or 2) for at least 1 second until the indicator light illuminates. The position is now stored in memory.
LINK TO KEYFOB Within 5 seconds of setting the memory position (indicator light is on and ignition is on), press the
lpd0151
button on the remote.
A keyfob can be linked to each memory button.
If memory positioning is reset to a new location, the keyfob automatically re-links.11
Page 14 of 36
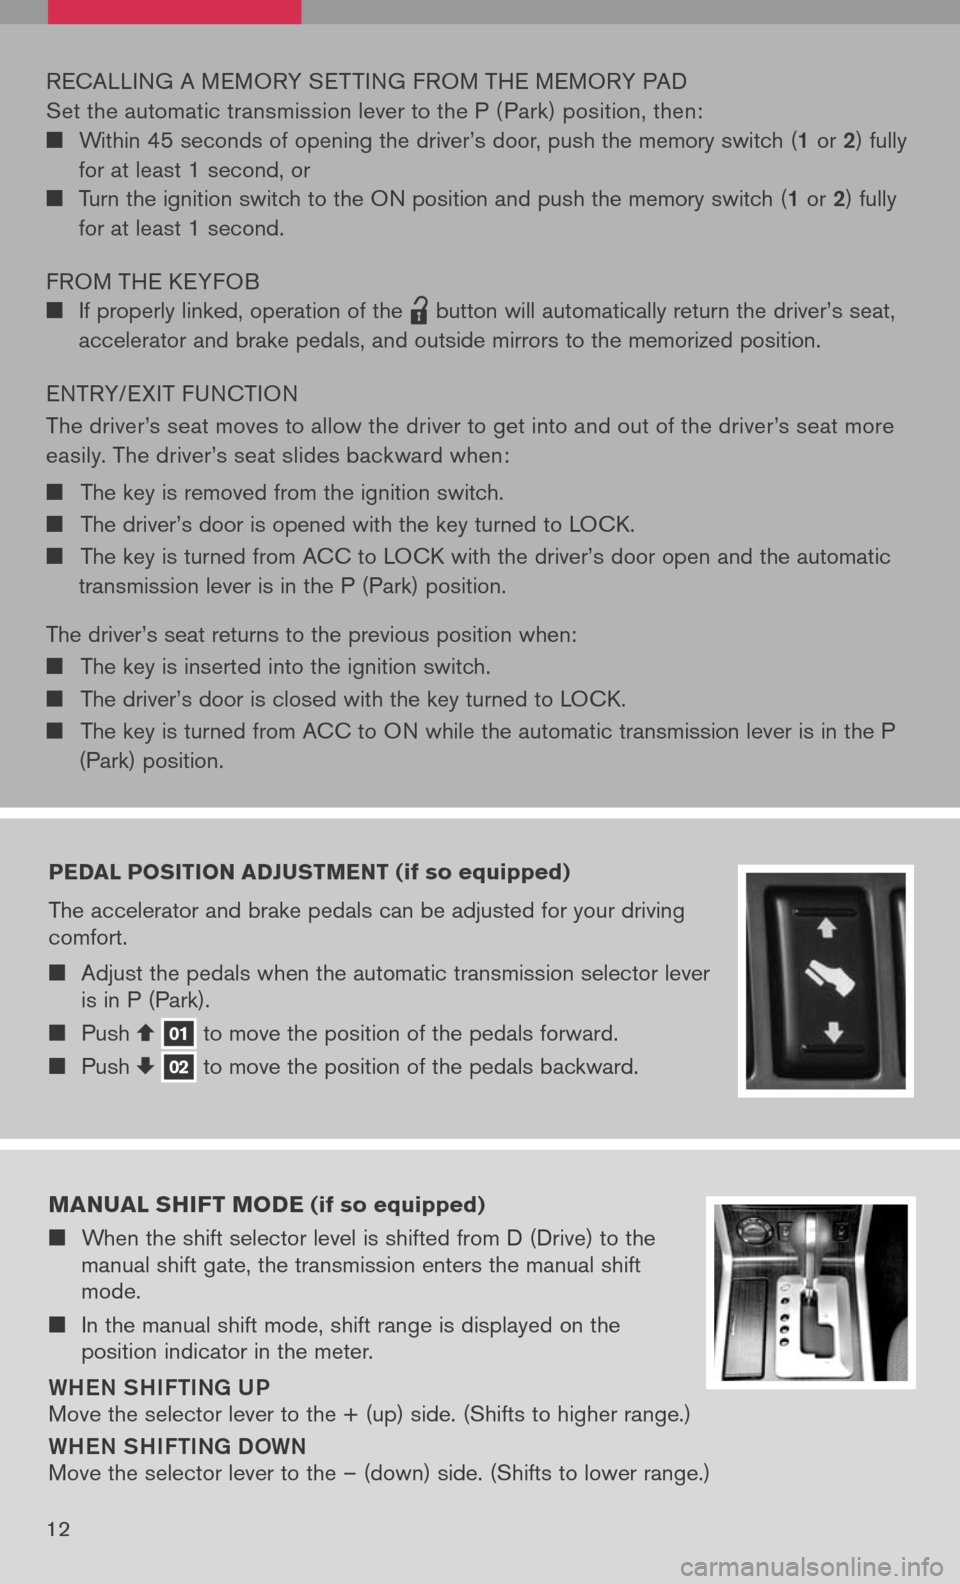
pedal position adJust Ment (if so equipped)
The accelerator and brake pedals can be adjusted for your driving comfort.
Adjust the pedals when the automatic transmission selector lever is in P (Park).
Push 01 to move the position of the pedals forward. Push 02 to move the position of the pedals backward.
RECALLING A MEMORY SET TING FROM THE MEMORY PAD
Set the automatic transmission lever to the P ( Park) position, then:
Within 45 seconds of opening the driver’s door, push the memory switch (1 or 2) fully
for at least 1 second, or
Turn the ignition switch to the ON position and push the memory switch (1 or 2) fully
for at least 1 second.
FROM THE KEYFOB
If properly linked, operation of the
lpd0151
button will automatically return the driver’s seat,
accelerator and brake pedals, and outside mirrors to the memorized position.
ENTRY/ EXIT FUNCTION
The driver’s seat moves to allow the driver to get into and out of the driver’s seat more
easily. The driver’s seat slides backward when:
The key is removed from the ignition switch.
The driver’s door is opened with the key turned to LOCK.
The key is turned from ACC to LOCK with the driver’s door open and the automatic
transmission lever is in the P (Park) position.
The driver’s seat returns to the previous position when:
The key is inserted into the ignition switch.
The driver’s door is closed with the key turned to LOCK.
The key is turned from ACC to ON while the automatic transmission lever is in the P
(Park) position.
M anual shiFt M ode (if so equipped)
When the shift selector level is shifted from D (Drive) to the manual shift gate, the transmission enters the manual shift mode.
In the manual shift mode, shift range is displayed on the position indicator in the meter.
Whe N Shi Fti Ng U P
Move the selector lever to the + (up) side. (Shifts to higher range.)
WheN Shi Fti Ng D OWN
Move the selector lever to the – (down) side. (Shifts to lower range.)
12
Page 15 of 36
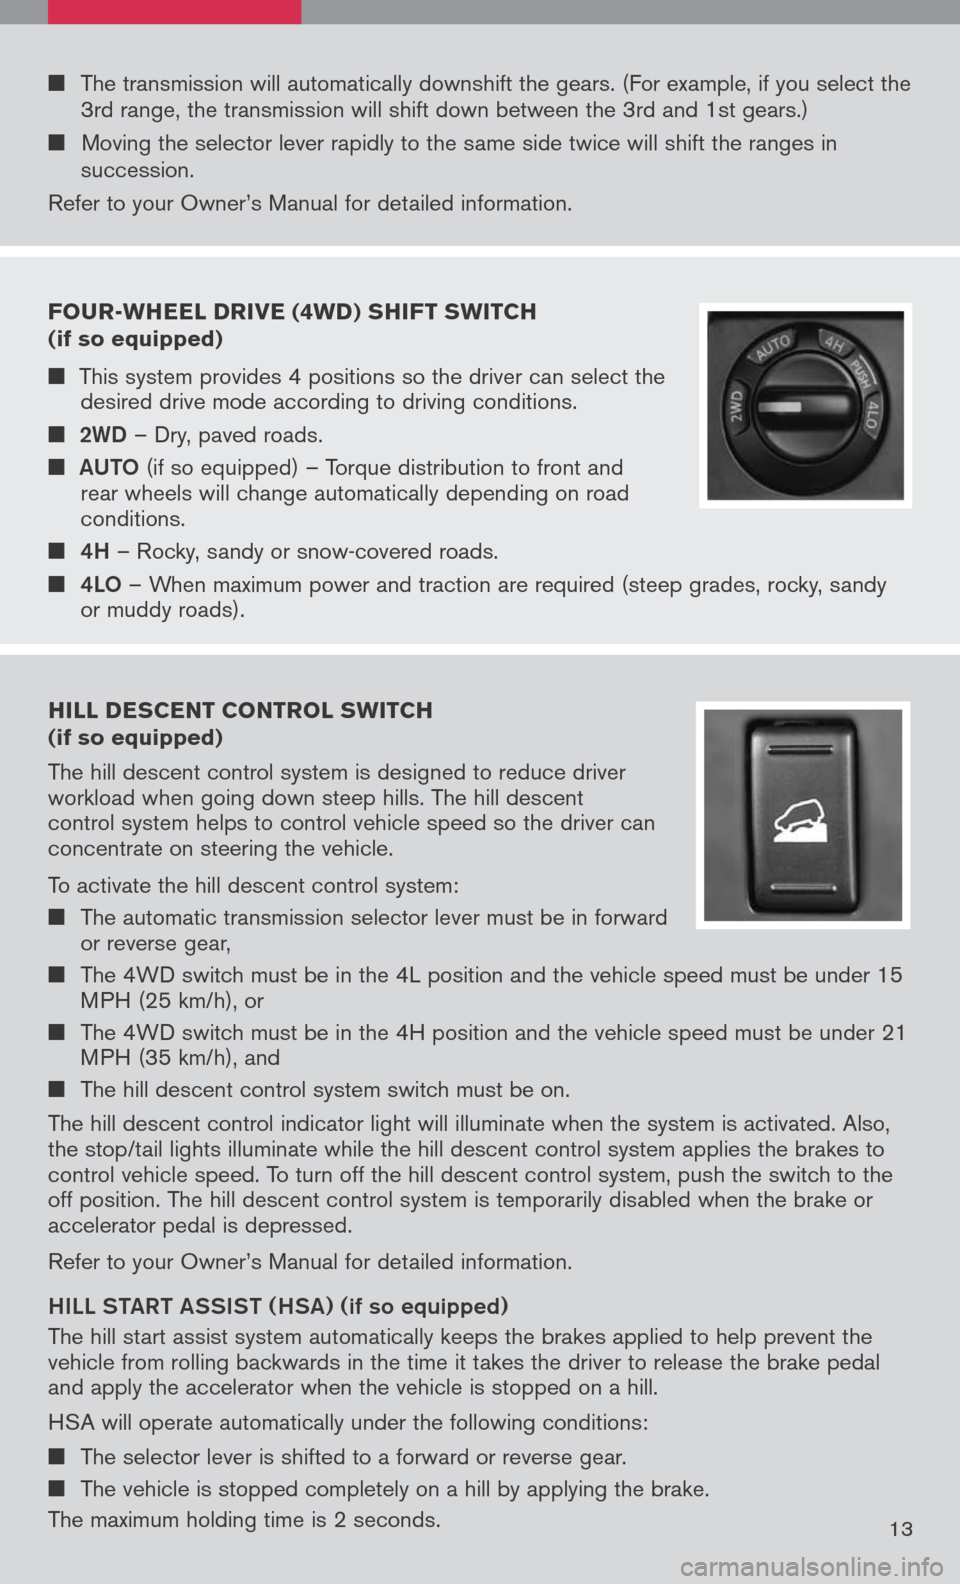
Four -Wheel drive (4W d) shi Ft sW itch
(if so equipped)
This system provides 4 positions so the driver can select the desired drive mode according to driving conditions.
2WD – Dry, paved roads.
aUt O
(if so equipped) – Torque distribution to front and rear wheels will change automatically depending on road conditions.
4h – Rocky, sandy or snow-covered roads.
4LO – When maximum power and traction are required (steep grades, rocky, sandy or muddy roads).
hill descent control s W itch (if so equipped)
The hill descent control system is designed to reduce driver workload when going down steep hills. The hill descent control system helps to control vehicle speed so the driver can concentrate on steering the vehicle.
To activate the hill descent control system:
The automatic transmission selector lever must be in forward or reverse gear,
The 4WD switch must be in the 4L position and the vehicle speed must be under 15 MPH (25 km/h), or
The 4WD switch must be in the 4H position and the vehicle speed must be under 21 MPH (35 km/h), and
The hill descent control system switch must be on.
The hill descent control indicator light will illuminate when the system is activated. Also, the stop/tail lights illuminate while the hill descent control system applies the brakes to control vehicle speed. To turn off the hill descent control system, push the switch to the off position. The hill descent control system is temporarily disabled when the brake or accelerator pedal is depressed.
Refer to your Owner’s Manual for detailed information.
hiLL Sta Rt aSS iS t ( hSa) (
if so equipped)
The hill start assist system automatically keeps the brakes applied to help prevent the vehicle from rolling backwards in the time it takes the driver to release the brake pedal and apply the accelerator when the vehicle is stopped on a hill.
HSA will operate automatically under the following conditions:
The selector lever is shifted to a forward or reverse gear.
The vehicle is stopped completely on a hill by applying the brake.
The maximum holding time is 2 seconds.13
The transmission will automatically downshift the gears. (For example, if you select the 3rd range, the transmission will shift down between the 3rd and 1st gears.)
Moving the selector lever rapidly to the same side twice will shift the ranges in succession.
Refer to your Owner’s Manual for detailed information.