trunk NISSAN PATHFINDER 2008 R51 / 3.G Quick Reference Guide
[x] Cancel search | Manufacturer: NISSAN, Model Year: 2008, Model line: PATHFINDER, Model: NISSAN PATHFINDER 2008 R51 / 3.GPages: 36, PDF Size: 3.11 MB
Page 4 of 36

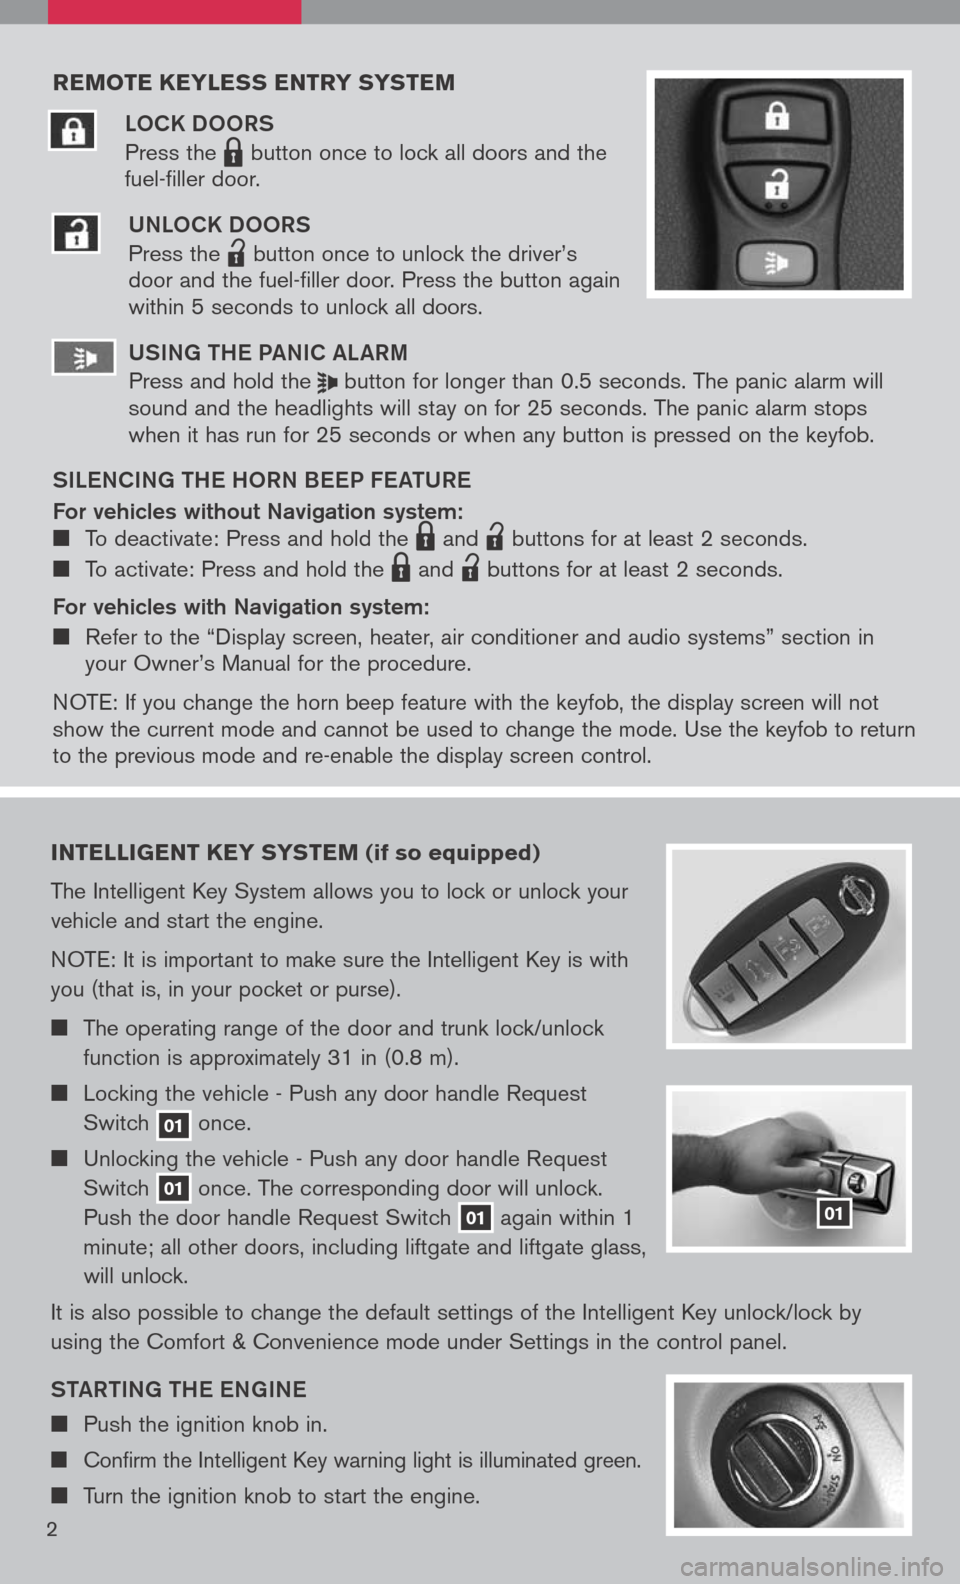
reMote keyless entry systeM
LOCK DOORS
Press the LPD0150 button once to lock all doors and the
fuel-filler door.
UNLOCK DOORS
Press the
lpd0151
button once to unlock the driver’s door and the fuel-filler door. Press the button again within 5 seconds to unlock all doors.
U SiN g the Pa NiC aL aR m
Press and hold the button for longer than 0.5 seconds. The panic alarm will sound and the headlights will stay on for 25 seconds. The panic alarm stops when it has run for 25 seconds or when any button is pressed on the keyfob.
S iL e NC iN g the h ORN B eeP F eat URe
For vehicles without Navigation system: To deactivate: Press and hold the LPD0150 and
lpd0151
buttons for at least 2 seconds.
To activate: Press and hold the LPD0150 and
lpd0151
buttons for at least 2 seconds.
For vehicles with Navigation system:
Refer to the “Display screen, heater, air conditioner and audio systems” section in your Owner’s Manual for the procedure.
N OTE: If you change the horn beep feature with the keyfob, the display screen will not show the current mode and cannot be used to change the mode. Use the keyfob to return to the previous mode and re-enable the display screen control.
intelligent key syste M (if so equipped)
The Intelligent Key System allows you to lock or unlock your
vehicle and start the engine.
NOTE: It is important to make sure the Intelligent Key is with
you (that is, in your pocket or purse).
The operating range of the door and trunk lock/unlock
function is approximately 31 in (0.8 m).
Locking the vehicle - Push any door handle Request
Switch 01 once.
Unlocking the vehicle - Push any door handle Request
Switch 01 once. The corresponding door will unlock.
Push the door handle Request Switch 01 again within 1
minute; all other doors, including liftgate and liftgate glass,
will unlock.
It is also possible to change the default settings of the Intelligent Key unlock/lock by
using the Comfort & Convenience mode under Settings in the control panel.
Sta Rti Ng the eN gi Ne
Push the ignition knob in.
Confirm the Intelligent Key warning light is illuminated green.
Turn the ignition knob to start the engine.
01
2
Page 18 of 36

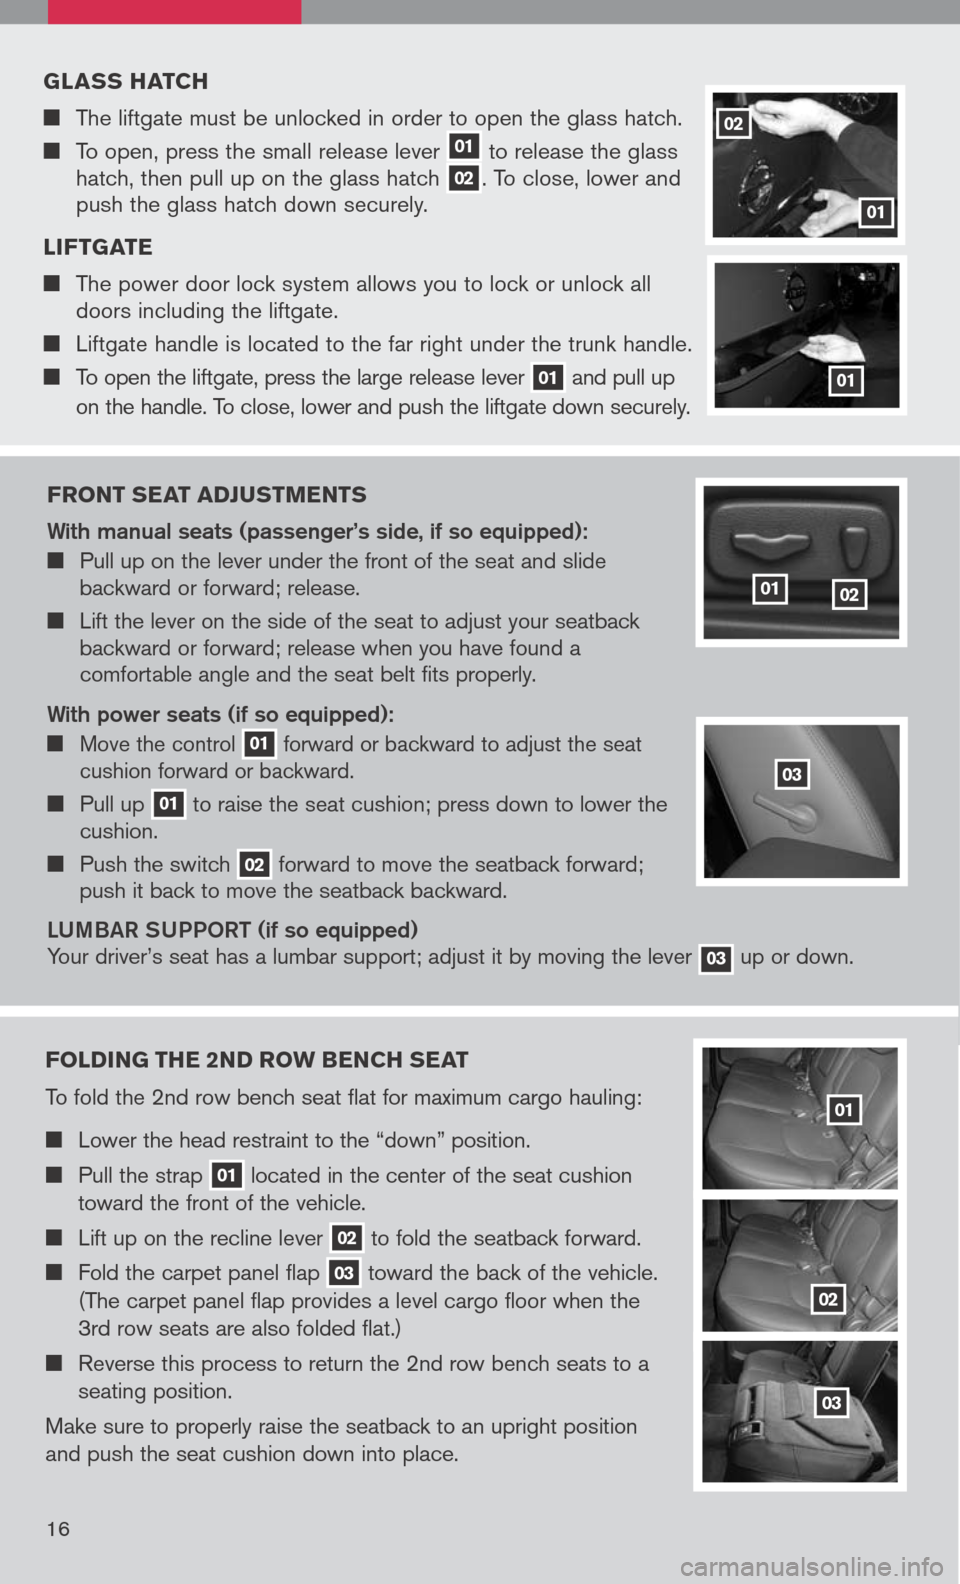
Front seat ad Just Ments
With manual seats (passenger’s side, if so equipped):
Pull up on the lever under the front of the seat and slide backward or forward; release.
Lift the lever on the side of the seat to adjust your seatback backward or forward; release when you have found a comfortable angle and the seat belt fits properly.
With power seats (if so equipped):
Move the control 01 forward or backward to adjust the seat cushion forward or backward.
Pull up 01 to raise the seat cushion; press down to lower the cushion.
Push the switch 02 forward to move the seatback forward; push it back to move the seatback backward.
LU mBaR SUPPOR t (if so equipped)
Your driver’s seat has a lumbar support; adjust it by moving the lever 03 up or down.
0102
g lass hatch
The liftgate must be unlocked in order to open the glass hatch.
To open, press the small release lever 01 to release the glass hatch, then pull up on the glass hatch 02. To close, lower and push the glass hatch down securely.
l iF tgate
The power door lock system allows you to lock or unlock all doors including the liftgate.
Liftgate handle is located to the far right under the trunk handle.
To open the liftgate, press the large release lever 01 and pull up
on the handle. To close, lower and push the liftgate down securely.
01
02
01
Folding the 2nd ro W bench seat
To fold the 2nd row bench seat flat for maximum cargo hauling:
Lower the head restraint to the “down” position.
Pull the strap 01 located in the center of the seat cushion
toward the front of the vehicle.
Lift up on the recline lever 02 to fold the seatback forward.
Fold the carpet panel flap 03 toward the back of the vehicle.
(The carpet panel flap provides a level cargo floor when the
3rd row seats are also folded flat.)
Reverse this process to return the 2nd row bench seats to a
seating position.
Make sure to properly raise the seatback to an upright position
and push the seat cushion down into place.
01
02
03
03
16