driver NISSAN PATHFINDER 2011 Owner´s Manual
[x] Cancel search | Manufacturer: NISSAN, Model Year: 2011, Model line: PATHFINDER, Model: NISSAN PATHFINDER 2011Pages: 474, PDF Size: 5.08 MB
Page 72 of 474
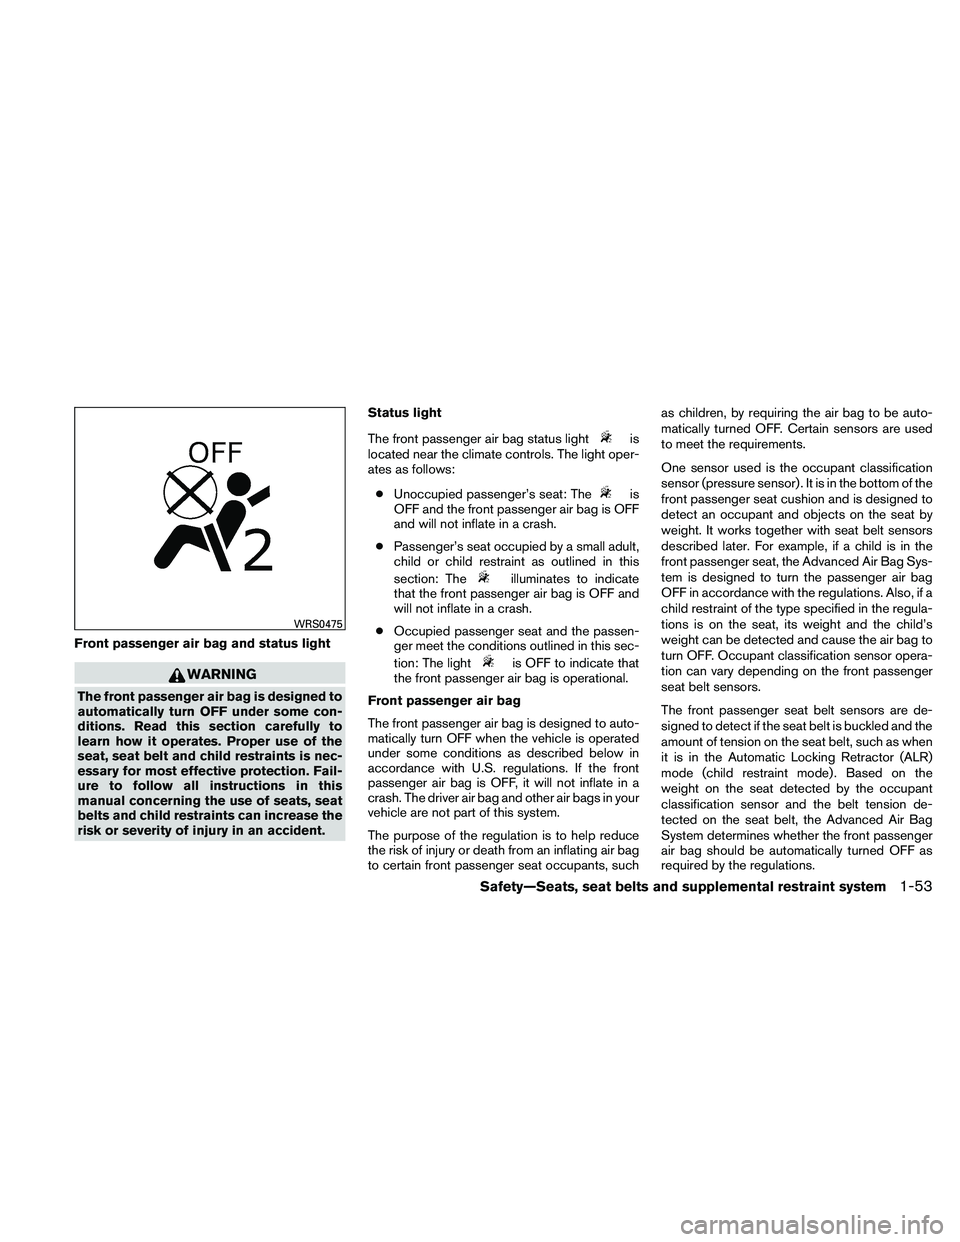
Front passenger air bag and status light
WARNING
The front passenger air bag is designed to
automatically turn OFF under some con-
ditions. Read this section carefully to
learn how it operates. Proper use of the
seat, seat belt and child restraints is nec-
essary for most effective protection. Fail-
ure to follow all instructions in this
manual concerning the use of seats, seat
belts and child restraints can increase the
risk or severity of injury in an accident.Status light
The front passenger air bag status light
is
located near the climate controls. The light oper-
ates as follows:
● Unoccupied passenger’s seat: The
is
OFF and the front passenger air bag is OFF
and will not inflate in a crash.
● Passenger’s seat occupied by a small adult,
child or child restraint as outlined in this
section: The
illuminates to indicate
that the front passenger air bag is OFF and
will not inflate in a crash.
● Occupied passenger seat and the passen-
ger meet the conditions outlined in this sec-
tion: The light
is OFF to indicate that
the front passenger air bag is operational.
Front passenger air bag
The front passenger air bag is designed to auto-
matically turn OFF when the vehicle is operated
under some conditions as described below in
accordance with U.S. regulations. If the front
passenger air bag is OFF, it will not inflate in a
crash. The driver air bag and other air bags in your
vehicle are not part of this system.
The purpose of the regulation is to help reduce
the risk of injury or death from an inflating air bag
to certain front passenger seat occupants, such as children, by requiring the air bag to be auto-
matically turned OFF. Certain sensors are used
to meet the requirements.
One sensor used is the occupant classification
sensor (pressure sensor) . It is in the bottom of the
front passenger seat cushion and is designed to
detect an occupant and objects on the seat by
weight. It works together with seat belt sensors
described later. For example, if a child is in the
front passenger seat, the Advanced Air Bag Sys-
tem is designed to turn the passenger air bag
OFF in accordance with the regulations. Also, if a
child restraint of the type specified in the regula-
tions is on the seat, its weight and the child’s
weight can be detected and cause the air bag to
turn OFF. Occupant classification sensor opera-
tion can vary depending on the front passenger
seat belt sensors.
The front passenger seat belt sensors are de-
signed to detect if the seat belt is buckled and the
amount of tension on the seat belt, such as when
it is in the Automatic Locking Retractor (ALR)
mode (child restraint mode) . Based on the
weight on the seat detected by the occupant
classification sensor and the belt tension de-
tected on the seat belt, the Advanced Air Bag
System determines whether the front passenger
air bag should be automatically turned OFF as
required by the regulations.
WRS0475
Safety—Seats, seat belts and supplemental restraint system1-53
Page 75 of 474
Front seat-mounted side-impact
supplemental air bag and roof-
mounted curtain side-impact and
rollover supplemental air bag systems
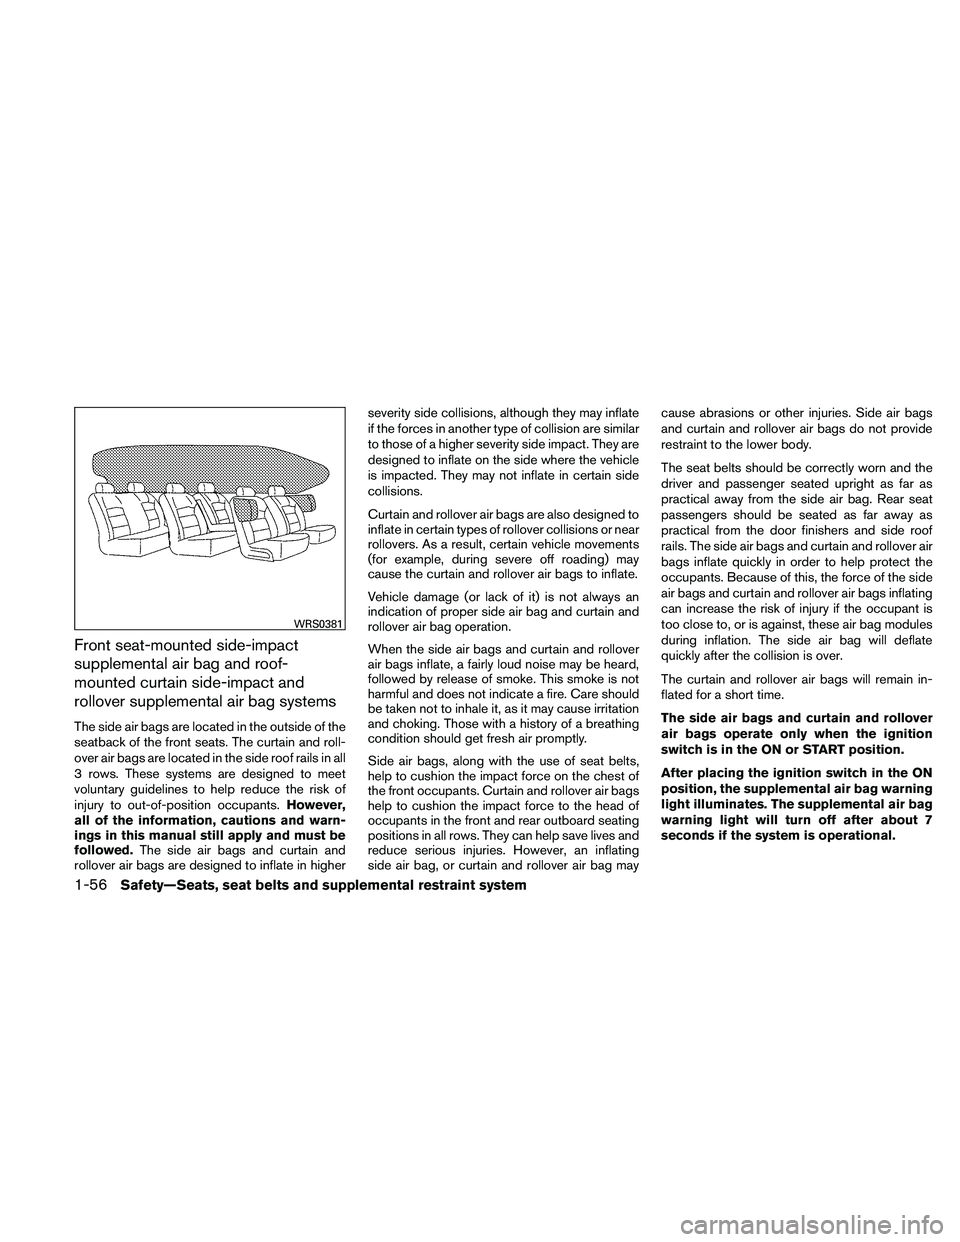
The side air bags are located in the outside of the
seatback of the front seats. The curtain and roll-
over air bags are located in the side roof rails in all
3 rows. These systems are designed to meet
voluntary guidelines to help reduce the risk of
injury to out-of-position occupants.However,
all of the information, cautions and warn-
ings in this manual still apply and must be
followed. The side air bags and curtain and
rollover air bags are designed to inflate in higher severity side collisions, although they may inflate
if the forces in another type of collision are similar
to those of a higher severity side impact. They are
designed to inflate on the side where the vehicle
is impacted. They may not inflate in certain side
collisions.
Curtain and rollover air bags are also designed to
inflate in certain types of rollover collisions or near
rollovers. As a result, certain vehicle movements
(for example, during severe off roading) may
cause the curtain and rollover air bags to inflate.
Vehicle damage (or lack of it) is not always an
indication of proper side air bag and curtain and
rollover air bag operation.
When the side air bags and curtain and rollover
air bags inflate, a fairly loud noise may be heard,
followed by release of smoke. This smoke is not
harmful and does not indicate a fire. Care should
be taken not to inhale it, as it may cause irritation
and choking. Those with a history of a breathing
condition should get fresh air promptly.
Side air bags, along with the use of seat belts,
help to cushion the impact force on the chest of
the front occupants. Curtain and rollover air bags
help to cushion the impact force to the head of
occupants in the front and rear outboard seating
positions in all rows. They can help save lives and
reduce serious injuries. However, an inflating
side air bag, or curtain and rollover air bag may
cause abrasions or other injuries. Side air bags
and curtain and rollover air bags do not provide
restraint to the lower body.
The seat belts should be correctly worn and the
driver and passenger seated upright as far as
practical away from the side air bag. Rear seat
passengers should be seated as far away as
practical from the door finishers and side roof
rails. The side air bags and curtain and rollover air
bags inflate quickly in order to help protect the
occupants. Because of this, the force of the side
air bags and curtain and rollover air bags inflating
can increase the risk of injury if the occupant is
too close to, or is against, these air bag modules
during inflation. The side air bag will deflate
quickly after the collision is over.
The curtain and rollover air bags will remain in-
flated for a short time.
The side air bags and curtain and rollover
air bags operate only when the ignition
switch is in the ON or START position.
After placing the ignition switch in the ON
position, the supplemental air bag warning
light illuminates. The supplemental air bag
warning light will turn off after about 7
seconds if the system is operational.
WRS0381
1-56Safety—Seats, seat belts and supplemental restraint system
Page 83 of 474
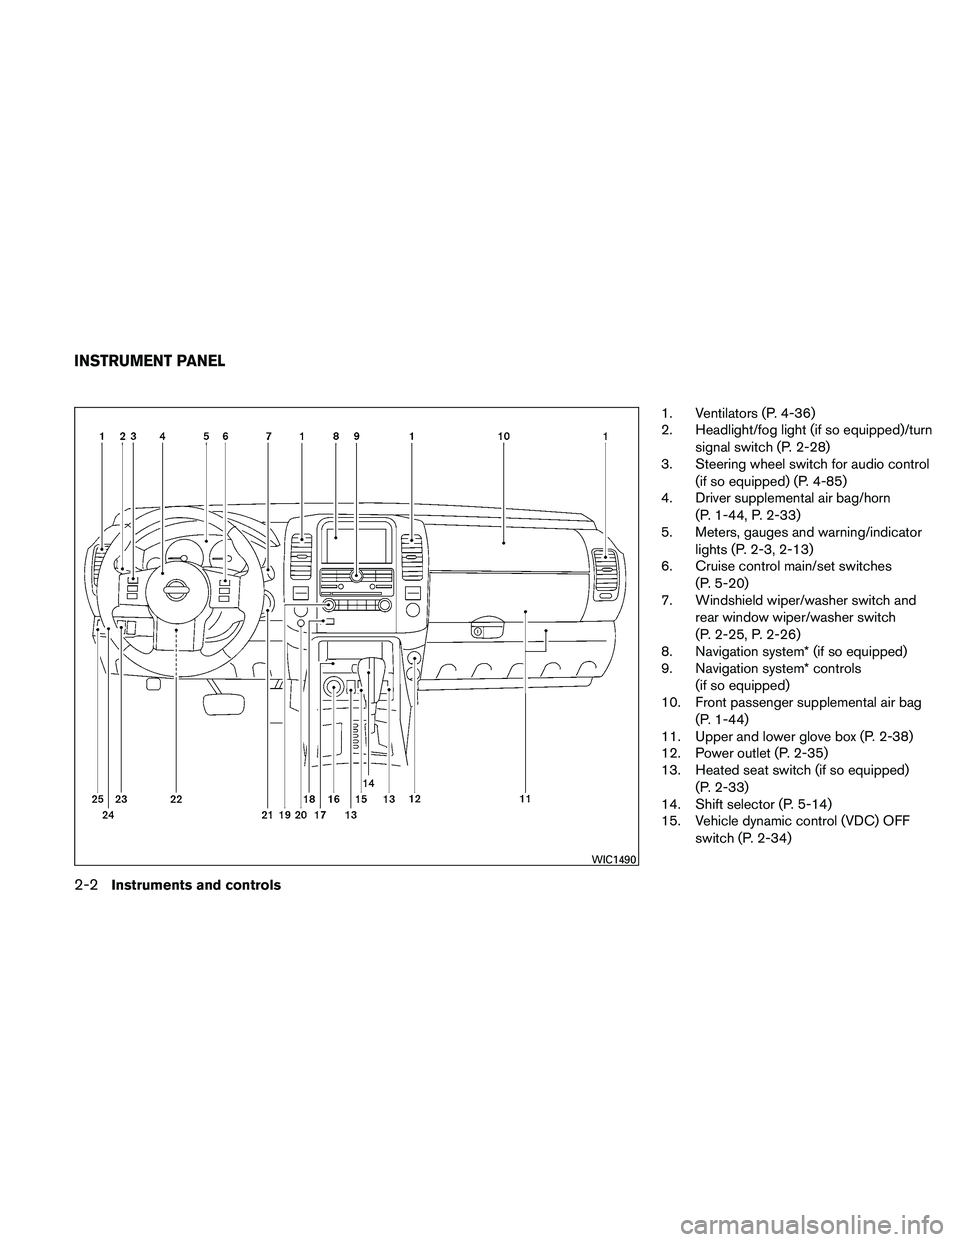
1. Ventilators (P. 4-36)
2. Headlight/fog light (if so equipped)/turnsignal switch (P. 2-28)
3. Steering wheel switch for audio control
(if so equipped) (P. 4-85)
4. Driver supplemental air bag/horn
(P. 1-44, P. 2-33)
5. Meters, gauges and warning/indicator
lights (P. 2-3, 2-13)
6. Cruise control main/set switches
(P. 5-20)
7. Windshield wiper/washer switch and
rear window wiper/washer switch
(P. 2-25, P. 2-26)
8. Navigation system* (if so equipped)
9. Navigation system* controls
(if so equipped)
10. Front passenger supplemental air bag
(P. 1-44)
11. Upper and lower glove box (P. 2-38)
12. Power outlet (P. 2-35)
13. Heated seat switch (if so equipped)
(P. 2-33)
14. Shift selector (P. 5-14)
15. Vehicle dynamic control (VDC) OFF
switch (P. 2-34)
WIC1490
INSTRUMENT PANEL
2-2Instruments and controls
Page 88 of 474
CAUTION
If the gauge indicates coolant tempera-
ture near the hot (H) end of the normal
range, reduce vehicle speed to decrease
temperature. If the gauge is over the nor-
mal range, stop the vehicle as soon as
safely possible. If the engine is over-
heated, continued operation of the ve-
hicle may seriously damage the engine.
See “If your vehicle overheats” in the “In
case of emergency” section for immediate
action required.
FUEL GAUGE
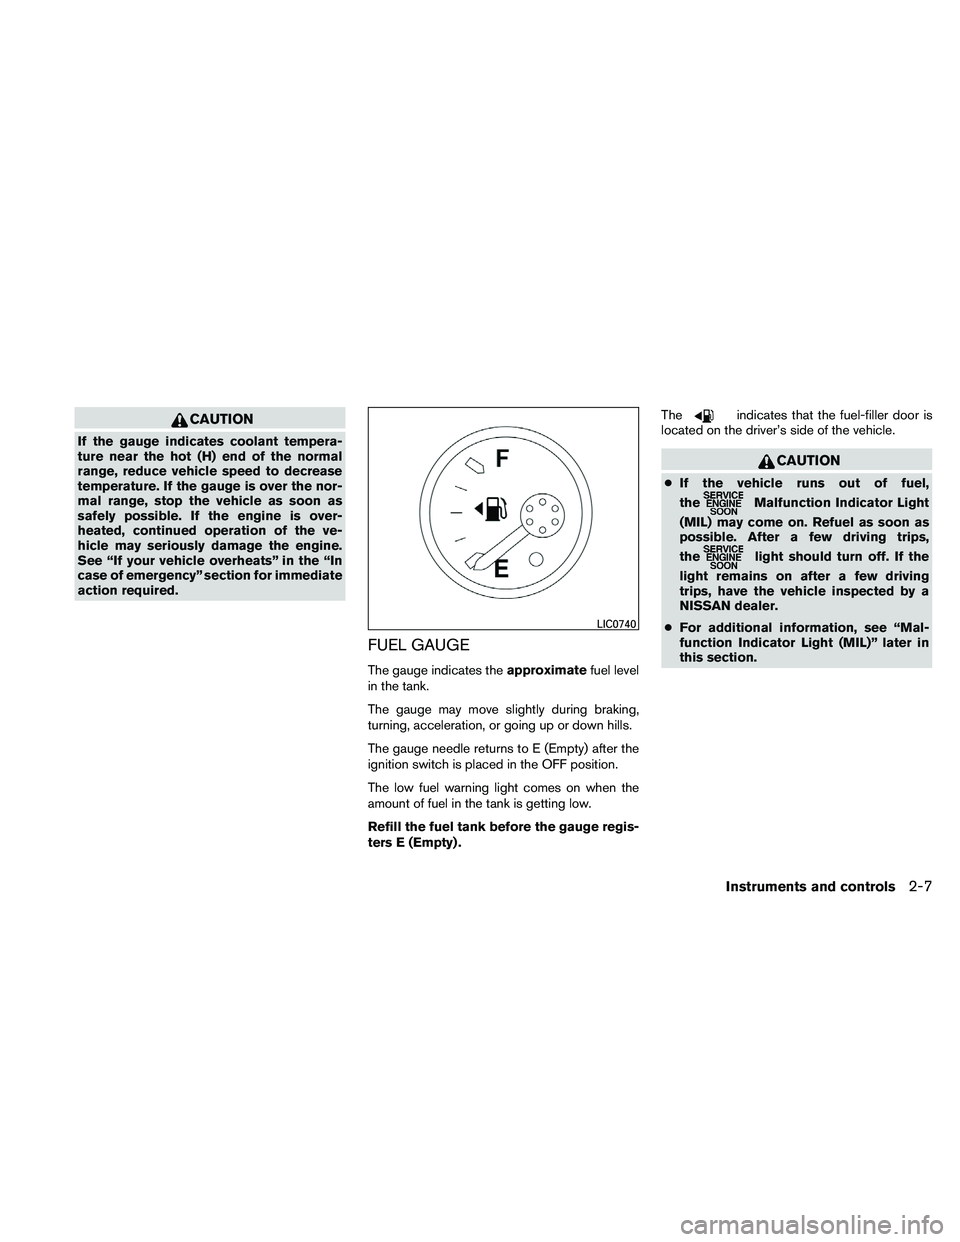
The gauge indicates theapproximatefuel level
in the tank.
The gauge may move slightly during braking,
turning, acceleration, or going up or down hills.
The gauge needle returns to E (Empty) after the
ignition switch is placed in the OFF position.
The low fuel warning light comes on when the
amount of fuel in the tank is getting low.
Refill the fuel tank before the gauge regis-
ters E (Empty) . The
indicates that the fuel-filler door is
located on the driver’s side of the vehicle.
CAUTION
● If the vehicle runs out of fuel,
the
Malfunction Indicator Light
(MIL) may come on. Refuel as soon as
possible. After a few driving trips,
the
light should turn off. If the
light remains on after a few driving
trips, have the vehicle inspected by a
NISSAN dealer.
● For additional information, see “Mal-
function Indicator Light (MIL)” later in
this section.
LIC0740
Instruments and controls2-7
Page 90 of 474
TRIP COMPUTER
The display of the trip computer is situated in the
speedometer display. When the ignition switch is
placed in the ON position, the display scrolls all
the modes of the trip computer and then shows
the mode chosen before the ignition switch was
placed in the OFF position.
When the ignition switch is placed in the ON
position, modes of the trip computer can be
selected by pushing the trip computer change
button. The following modes can be selected:
Distance to empty (dte—mile or km)
The distance to empty (dte) mode provides you
with an estimation of the distance that can be
driven before refueling. The dte is constantly be-
ing calculated, based on the amount of fuel in the
fuel tank and the actual fuel consumption.
The display is updated every 30 seconds.
The dte mode includes a low range warning
feature: when the fuel level is low, the dte mode is
automatically selected and the digits blink in or-
der to draw the driver’s attention. Press the
change button if you wish to return to the mode
that was selected before the warning occurred.
The dte mark (dte) will remain blinking until the
vehicle is refueled.When the fuel level drops even lower, the dte
display will change to (----) .
NOTE:
● If the amount of fuel added while the
ignition switch is OFF is small, the dis-
play just before the ignition switch is
turned OFF may continue to be dis-
played.
● When driving uphill or rounding curves,
the fuel in the tank shifts, which may
momentarily change the display.Average speed (MPH or km/h)
The average speed mode shows the average
vehicle speed since last reset. Resetting is done
by pressing the change button for more than
approximately 1 second. The display is updated
every 30 seconds. The first 30 seconds after a
reset, the display shows (----) .
Average fuel consumption (Mpg or
l/100km)
The average fuel consumption mode shows the
average fuel consumption since the last reset.
Resetting is done by pressing the change button
for more than approximately 1 second. The dis- play is updated every 30 seconds. At about the
first 1/3 miles (500 m) after a reset, the display
shows (----) .
Journey time
The journey time mode shows the time since the
last reset. The displayed time can be reset by
pressing the change button for more than ap-
proximately 1 second.
Trip computer reset
Pushing the change button for more than 3 sec-
onds will reset all modes except Trip A and dis-
tance to empty (dte) .
Instruments and controls2-9
Page 98 of 474
●If the warning light is still on after the
above operation, have your vehicle
checked by a NISSAN dealer as soon as
possible.
Low fuel warning light
This light comes on when the fuel level in the fuel
tank is getting low. Refuel as soon as it is conve-
nient, preferably before the fuel gauge reaches E
(Empty) . There will be a small reserve of fuel
in the tank when the fuel gauge needle
reaches E (Empty) .
Low tire pressure warning light
Your vehicle is equipped with a Tire Pressure
Monitoring System (TPMS) that monitors the tire
pressure of all tires except the spare.
The low tire pressure warning light warns of low
tire pressure or indicates that the TPMS is not
functioning properly.
After the ignition switch is placed in the ON
position, this light illuminates for about 1 second
and turns off. Low tire pressure warning:
If the vehicle is being driven with low tire
pressure, the warning light will illuminate.
A CHECK TIRE PRES (pressure) warning
message is also displayed in the odometer.
If you select the tire pressure information
in the display (if so equipped) , the LOW
PRESSURE warning message will be dis-
played. The tire pressure for each tire will
also be displayed.
When the low tire pressure warning light
illuminates, you should stop and adjust the
tire pressure of all 4 tires to the recom-
mended COLD tire pressure shown on the
Tire and Loading Information label located
in the driver’s door opening. The low tire
pressure warning light does not automati-
cally turn off when the tire pressure is ad-
justed. After the tire is inflated to the rec-
ommended pressure, the vehicle must be
driven at speeds above 16 MPH (25 km/h)
to activate the TPMS and turn off the low
tire pressure warning light. Use a tire pres-
sure gauge to check the tire pressure.
Press the reset button for more than 1 second to
turn off the CHECK TIRE PRES warning mes-
sage. The low tire pressure warning light remains
illuminated until the tires are inflated to the rec-
ommended cold tire pressure. The CHECK TIREPRES warning message is displayed each time
the ignition switch is turned on as long as the low
tire pressure warning light remains illuminated.
For additional information, see “Check tire pres-
sure warning message” in the “Instruments and
controls” section and “Tire Pressure Monitoring
System (TPMS)” in the “Starting and driving”
section and in the “In case of emergency” sec-
tion.
TPMS malfunction:
If the TPMS is not functioning properly, the low
tire pressure warning light will flash for approxi-
mately 1 minute when the ignition switch is
turned ON. The light will remain on after the 1
minute. The CHECK TIRE PRES warning mes-
sage is not displayed if the low tire pressure
warning light illuminates to indicate a TPMS mal-
function. Have the system checked by a NISSAN
dealer.
For additional information, see “Tire Pressure
Monitoring System (TPMS)” in the “Starting and
driving” section and “Tire pressure” in the “Main-
tenance and do-it-yourself” section.
Instruments and controls2-17
Page 99 of 474
WARNING
●If the light does not illuminate with the
ignition switch placed in the ON posi-
tion, have the vehicle checked by a
NISSAN dealer as soon as possible.
● If the light illuminates while driving,
avoid sudden steering maneuvers or
abrupt braking, reduce vehicle speed,
pull off the road to a safe location and
stop the vehicle as soon as possible.
Driving with under-inflated tires may
permanently damage the tires and in-
crease the likelihood of tire failure. Se-
rious vehicle damage could occur and
may lead to an accident and could re-
sult in serious personal injury. Check
the tire pressure for all four tires. Adjust
the tire pressure to the recommended
COLD tire pressure shown on the Tire
and Loading Information label located
in the driver’s door opening to turn the
low tire pressure warning light OFF. If
the light still illuminates while driving
after adjusting the tire pressure, a tire
may be flat. If you have a flat tire, re-
place it with a spare tire as soon as
possible. ●
When a spare tire is mounted or a wheel
is replaced, tire pressure will not be
indicated, the TPMS will not function
and the low tire pressure warning light
will flash for approximately 1 minute.
The light will remain on after 1 minute.
Contact your NISSAN dealer as soon as
possible for tire replacement and/or
system resetting.
● Replacing tires with those not originally
specified by NISSAN could affect the
proper operation of the TPMS.
CAUTION
● The TPMS is not a substitute for the
regular tire pressure check. Be sure to
check the tire pressure regularly.
● If the vehicle is being driven at speeds
of less than 16 MPH (25 km/h) , the
TPMS may not operate correctly.
● Be sure to install the specified size of
tires to the 4 wheels correctly.
Low windshield-washer fluid
warning light
This light comes on when the windshield-washer
fluid is at a low level. Add windshield-washer fluid as necessary. See “Windshield-washer fluid” in
the “Maintenance and do-it-yourself” section of
this manual.
NISSAN Intelligent Key™
warning light (if so equipped)
The Intelligent Key warning light illuminates green
when the ignition switch can be turned. The
Intelligent Key warning light illuminates red when
the ignition switch cannot be turned.
The Intelligent Key warning light blinks red if the
Intelligent Key is taken outside of the vehicle
while the ignition switch is placed in the ACC or
ON position.
● If the Intelligent Key warning light blinks,
make sure of the location of the Intelligent
Key as soon as possible. The Intelligent Key
should be carried by the driver while operat-
ing the vehicle.
● The Intelligent Key warning light turns off
about 10 seconds after the Intelligent Key is
brought inside the vehicle.
The Intelligent Key warning light blinks green
indicating that the Intelligent Key battery is almost
discharged.
See “NISSAN Intelligent Key™” in the “Pre-
driving checks and adjustments” section.
2-18Instruments and controls
Page 100 of 474
Seat belt warning light andchime
The light and chime remind you to fasten your
seat belts. The light illuminates whenever the
ignition switch is placed in the ON or START
position and remains illuminated until the driver’s
seat belt is fastened. At the same time, the chime
sounds for about 6 seconds unless the driver’s
seat belt is securely fastened.
The seat belt warning light may also illuminate if
the front passenger’s seat belt is not fastened
when the front passenger’s seat is occupied . For
7 seconds after the ignition switch is placed in
the ON position, the system does not activate the
warning light for the front passenger.
Refer to “Seat belts” in the “Safety—Seats, seat
belts and supplemental restraint system” section
for precautions on seat belt usage.
Shift P warning light
This light blinks red and the key reminder chime
sounds if the shift selector is in any position other
than P (Park) and the ignition switch is in the OFF
position. Return the shift selector to P (Park) with
the ignition switch in the OFF position and the
light will turn off. Place the ignition switch in the
LOCK position and the chime will turn off.
Supplemental air bag warninglight
When the ignition switch is placed in the ON or
START position, the supplemental air bag warn-
ing light illuminates for about 7 seconds and then
turns off. This means the system is operational.
If any of the following conditions occur, the front
air bag, side air bag , curtain air bag and preten-
sioner systems need servicing and your vehicle
must be taken to a NISSAN dealer:
● The supplemental air bag warning light re-
mains on after approximately 7 seconds.
● The supplemental air bag warning light
flashes intermittently.
● The supplemental air bag warning light does
not come on at all.
Unless checked and repaired, the supplemental
restraint system (air bag system) and/or the pre-
tensioners may not function properly. For addi-
tional details see “Supplemental restraint sys-
tem” in the “Safety—Seats, seat belts and
supplemental restraint system” section of this
manual.
WARNING
If the supplemental air bag warning light
is on, it could mean that the front air bag,
side air bag, curtain and roll-over air bag
systems and/or pretensioner systems will
not operate in an accident. To help avoid
injury to yourself or others, have your ve-
hicle checked by a NISSAN dealer as soon
as possible.
INDICATOR LIGHTS
Automatic transmission position indicator light
When the ignition switch is placed in the ON
position, this indicator light shows the shift selec-
tor position. See “Driving the vehicle” in the
“Starting and driving” section of this manual.
Cruise main switch indicatorlight
The light comes on when the cruise control main
switch is pushed. The light goes out when the
main switch is pushed again. When the cruise
main switch indicator light comes on, the cruise
control system is operational.
Instruments and controls2-19
Page 103 of 474
You cannot move the transfer 4WD shift switch
between 4H and 4LO unless you stop the vehicle
and shift the shift selector to the N position with
the brake pedal depressed.
Part time 4WD (if so equipped)
The 4LO indicator light must stop blinking and
remain illuminated or turn off before shifting the
transmission into gear. If the shift selector is
shifted from the N position to any other gear
when the 4LO indicator light is blinking, the ve-
hicle may move unexpectedly.
When you shift between 4H and 4LO, stop the
vehicle and shift the transmission shift selector to
the N position with the brake pedal depressed,
then depress and turn the 4WD shift switch to
4LO or 4H.
You cannot move the transfer 4WD shift switch
between 4H and 4LO unless you stop the vehicle
and shift the shift selector to the N position with
the brake pedal depressed.
Turn signal/hazard indicatorlights
The appropriate light flashes when the turn signal
switch is activated.
Both lights flash when the hazard switch is turned
on.
Vehicle Dynamic Control
(VDC) OFF indicator light
This indicator light comes on when the Vehicle
Dynamic Control off switch is pushed to OFF, the
transfer case is in the 4LO position (
model) , or when the Vehicle Dynamic Control
system is not functioning properly. This indicates
the Vehicle Dynamic Control system is not oper-
ating.
Push the Vehicle Dynamic Control off switch
again or restart the engine and the system will
operate normally. See “Vehicle Dynamic Control
(VDC) system” in the “Starting and driving” sec-
tion of this manual.
The Vehicle Dynamic Control light also comes on
when you place the ignition switch in the ON
position. The light will turn off after about 2 sec-
onds if the system is operational. If the light stays
on or comes on along with the SLIP indicator light
while you are driving, have the Vehicle Dynamic
Control system checked by a NISSAN dealer.
If the battery is removed or discharged, the Ve-
hicle Dynamic Control system is disabled and the
VDC indicator light will not turn off after 2 sec-
onds when the ignition switch is placed in the ON
position. To reset the system, you must perform
the reset procedure. Refer to “Vehicle Dynamic Control (VDC) system” in the “Starting and driv-
ing” section of this manual.
If the light does not go off after performing the
reset procedure, have the traction control system
checked by a NISSAN dealer.
While the Vehicle Dynamic Control system is
operating, you might feel slight vibration or hear
the system working when starting the vehicle or
accelerating, but this is normal.
AUDIBLE REMINDERS
Brake pad wear warning
The disc brake pads have audible wear warnings.
When a disc brake pad requires replacement, it
makes a high pitched scraping sound when the
vehicle is in motion, whether or not the brake
pedal is depressed. Have the brakes checked as
soon as possible if the warning sound is heard.
Key reminder chime
A chime sounds if the driver’s door is opened
while the key is left in the ignition switch. Remove
the key and take it with you when leaving the
vehicle.
2-22Instruments and controls
Page 104 of 474
Light reminder chime
With the ignition switch placed in the OFF posi-
tion, a chime sounds when the driver’s door is
opened if the headlights or parking lights are on.
Turn the headlight control switch off before leav-
ing the vehicle.
NISSAN Intelligent Key™ buzzer (if so
equipped)
The Intelligent Key buzzer sounds if any one of the
following improper operations is found.● The ignition switch is not returned to the
LOCK position when closing the doors.
● The Intelligent Key is left inside the vehicle
when locking the doors.
● The Intelligent Key is taken outside the ve-
hicle when operating the vehicle.
When the buzzer sounds, be sure to check both
the vehicle and the Intelligent Key. See “NISSAN
Intelligent Key™” in the “Pre-driving checks and
adjustments” section. Your vehicle has two types of security systems:
● Vehicle security system
● NISSAN Vehicle Immobilizer System
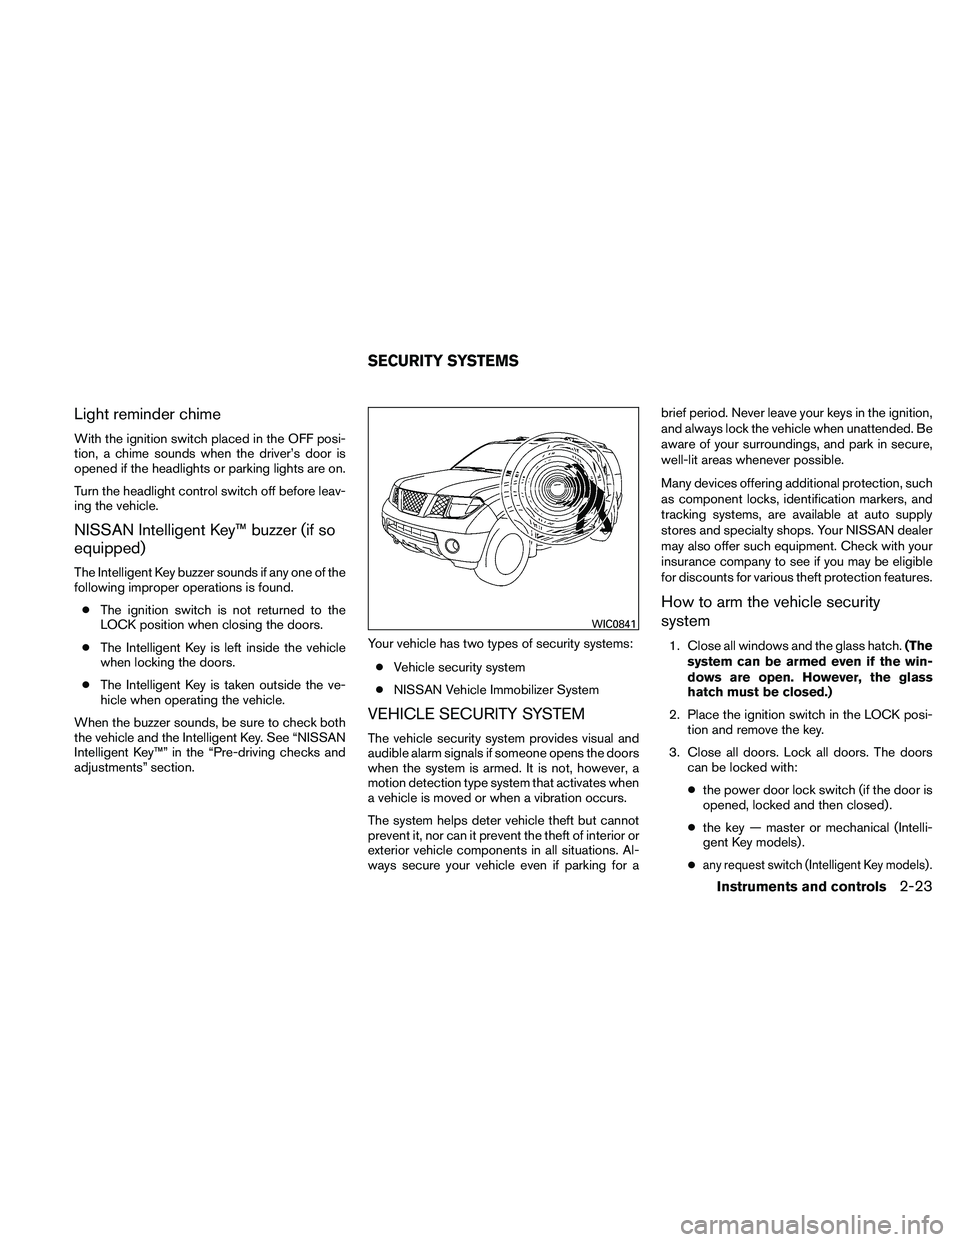
VEHICLE SECURITY SYSTEM
The vehicle security system provides visual and
audible alarm signals if someone opens the doors
when the system is armed. It is not, however, a
motion detection type system that activates when
a vehicle is moved or when a vibration occurs.
The system helps deter vehicle theft but cannot
prevent it, nor can it prevent the theft of interior or
exterior vehicle components in all situations. Al-
ways secure your vehicle even if parking for a brief period. Never leave your keys in the ignition,
and always lock the vehicle when unattended. Be
aware of your surroundings, and park in secure,
well-lit areas whenever possible.
Many devices offering additional protection, such
as component locks, identification markers, and
tracking systems, are available at auto supply
stores and specialty shops. Your NISSAN dealer
may also offer such equipment. Check with your
insurance company to see if you may be eligible
for discounts for various theft protection features.
How to arm the vehicle security
system
1. Close all windows and the glass hatch.
(The
system can be armed even if the win-
dows are open. However, the glass
hatch must be closed.)
2. Place the ignition switch in the LOCK posi- tion and remove the key.
3. Close all doors. Lock all doors. The doors can be locked with:
● the power door lock switch (if the door is
opened, locked and then closed) .
● the key — master or mechanical (Intelli-
gent Key models) .
●
any request switch (Intelligent Key models) .
WIC0841
SECURITY SYSTEMS
Instruments and controls2-23