AUX NISSAN PATHFINDER 2014 R52 / 4.G Owner's Manual
[x] Cancel search | Manufacturer: NISSAN, Model Year: 2014, Model line: PATHFINDER, Model: NISSAN PATHFINDER 2014 R52 / 4.GPages: 492, PDF Size: 4.62 MB
Page 302 of 492
CAUTION
●Only operate the Dual Head
Restraint/Headrest DVD System while
the vehicle engine is running. Operating
the Dual Head Restraint/Headrest DVD
System for extended periods of time
with the engine OFF can discharge the
vehicle battery.
● Do not allow the system to get wet.
Excessive moisture such as spilled liq-
uids may cause the system to
malfunction.
● While playing VIDEO-CD media, this
DVD player does not guarantee com-
plete functionality of all VIDEO-CD
formats.
Parental level (parental control)
Video data with the parental control setting can
be played with this system. Please use your own
judgement to set the parental control with the
system.
Disc selection
You can play the following disc formats with the
DVD player:
● DVD-VIDEO ●
VIDEO-CD
● DTS-CD
Use DVDs with the region code “ALL” or the code
applicable to your country. The region code is
displayed as a small symbol printed on the top of
the DVD. This vehicle-installed DVD player can
only play DVDs with an applicable region code.
Available audio sources
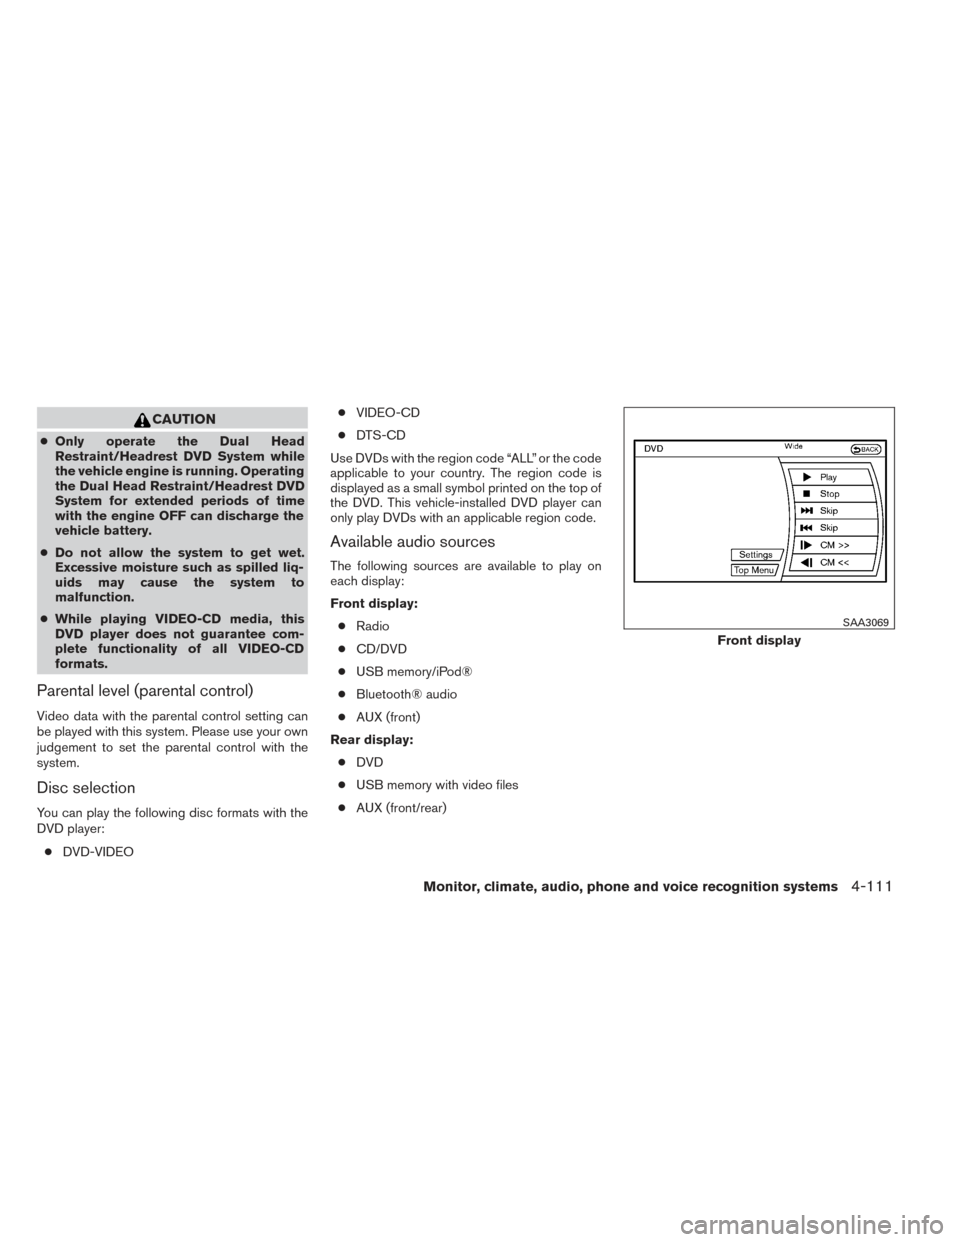
The following sources are available to play on
each display:
Front display: ● Radio
● CD/DVD
● USB memory/iPod®
● Bluetooth® audio
● AUX (front)
Rear display: ● DVD
● USB memory with video files
● AUX (front/rear)
Front display
SAA3069
Monitor, climate, audio, phone and voice recognition systems4-111
Page 303 of 492
PLAYING A DIGITAL VERSATILE
DISC (DVD)
DISC·AUX button
Park the vehicle in a safe location for the
front seat occupants to operate the DVD
player while watching the images.
Insert a DVD into the CD/DVD slot with the
labeled side up. The DVD will be guided auto-
matically into the slot. When ejecting the DVD,
press the EJECT button.Press the AUX·DVD button on the control panel
and turn the display to the DVD mode, and begin
playing the DVD automatically.
When a DVD is loaded, it will begin playing
automatically.
The front screen will be turned on when the
AUX·DVD button is pressed while a DVD is being
played, and it will turn off automatically after a
period of time. To turn it on again, press the
AUX·DVD button again.
Adjust front/rear displays
Front display:
To adjust the front display mode, press the DISP
button on the center multi-function control panel.
Follow the instructions displayed on the screen.
Rear display:
To adjust the rear display mode, press the pre-
ferred side (L or R) of the DISP button on the
remote controller.
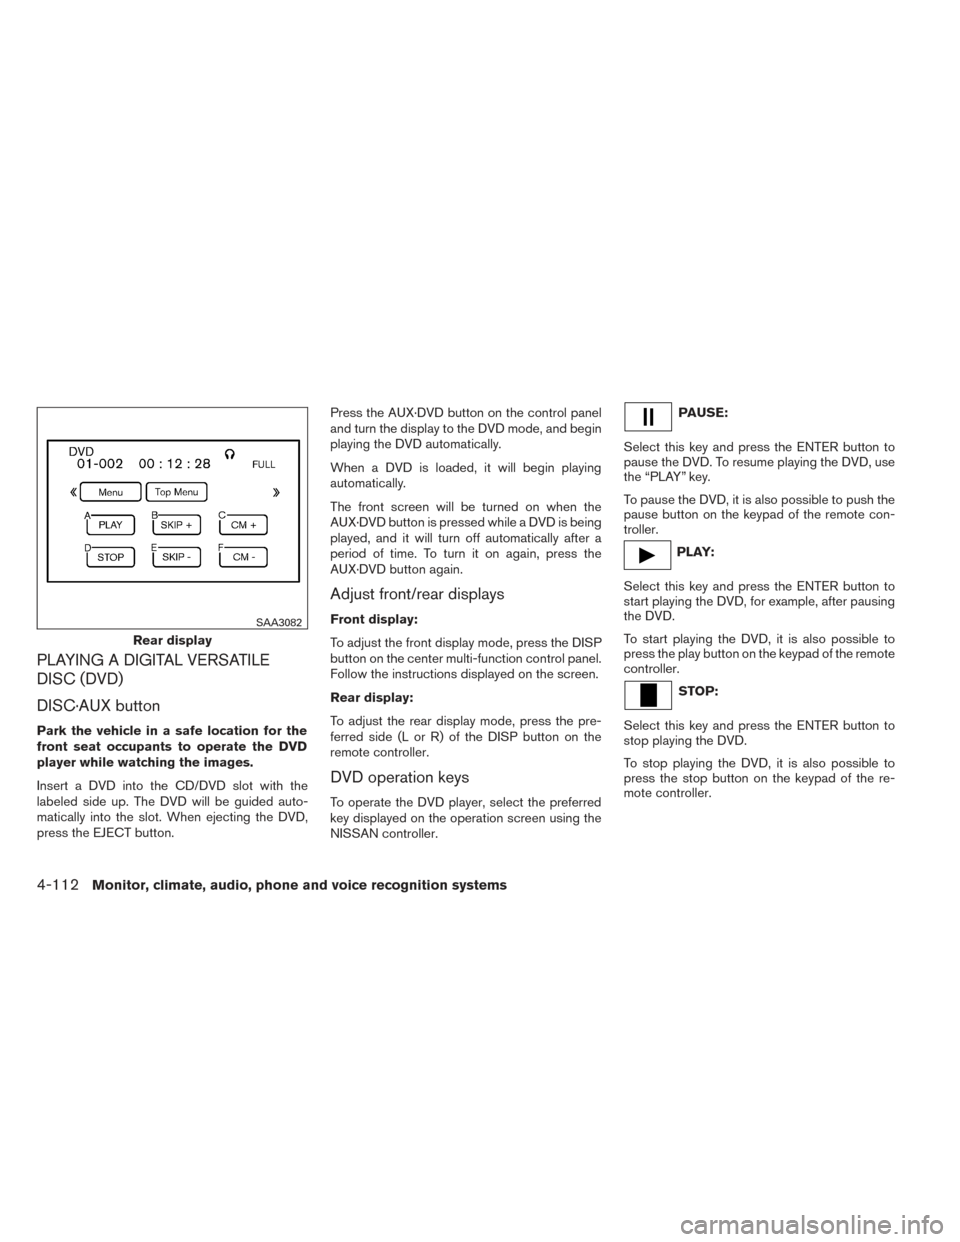
DVD operation keys
To operate the DVD player, select the preferred
key displayed on the operation screen using the
NISSAN controller.
PAUSE:
Select this key and press the ENTER button to
pause the DVD. To resume playing the DVD, use
the “PLAY” key.
To pause the DVD, it is also possible to push the
pause button on the keypad of the remote con-
troller.
PLAY:
Select this key and press the ENTER button to
start playing the DVD, for example, after pausing
the DVD.
To start playing the DVD, it is also possible to
press the play button on the keypad of the remote
controller.
STOP:
Select this key and press the ENTER button to
stop playing the DVD.
To stop playing the DVD, it is also possible to
press the stop button on the keypad of the re-
mote controller.
Rear display
SAA3082
4-112Monitor, climate, audio, phone and voice recognition systems
Page 306 of 492
Play Mode:
Choose the preferred play mode using the
NISSAN controller and press the ENTER button.
Remote controller operation
Use the remote controller to adjust the following
items.
Rear display ON/OFF:
The rear displays can be activated or deactivated
individually.
To activate or deactivate the rear displays, press
the preferred side (L or R) of the ON·OFF button
on the remote controller.
Joystick:
Use the joystick to select the items displayed on
the rear screen.
ENTER button:
Press the ENTER button to make the selected
item complete on the rear screen.
BACK button:
Press to go back to the previous screen or cancel
the selection.
DVD mode:
Press the DVD button to select the DVD mode.AUX mode:
The AUX (auxiliary input jacks) modes can be
activated or deactivated individually. To activate
the AUX mode, press the preferred side (L or R)
of the AUX button. Press the AUX button again to
deactivate the AUX mode and display another
mode.
Volume:
To control the volume level, push the VOL
button
or.
Display:
Display settings can be set individually for the
right and left screens.
Press the preferred side (L or R) of the DISP
button to adjust the rear display settings.
Sound:
To change the language, press the SOUND but-
ton. Each time the button is pressed, the lan-
guage will change to each language stored in the
DVD.
Track/Channel:
Press to skip to the previous or next DVD scene
selection.
Rear display settings
To adjust the rear display settings, select the
preferred key and press the ENTER button. The
following settings are available:
Aspect:
Select the display size from “CINEMA”, “WIDE”,
“FULL” or “NORMAL” using the joystick on the
remote controller.
Picture Mode:
To adjust the display brightness automatically,
select the “Brightness” key and then select from
“Darker”, “Normal” or “Brighter”. When adjusting
manually, select “OFF” and adjust using the joy-
stick on the remote controller and tilt the joystick
to the right or left.
To adjust tint, color, contrast or black level, select
a key using the joystick on the remote controller
and tilt the joystick to the right or left.
Press the BACK button on the remote controller
to apply the settings and return to the previous
display.
To return the adjustment levels to the default
value, select “Execute” next to “Initialization” us-
ing the joystick on the remote controller and
press the ENTER button. The “Execute” key is
deactivated when the picture mode settings are
already in the default value.
Monitor, climate, audio, phone and voice recognition systems4-115
Page 307 of 492
Color System:
To choose the color system, select from “NTSC”,
“PAL”, “PAL-60”, “PAL-M”, “PAL-N” or “AUTO”
using the joystick on the remote controller and tilt
the joystick to the right or left.
3D Y/C filter:
Set to ON/OFF using the joystick on the remote
controller. When turned on, small characters and
an outline of the shapes will be displayed more
clearly than when turned off.
AUX Volume Setting:
To set the AUX volume, select from “High”, “Low”
or “Middle” using the joystick on the remote con-
troller and tilt the joystick to the right or left.
OPERATING TIPS
●The images from a device that is connected
to the rear auxiliary input jacks cannot be
viewed on the front displays.
● It is not possible to switch the source to USB
(if so equipped) or DVD using the remote
controller when the rear display is in the AUX
mode. Press the AUX (L)/ (R) button in the
remote controller and turn off the AUX mode,
and then push the preferred mode switch. ●
It is not possible to display different video
files, such as DVD or video files in the USB
memory, on the front and rear displays at the
same time.
● It is not possible to play an audio file and a
video file in the same USB memory at the
same time.
Multiple source display
It is possible to play different sources on each
display. The following example shows how to
operate multiple sources.
1. Display a video file in the front display by selecting the DVD mode.
2. Press the L side on the power ON·OFF button on the remote controller. The left rear
display comes on and the DVD screen will
be displayed.
3. Press the R side on the power ON·OFF button on the remote controller. The right
rear display comes on and the DVD screen
will be displayed.
4. Switch the source on the front display to an audio source. The sound from the speakers
switches according to the front display. The
rear display continues to display the DVD. 5. Turn on a pair of headphones and listen to
the DVD on the rear displays using the head-
phones.
6. Connect an auxiliary device into the AUX jacks and press the AUX (L) or AUX (R)
button on the remote controller. The se-
lected side of the rear display turns to the
AUX mode. The other rear display continues
to display the DVD.
7. Turn on the other pair of headphones. If the sound from the headphones is not from the
AUX jacks, switch the channel with the
channel select switch on the headphones.
CARE AND MAINTENANCE
Use a lightly dampened, lint free cloth to clean the
surfaces of your Dual Head Restraint/Headrest
DVD System (DVD player face, screen, remote
controller, etc.) .
4-116Monitor, climate, audio, phone and voice recognition systems
Page 346 of 492
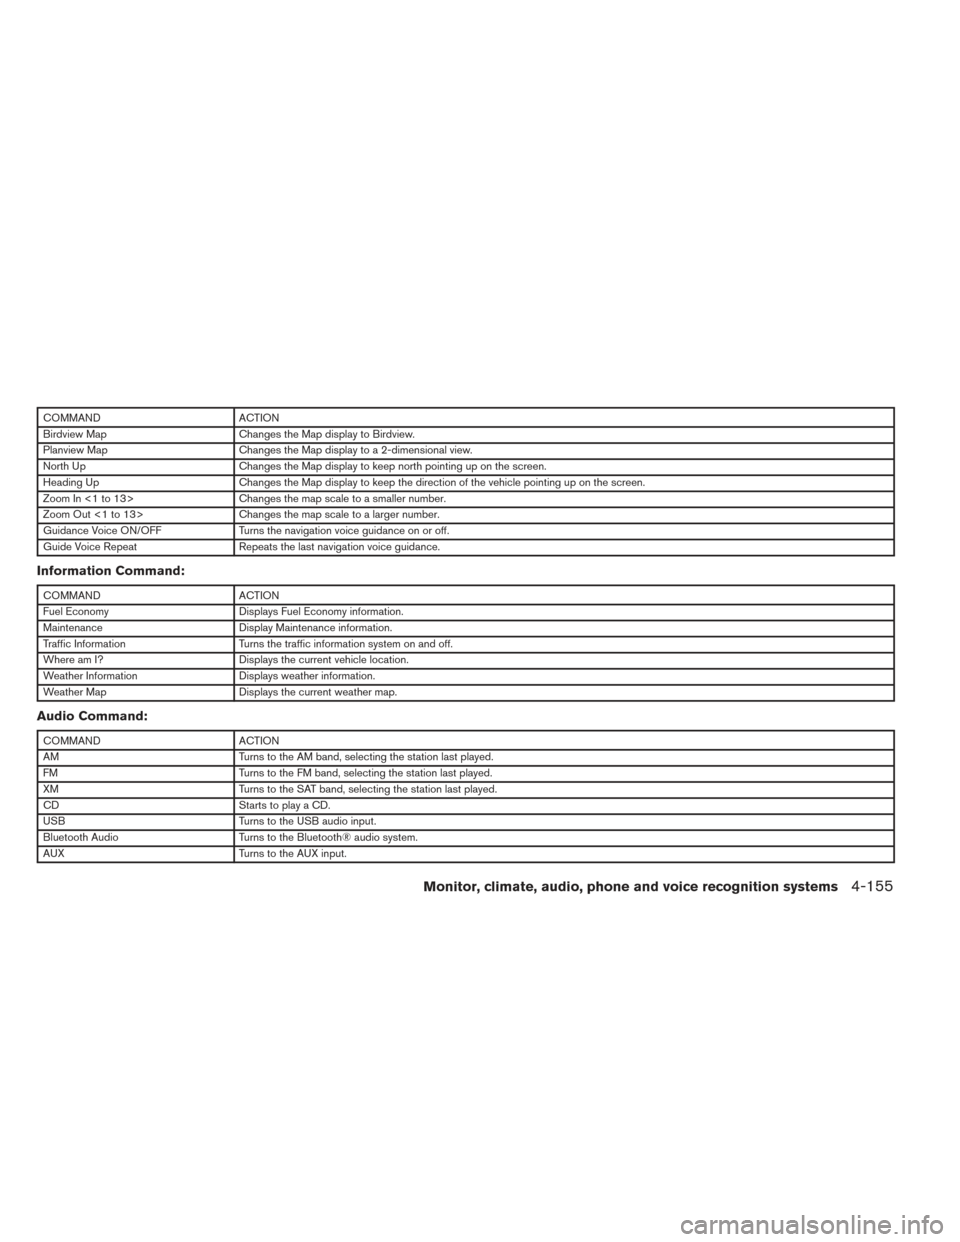
COMMANDACTION
Birdview Map Changes the Map display to Birdview.
Planview Map Changes the Map display to a 2-dimensional view.
North Up Changes the Map display to keep north pointing up on the screen.
Heading Up Changes the Map display to keep the direction of the vehicle pointing up on the screen.
Zoom In <1 to 13> Changes the map scale to a smaller number.
Zoom Out <1 to 13> Changes the map scale to a larger number.
Guidance Voice ON/OFF Turns the navigation voice guidance on or off.
Guide Voice Repeat Repeats the last navigation voice guidance.
Information Command:
COMMANDACTION
Fuel Economy Displays Fuel Economy information.
Maintenance Display Maintenance information.
Traffic Information Turns the traffic information system on and off.
Where am I? Displays the current vehicle location.
Weather Information Displays weather information.
Weather Map Displays the current weather map.
Audio Command:
COMMANDACTION
AM Turns to the AM band, selecting the station last played.
FM Turns to the FM band, selecting the station last played.
XM Turns to the SAT band, selecting the station last played.
CD Starts to play a CD.
USB Turns to the USB audio input.
Bluetooth Audio Turns to the Bluetooth® audio system.
AUX Turns to the AUX input.
Monitor, climate, audio, phone and voice recognition systems4-155
Page 484 of 492
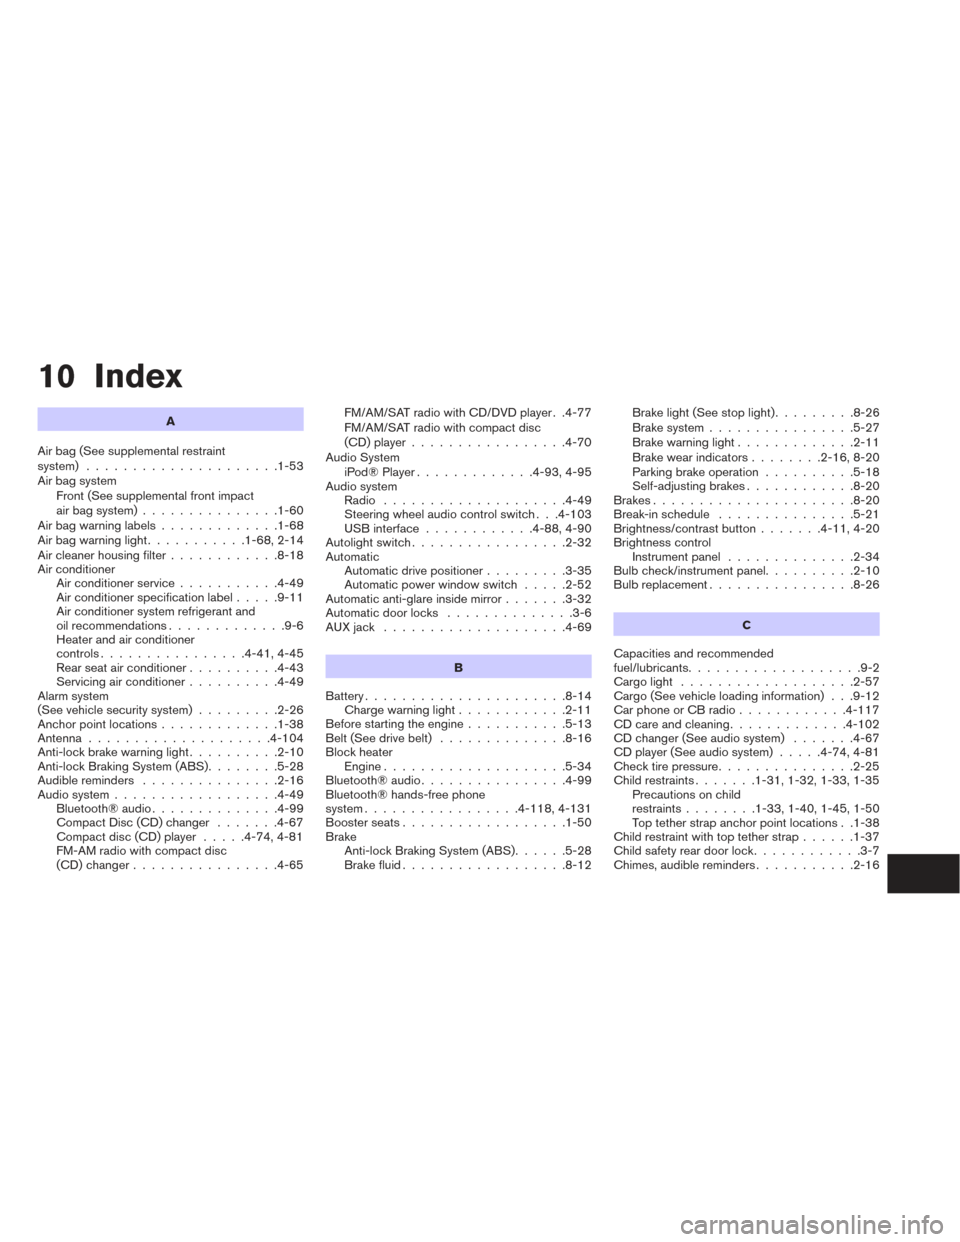
10 Index
A
Air bag (See supplemental restraint
system) .....................1-53
Air bag system Front (See supplemental front impact
air bag system) ...............1-60
Airbagwarninglabels.............1-68
Airbagwarninglight...........1-68,2-14
Air cleaner housing filter ............8-18
Air conditioner Air conditioner service ...........4-49
Air conditioner specification label .....9-11
Air conditioner system refrigerant and
oil recommendations .............9-6
Heater and air conditioner
controls................4-41,4-45
Rear seat air conditioner ..........4-43
Servicing air conditioner ..........4-49
Alarm system
(See vehicle security system) .........2-26
Anchor point locations .............1-38
Antenna....................4-104
Anti-lock brake warning light ..........2-10
Anti-lock Braking System (ABS) ........5-28
Audible reminders ...............2-16
Audio system ..................4-49
Bluetooth®audio..............4-99
Compact Disc (CD) changer .......4-67
Compact disc (CD) player .....4-74,4-81
FM-AM radio with compact disc
(CD) changer ................4-65 FM/AM/SAT radio with CD/DVD player . .4-77
FM/AM/SAT radio with compact disc
(CD) player
.................4-70
Audio System iPod®Player.............4-93,4-95
Audio system Radio ....................4-49
Steering wheel audio control switch . . .4-103
USB interface ............4-88,4-90
Autolight switch .................2-32
Automatic Automatic drive positioner .........3-35
Automatic power window switch .....2-52
Automatic anti-glare inside mirror .......3-32
Automatic door locks ..............3-6
AUXjack ....................4-69
B
Battery ......................8-14
Charge warning light ............2-11
Before starting the engine ...........5-13
Belt (See drive belt) ..............8-16
Block heater Engine ....................5-34
Bluetooth®audio................4-99
Bluetooth® hands-free phone
system .................4- 118, 4-131
Boosterseats..................1-50
Brake Anti-lock Braking System (ABS) ......5-28
Brake fluid ..................8-12 Brakelight(Seestoplight).........8-26
Brake system
................5-27
Brake warning light .............2-11
Brake wear indicators ........2-16,8-20
Parking brake operation ..........5-18
Self-adjusting brakes ............8-20
Brakes ......................8-20
Break-inschedule ...............5-21
Brightness/contrast button .......4-11,4-20
Brightness control Instrument panel ..............2-34
Bulb check/instrument panel ..........2-10
Bulbreplacement................8-26
C
Capacities and recommended
fuel/lubricants ...................9-2
Cargolight ...................2-57
Cargo
(See vehicle loading information) . . .9-12
Car phone or CB radio ............4-117
CD care and cleaning .............4-102
CD changer (See audio system) .......4-67
CD player (See audio system) .....4-74,4-81
Check tire pressure ...............2-25
Child restraints .......1-31,1-32,1-33,1-35
Precautions on child
restraints ........1-33,1-40,1-45,1-50
Top tether strap anchor point locations . .1-38
Child restraint with top tether strap ......1-37
Child safety rear door lock ............3-7
Chimes,audiblereminders...........2-16