climate control NISSAN PATHFINDER 2016 R52 / 4.G Quick Reference Guide
[x] Cancel search | Manufacturer: NISSAN, Model Year: 2016, Model line: PATHFINDER, Model: NISSAN PATHFINDER 2016 R52 / 4.GPages: 32, PDF Size: 1.88 MB
Page 2 of 32
11
2
12
212220
23
24
3
4
5
10
16
1
6
7
19
8
17
Behind
Steering
Wheel
13
14
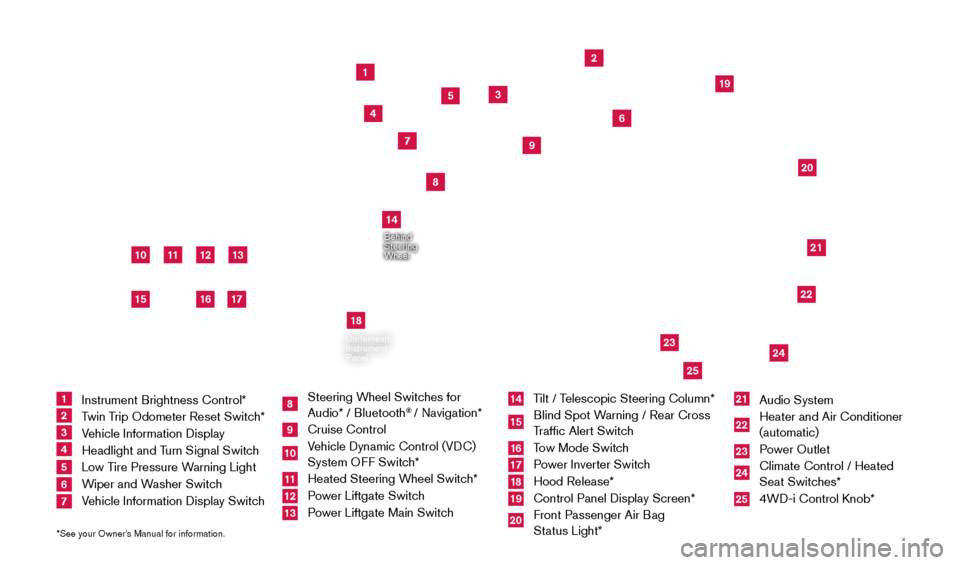
1 Instrument Brightness Control*
2 Twin Trip Odometer Reset Switch*3 Vehicle Information Display4 Headlight and Turn Signal Switch5 Low Tire Pressure Warning Light6 Wiper and Washer Switch 7 Vehicle Information Display Switch
8 Steering Wheel Switches for
Audio* / Bluetooth
® / Navigation*
9 Cruise Control
10 Vehicle Dynamic Control (VDC) System OFF Switch* 11 Heated Steering W heel Switch*12 Power Liftgate Switch13 Power Liftgate Main Switch
14 Tilt / Telescopic Steering Column*15 Blind Spot Warning / Rear Cross
Traffic Alert Switch16 Tow Mode Switch17 Power Inverter Switch18 Hood Release*
19 Control Panel Display Screen*
20 Front Passenger Air B ag
Status Light*
21 Audio System
22 Heater and Air Conditioner
(automatic)
23 Power Outlet
24 Climate Control / Heated
Seat Switches*25 4WD-i Control K nob*
*See your Owner’s Manual for information.
Underneath
Instrument
Panel
In Front
of Console
25
15
9
18
2009259_16b_Pathfinder_US_pQRG_121715.indd 412/17/15 5:01 PM
Page 3 of 32
NEW SYSTEM FEATURESAround View® Monitor System with Camera Aided Sonar (parking sensor) (if so equip\
ped) ...2
NavT
raffic and NavWeather (if so equipped)...........................................3
Hill Descent Control (H
DC) (if so equipped)
..........................................4
Blind Spot W
arning (BSW) with Rear Cross Traffic Alert (RCTA) (if so equipped)
............4
ESSENTIAL INFORMATIONTire Pressure Monitoring System (TPMS) with Easy Fill Tire Alert .........................5
Loose Fuel Cap ..................................................................6
Fuel-filler Door ...................................................................6
T
owing Your Vehicle ...............................................................
6
Cloc
k Set/Adjustment .............................................................
7
FIRST DRIVE FEATURESNissan Intelligent Key® System......................................................8
P
ower Liftgate (if so equipped)......................................................9
Front P
ower Seat Adjustments (if so equipped) .......................................
10
2ND Row Seats ..................................................................10
3RD Row Seats ..................................................................11
Automatic Drive P ositioner (if so equipped) ..........................................11
Outside Mirror Control Switc
h .....................................................
12
St
arting/Stopping the Engine ......................................................
12
Headlight Control Switc
h
.........................................................13
W
iper and Washer Switch ........................................................
14
Heater and Air Conditioner (automatic)
..............................................
14
Rear Climate Controls
............................................................
16
AM
/FM/SiriusXM
® Satellite Radio with CD/DVD Player (if so equipped) ..................16
U
SB (Universal Serial Bus) Connection Port/iPod® Interface (if so equipped) ..............17
Cruise Control ..................................................................18
P
ower Outlets
...................................................................18
SYSTEM GUIDEVehicle Information Display ........................................................20
Bluetooth® Hands-free Phone System (if so equipped).................................21
• System Operating T ips..........................................................21
Bluetooth® System with Navigation (if so equipped) ...................................22
Bluetooth® System without Navigation (if so equipped) ................................24
Bluetooth® Streaming Audio with Navigation (if so equipped) . . . . . . . . . .\
. . . . . . . . . . . . . . . . . 26
Navigation System (if so equipped) .................................................27
N
ISSAN Mobile Entertainment System (MES) (if so equipped)
..........................28
HomeLink® Universal Transceiver (if so equipped) .....................................29
TAB LE OF CONTE NTS
Please see your Owner’s Manual for important safety information and system operation limitations.
• A cellular telephone should not be used for any purpose while driving so\
full attention may be given to
vehicle operation.
•
Always wear your seat belt.
• Supplemental air bags do not replace proper seat belt usage.
•
Children 12 and under should always ride in the rear seat properly secur\
ed in c
hild restraints or seat belts
according to their age and weight.
• Do not drink and drive.
For more information, refer to the “Safety — Seats, seat belts and supplemental restraint system (sectio\
n 1) ”,
the “Monitor, climate, audio, phone and voice recognition systems (section 4)” and the “Starting and driving
(section 5)” of your Owner’s Manual.
Additional information about your vehicle is also available in your Owne\
r’s Manual, Navigation System
Owner’s Manual and at www.NissanUSA.com.
2009259_16b_Pathfinder_US_pQRG_121715.indd 512/17/15 5:01 PM
Page 9 of 32

7
CLOCK SET/ADJUSTMENT
AM/FM RADIO
To adjust the time of the clock on the display:
1. Press and hold the
DISP CLOCK button
1.
2.
Rot
ate the TUNE/FOLDER knob
2 to adjust
the hour.
3.
Press the
AUDIO button
2 or press the DISP CLOCK button 1 to accept
the hour.
4. Rot
ate the TUNE/FOLDER knob
2 to adjust the minutes.
5.
Press the
AUDIO button
2 or press the DISP CLOCK button 1 to accept the
minutes and exit the clock adjustment menu.
SATELLITE RADIO (if so equipped) AND WITH NAVIGATION (if so equipped)
To adjust the time and the appearance of the clock on the display:
1.
Press the
SETTING button on the
control panel.
2. Select the “Others” key
.
3. Select the “Cloc
k” key.
The following settings can be adjusted:
•
On-screen Clock: The clock in the upper right corner of the display can be turned
ON or OFF based on the indicator light.
•
Clock Format (24h): The clock can be set to 12 hours or 24 hours.
•
Offset (hour): The time can be adjusted by increasing or decreasing per hour.
•
Offset (min): The time can be adjusted by increasing or decreasing per minute.
•
Daylight Savings Time: The application of Daylight Savings Time can be turned
ON or OFF.
•
Time Zone: Adjust the time zone. Choose a time zone from the available list.
Press the BACK button to return to the previous screen.
For more information, refer to the “Monitor, climate, audio, phone and voice recognition systems (section 4) ” of
your Owner’s Manual.
2
1
2009259_16b_Pathfinder_US_pQRG_121715.indd 712/17/15 5:01 PM
To view detailed instructional videos regarding these and other features, please go to www.nissanownersinfo.mobi.
Page 10 of 32
8
NISSAN INTELLIGENT KEY® SYSTE M
The Nissan Intelligent Key® system allows you to
lock or unlock your vehicle, open your liftgate and
remotely start the engine. It is important to make sure
the Intelligent Key is with you (that is, in your pocket
or purse).
REMOTE ENGINE START* (if so equipped)
The remote start operating range is approximately 200 ft (60 m) from the vehicle. The effective operating range may be shorter if there
are walls or other obstructions between the key and the vehicle.
For the remote start to function, the vehicle must be in the P (PARK) position with the ignition off and all doors must be closed and locked. Please see your Owner’s Manual
for additional information.
To start your vehicle remotely:
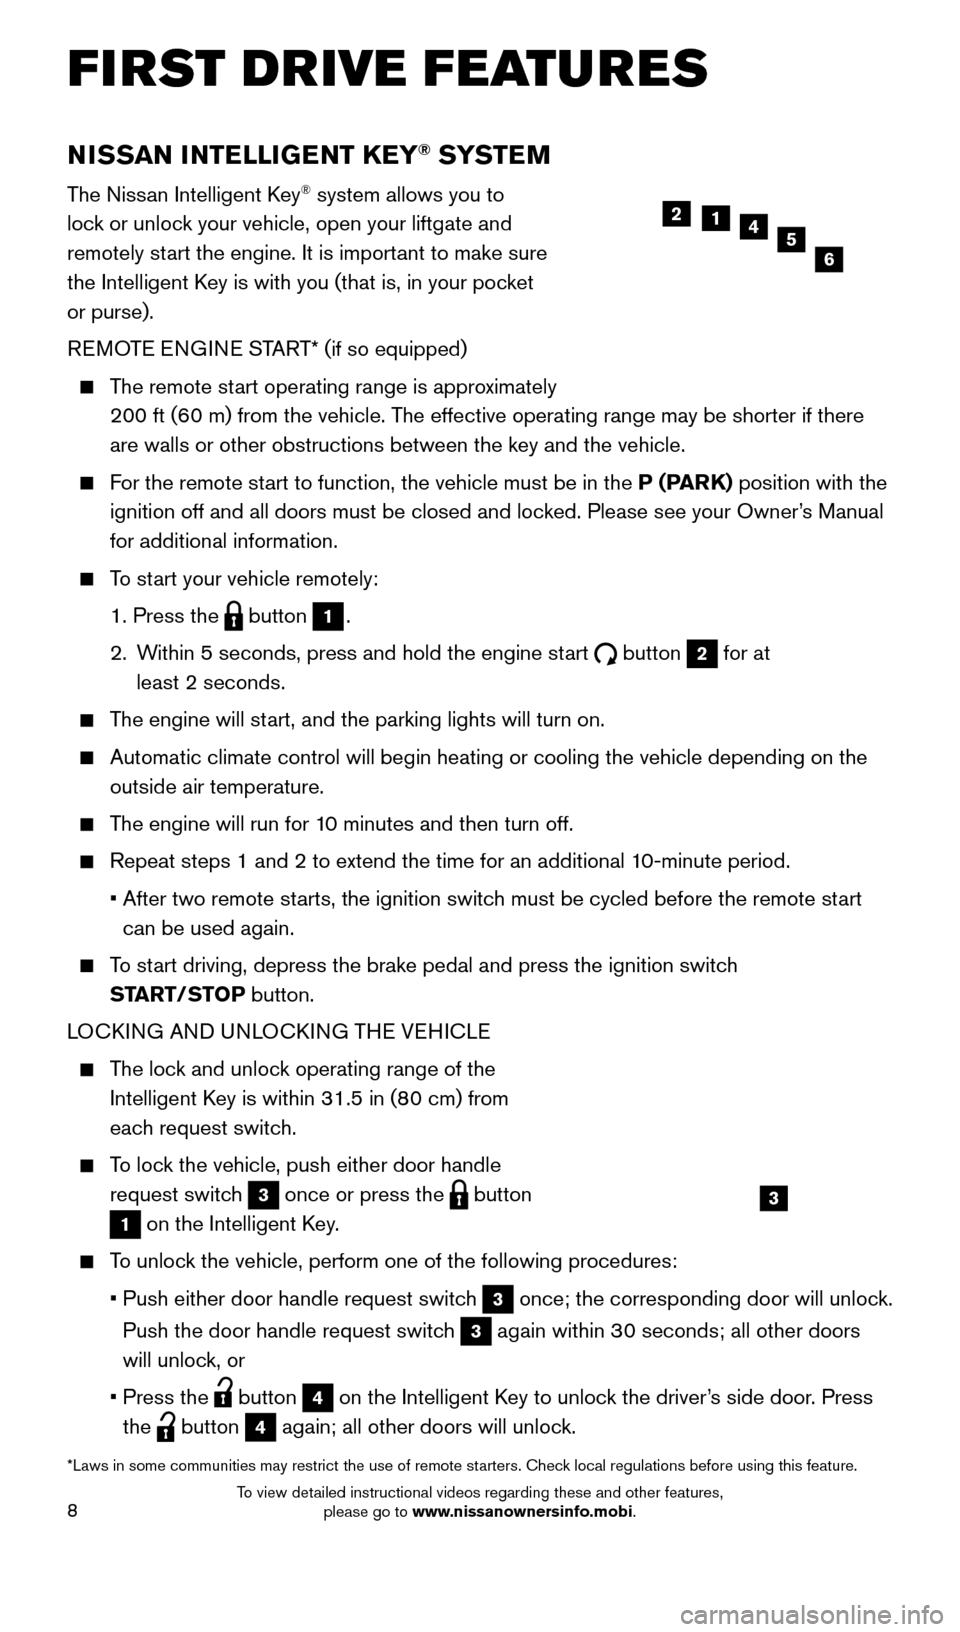
1. Press the button 1.
2.
W
ithin 5 seconds, press and hold the engine start
button 2 for at
least 2 seconds.
The engine will start, and the parking lights will turn on.
Automatic climate control will begin heating or cooling the vehicle depe\
nding on the
outside air temperature.
The engine will run for 10 minutes and then turn off.
Repeat steps 1 and 2 to extend the time for an additional 1 0-minute period.
•
After two remote st
arts, the ignition switch must be cycled before the remote start
can be used again.
To start driving, depress the brake pedal and press the ignition switch START/STOP button.
LOCKING AND UNLOCKING THE VEHICLE
The lock and unlock operating range of the Intelligent Key is within 31.5 in (80 cm) from
each request switch.
To lock the vehicle, push either door handle request switch
3 once or press the button
1 on the Intelligent Key.
To unlock the vehicle, perform one of the following procedures:
• Push either door handle request
switch
3 once; the corresponding door will unlock.
Push the door handle request switch
3 again within 30 seconds; all other doors
will unlock, or
•
Press the button 4 on the Intelligent Key to unlock the driver’s side door. Press
the
button 4 again; all other doors will unlock.
5124
6
FIRST DRIVE FEATURES
3
*Laws in some communities may restrict the use of remote starters. Check local regulations before using this feature.
2009259_16b_Pathfinder_US_pQRG_121715.indd 812/17/15 5:01 PM
To view detailed instructional videos regarding these and other features, please go to www.nissanownersinfo.mobi.
Page 17 of 32

15
3 ON•OFF BUTTON/FAN SPEED CONTROL DIAL
Turn the fan speed control dial left to decrease fan speed or right to in\
crease
fan speed.
Press the ON•OFF button to turn the system on or off.
4 MODE BUTTON
Press the M ODE button to cycle through the following air flow outlets:
Air flows from the center and side vents.
Air flows from the center , side and foot vents.
Air flows mainly from the foot vents.
Air flows from the front defroster and foot vents.
5 AIR RECIRCULATION BUTTON
Press the air recirculation button to recirculate interior air inside the vehicle.
The indicator light on the button will illuminate. This system is used to avoid certain
outside odors and to help adjust the inside vehicle temperature more eff\
ectively.
The air recirculation mode cannot be activated when the climate control s\
ystem is in the front defroster mode
.
6 REAR AIR CONDITIONER
To control the rear automatic air conditioning system with the front air \
conditioner control panel:
•
T
urn on the front climate control system by
pressing the ON•OFF button.
•
Press the
REAR button.
When the rear automatic air conditioning system is on, the indicator light on the REAR
button will illuminate and the front display will
switch to the “Rear Air-conditioning” screen.
Use the driver’s temperature and fan speed buttons to adjust the settings.
To adjust the front air conditioning system, press the REAR button again.
To turn off the rear automatic air conditioning system from the front con\
trols, press the REAR button until the “Rear Air-conditioning” screen is displayed. Then press
the ON•OFF button
3.
The rear passenger controls are unavailable when the “Rear Air-conditi\
oning” screen is shown on the front display.
7 DEFROSTING/DEFOGGING FRONT AND SIDE WINDOWS
Press the front defroster button to turn the system on. The A/C automatically
turns on when the front defroster mode is selected. This feature removes humidity
from the air.
Turn the temperature control dial 1 to set the desired temperature.
To defrost the front and side windows, set the temperature control 1 and fan
speed control 3 to their maximum settings.
8 REAR WINDOW AND OUTSIDE MIRROR (if so equipped) DEFROSTER SWITCH
Push the rear window defroster switc h to defrost the rear window and
outside mirror (if so equipped).
This function automatically turns off after approximately 15 minutes.
9 A/C BUTTON
Press the A/C button to turn the air conditioner system on or off. This system helps
cool and dehumidify the air inside the cabin and defog the windows.
For more information, refer to the “Instruments and controls (section 2)” and the “Monitor, climate, audio, phone
and voice recognition systems (section 4)” of your Owner’s Manual.
2009259_16b_Pathfinder_US_pQRG_121715.indd 1512/17/15 5:02 PM
To view detailed instructional videos regarding these and other features, please go to www.nissanownersinfo.mobi.
Page 18 of 32
16
AM/FM/SiriusXM®* SATELLITE RADIO WITH CD/DVD PLAYER
(if so equipped)
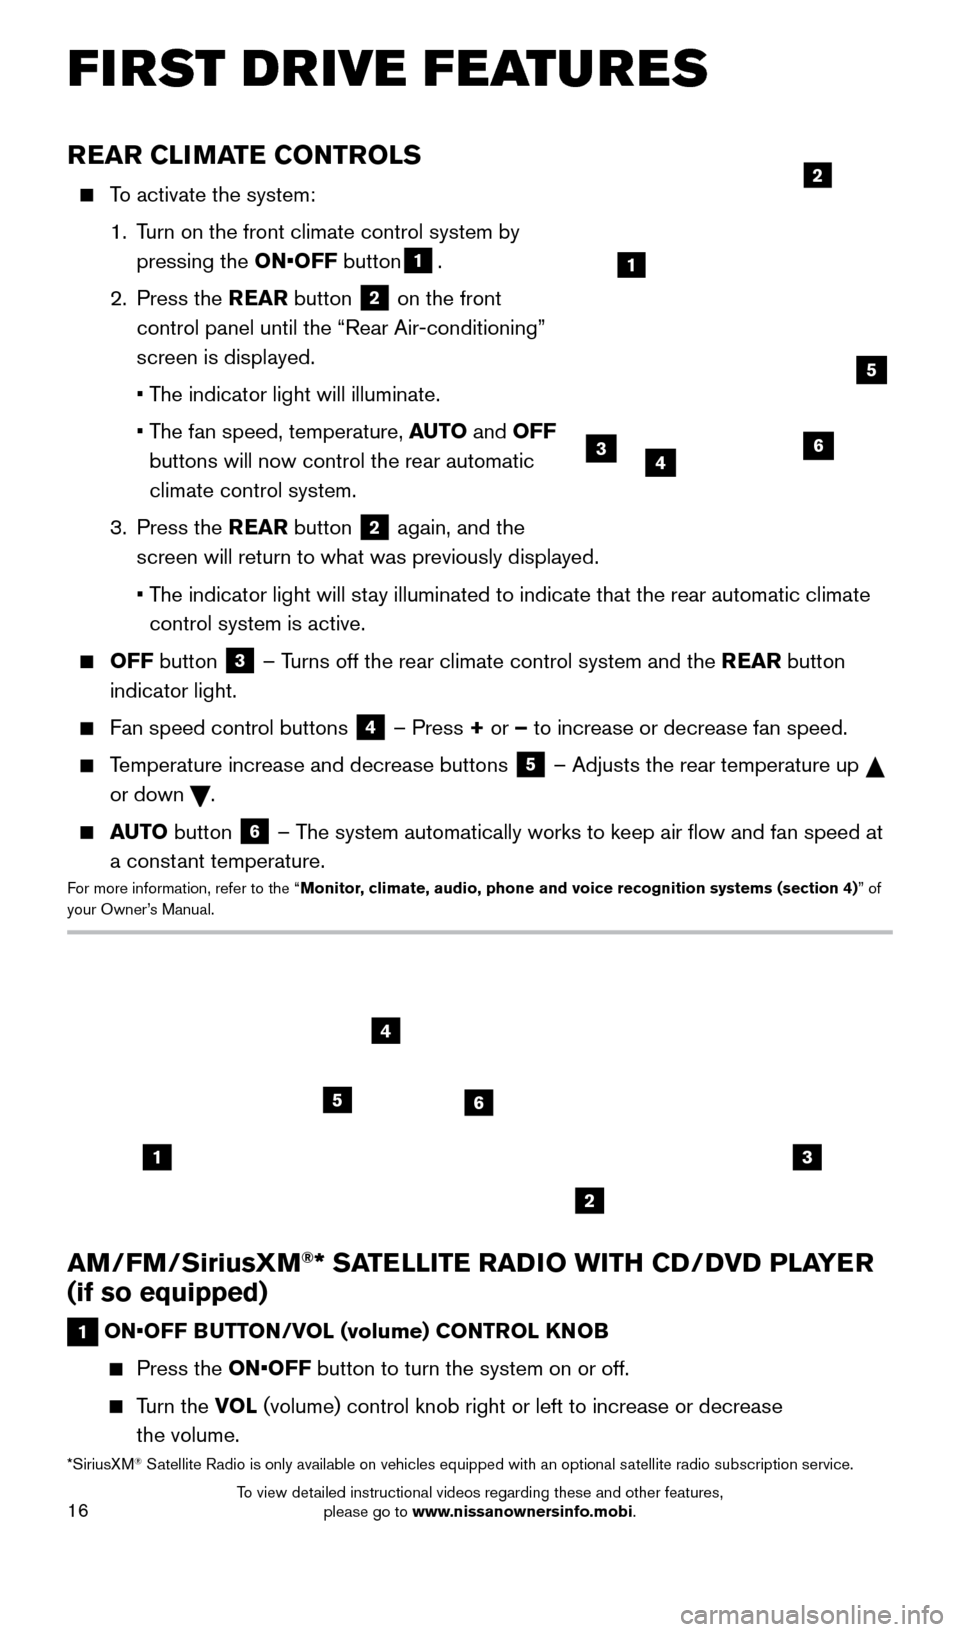
1 ON•OFF BUTTON/VOL (volume) CONTROL KNOB
Press the ON•OFF button to turn the system on or off.
Turn the VOL (volume) control knob right or left to increase or decrease
the volume.
13
2
56
4
REAR CLIMATE CONTROLS
To activate the system:
1.
T
urn on the front climate control system by
pressing the ON•OFF button
1.
2.
Press the REAR button
2 on the front
control panel until the “Rear Air-conditioning”
screen is displayed.
• T
he indicator light will illuminate.
•
T
he fan speed, temperature, AUTO and OFF
buttons will now control the rear automatic
climate control system.
3.
Press the REAR button
2 again, and the
screen will return to what was previously displayed.
•
T
he indicator light will stay illuminated to indicate that the rear automatic climate
control system is active.
OFF button 3 – Turns off the rear climate control system and the REAR button
indicator light.
Fan speed control buttons 4 – Press + or – to increase or decrease fan speed.
Temperature increase and decrease buttons 5 – Adjusts the rear temperature up
or down
.
AUTO button 6 – The system automatically works to keep air flow and fan speed at
a constant temperature.
For more information, refer to the “Monitor, climate, audio, phone and voice recognition systems (section 4) ” of
your Owner’s Manual.
2
364
5
1
*SiriusXM® Satellite Radio is only available on vehicles equipped with an optional s\
atellite radio subscription service.
FIRST DRIVE FEATURES
2009259_16b_Pathfinder_US_pQRG_121715.indd 1612/17/15 5:02 PM
To view detailed instructional videos regarding these and other features, please go to www.nissanownersinfo.mobi.
Page 23 of 32

21
BLUETOOTH® HANDS-FREE PHONE SYSTEM1 (if so equipped)
A cellular telephone should not be used
while driving so full attention may be given
to vehicle operation.
2
SYSTEM OPERATING TIPS
Press the or button on the steering
wheel to interrupt the voice prompts at any time
and speak a command after the tone.
For vehicles not equipped with Navigation:
•
T
o use the system faster, you may speak the
second level commands with the main menu
command on the main menu. For example,
press the
or button on the steering
wheel, and after the tone, say “Call Redial”.
For vehicles equipped with Navigation:
•
Refer to the “V
oice recognition (section 9)” of
your Navigation System Owner’s Manual for
more information.
The “Help” command can be used to hear a list of available commands\
at any time.
Reduce bac kground noise as much as possible by closing windows and pointing
HVAC vents away from the ceiling.
Speak naturally without long pauses and without raising your voice.
When speaking phonebook names, please be aware some cellular phones requi\
re the last name to be spoken before the first name. For example, “Michael Smith” may be
spoken as “Smith Michael”.
To cancel a Voice Recognition session, say “Exit” or press and hold the
or button on the steering wheel.
Voice commands can be used to operate various Bluetooth®,1 system features
using the NISSAN Voice Recognition system. See your Owner’s Manual for
detailed information.
If the Voice Recognition system does not recognize your voice commands, train th\
e system using the Voice Adaptation Mode.
For more detailed information and instructions, refer to your cellular phone’s Owner’s Manual and visit www.NissanUSA.com/bluetooth.
1 Availability of specific features is dependent upon the phone’s Bluetooth® support. Please refer to your phone owner’s
manual for details. Bluetooth® word mark and logos are owned by Bluetooth SIG, Inc., and any use of such marks by
NISSAN is under license. See www.NissanUSA.com/bluetooth for details.
2 Some jurisdictions prohibit the use of cellular telephones while drivin\
g.
For more information, refer to the “Monitor, climate, audio, phone and voice recognition systems (section 4) ” of
your Owner’s Manual.
Microphone
Bluetooth®
Controls
2009259_16b_Pathfinder_US_pQRG_121715.indd 2112/17/15 5:02 PM
To view detailed instructional videos regarding these and other features, please go to www.nissanownersinfo.mobi.
Page 25 of 32

23
PHONEBOOK
Depending on your cellular phone, the system may automatically download \
your
cellular phone’s entire phonebook to the vehicle’s Bluetooth®,2 system.
If the phonebook does not download
automatically, the vehicle phonebook may be
set for up to 40 entries.
To manually download entries:
1.
Press the
button on the steering wheel and
touch the “Quick Dial” key.
2.
T
ouch the “Add New” key at the top of the
display. There are different methods to input a phone number. Select one of the
following options:
•
“Copy from Call History” to s
ave a number from the Outgoing, Incoming or
Missed Calls list.
•
“Copy from the Handset” to s
ave a number
that has been downloaded from your
handset to the vehicle.
•
“Enter Number by K
eypad” to input the
number and name manually.
MAKING A CALL
To make a call, follow this procedure:
1.
Press the
button on the steering wheel.
The “Phone” menu will appear on the control
panel display.
2.
T
ouch the “Quick Dial”, “Call History,”
“Phonebook” or “Dial Number” key.
3.
Select the desired entry from the list.
4.
Dialing begins when the entry is selected or
when the “O
K” key is selected.
RECEIVING/ENDING A CALL
To accept the call, press the button on the
steering wheel or touch the “Answer” key.
To reject the call, press and hold the button on
the steering wheel or touch the “Reject Call” key.
To hang up, press the button on the steering
wheel or touch the “Hang up” key.
1 Some jurisdictions prohibit the use of cellular telephones while drivin\
g.2 Availability of specific features is dependent upon the phone’s Bluetooth® support. Please refer to your phone owner’s manual for
details. Bluetooth® word mark and logos are owned by Bluetooth SIG,
Inc., and any use of such marks by NISSAN is under license. See
www.NissanUSA.com/bluetooth for details.
3 Laws in some jurisdictions may restrict the use of “T ext-to-Speech”. Some applications and features such as social
networking and texting, may also be restricted. Check local regulations for any requirements before using these features.
Compatible smartphone required. Text rates and/or data usage may apply.
To view detailed instructional videos regarding these and other features, please go\
to www.nissanownersinfo.mobi.
For more information, refer to the “Monitor, climate, audio, phone and voice recognition systems (section 4) ” of
your Owner’s Manual.
2009259_16b_Pathfinder_US_pQRG_121715.indd 2312/17/15 5:02 PM
To view detailed instructional videos regarding these and other features, please go to www.nissanownersinfo.mobi.
Page 28 of 32

26
BLUETOOTH® STREAMING AUDIO WITH NAVIGATION
(if so equipped)
If you have a compatible Bluetooth® device with streaming audio (A2DP and AVRCP
profiles), you can set up the wireless connection between your Blueto\
oth® device and
your vehicle’s audio system. This connection allows you to listen to audio from the
Bluetooth
® device using your vehicle’s speakers.
A cellular telephone should not be used while driving so full attention \
may be given to
vehicle operation. *
To use your connected Bluetooth® device to stream audio, it will need to be connected
as an audio device. The following procedure will initially connect a Bluetooth® device
as an audio player and allow you to switch between devices.
1.
Press the SETTING button on the control panel and touch the “Bluetooth” key on
the display.
2.
Select “Connected Devices”.
3.
Select “
Audio Player”.
4.
Select the name of the device that you are
attempting to connect as an audio player
.
5.
Select “Select”.
6.
V
erify that the system confirms that
the device has been selected as an
audio player.
Once your Bluetooth® device has been
connected as an audio device, press the
DISC•AUX button on the control panel to select
the Bluetooth
® Streaming Audio player.
Bluetooth® connectivity issues can usually be
resolved with a reboot of your cellular phone if
you do not regularly turn off your cellular phone.
Otherwise, try updating your cellular phone with
the latest software.
*Some jurisdictions prohibit the use of cellular telephones while drivin\
g.
For more information, refer to the “Monitor, climate, audio, phone and voice recognition systems (section 4) ” of
your Owner’s Manual or visit www.NissanUSA.com/bluetooth.
SYSTEM GUIDE
2009259_16b_Pathfinder_US_pQRG_121715.indd 2612/17/15 5:03 PM
To view detailed instructional videos regarding these and other features, please go to www.nissanownersinfo.mobi.
Page 29 of 32
27
NAVIGATION SYSTEM (if so equipped)
Your Navigation System can calculate a route
from your current location
to a preferred destination.
The real-time map display
and turn-by-turn voice
guidance will lead you
along the route.
The Navigation System will continually update
your vehicle’s position.
If you have deviated from
the original route, it will
recalculate the route from
your current location.
To help promote safe driving, some functions
cannot be operated or
have limited operation when the vehicle speed is above 5 mph (8 km/h).\
The on-screen
text and keys for these restricted functions will be “grayed-out” \
or muted and cannot
be selected while driving. These functions will become available again when the vehicle
speed is reduced to 5 mph (8 km/h). Voice commands may be available for some of the
restricted functions. For more information, refer to the “Monitor, climate, audio, phone
and voice recognition systems (section 4)” of your Owner’s Manual.
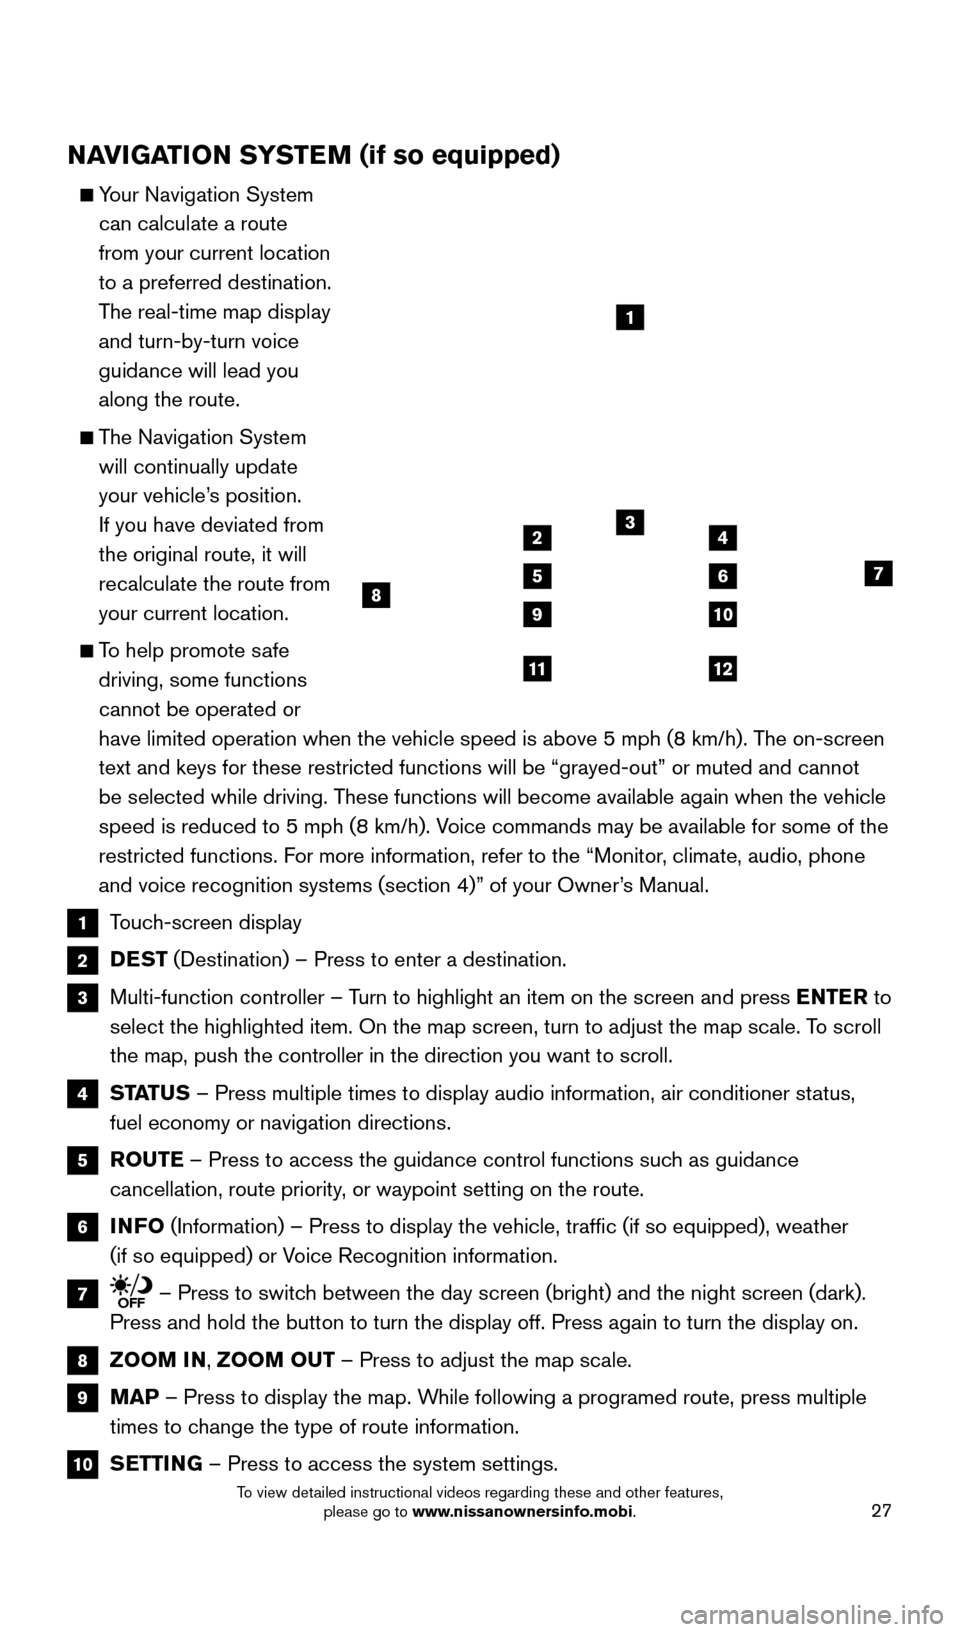
1 Touch-screen display
2 DEST (Destination) – Press to enter a destination.
3 Multi-function controller – T urn to highlight an item on the screen and press ENTER to
select the highlighted item. On the map screen, turn to adjust the map s\
cale. To scroll
the map, push the controller in the direction you want to scroll.
4 STATUS – Press multiple times to display audio information, air conditioner\
status,
fuel economy or navigation directions.
5 ROUTE – Press to access the guidance control functions such as guidance
cancellation, route priority, or waypoint setting on the route.
6 INFO (Information) – Press to display the vehicle, traffic (if so eq\
uipped), weather
(if so equipped) or Voice Recognition information.
7 – Press to switch between the day screen (bright) and the night screen (dark).
Press and hold the button to turn the display off. Press again to turn t\
he display on.
8 ZOOM IN, ZOOM OUT – Press to adjust the map scale.
9 MAP – Press to display the map. While following a programed route, press multiple
times to change the type of route information.
10 SETTING – Press to access the system settings.
1
3
7
9
24
56
10
1112
8
2009259_16b_Pathfinder_US_pQRG_121715.indd 2712/17/15 5:03 PM
To view detailed instructional videos regarding these and other features, please go to www.nissanownersinfo.mobi.