change wheel NISSAN PATHFINDER 2023 Owners Manual
[x] Cancel search | Manufacturer: NISSAN, Model Year: 2023, Model line: PATHFINDER, Model: NISSAN PATHFINDER 2023Pages: 665, PDF Size: 4.64 MB
Page 9 of 665
For descriptions specified for intelligent
4–wheel drive models, a4x4mark is placed
at the beginning of the applicable
sections/items.
As with other vehicles with features for
off-road use, failure to operate 4-wheel
drive models correctly may result in loss
of control or an accident. For additional
information, see “Driving safety precau-
tions” (P. 5-10).
ON-PAVEMENT AND OFF-ROAD DRIVING
This vehicle will handle and maneuver
differently from an ordinary passenger
car because it has a higher center of
gravity for off-road use. As with other
vehicles with features of this type, fail-
ure to operate this vehicle correctly may
result in loss of control or an accident.
For additional information, see “On-
pavement and off-road driving precau-
tions” (P. 5-8), “Avoiding collision and
roll-over” (P. 5-9) and “Driving safety
precautions” (P. 5-10).
MODIFICATION OF YOUR VEHICLE
This vehicle should not be modified.
Modification could affect its perfor-
mance, safety, emissions or durability
and may even violate governmental
regulations. In addition, damage or per-
formance problems resulting from
modifications may not be covered un-
der NISSAN warranties.
WARNING
Installing an af termarket On-Board Di-
agnostic (OBD) plug-in device that uses
the port during normal driving, for ex-
ample remote insurance company
monitoring, remote vehicle diagnos-
tics, telematics or engine reprogram-
ming, may cause interference or dam-
age to vehicle systems. We do not
recommend or endorse the use of any
af termarket OBD plug-in devices, un-
less specifically approved by NISSAN.
The vehicle warranty may not cover
damage caused by any af termarket
plug-in device.
This manual includes information for all fea-
tures and equipment available on this model.
Features and equipment in your vehicle may
vary depending on model, trim level, options
selected, order, date of production, region or
availability. Therefore, you may find informa-
tion about features or equipment that are
not included or installed on your vehicle.
All information, specifications and illustra-
tions in this manual are those in effect at the
time of printing. NISSAN reserves the right to
change specifications, performance, design
or component suppliers without notice and
without obligation. From time to time,
NISSAN may update or revise this manual to
provide Owners with the most accurate in-
formation currently available. Please care-
fully read and retain with this manual all revi-
sion updates sent to you by NISSAN to
ensure you have access to accurate and up-
to-date information regarding your vehicle.
Current versions of vehicle Owner's Manuals
and any updates can also be found in the
Owner section of the NISSAN website at
https://owners.nissanusa.com/
nowners/navigation/manualsGuide.Ifyou
have questions concerning any information
in your Owner's Manual, contact NISSAN
Consumer Affairs. Refer to NISSAN CUS-
TOMER CARE PROGRAM page in this Owner’s
Manual for contact information.
WHEN READING THE MANUAL
Page 99 of 665
• A child restraint or other object pressingagainst the rear of the seatback.
• A rear passenger pushing or pulling on the back of the front passenger seat.
• Forcing the front seat or seatback against an object on the seat or floor be-
hind it.
• An object placed under the front passen- ger seat.
• An object placed between the seat cush- ion and center console.
If the vehicle is moving, please come to a
stop when it is safe to do so. Check and
correct any of the above conditions. Re-
start the vehicle and wait 1 minute.
NOTE:
A system check will be performed during
which the front passenger air bag status
light will remain lit for about 7 seconds
initially.
If the light is still OFF af ter this, the small
adult, child or child restraint should be re-
positioned in the rear seat and the vehicle
should be checked as soon as possible. It is
recommended that you visit a NISSAN
dealer for this service. 3. If the light is OFF with no front passenger
and no objects on the front passenger
seat, the vehicle should be checked. It is
recommended that you visit a NISSAN
dealer as soon as possible.
Other supplemental front-impact air
bag precautions
WARNING
• Do not place any objects on the
steering wheel pad or on the instru-
ment panel. Also, do not place any
objects between any occupant and
the steering wheel or instrument
panel. Such objects may become
dangerous projectiles and cause in-
jury if the front air bags inflate.
• Immediately af ter inflation, several
front air bag system components will
be hot. Do not touch them; you may
severely burn yourself.
• No unauthorized changes should be
made to any components or wiring
of the supplemental air bag system.
This is to prevent accidental inflation
of the supplemental air bag or dam-
age to the supplemental air bag
system. •
Do not make unauthorized changes
to your vehicle's electrical system,
suspension system or front end
structure. This could affect proper
operation of the front air bag system.
• Tampering with the front air bag sys-
tem may result in serious personal
injury. Tampering includes changes
to the steering wheel and the instru-
ment panel assembly by placing ma-
terial over the steering wheel pad
and above the instrument panel or
by installing additional trim material
around the air bag system.
• Removing or modif ying the front
passenger seat may affect the func-
tion of the air bag system and result
in serious personal injury.
1-74Safety-Seats, seat belts and supplemental restraint system
Page 123 of 665
•The engine oil pressure warning light
is not designed to indicate oil level.
The oil level should be checked using
the dipstick. For additional informa-
tion, see “Engine oil” (P. 8-6 ).
Master warning light (if so
equipped)
When the ignition is in the ON position, the
master warning light illuminates if a
warning message appears in the vehicle
information display.
For additional information, see “Vehicle in-
formation display–7 inch (18 cm) Type A”
(P. 2-23) or “Vehicle information display—12.3
inch (31 cm) Type B” (P. 2-48).
Seat belt warning light and
chime (if so equipped)
• The light and chime remind you to fasten the seat belts.
• The seat belt warning light will illuminate when the ignition switch is pushed to the
ON position if the driver’s seat belt is not
fastened, or if the front passenger seat
belt is not fastened when occupied.
• The seat belt warning light will also illumi- nate if a rear passenger seat belt is
changed from fastened to unfastened. • If the driver’s seat belt is not fastened
when the ignition switch is pushed to the
ON position, the chime will sound shortly.
• If the vehicle is driven above 9 mph (15 km/h) in the conditions that illuminate
the seat belt warning light, the lamp will
begin to blink and the chime will sound
for over one minute, or until the seat belt
is fastened again.
NOTE:
•The warning light and/or chime may
activate if an object is placed in the un-
occupied front passenger seat. In this
case, please remove the object from
the front passenger seat.
• The warning light and/or chime may
activate if any seat belt is unfastened
before the vehicle comes to a complete
stop. Please remain fastened until the
vehicle has come to a complete stop.
Steering Assist Hands Off
warning light (if so
equipped)
When the Steering Assist is activated, it
monitors the driver’s steering wheel opera-
tion. If the steering wheel is not operated or
the driver takes his/her hands off the
steering wheel for a period of time, the warning light illuminates. If the driver does
not operate the steering wheel af ter the
warning light has been illuminated, an au-
dible alert sounds and the warning flashes
in the vehicle information display, followed
by a quick brake application to request the
driver to take control of the vehicle again. If
the driver remains unresponsive, the ve-
hicle will automatically turn on the hazard
lights and slow to a complete stop.
For additional information, see “Steering
Assist” (P. 5-119).
Supplemental air bag
warning light
When the ignition switch is placed in the ON
position, the supplemental air bag warning
light illuminates for about 7 seconds and
then turns off. This means the system is
operational.
If any of the following conditions occur, the
front air bag, side air bag, curtain air bag,
and pretensioner seat belt systems need
servicing:
• The supplemental air bag warning light
remains on af ter approximately 7
seconds.
• The supplemental air bag warning light flashes intermittently.
2-16Instruments and controls
Page 131 of 665
• Audio information
• Compass and navigation information (ifso equipped)
• Shif t position
• Distance to empty
• Odometer
• Clock and outside temperature
HOW TO USE THE VEHICLE
INFORMATION DISPLAY
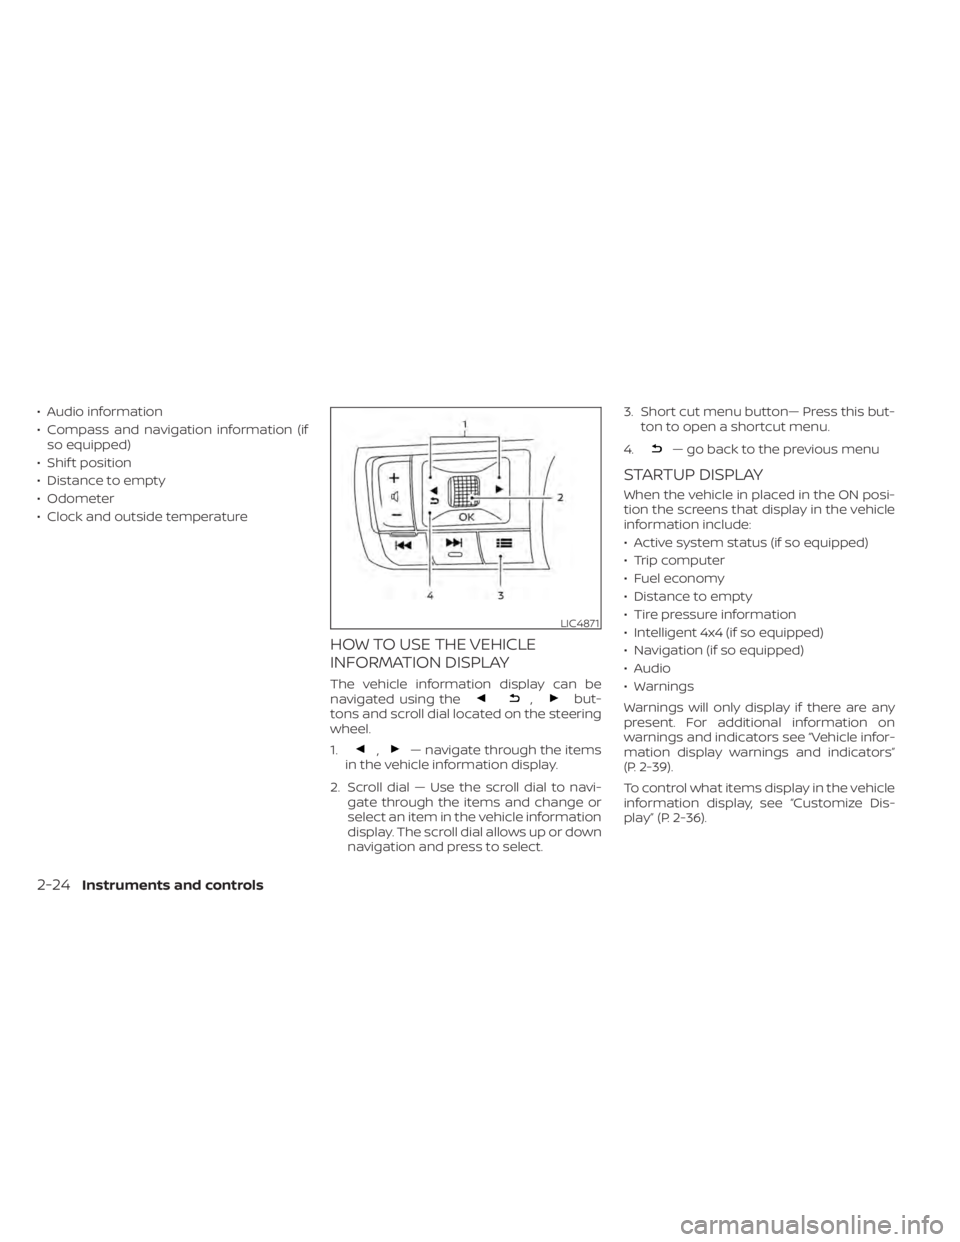
The vehicle information display can be
navigated using the,but-
tons and scroll dial located on the steering
wheel.
1.
,— navigate through the items
in the vehicle information display.
2. Scroll dial — Use the scroll dial to navi- gate through the items and change or
select an item in the vehicle information
display. The scroll dial allows up or down
navigation and press to select. 3. Short cut menu button— Press this but-
ton to open a shortcut menu.
4.
— go back to the previous menu
STARTUP DISPLAY
When the vehicle in placed in the ON posi-
tion the screens that display in the vehicle
information include:
• Active system status (if so equipped)
• Trip computer
• Fuel economy
• Distance to empty
• Tire pressure information
• Intelligent 4x4 (if so equipped)
• Navigation (if so equipped)
• Audio
• Warnings
Warnings will only display if there are any
present. For additional information on
warnings and indicators see “Vehicle infor-
mation display warnings and indicators”
(P. 2-39).
To control what items display in the vehicle
information display, see “Customize Dis-
play ” (P. 2-36).
LIC4871
2-24Instruments and controls
Page 135 of 665
13. Traffic Sign Recognition (if so
equipped)
The Traffic Sign Recognition (TSR) system
provides the driver with information about
the most recently detected speed limit.
For additional information, see “Traffic Sign
Recognition (TSR) (P. 5-35).
14. Idling Stop System (if so
equipped)
The Idling Stop System provides the driver
with information about the amount of fuel
saved while using the system.
For additional information, see “Idling Stop
System” (P. 5-189).
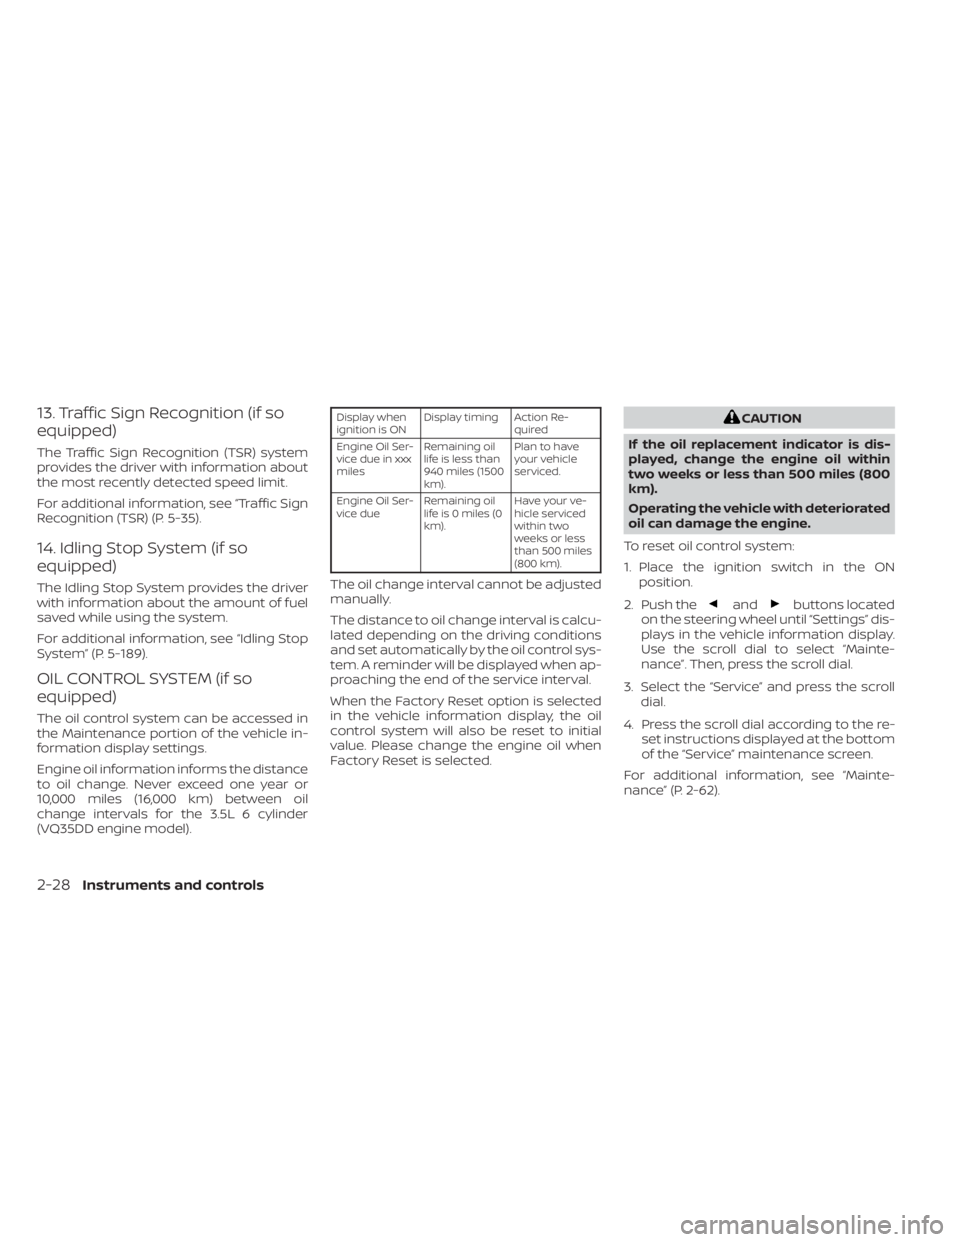
OIL CONTROL SYSTEM (if so
equipped)
The oil control system can be accessed in
the Maintenance portion of the vehicle in-
formation display settings.
Engine oil information informs the distance
to oil change. Never exceed one year or
10,000 miles (16,000 km) between oil
change intervals for the 3.5L 6 cylinder
(VQ35DD engine model).
Display when
ignition is ONDisplay timing Action Re-
quired
Engine Oil Ser-
vice due in xxx
miles Remaining oil
life is less than
940 miles (1500
km). Plan to have
your vehicle
serviced.
Engine Oil Ser-
vice due Remaining oil
lifeis0miles(0
km). Have your ve-
hicle serviced
within two
weeks or less
than 500 miles
(800 km).
The oil change interval cannot be adjusted
manually.
The distance to oil change interval is calcu-
lated depending on the driving conditions
and set automatically by the oil control sys-
tem. A reminder will be displayed when ap-
proaching the end of the service interval.
When the Factory Reset option is selected
in the vehicle information display, the oil
control system will also be reset to initial
value. Please change the engine oil when
Factory Reset is selected.
CAUTION
If the oil replacement indicator is dis-
played, change the engine oil within
two weeks or less than 500 miles (800
km).
Operating the vehicle with deteriorated
oil can damage the engine.
To reset oil control system:
1. Place the ignition switch in the ON position.
2. Push the
andbuttons located
on the steering wheel until “Settings” dis-
plays in the vehicle information display.
Use the scroll dial to select “Mainte-
nance”. Then, press the scroll dial.
3. Select the “Service” and press the scroll dial.
4. Press the scroll dial according to the re- set instructions displayed at the bottom
of the “Service” maintenance screen.
For additional information, see “Mainte-
nance” (P. 2-62).
2-28Instruments and controls
Page 142 of 665
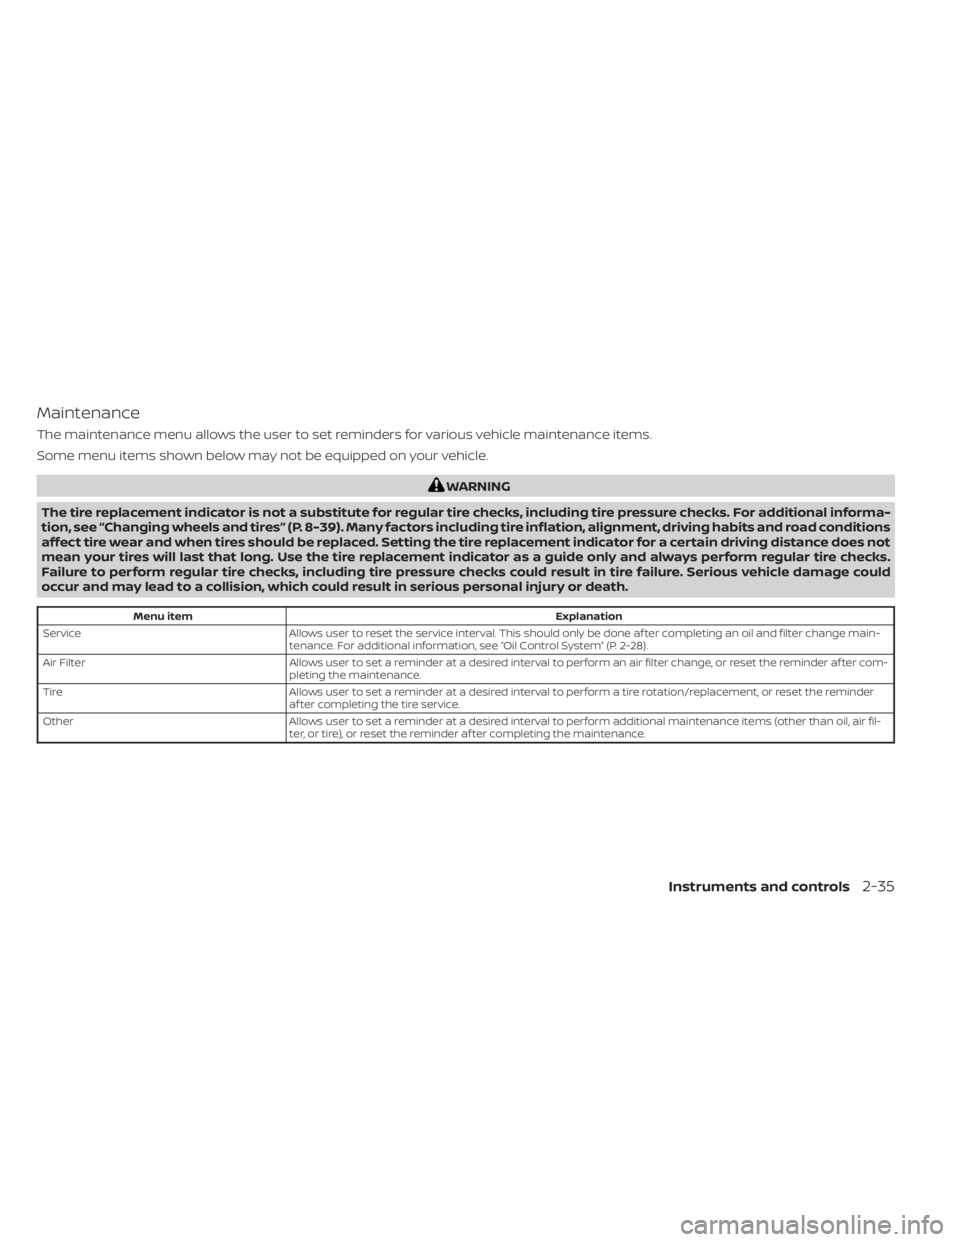
Maintenance
The maintenance menu allows the user to set reminders for various vehicle maintenance items.
Some menu items shown below may not be equipped on your vehicle.
WARNING
The tire replacement indicator is not a substitute for regular tire checks, including tire pressure checks. For additional informa-
tion, see “Changing wheels and tires” (P. 8-39). Many factors including tire inflation, alignment, driving habits and road conditions
affect tire wear and when tires should be replaced. Setting the tire replacement indicator for a certain driving distance does not
mean your tires will last that long. Use the tire replacement indicator as a guide only and always perform regular tire checks.
Failure to perform regular tire checks, including tire pressure checks could result in tire failure. Serious vehicle damage could
occur and may lead to a collision, which could result in serious personal injury or death.
Menu item Explanation
Service Allows user to reset the service interval. This should only be done af ter completing an oil and filter change main-
tenance. For additional information, see “Oil Control System” (P. 2-28).
Air Filter Allows user to set a reminder at a desired interval to perform an air filter change, or reset the reminder af ter com-
pleting the maintenance.
Tire Allows user to set a reminder at a desired interval to perform a tire rotation/replacement, or reset the reminder
af ter completing the tire service.
Other Allows user to set a reminder at a desired interval to perform additional maintenance items (other than oil, air fil-
ter, or tire), or reset the reminder af ter completing the maintenance.
Instruments and controls2-35
Page 150 of 665
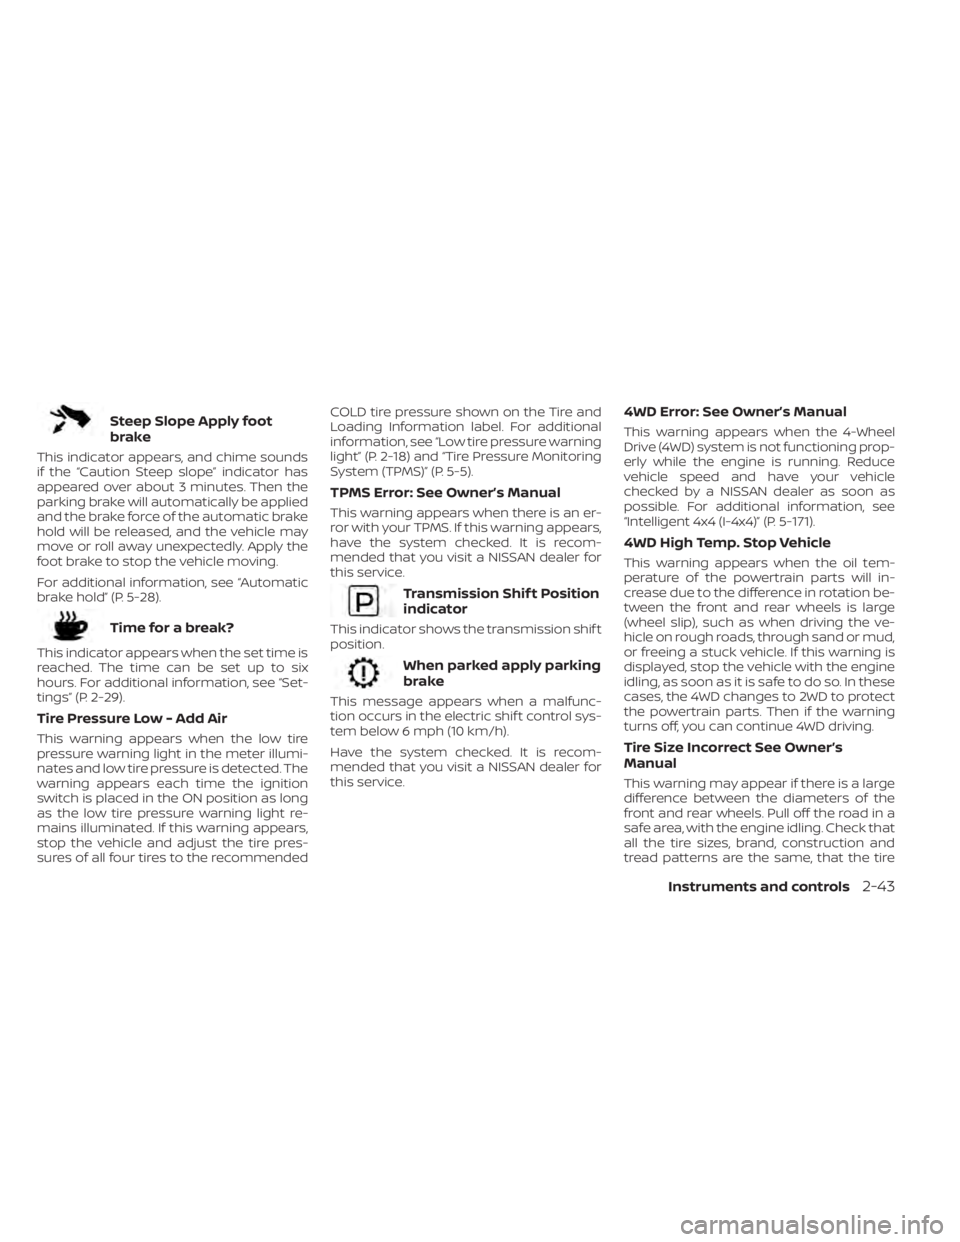
Steep Slope Apply foot
brake
This indicator appears, and chime sounds
if the “Caution Steep slope” indicator has
appeared over about 3 minutes. Then the
parking brake will automatically be applied
and the brake force of the automatic brake
hold will be released, and the vehicle may
move or roll away unexpectedly. Apply the
foot brake to stop the vehicle moving.
For additional information, see “Automatic
brake hold” (P. 5-28).
Time for a break?
This indicator appears when the set time is
reached. The time can be set up to six
hours. For additional information, see “Set-
tings” (P. 2-29).
Tire Pressure Low - Add Air
This warning appears when the low tire
pressure warning light in the meter illumi-
nates and low tire pressure is detected. The
warning appears each time the ignition
switch is placed in the ON position as long
as the low tire pressure warning light re-
mains illuminated. If this warning appears,
stop the vehicle and adjust the tire pres-
sures of all four tires to the recommendedCOLD tire pressure shown on the Tire and
Loading Information label. For additional
information, see “Low tire pressure warning
light” (P. 2-18) and “Tire Pressure Monitoring
System (TPMS)” (P. 5-5).
TPMS Error: See Owner’s Manual
This warning appears when there is an er-
ror with your TPMS. If this warning appears,
have the system checked. It is recom-
mended that you visit a NISSAN dealer for
this service.
Transmission Shif t Position
indicator
This indicator shows the transmission shif t
position.
When parked apply parking
brake
This message appears when a malfunc-
tion occurs in the electric shif t control sys-
tem below 6 mph (10 km/h).
Have the system checked. It is recom-
mended that you visit a NISSAN dealer for
this service.
4WD Error: See Owner’s Manual
This warning appears when the 4-Wheel
Drive (4WD) system is not functioning prop-
erly while the engine is running. Reduce
vehicle speed and have your vehicle
checked by a NISSAN dealer as soon as
possible. For additional information, see
“Intelligent 4x4 (I-4x4)” (P. 5-171).
4WD High Temp. Stop Vehicle
This warning appears when the oil tem-
perature of the powertrain parts will in-
crease due to the difference in rotation be-
tween the front and rear wheels is large
(wheel slip), such as when driving the ve-
hicle on rough roads, through sand or mud,
or freeing a stuck vehicle. If this warning is
displayed, stop the vehicle with the engine
idling, as soon as it is safe to do so. In these
cases, the 4WD changes to 2WD to protect
the powertrain parts. Then if the warning
turns off, you can continue 4WD driving.
Tire Size Incorrect See Owner’s
Manual
This warning may appear if there is a large
difference between the diameters of the
front and rear wheels. Pull off the road in a
safe area, with the engine idling. Check that
all the tire sizes, brand, construction and
tread patterns are the same, that the tire
Instruments and controls2-43
Page 151 of 665
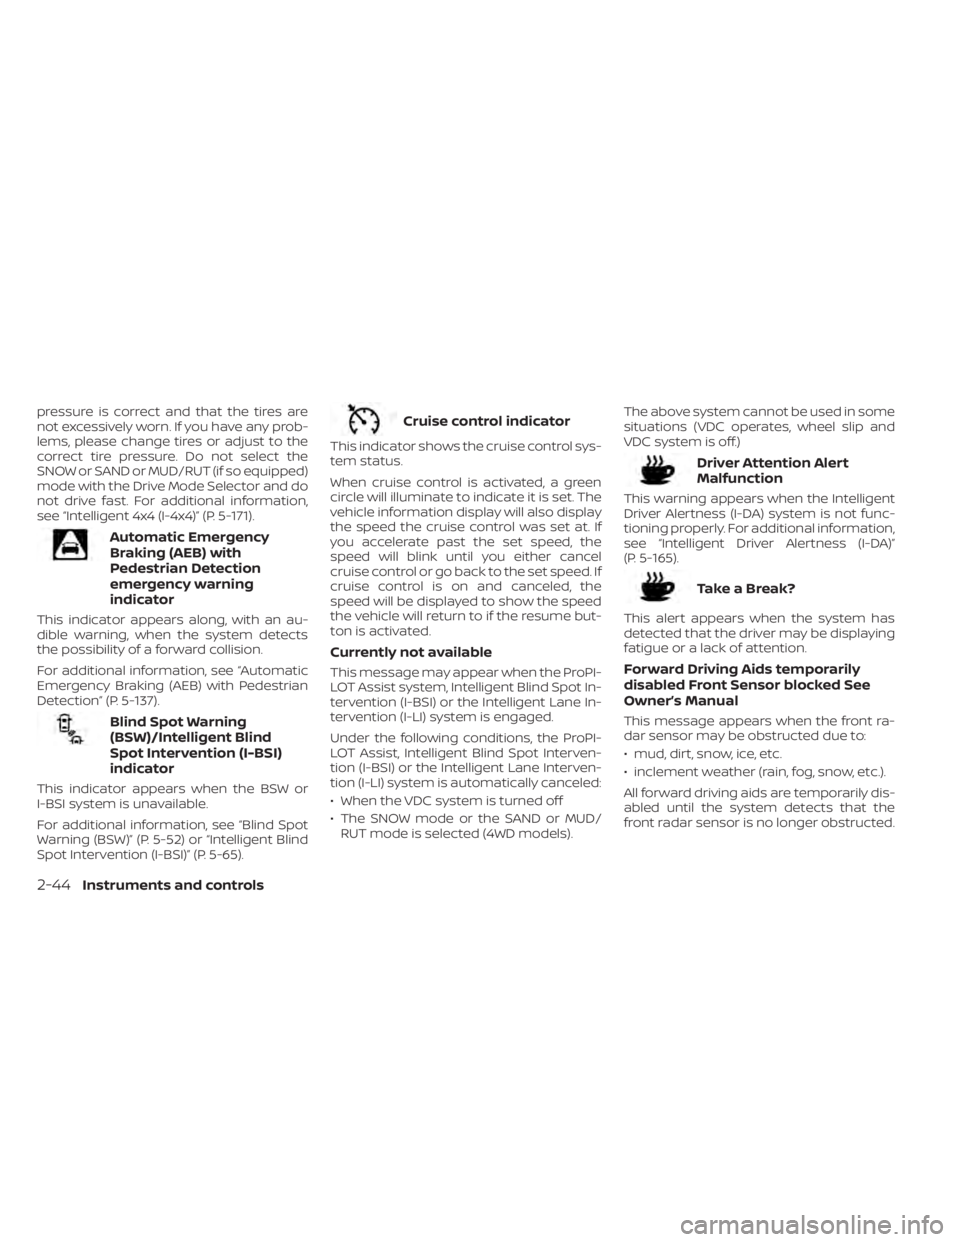
pressure is correct and that the tires are
not excessively worn. If you have any prob-
lems, please change tires or adjust to the
correct tire pressure. Do not select the
SNOW or SAND or MUD/RUT (if so equipped)
mode with the Drive Mode Selector and do
not drive fast. For additional information,
see “Intelligent 4x4 (I-4x4)” (P. 5-171).
Automatic Emergency
Braking (AEB) with
Pedestrian Detection
emergency warning
indicator
This indicator appears along, with an au-
dible warning, when the system detects
the possibility of a forward collision.
For additional information, see “Automatic
Emergency Braking (AEB) with Pedestrian
Detection” (P. 5-137).
Blind Spot Warning
(BSW)/Intelligent Blind
Spot Intervention (I-BSI)
indicator
This indicator appears when the BSW or
I-BSI system is unavailable.
For additional information, see “Blind Spot
Warning (BSW)” (P. 5-52) or “Intelligent Blind
Spot Intervention (I-BSI)” (P. 5-65).
Cruise control indicator
This indicator shows the cruise control sys-
tem status.
When cruise control is activated, a green
circle will illuminate to indicate it is set. The
vehicle information display will also display
the speed the cruise control was set at. If
you accelerate past the set speed, the
speed will blink until you either cancel
cruise control or go back to the set speed. If
cruise control is on and canceled, the
speed will be displayed to show the speed
the vehicle will return to if the resume but-
ton is activated.
Currently not available
This message may appear when the ProPI-
LOT Assist system, Intelligent Blind Spot In-
tervention (I-BSI) or the Intelligent Lane In-
tervention (I-LI) system is engaged.
Under the following conditions, the ProPI-
LOT Assist, Intelligent Blind Spot Interven-
tion (I-BSI) or the Intelligent Lane Interven-
tion (I-LI) system is automatically canceled:
• When the VDC system is turned off
• The SNOW mode or the SAND or MUD/RUT mode is selected (4WD models). The above system cannot be used in some
situations (VDC operates, wheel slip and
VDC system is off.)
Driver Attention Alert
Malfunction
This warning appears when the Intelligent
Driver Alertness (I-DA) system is not func-
tioning properly. For additional information,
see “Intelligent Driver Alertness (I-DA)”
(P. 5-165).
TakeaBreak?
This alert appears when the system has
detected that the driver may be displaying
fatigue or a lack of attention.
Forward Driving Aids temporarily
disabled Front Sensor blocked See
Owner’s Manual
This message appears when the front ra-
dar sensor may be obstructed due to:
• mud, dirt, snow, ice, etc.
• inclement weather (rain, fog, snow, etc.).
All forward driving aids are temporarily dis-
abled until the system detects that the
front radar sensor is no longer obstructed.
2-44Instruments and controls
Page 155 of 665
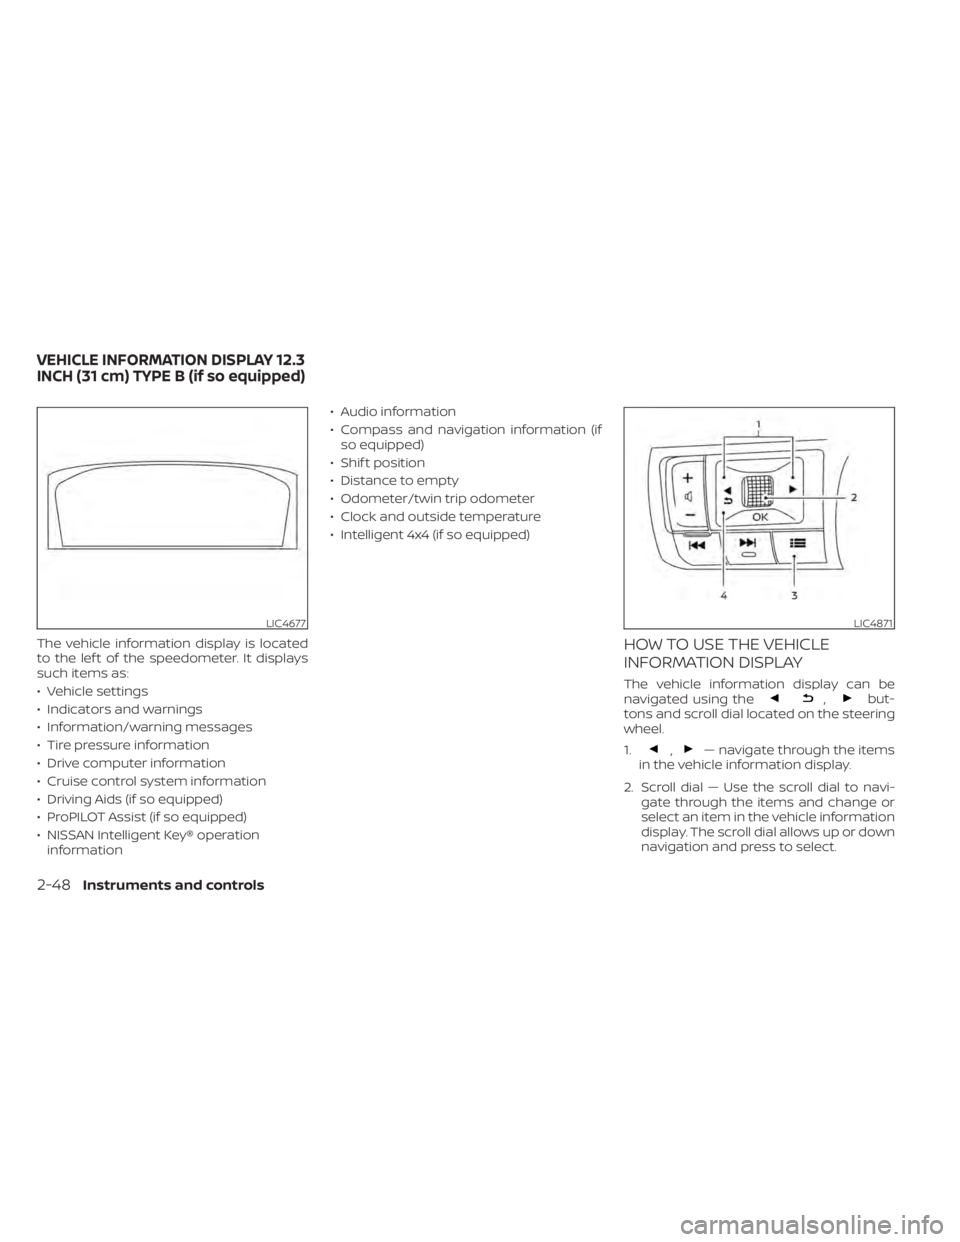
The vehicle information display is located
to the lef t of the speedometer. It displays
such items as:
• Vehicle settings
• Indicators and warnings
• Information/warning messages
• Tire pressure information
• Drive computer information
• Cruise control system information
• Driving Aids (if so equipped)
• ProPILOT Assist (if so equipped)
• NISSAN Intelligent Key® operationinformation • Audio information
• Compass and navigation information (if
so equipped)
• Shif t position
• Distance to empty
• Odometer/twin trip odometer
• Clock and outside temperature
• Intelligent 4x4 (if so equipped)HOW TO USE THE VEHICLE
INFORMATION DISPLAY
The vehicle information display can be
navigated using the,but-
tons and scroll dial located on the steering
wheel.
1.
,— navigate through the items
in the vehicle information display.
2. Scroll dial — Use the scroll dial to navi- gate through the items and change or
select an item in the vehicle information
display. The scroll dial allows up or down
navigation and press to select.
LIC4677LIC4871
VEHICLE INFORMATION DISPLAY 12.3
INCH (31 cm) TYPE B (if so equipped)
2-48Instruments and controls
Page 161 of 665
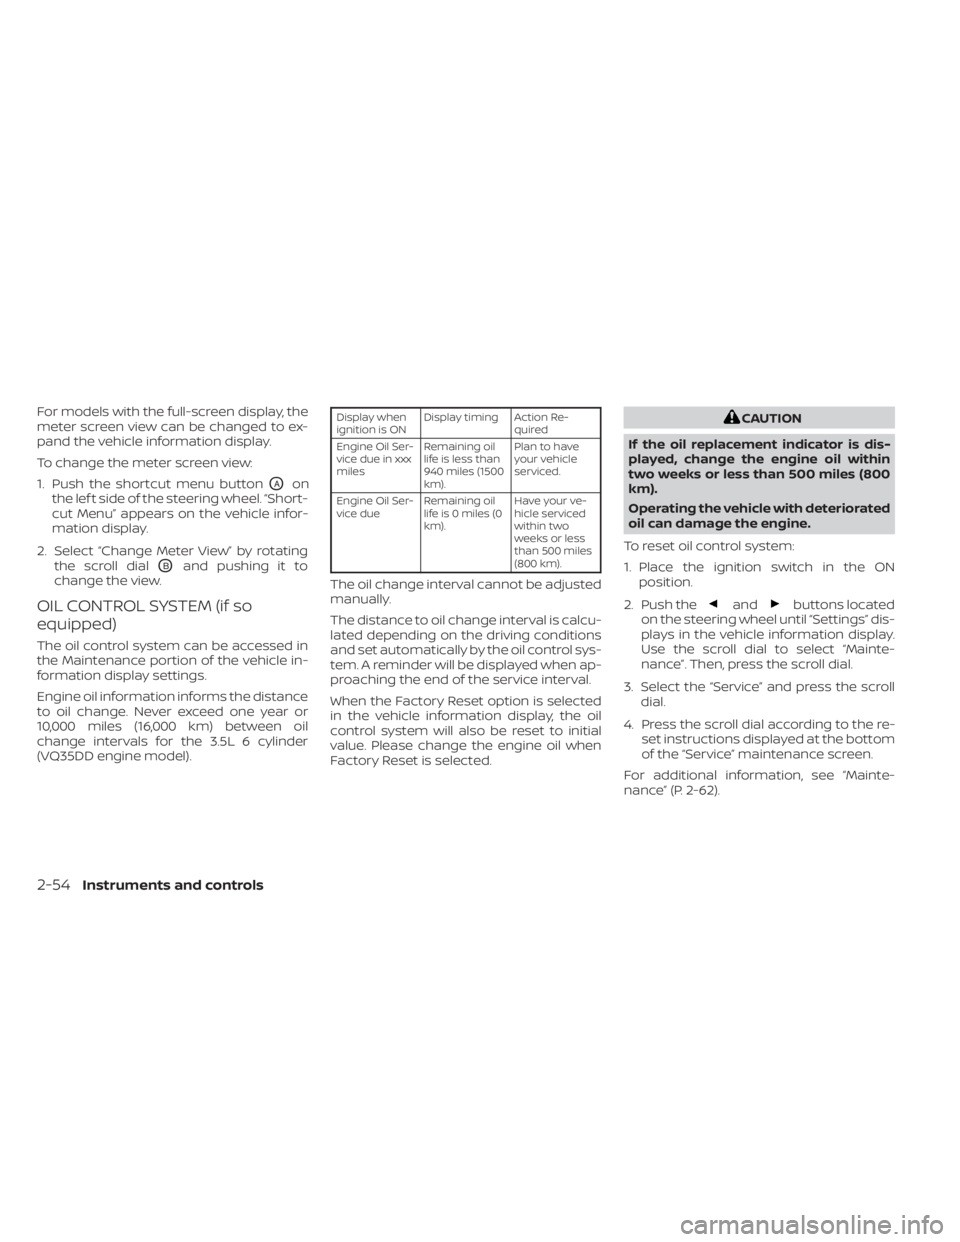
For models with the full-screen display, the
meter screen view can be changed to ex-
pand the vehicle information display.
To change the meter screen view:
1. Push the shortcut menu button
OAon
the lef t side of the steering wheel. “Short-
cut Menu” appears on the vehicle infor-
mation display.
2. Select “Change Meter View” by rotating the scroll dial
OBand pushing it to
change the view.
OIL CONTROL SYSTEM (if so
equipped)
The oil control system can be accessed in
the Maintenance portion of the vehicle in-
formation display settings.
Engine oil information informs the distance
to oil change. Never exceed one year or
10,000 miles (16,000 km) between oil
change intervals for the 3.5L 6 cylinder
(VQ35DD engine model).
Display when
ignition is ON Display timing Action Re-
quired
Engine Oil Ser-
vice due in xxx
miles Remaining oil
life is less than
940 miles (1500
km). Plan to have
your vehicle
serviced.
Engine Oil Ser-
vice due Remaining oil
lifeis0miles(0
km). Have your ve-
hicle serviced
within two
weeks or less
than 500 miles
(800 km).
The oil change interval cannot be adjusted
manually.
The distance to oil change interval is calcu-
lated depending on the driving conditions
and set automatically by the oil control sys-
tem. A reminder will be displayed when ap-
proaching the end of the service interval.
When the Factory Reset option is selected
in the vehicle information display, the oil
control system will also be reset to initial
value. Please change the engine oil when
Factory Reset is selected.
CAUTION
If the oil replacement indicator is dis-
played, change the engine oil within
two weeks or less than 500 miles (800
km).
Operating the vehicle with deteriorated
oil can damage the engine.
To reset oil control system:
1. Place the ignition switch in the ON position.
2. Push the
andbuttons located
on the steering wheel until “Settings” dis-
plays in the vehicle information display.
Use the scroll dial to select “Mainte-
nance”. Then, press the scroll dial.
3. Select the “Service” and press the scroll dial.
4. Press the scroll dial according to the re- set instructions displayed at the bottom
of the “Service” maintenance screen.
For additional information, see “Mainte-
nance” (P. 2-62).
2-54Instruments and controls