Window NISSAN QASHQAI 2013 User Guide
[x] Cancel search | Manufacturer: NISSAN, Model Year: 2013, Model line: QASHQAI, Model: NISSAN QASHQAI 2013Pages: 297, PDF Size: 4.09 MB
Page 33 of 297
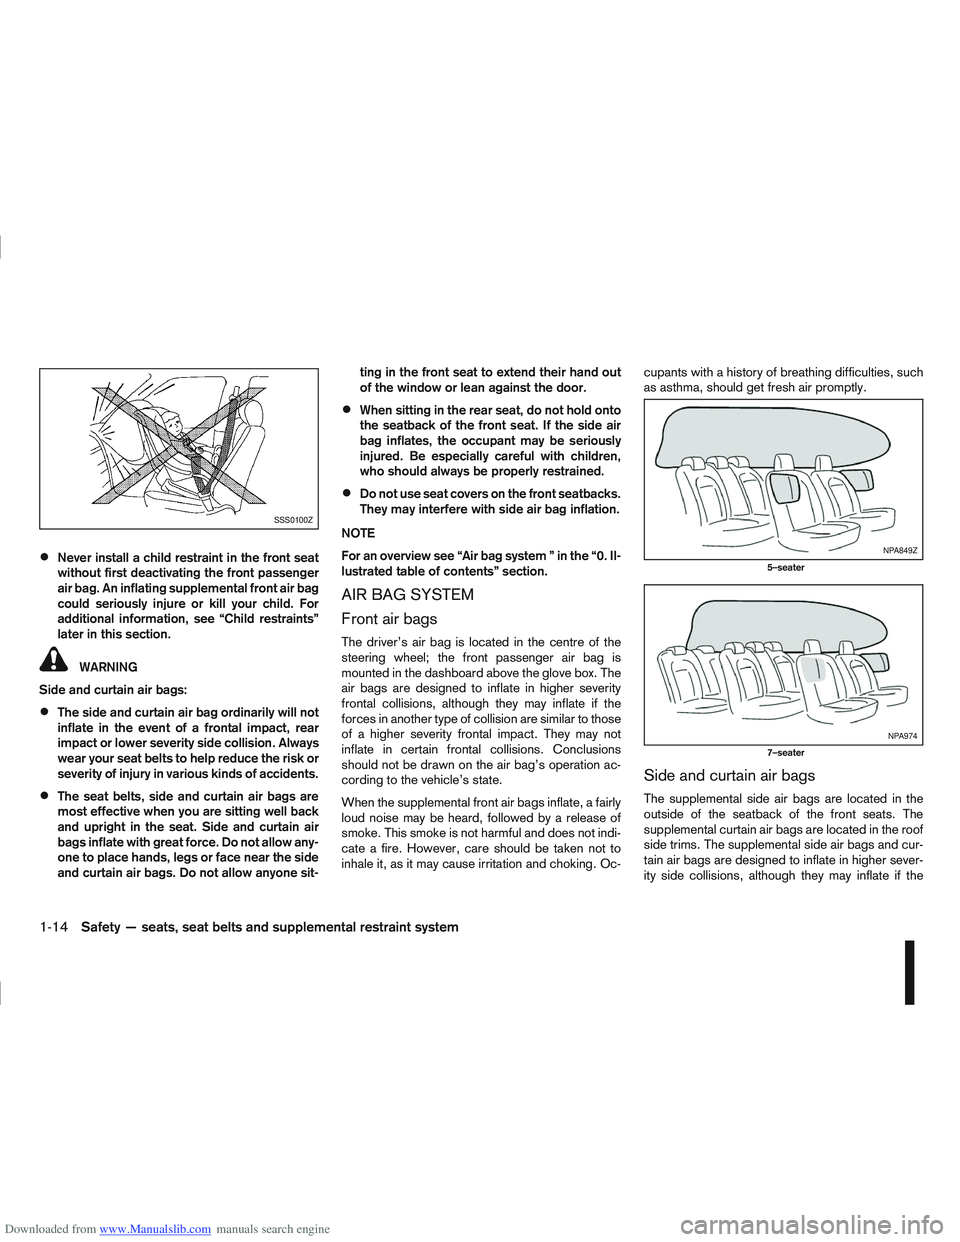
Downloaded from www.Manualslib.com manuals search engine Never install a child restraint in the front seat
without first deactivating the front passenger
air bag. An inflating supplemental front air bag
could seriously injure or kill your child. For
additional information, see “Child restraints”
later in this section.
WARNING
Side and curtain air bags:
The side and curtain air bag ordinarily will not
inflate in the event of a frontal impact, rear
impact or lower severity side collision. Always
wear your seat belts to help reduce the risk or
severity of injury in various kinds of accidents.
The seat belts, side and curtain air bags are
most effective when you are sitting well back
and upright in the seat. Side and curtain air
bags inflate with great force. Do not allow any-
one to place hands, legs or face near the side
and curtain air bags. Do not allow anyone sit- ting in the front seat to extend their hand out
of the window or lean against the door.
When sitting in the rear seat, do not hold onto
the seatback of the front seat. If the side air
bag inflates, the occupant may be seriously
injured. Be especially careful with children,
who should always be properly restrained.
Do not use seat covers on the front seatbacks.
They may interfere with side air bag inflation.
NOTE
For an overview see “Air bag system ” in the “0. Il-
lustrated table of contents” section.
AIR BAG SYSTEM
Front air bags
The driver’s air bag is located in the centre of the
steering wheel; the front passenger air bag is
mounted in the dashboard above the glove box. The
air bags are designed to inflate in higher severity
frontal collisions, although they may inflate if the
forces in another type of collision are similar to those
of a higher severity frontal impact. They may not
inflate in certain frontal collisions. Conclusions
should not be drawn on the air bag’s operation ac-
cording to the vehicle’s state.
When the supplemental front air bags inflate, a fairly
loud noise may be heard, followed by a release of
smoke. This smoke is not harmful and does not indi-
cate a fire. However, care should be taken not to
inhale it, as it may cause irritation and choking. Oc- cupants with a history of breathing difficulties, such
as asthma, should get fresh air promptly.
Side and curtain air bags
The supplemental side air bags are located in the
outside of the seatback of the front seats. The
supplemental curtain air bags are located in the roof
side trims. The supplemental side air bags and cur-
tain air bags are designed to inflate in higher sever-
ity side collisions, although they may inflate if the
SSS0100Z
NPA849Z
5–seater
NPA974
7–seater
1-14Safety — seats, seat belts and supplemental restraint system
Page 49 of 297
Downloaded from www.Manualslib.com manuals search engine 2Instruments and controls
Instruments and controls
Meters and gauges .................................................. 2-2
Speedometer...................................................... 2-2
Fuel gauge ......................................................... 2-2
Tachometer ........................................................ 2-2
Engine coolant temperature gauge ...................... 2-2
Warning/indicator lights and audible reminders ........ 2-3 Checking bulbs .................................................. 2-3
Warning lights .................................................... 2-3
Indicator lights .................................................... 2-7
Audible reminders............................................... 2-9
Vehicle information display ....................................... 2-11 Warnings and alerts............................................ 2-12
Odometer/twin trip odometer .............................. 2-16
Brightness control .............................................. 2-16
Trip computer ..................................................... 2-16
Settings menu .................................................... 2-18
Cruise control/Speed limiter indicator (where
fitted).................................................................. 2-21
Wiper and washer switch ........................................ 2-21 Windscreen ........................................................ 2-22
Rear window ...................................................... 2-23
Defogger switch ...................................................... 2-23 Rear window defogger ....................................... 2-23
Outside mirror defogger (where fitted) ................ 2-24
Headlight and turn signal switch............................... 2-24 Xenon headlights (where fitted) ........................... 2-24
Headlight switch ................................................. 2-24
Turn signal switch ............................................... 2-26
Fog light switch ....................................................... 2-26 Front fog light (where fitted) ................................ 2-26 Rear fog light ...................................................... 2-27
Headlight aiming control .......................................... 2-27 Headlight aiming control switch (where fitted) ..... 2-27
Automatic aiming control (xenon headlights) ........ 2-27
Headlight cleaner (where fitted) ............................... 2-28
Hazard warning flasher switch ................................. 2-28
Horn ........................................................................\
2-29
Seat heating (where fitted) ....................................... 2-29
Power outlet ............................................................ 2-30
Storage ................................................................... 2-31 Storage trays ...................................................... 2-31
Glove box ........................................................... 2-31
Console box ....................................................... 2-32
Cup holders ....................................................... 2-32
Bottle holder ....................................................... 2-32
Map pocket (where fitted) ................................... 2-32
Seat pocket (where fitted)................................... 2-32
Roof rail (where fitted) ........................................ 2-32
Rear parcel shelf (where fitted) ................................ 2-33
Tonneau cover (where fitted).................................... 2-33
Windows ................................................................. 2-34 Power windows .................................................. 2-34
C-View® glass roof (where fitted) ............................ 2-36 Sunshade operation ............................................ 2-36
System reinitialisation.......................................... 2-37
Interior lights ............................................................ 2-37 Front Room light ................................................. 2-37
Map lights (where fitted) ..................................... 2-38
Rear room/reading light ...................................... 2-38
Luggage compartment light ................................ 2-38
Page 72 of 297
Downloaded from www.Manualslib.com manuals search engine REAR WINDOW
WARNING
In freezing temperatures the washer solution
may freeze on the rear window and obscure your
vision. Warm the rear window with the rear win-
dow defogger before you wash the rear window.
CAUTION
Do not operate the washer continuously for
more than 15 seconds.
Do not operate the washer if the reservoir
tank is empty or frozen.
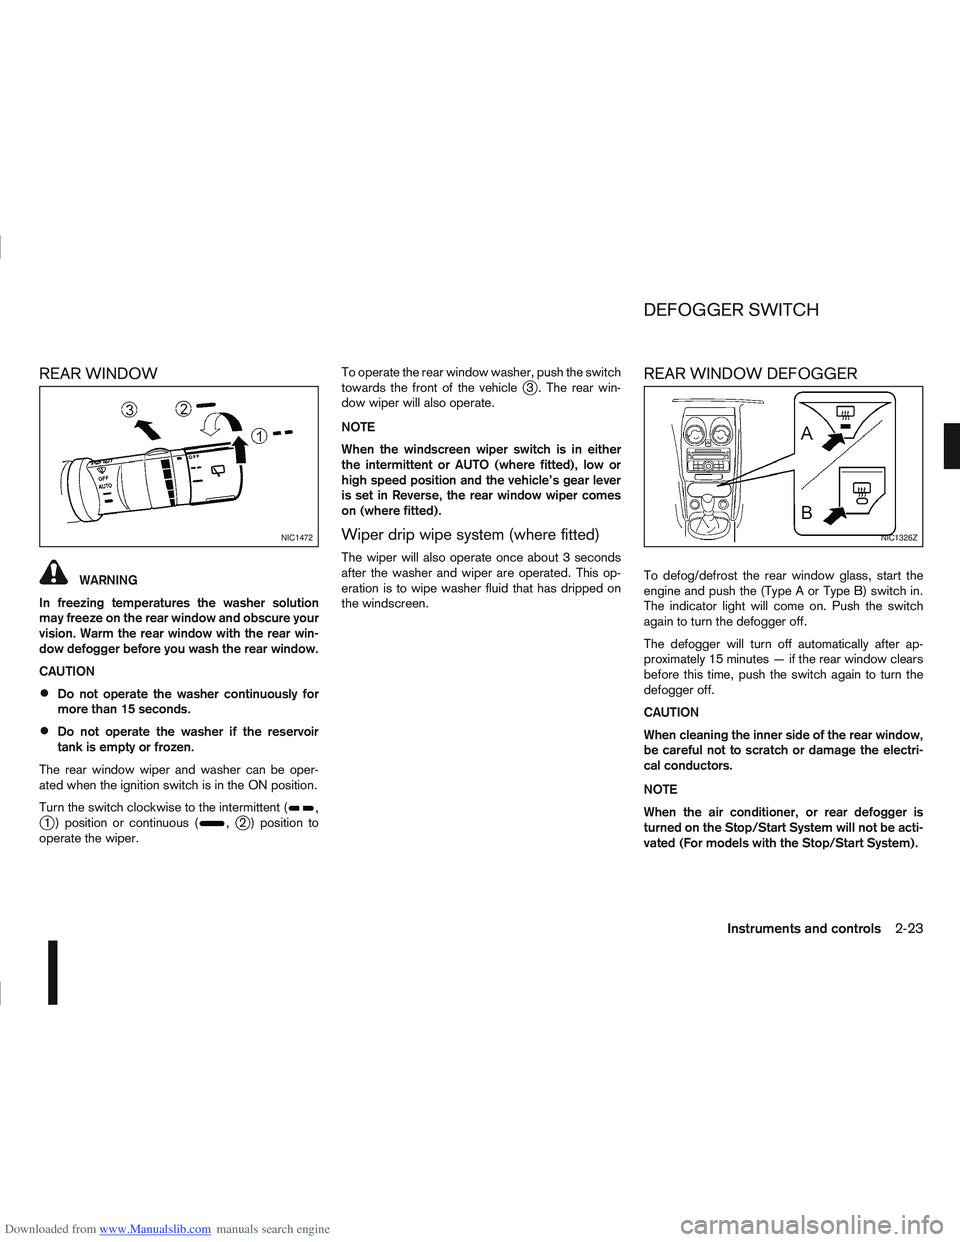
The rear window wiper and washer can be oper-
ated when the ignition switch is in the ON position.
Turn the switch clockwise to the intermittent (
,j1 ) position or continuous (,j2 ) position to
operate the wiper. To operate the rear window washer, push the switch
towards the front of the vehicle
j3 . The rear win-
dow wiper will also operate.
NOTE
When the windscreen wiper switch is in either
the intermittent or AUTO (where fitted), low or
high speed position and the vehicle’s gear lever
is set in Reverse, the rear window wiper comes
on (where fitted).
Wiper drip wipe system (where fitted)
The wiper will also operate once about 3 seconds
after the washer and wiper are operated. This op-
eration is to wipe washer fluid that has dripped on
the windscreen.
REAR WINDOW DEFOGGER
To defog/defrost the rear window glass, start the
engine and push the (Type A or Type B) switch in.
The indicator light will come on. Push the switch
again to turn the defogger off.
The defogger will turn off automatically after ap-
proximately 15 minutes — if the rear window clears
before this time, push the switch again to turn the
defogger off.
CAUTION
When cleaning the inner side of the rear window,
be careful not to scratch or damage the electri-
cal conductors.
NOTE
When the air conditioner, or rear defogger is
turned on the Stop/Start System will not be acti-
vated (For models with the Stop/Start System).
NIC1472NIC1326Z
DEFOGGER SWITCH
Instruments and controls2-23
Page 77 of 297
Downloaded from www.Manualslib.com manuals search engine NISSAN recommends consulting local regulations
on the use of lights.To clean the headlights, pull the windscreen washer
switch towards you while the headlight switch is in
the
position and the ignition switch is in the ON
position.
NOTE
The headlight cleaner will automatically operate
every fifth operation of the wiper and washer
switch.
See “Wiper and washer switch” earlier in this sec-
tion
CAUTION
Do not operate the cleaner continuously for
more than 15 seconds.
Do not operate the cleaner if the washer fluid
reservoir is empty or frozen.
See “Window washer fluid/headlight cleaner fluid
(where fitted)” in the “8. Maintenance and
do-it-yourself” section for details on refilling the res-
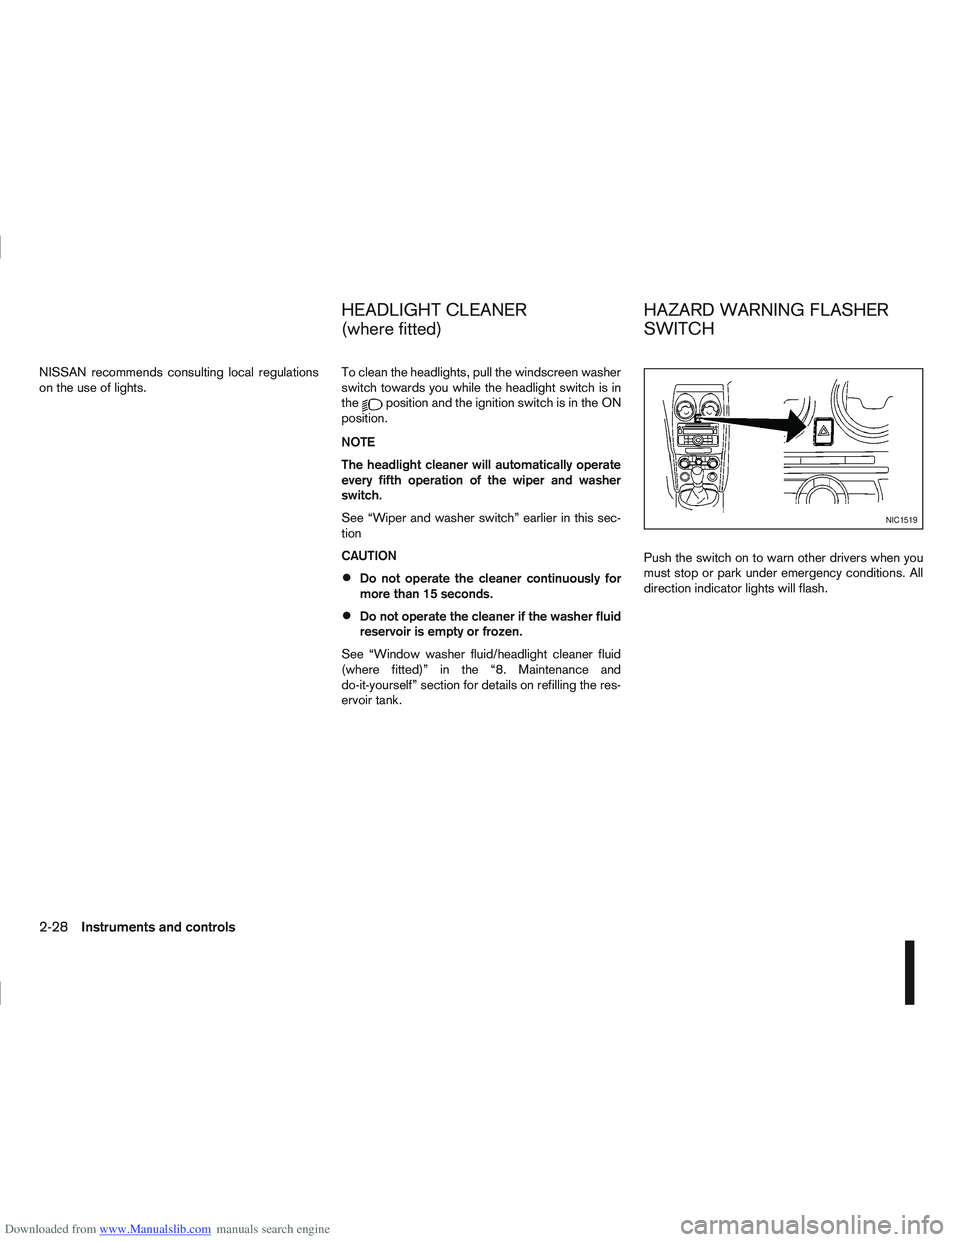
ervoir tank. Push the switch on to warn other drivers when you
must stop or park under emergency conditions. All
direction indicator lights will flash.
NIC1519
HEADLIGHT CLEANER
(where fitted)
HAZARD WARNING FLASHER
SWITCH
2-28Instruments and controls
Page 79 of 297

Downloaded from www.Manualslib.com manuals search engine WARNING
Take care as the power outlet and plug may be
hot during or immediately after use.
CAUTION
This power outlet is not designed for use with
a cigarette lighter unit.
Do not use with accessories that exceed a 12
volt, 120 W (10 A) power draw. Do not use
double adaptors or more than one electrical
accessory.
Use this power outlet with the engine running
(do not use for extended periods of time with
the engine stopped or idling).
Avoid using when the air conditioner, head-
lights or rear window defogger are on.
When not in use, be sure that the cap is
closed. Do not allow water to come into con-
tact with the outlet.
Before inserting or disconnecting a plug, be
sure to turn off the power switch of the elec-
trical accessory being used or the Acc power
of the vehicle.
Fully push the plug in sufficiently. If sufficient
contact is not made, the plug may overheat or
the internal temperature fuse may blow.
NIC1372Z
Front row
NIC1451
2nd row (7-seater)
POWER OUTLET
2-30Instruments and controls
Page 83 of 297
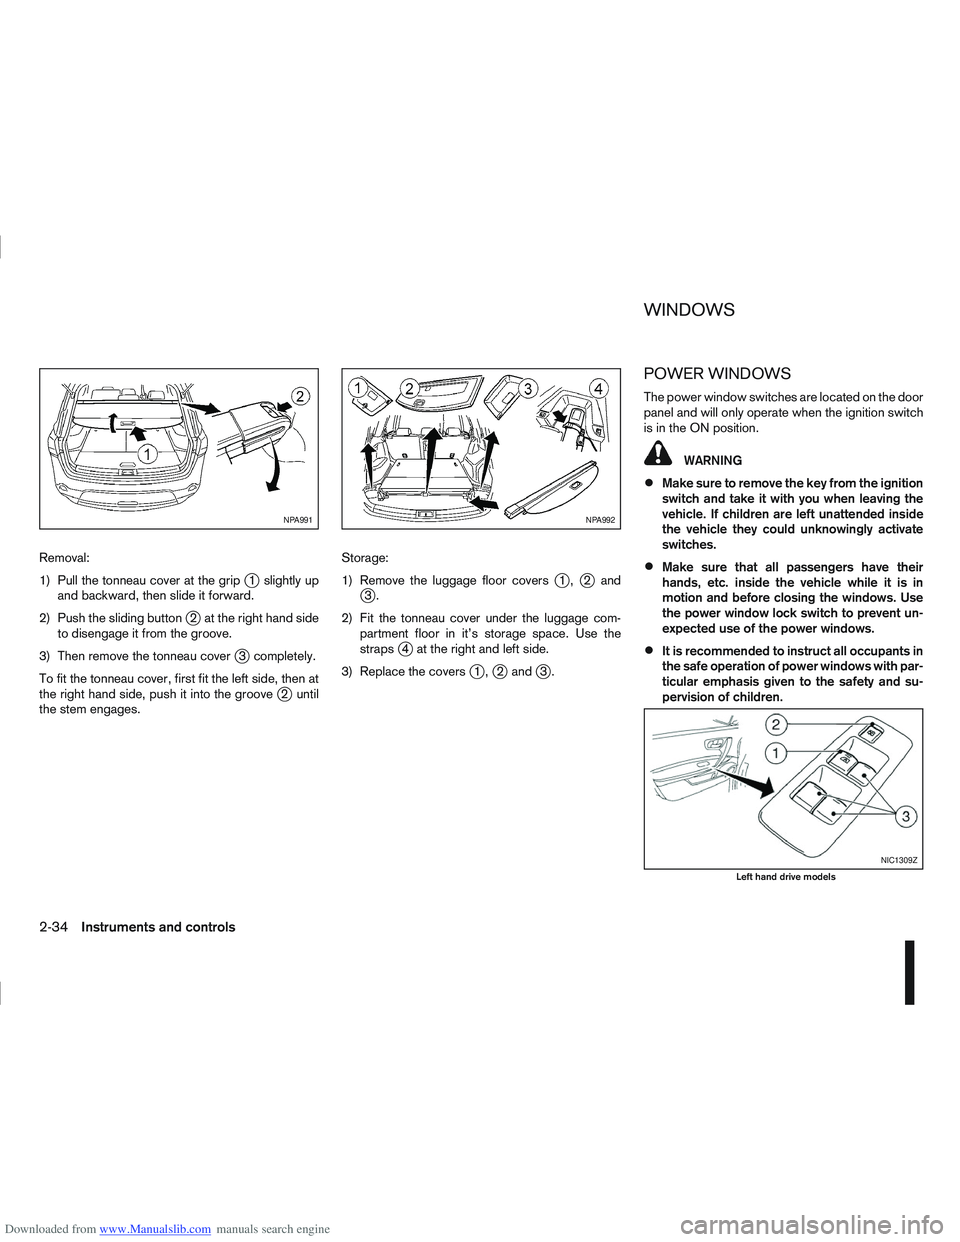
Downloaded from www.Manualslib.com manuals search engine Removal:
1) Pull the tonneau cover at the grip
j1 slightly up
and backward, then slide it forward.
2) Push the sliding button
j2 at the right hand side
to disengage it from the groove.
3) Then remove the tonneau cover
j3 completely.
To fit the tonneau cover, first fit the left side, then at
the right hand side, push it into the groove
j2 until
the stem engages. Storage:
1) Remove the luggage floor covers
j1,j2andj3.
2) Fit the tonneau cover under the luggage com- partment floor in it’s storage space. Use the
straps
j4 at the right and left side.
3) Replace the covers
j1,j2 andj3.
POWER WINDOWS
The power window switches are located on the door
panel and will only operate when the ignition switch
is in the ON position.
WARNING
Make sure to remove the key from the ignition
switch and take it with you when leaving the
vehicle. If children are left unattended inside
the vehicle they could unknowingly activate
switches.
Make sure that all passengers have their
hands, etc. inside the vehicle while it is in
motion and before closing the windows. Use
the power window lock switch to prevent un-
expected use of the power windows.
It is recommended to instruct all occupants in
the safe operation of power windows with par-
ticular emphasis given to the safety and su-
pervision of children.
NPA991NPA992
NIC1309Z
Left hand drive models
WINDOWS
2-34Instruments and controls
Page 84 of 297
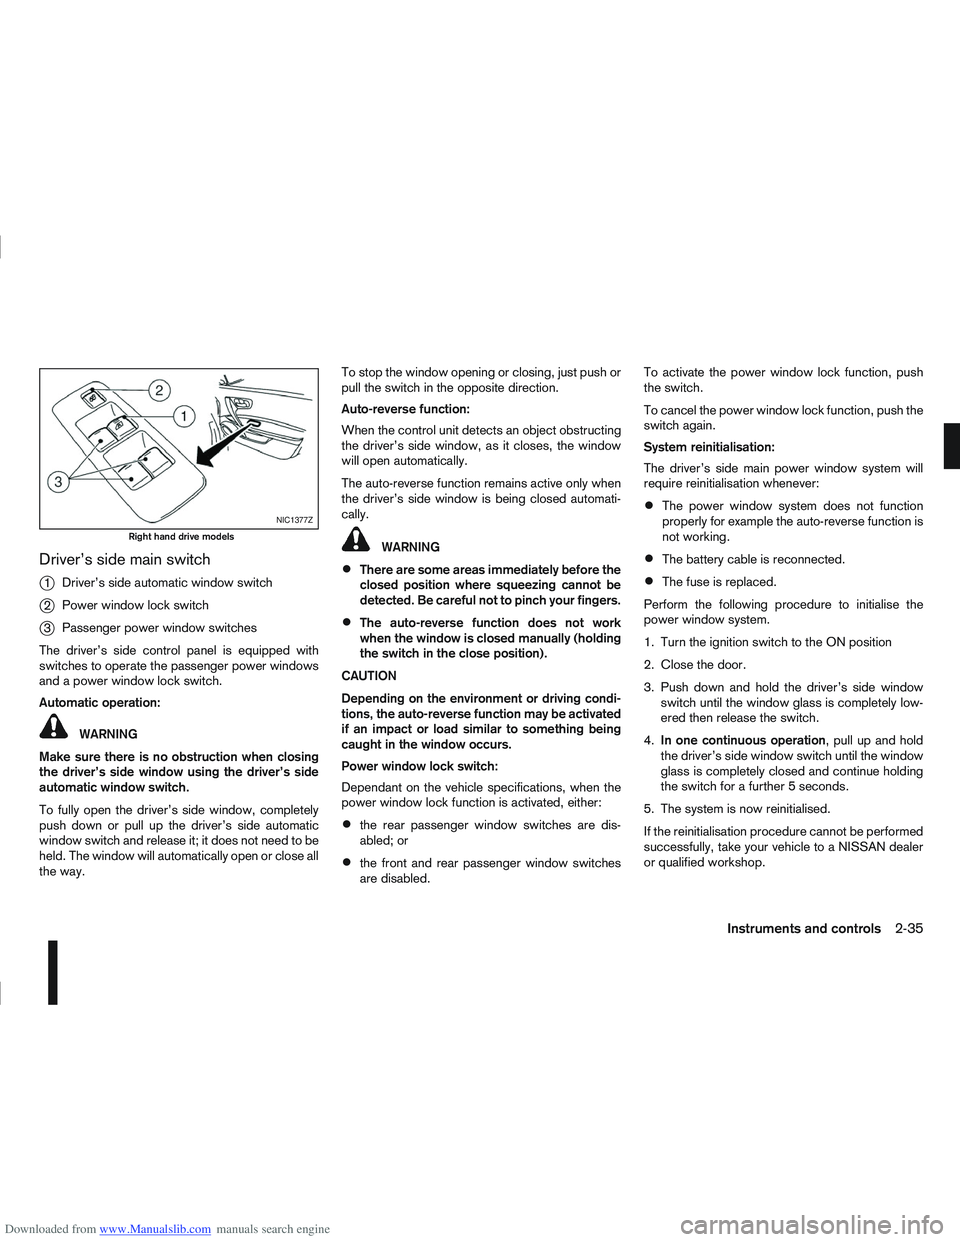
Downloaded from www.Manualslib.com manuals search engine Driver’s side main switch
j
1Driver’s side automatic window switch
j2Power window lock switch
j3Passenger power window switches
The driver’s side control panel is equipped with
switches to operate the passenger power windows
and a power window lock switch.
Automatic operation:
WARNING
Make sure there is no obstruction when closing
the driver’s side window using the driver’s side
automatic window switch.
To fully open the driver’s side window, completely
push down or pull up the driver’s side automatic
window switch and release it; it does not need to be
held. The window will automatically open or close all
the way. To stop the window opening or closing, just push or
pull the switch in the opposite direction.
Auto-reverse function:
When the control unit detects an object obstructing
the driver’s side window, as it closes, the window
will open automatically.
The auto-reverse function remains active only when
the driver’s side window is being closed automati-
cally.
WARNING
There are some areas immediately before the
closed position where squeezing cannot be
detected. Be careful not to pinch your fingers.
The auto-reverse function does not work
when the window is closed manually (holding
the switch in the close position).
CAUTION
Depending on the environment or driving condi-
tions, the auto-reverse function may be activated
if an impact or load similar to something being
caught in the window occurs.
Power window lock switch:
Dependant on the vehicle specifications, when the
power window lock function is activated, either:
the rear passenger window switches are dis-
abled; or
the front and rear passenger window switches
are disabled. To activate the power window lock function, push
the switch.
To cancel the power window lock function, push the
switch again.
System reinitialisation:
The driver’s side main power window system will
require reinitialisation whenever:
The power window system does not function
properly for example the auto-reverse function is
not working.
The battery cable is reconnected.
The fuse is replaced.
Perform the following procedure to initialise the
power window system.
1. Turn the ignition switch to the ON position
2. Close the door.
3. Push down and hold the driver’s side window switch until the window glass is completely low-
ered then release the switch.
4. In one continuous operation , pull up and hold
the driver’s side window switch until the window
glass is completely closed and continue holding
the switch for a further 5 seconds.
5. The system is now reinitialised.
If the reinitialisation procedure cannot be performed
successfully, take your vehicle to a NISSAN dealer
or qualified workshop.
NIC1377Z
Right hand drive models
Instruments and controls2-35
Page 85 of 297
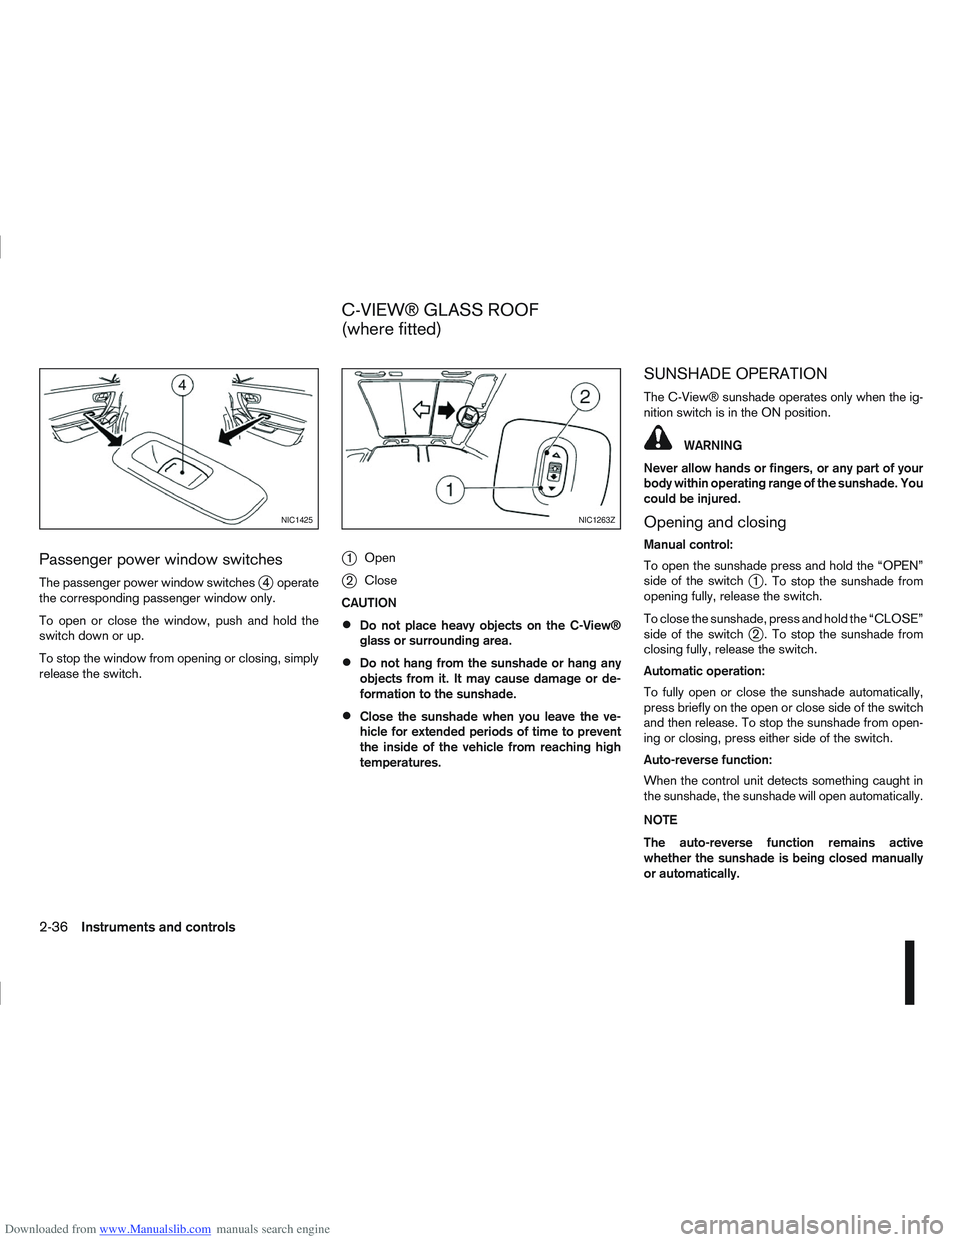
Downloaded from www.Manualslib.com manuals search engine Passenger power window switches
The passenger power window switchesj4 operate
the corresponding passenger window only.
To open or close the window, push and hold the
switch down or up.
To stop the window from opening or closing, simply
release the switch.
j1 Open
j2Close
CAUTION
Do not place heavy objects on the C-View®
glass or surrounding area.
Do not hang from the sunshade or hang any
objects from it. It may cause damage or de-
formation to the sunshade.
Close the sunshade when you leave the ve-
hicle for extended periods of time to prevent
the inside of the vehicle from reaching high
temperatures.
SUNSHADE OPERATION
The C-View® sunshade operates only when the ig-
nition switch is in the ON position.
WARNING
Never allow hands or fingers, or any part of your
body within operating range of the sunshade. You
could be injured.
Opening and closing
Manual control:
To open the sunshade press and hold the “OPEN”
side of the switch
j1 . To stop the sunshade from
opening fully, release the switch.
To close the sunshade, press and hold the “CLOSE”
side of the switch
j2 . To stop the sunshade from
closing fully, release the switch.
Automatic operation:
To fully open or close the sunshade automatically,
press briefly on the open or close side of the switch
and then release. To stop the sunshade from open-
ing or closing, press either side of the switch.
Auto-reverse function:
When the control unit detects something caught in
the sunshade, the sunshade will open automatically.
NOTE
The auto-reverse function remains active
whether the sunshade is being closed manually
or automatically.
NIC1425NIC1263Z
C-VIEW® GLASS ROOF
(where fitted)
2-36Instruments and controls
Page 91 of 297
Downloaded from www.Manualslib.com manuals search engine use of additional remote controllers, contact a
NISSAN dealer or qualified workshop.
The integrated keyfob will not function under the fol-
lowing conditions:
When the distance between the integrated key-
fob and vehicle is more than approximately 5 m
(15 ft).
When the integrated keyfob battery is
discharged.
When the key is in the ignition switch.
All doors can be locked or unlocked from the out-
side by pressing the “LOCK”
or “UNLOCK”button on the integrated keyfob.
For Super Lock system models only (RHD mod-
els):
When the vehicle is occupied, never lock the
doors with the integrated keyfob. Doing so will
trap the occupants, since the Super Lock system
prevents the doors from being opened from the
inside.
WARNING
Only operate the integrated keyfob lock button in
full and clear view of the vehicle to prevent any-
body being trapped inside the vehicle.
CAUTION
When locking the doors using the integrated
keyfob, be sure not to leave the key in the
vehicle.
Always remove the ignition key or Intelligent
Key, close all windows before operating the
keyfob door lock system.
Ensure that the driver’s door is securely
closed before operating the integrated keyfob
door lock system for correct operation of the
system.
Do not allow the integrated keyfob, which
contains electrical components, to come into
contact with water or salt water. This could
affect the system function.
Do not drop the integrated keyfob.
Do not strike the integrated keyfob sharply
against another object.
Do not place the integrated keyfob for an ex-
tended period in an area where temperatures
exceed 60°C (140°F).
If a integrated keyfob is lost or stolen, NISSAN rec-
ommends erasing the ID code of that integrated
keyfob from the vehicle. This may prevent the unau-
thorised use of the integrated keyfob to unlock the
vehicle. For information regarding the erasing pro-
cedure, contact a NISSAN dealer or qualified work-
shop.
For information regarding the replacement of a bat-
tery, see “Battery” in the “8. Maintenance and
do-it-yourself” section.
SWITCHING FROM CONVENIENCE
MODE TO ANTI-HIJACK MODE
Selective unlock or “Anti-hijack” mode allows the
remote unlocking of only the driver’s door to prevent
an attacker from entering the vehicle via an unlocked
passenger door.
As default, the unlock mode will be set to “Conve-
nience” mode (all doors will unlock). Follow the in-
structions below to switch between convenience
mode and anti-hijack mode.
jA Key with integrated keyfob (from
outside the vehicle)
1. Turn the ignition switch to the “OFF” position.
2. Press and hold both the “LOCK”
and “UN-
LOCK”buttons for 5 seconds.
Setting anti-hijack mode:
– The direction indicators flash once.
Setting convenience mode:
– The direction indicators flash three times.
jB Intelligent Key
1. Turn the ignition switch from ON to LOCK and
exit the vehicle.
2. From outside the vehicle, lock the vehicle using the integrated keyfob “LOCK” button
.
3. Press and hold both the “LOCK”
and “UN-
LOCK”buttons for 10 seconds.
4. Within 3 seconds, press and hold the driver’s
3-4Pre-driving checks and adjustments
Page 92 of 297
Downloaded from www.Manualslib.com manuals search engine door outside lock switch until the direction indi-
cators flash to confirm the setting mode. Then
release the driver’s door outside lock switch.
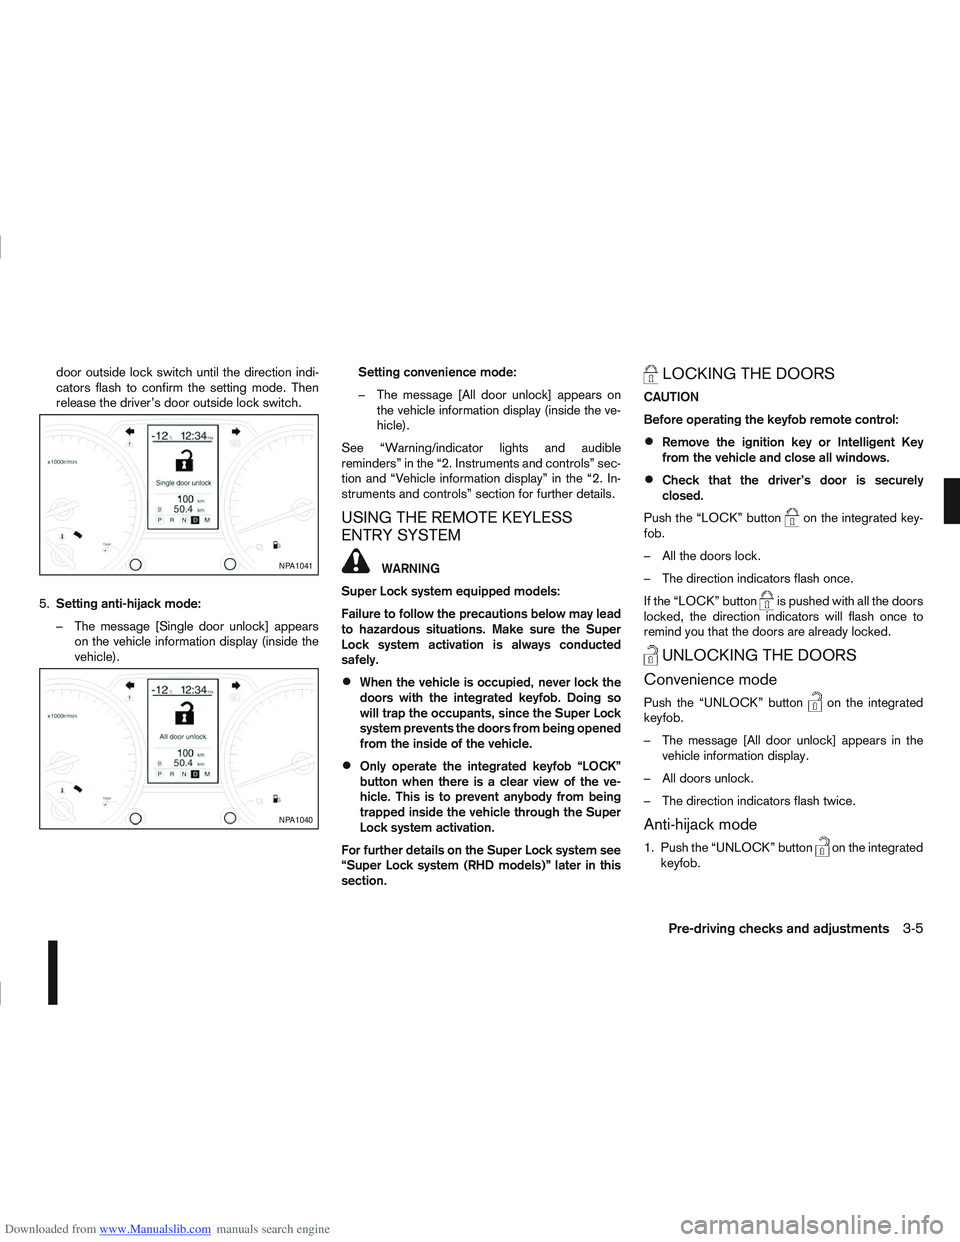
5. Setting anti-hijack mode:
– The message [Single door unlock] appears on the vehicle information display (inside the
vehicle). Setting convenience mode:
– The message [All door unlock] appears on
the vehicle information display (inside the ve-
hicle).
See “Warning/indicator lights and audible
reminders” in the “2. Instruments and controls” sec-
tion and “Vehicle information display” in the “2. In-
struments and controls” section for further details.
USING THE REMOTE KEYLESS
ENTRY SYSTEM
WARNING
Super Lock system equipped models:
Failure to follow the precautions below may lead
to hazardous situations. Make sure the Super
Lock system activation is always conducted
safely.
When the vehicle is occupied, never lock the
doors with the integrated keyfob. Doing so
will trap the occupants, since the Super Lock
system prevents the doors from being opened
from the inside of the vehicle.
Only operate the integrated keyfob “LOCK”
button when there is a clear view of the ve-
hicle. This is to prevent anybody from being
trapped inside the vehicle through the Super
Lock system activation.
For further details on the Super Lock system see
“Super Lock system (RHD models)” later in this
section.
LOCKING THE DOORS
CAUTION
Before operating the keyfob remote control:
Remove the ignition key or Intelligent Key
from the vehicle and close all windows.
Check that the driver’s door is securely
closed.
Push the “LOCK” button
on the integrated key-
fob.
– All the doors lock.
– The direction indicators flash once.
If the “LOCK” button
is pushed with all the doors
locked, the direction indicators will flash once to
remind you that the doors are already locked.
UNLOCKING THE DOORS
Convenience mode
Push the “UNLOCK” buttonon the integrated
keyfob.
– The message [All door unlock] appears in the vehicle information display.
– All doors unlock.
– The direction indicators flash twice.
Anti-hijack mode
1. Push the “UNLOCK” buttonon the integrated
keyfob.
NPA1041
NPA1040
Pre-driving checks and adjustments3-5