psi NISSAN QASHQAI 2013 Owners Manual
[x] Cancel search | Manufacturer: NISSAN, Model Year: 2013, Model line: QASHQAI, Model: NISSAN QASHQAI 2013Pages: 297, PDF Size: 4.09 MB
Page 136 of 297

Downloaded from www.Manualslib.com manuals search engine CD eject button
CD player:
Press the eject (
) button and the CD will be
ejected.
6 CD changer:
1. A CD can be ejected by:
Pressing the eject () button (the currently
played CD will be ejected).
Pressing a CD select button followed by the
eject () button.
Pressing the eject () button followed by a
CD select button.
2. After pressing the eject (
) button, a notifica-
tion message appears in the display.
3. When the CD slot door opens, the CD is ejected and the CD can now be removed.
4. If necessary, insert another CD into the respec- tive CD slot or wait to let the system close the
CD slot door.
To eject all the discs sequentially, press and hold
the eject (
) button for longer than 1.5 seconds.
The CD changer will start to eject from the current
or last used CD. After removing an ejected CD, the
next CD will be ejected. Ejecting CD (with ignition switch in “OFF” or
LOCK):
When the ignition switch is in the “OFF” or LOCK
position it is possible to eject the currently played
CD. However the audio unit will not be activated.
CD player:
Press the eject (
) button and the CD will be
ejected.
6 CD changer:
Press the eject () button less than 1.5 sec-
onds and the CD will be ejected.
To eject all CD’s in sequential order, keep the
eject () button pressed for longer than 1.5
seconds. The CD changer starts to eject from
the current or last used CD onwards. After re-
moving an ejected CD, the next one comes out.
NOTE
When the CD is ejected and not removed
within 15 seconds, it will automatically retract
into the slot to protect it from damage.
If an error message appears in the display,
press the eject () button to eject the faulty
CD and insert another CD or check if the
ejected CD is inserted upside down.
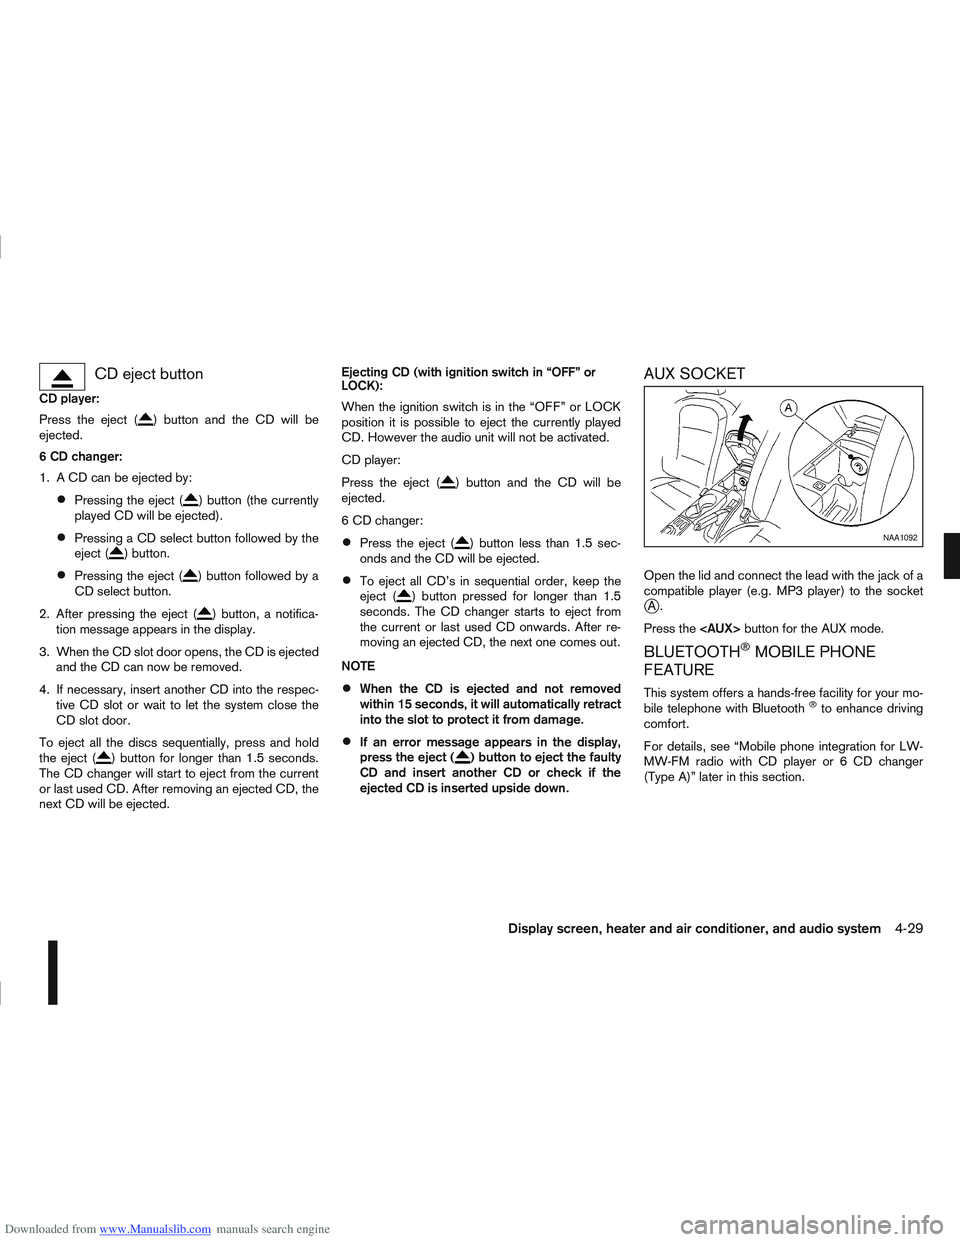
AUX SOCKET
Open the lid and connect the lead with the jack of a
compatible player (e.g. MP3 player) to the socket
jA.
Press the
BLUETOOTH®MOBILE PHONE
FEATURE
This system offers a hands-free facility for your mo-
bile telephone with Bluetooth®to enhance driving
comfort.
For details, see “Mobile phone integration for LW-
MW-FM radio with CD player or 6 CD changer
(Type A)” later in this section.
NAA1092
Display screen, heater and air conditioner, and audio system4-29
Page 143 of 297

Downloaded from www.Manualslib.com manuals search engine 3. Turn the
folder.
4. Press
turn the
If the current selected folder contains sub folders,
press
folders will be displayed. Turn the
dial for the sub folder then press
lect. Select the [Root] folder item when songs are
recorded additionally in the root folder.
To return to the previous folder screen, press
.
Repeat button:
Push the
j1 button and the current track will
be played continuously.
button:
Push the
j2 button and all the tracks will be
played in a random order.
mbutton:
While a CD with recorded music information tags
(CD-text/ID3–text tags) is being played, the title of
the played track is displayed. If the title information
is not provided then [Track] is displayed.
When the
j5 button is pressed repeatedly,
further information about the track can be displayed
along with the track title as follows:
CD: Track time
→Artist name→ Track title→Album
title→ Track time
CD with MP3/WMA:
Track time →Artist name→ Album title→Folder
name →Track time
Track details:
A long press on the
j5 button will turn the dis-
play into a detailed overview and after a few sec-
onds it returns to the main display, or press
j5
briefly.
CD eject button
CD player:
Press the
(eject) button and the CD will be
ejected.
Ejecting CD (with ignition switch in “OFF” or
LOCK):
When the ignition switch is in the “OFF” or LOCK
position it is possible to eject the currently played
CD. However the audio unit will not be activated.
Press the
button and the CD will be ejected.
NOTE
When the CD is ejected and not removed
within 8 seconds, it will automatically retract
into the slot to protect it from damage.
If an error message appears in the display,
pressto eject the faulty CD and insert an-
other CD or check if the ejected CD is in-
serted upside down.
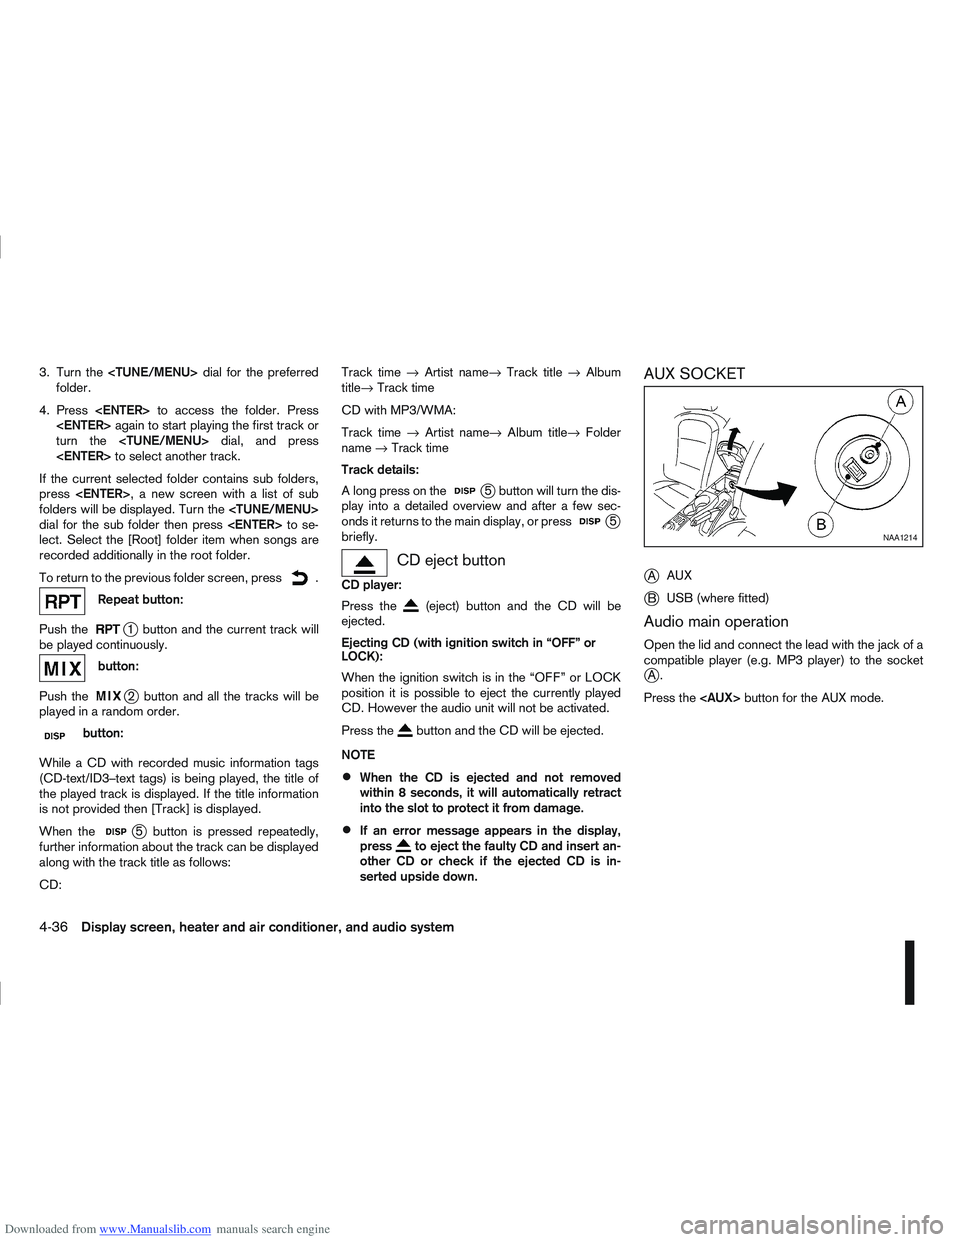
AUX SOCKET
j
A AUX
jB USB (where fitted)
Audio main operation
Open the lid and connect the lead with the jack of a
compatible player (e.g. MP3 player) to the socket
jA.
Press the
NAA1214
4-36Display screen, heater and air conditioner, and audio system
Page 216 of 297

Downloaded from www.Manualslib.com manuals search engine Repairing tyre
1. Shake the sealant bottle well.
2. Remove the bottle cap and the orange plug fromthe top of the compressor.
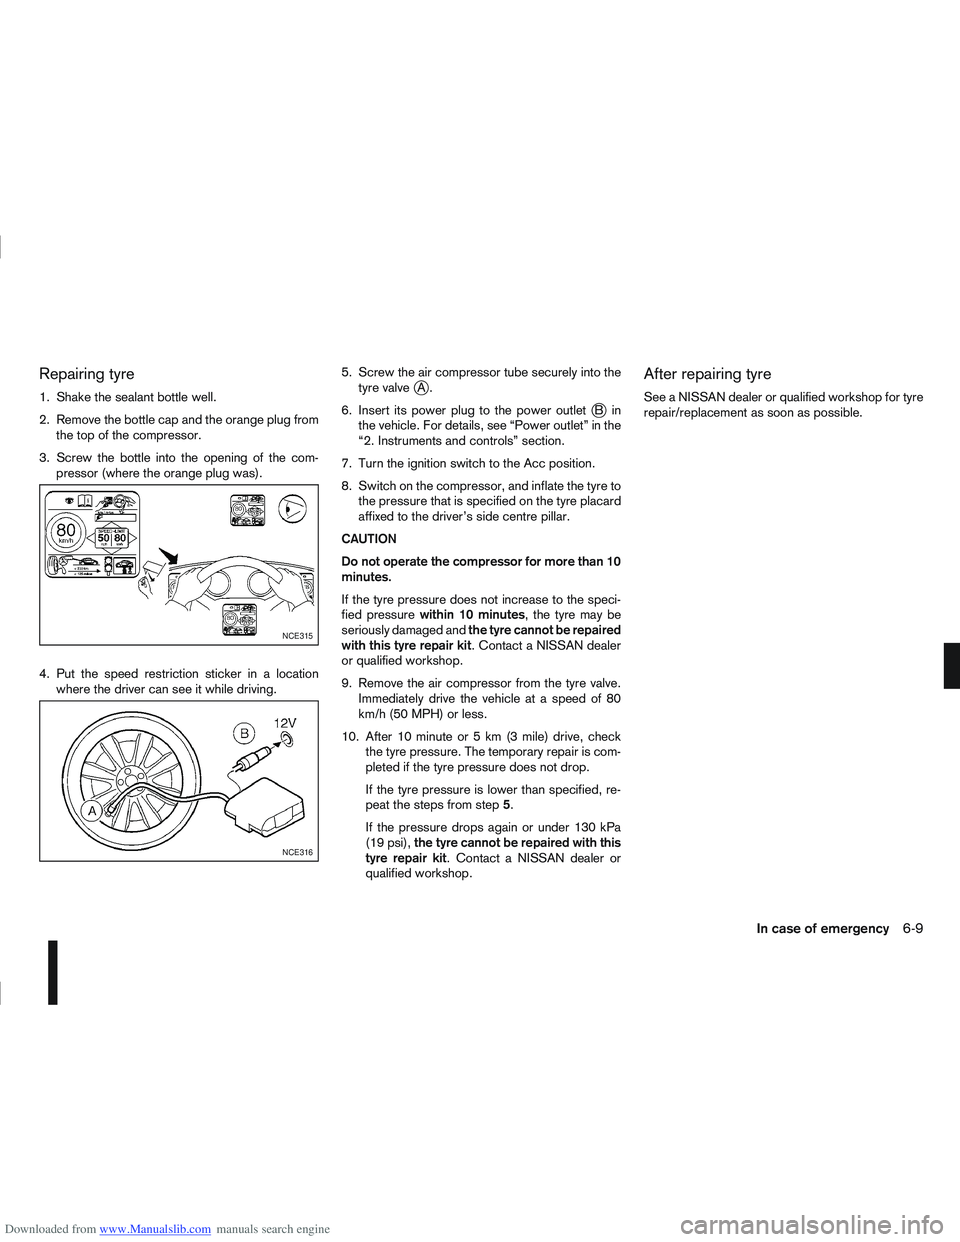
3. Screw the bottle into the opening of the com- pressor (where the orange plug was).
4. Put the speed restriction sticker in a location where the driver can see it while driving. 5. Screw the air compressor tube securely into the
tyre valvejA.
6. Insert its power plug to the power outlet
jBin
the vehicle. For details, see “Power outlet” in the
“2. Instruments and controls” section.
7. Turn the ignition switch to the Acc position.
8. Switch on the compressor, and inflate the tyre to the pressure that is specified on the tyre placard
affixed to the driver’s side centre pillar.
CAUTION
Do not operate the compressor for more than 10
minutes.
If the tyre pressure does not increase to the speci-
fied pressure within 10 minutes , the tyre may be
seriously damaged and the tyre cannot be repaired
with this tyre repair kit . Contact a NISSAN dealer
or qualified workshop.
9. Remove the air compressor from the tyre valve. Immediately drive the vehicle at a speed of 80
km/h (50 MPH) or less.
10. After 10 minute or 5 km (3 mile) drive, check the tyre pressure. The temporary repair is com-
pleted if the tyre pressure does not drop.
If the tyre pressure is lower than specified, re-
peat the steps from step 5.
If the pressure drops again or under 130 kPa
(19 psi), the tyre cannot be repaired with this
tyre repair kit. Contact a NISSAN dealer or
qualified workshop.
After repairing tyre
See a NISSAN dealer or qualified workshop for tyre
repair/replacement as soon as possible.
NCE315
NCE316
In case of emergency6-9