heater NISSAN QASHQAI 2015 Owner´s Manual
[x] Cancel search | Manufacturer: NISSAN, Model Year: 2015, Model line: QASHQAI, Model: NISSAN QASHQAI 2015Pages: 338, PDF Size: 4.88 MB
Page 5 of 338
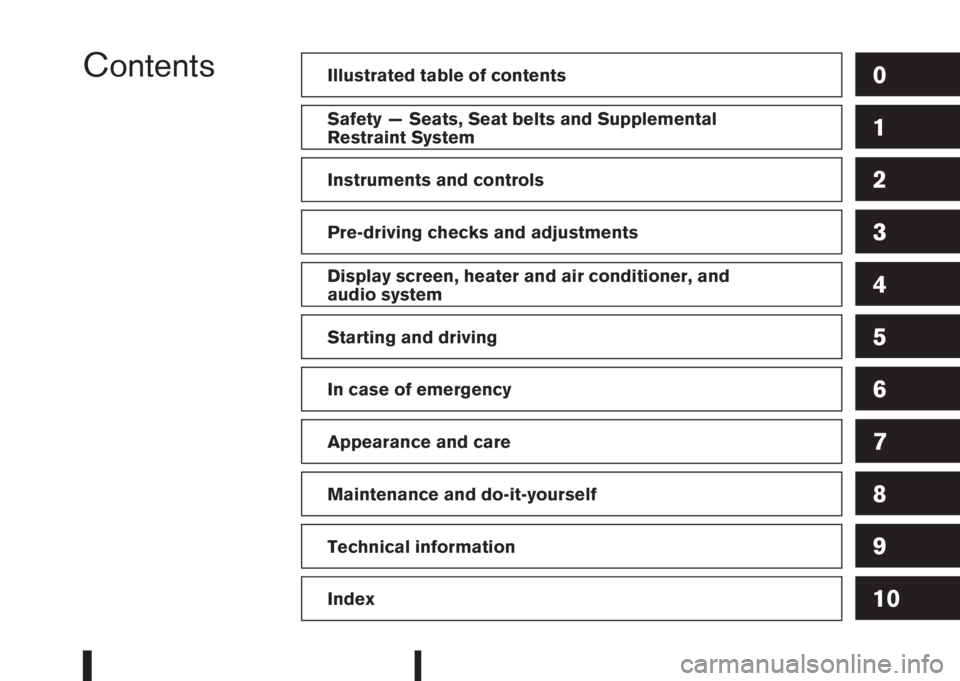
ContentsIllustrated table of contents0
Safety — Seats, Seat belts and Supplemental
Restraint System1
Instruments and controls2
Pre-driving checks and adjustments3
Display screen, heater and air conditioner, and
audio system4
Starting and driving5
In case of emergency6
Appearance and care7
Maintenance and do-it-yourself8
Technical information9
Index10
Page 14 of 338
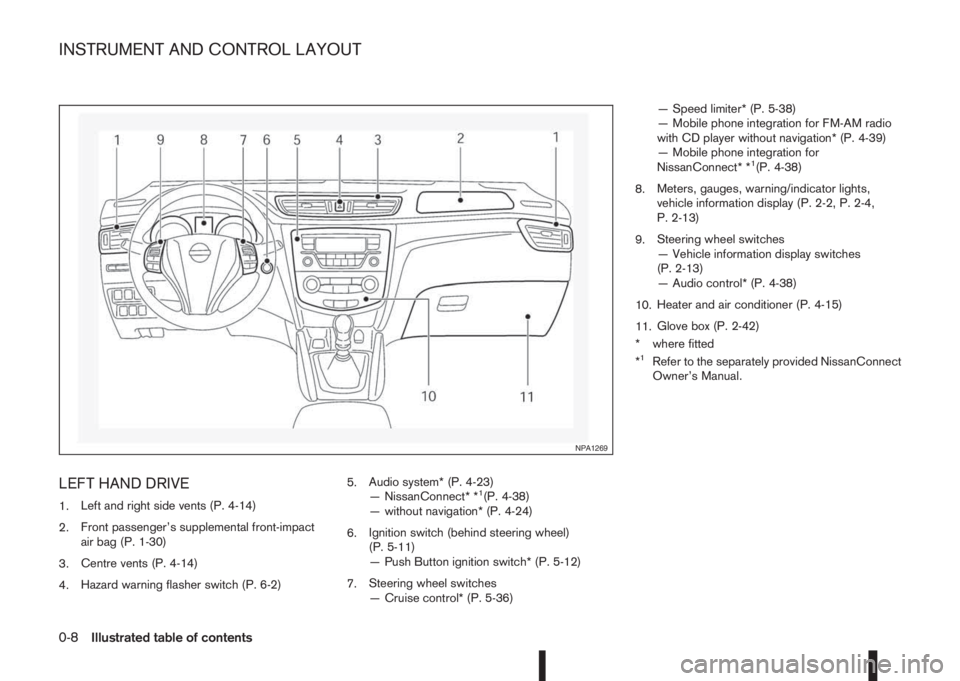
LEFT HAND DRIVE
1.Left and right side vents (P. 4-14)
2.Front passenger’s supplemental front-impact
air bag (P. 1-30)
3.Centre vents (P. 4-14)
4.Hazard warning flasher switch (P. 6-2)5.Audio system* (P. 4-23)
— NissanConnect* *1(P. 4-38)
— without navigation* (P. 4-24)
6.Ignition switch (behind steering wheel)
(P. 5-11)
— Push Button ignition switch* (P. 5-12)
7.Steering wheel switches
— Cruise control* (P. 5-36)— Speed limiter* (P. 5-38)
— Mobile phone integration for FM-AM radio
with CD player without navigation* (P. 4-39)
— Mobile phone integration for
NissanConnect* *
1(P. 4-38)
8.Meters, gauges, warning/indicator lights,
vehicle information display (P. 2-2, P. 2-4,
P. 2-13)
9.Steering wheel switches
— Vehicle information display switches
(P. 2-13)
— Audio control* (P. 4-38)
10.Heater and air conditioner (P. 4-15)
11.Glove box (P. 2-42)
* where fitted
*
1Refer to the separately provided NissanConnect
Owner’s Manual.
NPA1269
INSTRUMENT AND CONTROL LAYOUT
0-8Illustrated table of contents
Page 15 of 338
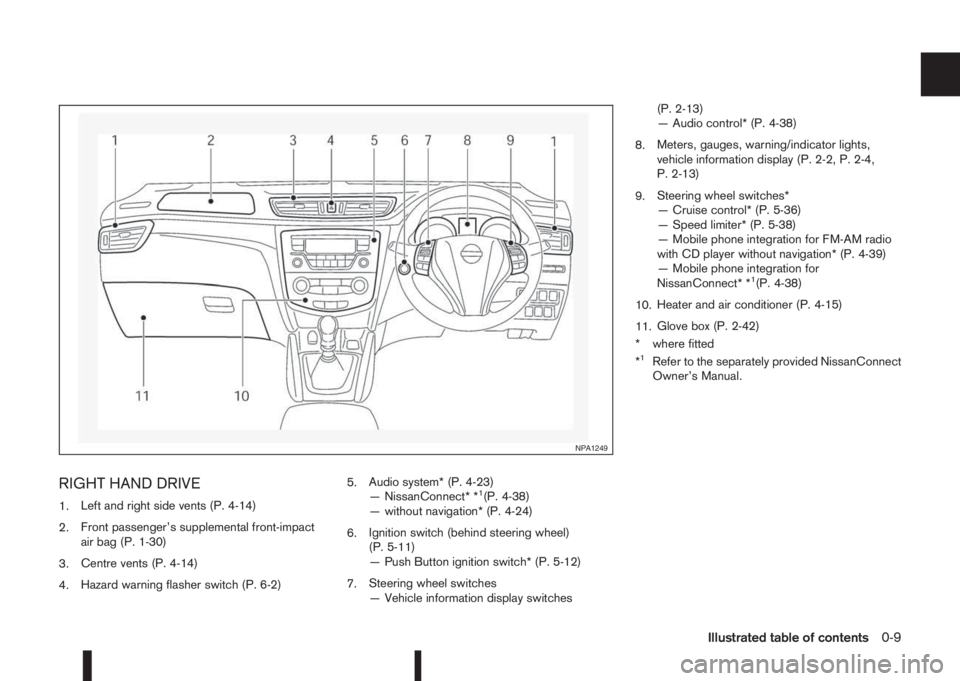
RIGHT HAND DRIVE
1.Left and right side vents (P. 4-14)
2.Front passenger’s supplemental front-impact
air bag (P. 1-30)
3.Centre vents (P. 4-14)
4.Hazard warning flasher switch (P. 6-2)5.Audio system* (P. 4-23)
— NissanConnect* *1(P. 4-38)
— without navigation* (P. 4-24)
6.Ignition switch (behind steering wheel)
(P. 5-11)
— Push Button ignition switch* (P. 5-12)
7.Steering wheel switches
— Vehicle information display switches(P. 2-13)
— Audio control* (P. 4-38)
8.Meters, gauges, warning/indicator lights,
vehicle information display (P. 2-2, P. 2-4,
P. 2-13)
9.Steering wheel switches*
— Cruise control* (P. 5-36)
— Speed limiter* (P. 5-38)
— Mobile phone integration for FM-AM radio
with CD player without navigation* (P. 4-39)
— Mobile phone integration for
NissanConnect* *
1(P. 4-38)
10.Heater and air conditioner (P. 4-15)
11.Glove box (P. 2-42)
* where fitted
*
1Refer to the separately provided NissanConnect
Owner’s Manual.
NPA1249
Illustrated table of contents0-9
Page 21 of 338
1Safety — seats, seat belts and supplemental
restraint systemSafety — seats, seat belts and supplemental
restraint system
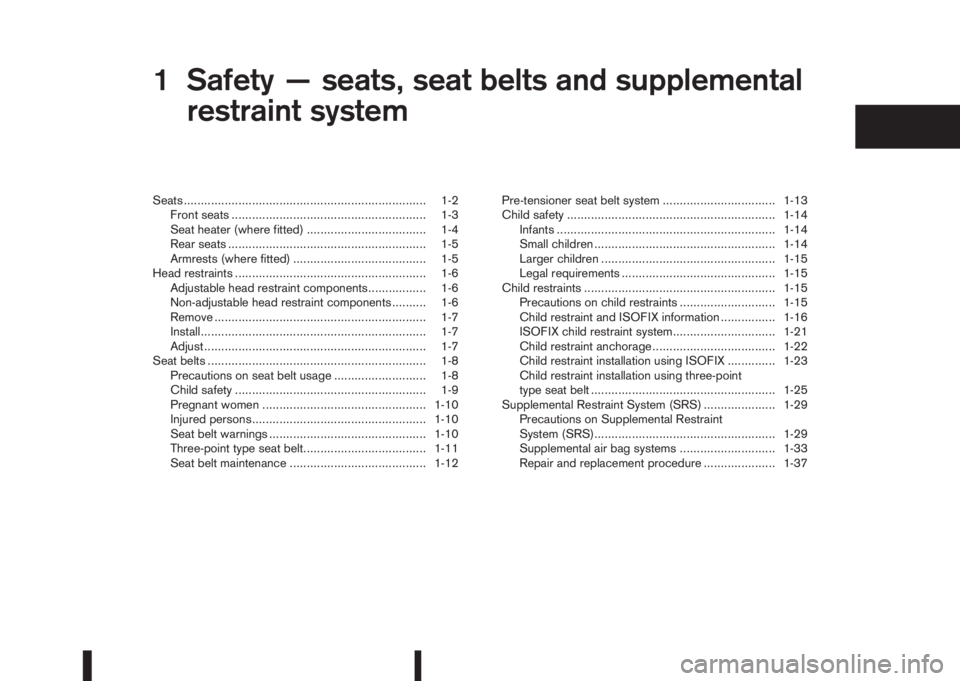
Seats ....................................................................... 1-2
Front seats ......................................................... 1-3
Seat heater (where fitted) ................................... 1-4
Rear seats .......................................................... 1-5
Armrests (where fitted) ....................................... 1-5
Head restraints ........................................................ 1-6
Adjustable head restraint components................. 1-6
Non-adjustable head restraint components .......... 1-6
Remove .............................................................. 1-7
Install.................................................................. 1-7
Adjust ................................................................. 1-7
Seat belts ................................................................ 1-8
Precautions on seat belt usage ........................... 1-8
Child safety ........................................................ 1-9
Pregnant women ................................................ 1-10
Injured persons................................................... 1-10
Seat belt warnings .............................................. 1-10
Three-point type seat belt.................................... 1-11
Seat belt maintenance ........................................ 1-12Pre-tensioner seat belt system ................................. 1-13
Child safety ............................................................. 1-14
Infants ................................................................ 1-14
Small children ..................................................... 1-14
Larger children ................................................... 1-15
Legal requirements ............................................. 1-15
Child restraints ........................................................ 1-15
Precautions on child restraints ............................ 1-15
Child restraint and ISOFIX information ................ 1-16
ISOFIX child restraint system.............................. 1-21
Child restraint anchorage .................................... 1-22
Child restraint installation using ISOFIX .............. 1-23
Child restraint installation using three-point
type seat belt ...................................................... 1-25
Supplemental Restraint System (SRS) ..................... 1-29
Precautions on Supplemental Restraint
System (SRS)..................................................... 1-29
Supplemental air bag systems ............................ 1-33
Repair and replacement procedure ..................... 1-37
Page 24 of 338
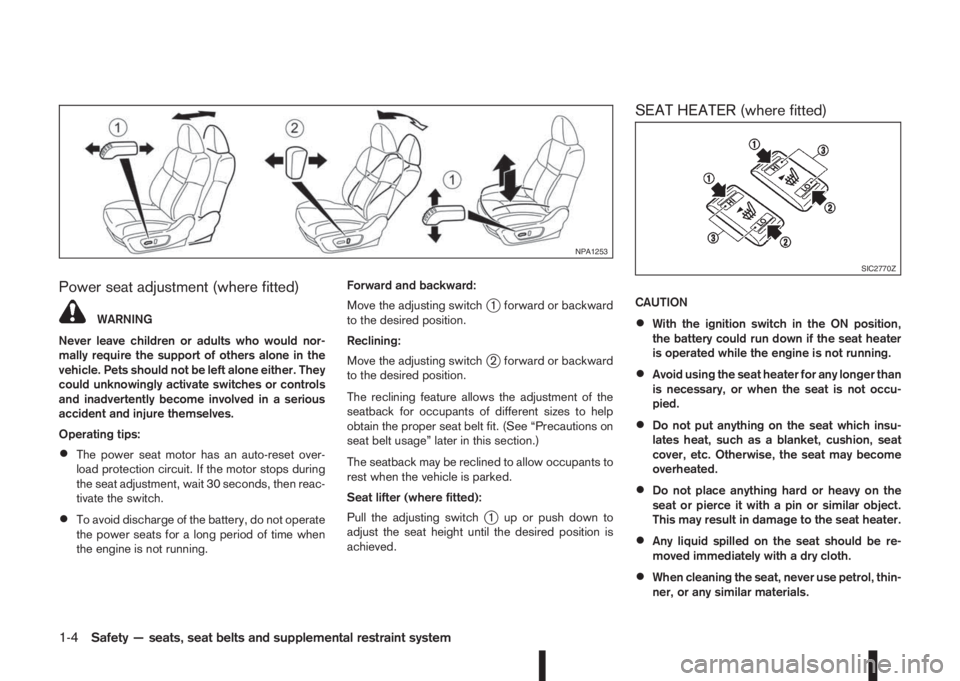
Power seat adjustment (where fitted)
WARNING
Never leave children or adults who would nor-
mally require the support of others alone in the
vehicle. Pets should not be left alone either. They
could unknowingly activate switches or controls
and inadvertently become involved in a serious
accident and injure themselves.
Operating tips:
•The power seat motor has an auto-reset over-
load protection circuit. If the motor stops during
the seat adjustment, wait 30 seconds, then reac-
tivate the switch.
•To avoid discharge of the battery, do not operate
the power seats for a long period of time when
the engine is not running.Forward and backward:
Move the adjusting switch
j1 forward or backward
to the desired position.
Reclining:
Move the adjusting switch
j2 forward or backward
to the desired position.
The reclining feature allows the adjustment of the
seatback for occupants of different sizes to help
obtain the proper seat belt fit. (See “Precautions on
seat belt usage” later in this section.)
The seatback may be reclined to allow occupants to
rest when the vehicle is parked.
Seat lifter (where fitted):
Pull the adjusting switch
j1 up or push down to
adjust the seat height until the desired position is
achieved.
SEAT HEATER (where fitted)
CAUTION
•With the ignition switch in the ON position,
the battery could run down if the seat heater
is operated while the engine is not running.
•Avoid using the seat heater for any longer than
is necessary, or when the seat is not occu-
pied.
•Do not put anything on the seat which insu-
lates heat, such as a blanket, cushion, seat
cover, etc. Otherwise, the seat may become
overheated.
•Do not place anything hard or heavy on the
seat or pierce it with a pin or similar object.
This may result in damage to the seat heater.
•Any liquid spilled on the seat should be re-
moved immediately with a dry cloth.
•When cleaning the seat, never use petrol, thin-
ner, or any similar materials.
NPA1253
SIC2770Z
1-4Safety — seats, seat belts and supplemental restraint system
Page 25 of 338
•If any malfunctions are found or the seat does
not operate, turn the switch off and have the
system checked by a NISSAN dealer or quali-
fied workshop.
Heated seats
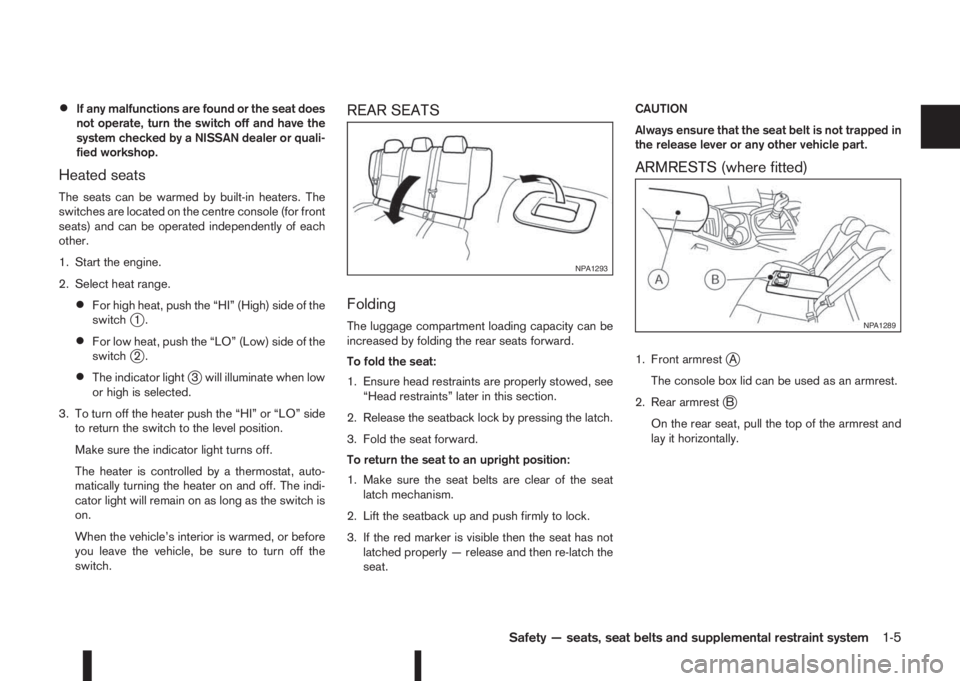
The seats can be warmed by built-in heaters. The
switches are located on the centre console (for front
seats) and can be operated independently of each
other.
1. Start the engine.
2. Select heat range.
•For high heat, push the “HI” (High) side of the
switchj1.
•For low heat, push the “LO” (Low) side of the
switchj2.
•The indicator lightj3 will illuminate when low
or high is selected.
3. To turn off the heater push the “HI” or “LO” side
to return the switch to the level position.
Make sure the indicator light turns off.
The heater is controlled by a thermostat, auto-
matically turning the heater on and off. The indi-
cator light will remain on as long as the switch is
on.
When the vehicle’s interior is warmed, or before
you leave the vehicle, be sure to turn off the
switch.
REAR SEATS
Folding
The luggage compartment loading capacity can be
increased by folding the rear seats forward.
To fold the seat:
1. Ensure head restraints are properly stowed, see
“Head restraints” later in this section.
2. Release the seatback lock by pressing the latch.
3. Fold the seat forward.
To return the seat to an upright position:
1. Make sure the seat belts are clear of the seat
latch mechanism.
2. Lift the seatback up and push firmly to lock.
3. If the red marker is visible then the seat has not
latched properly — release and then re-latch the
seat.CAUTION
Always ensure that the seat belt is not trapped in
the release lever or any other vehicle part.
ARMRESTS (where fitted)
1. Front armrestjA
The console box lid can be used as an armrest.
2. Rear armrest
jB
On the rear seat, pull the top of the armrest and
lay it horizontally.
NPA1293
NPA1289
Safety — seats, seat belts and supplemental restraint system1-5
Page 73 of 338
![NISSAN QASHQAI 2015 Owner´s Manual •[Steering effort]: this can be set to [Normal] or
[Sport].
The [Driving Aids] option has a sub-menu, from
which you can choose whether or not to have fur-
ther items displayed. These items are:
• NISSAN QASHQAI 2015 Owner´s Manual •[Steering effort]: this can be set to [Normal] or
[Sport].
The [Driving Aids] option has a sub-menu, from
which you can choose whether or not to have fur-
ther items displayed. These items are:
•](/img/5/40325/w960_40325-72.png)
•[Steering effort]: this can be set to [Normal] or
[Sport].
The [Driving Aids] option has a sub-menu, from
which you can choose whether or not to have fur-
ther items displayed. These items are:
•[Lane] (Lane Departure Warning system)
•[Blind Spot] Blind Spot Warning system)
•[Emergency Brake] (Forward Emergency Brake
system)
The [Driver Attention] option can be used to activate
or deactivate the Driver Attention Support feature
(where fitted). This system is able to detect whether
the driver is displaying a lack of attention, or is dis-
tracted. It does this by monitoring driving style, and
steering behaviour, and it notes deviations from the
normal pattern. If the system detects that driver at-
tention is decreasing, the system uses an audible
and visual warning to suggest that the driver takes a
break.
[Clock]
For details of how to set the clock, see “Setting the
clock” in the “4. Display screen, heater and air con-
ditioner, and audio system” section or the separate
NissanConnect Owner’s manual.
[Display settings]
Use theorswitches to scroll and the ENTER
button to change the status, warnings or turn on or
off any of the systems/warnings displayed in the
[Display Settings] menu. The following menu op-
tions are available:
•[Contents selection]
•[Body Colour]
•[ECO Mode Settings] (where fitted)
•[Stop/Start]
•[ECO Drive Report]
•[Welcome Effect]
[Contents selection]:
The items that display when the ignition switch is
placed in the ON position can be enabled/disabled.
To change the items that are displayed, use the
orbuttons to scroll and the ENTER button to
select a menu item: The following items (where fit-
ted) are available in the [Meter Settings] menu:
•[Home]
•[Average speed]
•[Trip]
•[Fuel economy]
•[Navigation] (where fitted)
•[Traffic Sign] (where fitted)
•[Audio]
•[Driving aids] (where fitted)
•[Tyre pressures]
•[Driver Attention] (where fitted)
•[Chassis control]
The [Driving Aids] option has a sub-menu, from
which you can choose whether or not to have fur-
ther items displayed. These items are:
•[Lane] (Lane Departure Warning system)
•[Blind Spot] Blind Spot Warning system)
•[Emergency Brake] (Forward Emergency Brak-
ing system)
[Body Colour]:
The colour of the vehicle that displays in the vehicle
information display when the ignition switch is
placed in the ON position can be changed.
[ECO mode settings] (where fitted):
You can choose which of the ECO mode features
you wish to see displayed. These include the ECO
indicator ([ECO glow]), and from the Display sub-
menu, the [Pedal Guide] and Instant fuel economy
([Fuel econ.]) display.
[Stop/Start]:
The [Stop/Start] system mode shows the CO2 sav-
ings and the engine stop time. (See “Stop/Start Sys-
tem (where fitted)” in the “5. Starting and driving”
section.)
Instruments and controls2-15
Page 86 of 338
![NISSAN QASHQAI 2015 Owner´s Manual 1. [Fuel economy] (l (litre)/100 km,
km/l(litre) or MPG)
Current fuel consumption:
The current fuel consumption mode shows the cur-
rent fuel consumption.
Average fuel consumption:
The average fuel co NISSAN QASHQAI 2015 Owner´s Manual 1. [Fuel economy] (l (litre)/100 km,
km/l(litre) or MPG)
Current fuel consumption:
The current fuel consumption mode shows the cur-
rent fuel consumption.
Average fuel consumption:
The average fuel co](/img/5/40325/w960_40325-85.png)
1. [Fuel economy] (l (litre)/100 km,
km/l(litre) or MPG)
Current fuel consumption:
The current fuel consumption mode shows the cur-
rent fuel consumption.
Average fuel consumption:
The average fuel consumption mode shows the av-
erage fuel consumption since the last reset. Push
the ENTER switch for longer than 1 second to enter
the Reset menu.
The display is updated every 30 seconds. For about
the first 500 m (1/3 mile) after a reset, the display
shows “——”.
Push ENTER briefly to show the second Fuel
Economy page.
2. [Speed] and [Average speed] (km/h
or MPH)
The (digital) speed shows the current speed at
which the vehicle is travelling.
The average speed mode shows the average ve-
hicle speed since the last reset. Push the ENTER
switch for longer than 1 second to enter the Reset
menu.
The display is updated every 30 seconds. The first
30 seconds after a reset, the display shows “——”.
3. [Range] (dte — km or mile)
The distance to empty (dte) mode provides you with
an estimation of the distance that can be driven
before refuelling. The dte is constantly being calcu-
lated, based on the amount of fuel in the fuel tank
and the actual fuel consumption.
The display is updated every 30 seconds.
The dte mode includes a low range warning feature.
If the fuel level is low, the warning is displayed on
the screen.
When the fuel level drops even lower, the dte dis-
play will change to “——”.
•If the amount of fuel added is small, the display
just before the ignition switch is placed in the
“OFF” position may continue to be displayed.
•When driving uphill or rounding curves, the fuel
in the tank shifts, which may momentarily change
the display.
4. Elapsed [time] and [trip distance] (km
or mile)
Elapsed [time]:
The elapsed time mode shows the time since the
last reset. Push the ENTER switch for longer than 1
second to enter the Reset menu. (The trip odometer
is also reset at the same time.)[Trip distance]:
The trip odometer mode shows the total distance
the vehicle has been driven since the last reset.
Push the ENTER switch for longer than 1 second to
enter the Reset menu. (The elapsed time is also
reset at the same time.)
5. Navigation (where fitted)
When the route guidance is set in the navigation
system, this item shows the navigation route infor-
mation.
For more details, see the separately provided Nis-
sanConnect Owner’s manual.
6. Audio
The audio mode shows the status of audio informa-
tion.
For more details, see “FM AM radio with CD player
(where fitted)” in the “4. Display screen, heater and
air conditioner, and audio system” section or the
separately provided NissanConnect Owner’s
manual.
7. [Driving aids] (where fitted)
The driving aids mode shows the operating condi-
tion for the following systems.
•Lane Departure Warning (LDW)
•Blind Spot Warning (BSW)
•Forward Emergency Braking
Push ENTER to access the driving aids setting
menu.
2-28Instruments and controls
Page 87 of 338
For more details, see “Blind Spot Warning (BSW)
system (where fitted)” in the “5. Starting and driving”
section, “Lane Departure Warning (LDW) system
(where fitted)” in the “5. Starting and driving” sec-
tion, and/or “Forward emergency braking system
(where fitted)” in the “5. Starting and driving” sec-
tion.
8. [Tyre pressures] (where fitted)
The tyre pressure mode shows the pressure of all
four tyres. The displayed values are only available
while the vehicle is being driven.
When the [Low Tyre Pressure] warning appears,
the display can be switched to the tyre pressure
mode by pushing the ENTER switch to reveal addi-
tional details on the displayed warning.
9. [Chassis control]
When either the Active Trace Control (where fitted),
Active Engine Brake (where fitted), Hill start Assist
(where fitted) or the Active Ride Control system is
operated, it shows the operating condition. See
“Chassis control” in the “5. Starting and driving”
section and “Hill Start Assist (HSA) system” in the
“5. Starting and driving” section for more details.
10. [Stop/Start] system (where fitted)
The Stop/Start system mode shows the CO2 sav-
ings and the engine stop time. (See “Stop/Start Sys-
tem (where fitted)” in the “5. Starting and driving”
section.)[Trip CO2 saving] and engine stop time:
The trip CO2 saving and engine stop time mode
shows the CO2 saving and engine stop time since
the last reset.
The CO2 saving and engine stop time can be reset
by pushing the ENTER switch for longer than 1 sec-
ond.
[Total CO2 saving] and engine stop time:
The total CO2 saving and engine stop time mode
shows:
•The estimated CO2 exhaust emissions
prevented.
•The engine stop time that the engine has been
stopped by the Stop/Start System.
NOTE
The Total CO2 saving and engine stop time val-
ues cannot be reset and show accumulated
Stop/Start System information since the vehicle
was built.
11. Warning check
The current warnings are displayed. If no warning is
present, “No Warnings” is displayed.
[CLOCK] AND [OUTSIDE AIR
TEMPERATURE]
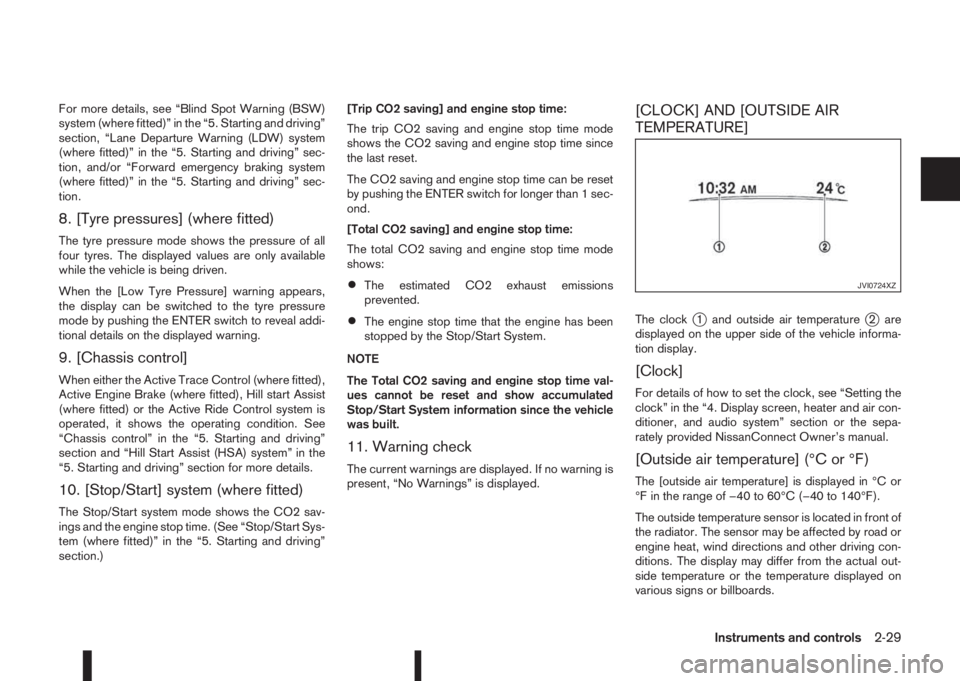
The clockj1 and outside air temperaturej2 are
displayed on the upper side of the vehicle informa-
tion display.
[Clock]
For details of how to set the clock, see “Setting the
clock” in the “4. Display screen, heater and air con-
ditioner, and audio system” section or the sepa-
rately provided NissanConnect Owner’s manual.
[Outside air temperature] (°C or °F)
The [outside air temperature] is displayed in °C or
°F in the range of −40 to 60°C (−40 to 140°F).
The outside temperature sensor is located in front of
the radiator. The sensor may be affected by road or
engine heat, wind directions and other driving con-
ditions. The display may differ from the actual out-
side temperature or the temperature displayed on
various signs or billboards.
JVI0724XZ
Instruments and controls2-29
Page 92 of 338
NOTE
In the AUTO position (where fitted), the rear wiper
will not begin to sweep when the shift lever is
placed in the R position. It waits until the front
wipers have made the first sweep.THERMACLEAR HEATED
WINDSCREEN (where fitted)
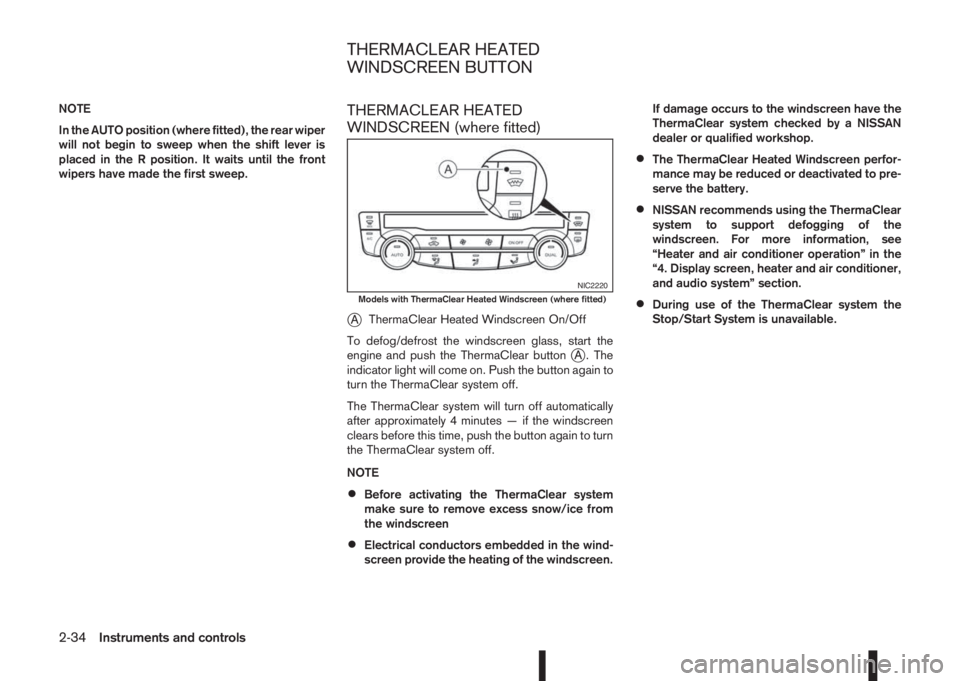
j
AThermaClear Heated Windscreen On/Off
To defog/defrost the windscreen glass, start the
engine and push the ThermaClear button
jA . The
indicator light will come on. Push the button again to
turn the ThermaClear system off.
The ThermaClear system will turn off automatically
after approximately 4 minutes — if the windscreen
clears before this time, push the button again to turn
the ThermaClear system off.
NOTE
•Before activating the ThermaClear system
make sure to remove excess snow/ice from
the windscreen
•Electrical conductors embedded in the wind-
screen provide the heating of the windscreen.If damage occurs to the windscreen have the
ThermaClear system checked by a NISSAN
dealer or qualified workshop.
•The ThermaClear Heated Windscreen perfor-
mance may be reduced or deactivated to pre-
serve the battery.
•NISSAN recommends using the ThermaClear
system to support defogging of the
windscreen. For more information, see
“Heater and air conditioner operation” in the
“4. Display screen, heater and air conditioner,
and audio system” section.
•During use of the ThermaClear system the
Stop/Start System is unavailable.
NIC2220Models with ThermaClear Heated Windscreen (where fitted)
THERMACLEAR HEATED
WINDSCREEN BUTTON
2-34Instruments and controls