interior lights NISSAN QASHQAI 2017 Owner´s Manual
[x] Cancel search | Manufacturer: NISSAN, Model Year: 2017, Model line: QASHQAI, Model: NISSAN QASHQAI 2017Pages: 508, PDF Size: 2.68 MB
Page 81 of 508
Glove box ........................................................................... 2-56
Console box ....................................................................... 2-56
Sunglasses holder ........................................................... 2-57
Card holder (driver’s side) ............................................. 2-57
Luggage hooks ................................................................. 2-58
Parcel shelf ........................................................................ 2-58
Roof rail (if so equipped) ..................................................... 2-60
Windows .................................................................................. 2-61
Power windows ................................................................ 2-61Moonroof (if so equipped) .................................................. 2-63
Power moonroof ............................................................. 2-63
Interior lights .......................................................................... 2-65
Interior light switch ........................................................ 2-66
Console light (if so equipped) .................................... 2-66
Map lights ........................................................................ 2-66
Room light ...................................................................... 2-67
Vanity mirror light (if so equipped) ............................ 2-67
Cargo light ....................................................................... 2-68
Page 101 of 508
2-22Instruments and controls
1. Use thebuttons*2to select “Display”.
2. Press the OK
*1to turn ON/OFF the ECO
management display in the vehicle informa-
tion display.
- View History
This setting allows the customer to reset the
past history of the fuel economy and the best
fuel economy.
Welcome Effect:
You can choose whether or not to display the
welcome screen when the ignition switch is
placed in the ON position. You can also choose
the following items to define how the welcome
screen looks:
.Dial Effect
.Display Effect
Select “Welcome Effect” using the
buttons
*2and press the OK*1to select this menu.
Use thebuttons*2to navigate between
the menu options and press the OK
*1to turn
each function ON/OFF.
Vehicle Settings
The vehicle settings allows the customer to
change settings for the following settings.
.Lighting
.Turn indicator
.Locking
.Wipers
.Remote start (if so equipped)
The vehicle settings can be changed using the
*2, and the OK*1buttons.
Lighting:
The “Lighting” menu has the following options:
.Welcome Light
The welcome lighting can be set to be ON
or OFF. From the “Lighting” menu, select
“Welcome Light”. Use the OK
*1to turn
this feature ON or OFF.
.Auto Room Lamp
The interior light timer can be set to be ON
or OFF. From the “Lighting” menu, select
“Auto Room Lamp”. Use the OK
*1to turn
this feature ON or OFF.
.Light Sensitivity (if so equipped)
The sensitivity of the automatic lighting can
be adjusted. From the “Lighting” menu,
select “Light Sensitivity”. Use the
buttons*2and the OK*1to select therequired sensitivity. The following options
are available:
— Turn on earliest
— Turn on earlier
— Turn on standard
— Turn on later
.Light Off Delay (if so equipped)
The duration of the automatic headlights can
be changed from 0 to 180 seconds. From
the “Lighting” menu, select “Light Off
Delay”. Use the OK
*1to change the
duration.
Turn indicator:
The “3 Flash Pass” overtaking feature can be set
to be ON or OFF. From the “Turn indicator”
menu, select “3 Flash Pass”. Use the OK
*1to
turn this feature ON or OFF.
Locking:
There are the following options in the “Locking”
menu:
.I–Key Door Lock (if so equipped)
When this item is turned on, the request
switch on the door is activated. From the
“Locking” menu, select “I-Key Door Lock”.
Use the OK
*1to activate or deactivate this
function.
Page 116 of 508
prevent it, nor can it prevent the theft of interior
or exterior vehicle components in all situations.
Always secure your vehicle even if parking for a
brief period. Never leave your keys in the vehicle,
and always lock it when unattended. Be aware
of your surroundings, and park in secure, well-lit
areas whenever possible.
Many devices offering additional protection,
such as component locks, identification markers,
and tracking systems, are available at auto
supply stores and specialty shops. Your
NISSAN dealer may also offer such equipment.
Check with your insurance company to see if
you may be eligible for discounts for various
theft protection features.
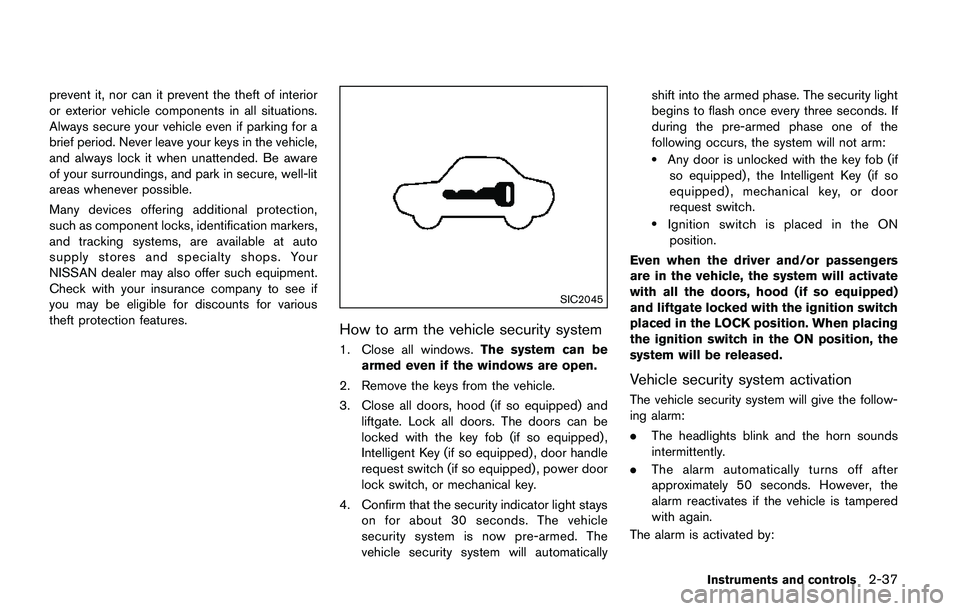
SIC2045
How to arm the vehicle security system
1. Close all windows.The system can be
armed even if the windows are open.
2. Remove the keys from the vehicle.
3. Close all doors, hood (if so equipped) and
liftgate. Lock all doors. The doors can be
locked with the key fob (if so equipped) ,
Intelligent Key (if so equipped) , door handle
request switch (if so equipped) , power door
lock switch, or mechanical key.
4. Confirm that the security indicator light stays
on for about 30 seconds. The vehicle
security system is now pre-armed. The
vehicle security system will automaticallyshift into the armed phase. The security light
begins to flash once every three seconds. If
during the pre-armed phase one of the
following occurs, the system will not arm:
.Any door is unlocked with the key fob (if
so equipped) , the Intelligent Key (if so
equipped) , mechanical key, or door
request switch.
.Ignition switch is placed in the ON
position.
Even when the driver and/or passengers
are in the vehicle, the system will activate
with all the doors, hood (if so equipped)
and liftgate locked with the ignition switch
placed in the LOCK position. When placing
the ignition switch in the ON position, the
system will be released.
Vehicle security system activation
The vehicle security system will give the follow-
ing alarm:
.The headlights blink and the horn sounds
intermittently.
.The alarm automatically turns off after
approximately 50 seconds. However, the
alarm reactivates if the vehicle is tampered
with again.
The alarm is activated by:
Instruments and controls2-37
Page 126 of 508
If the ambient image sensor is damaged due to
an accident, it is recommended you contact a
NISSAN dealer.
Battery saver system
.When the headlight switch is in theorposition while the ignition switch is in
the ON position, the lights will automatically
turn off within a period of time after the
ignition switch has been placed in the OFF
position.
.When the headlight switch remains in the
orposition after the lights auto-
matically turn off, the lights will turn on when
the ignition switch is placed in the ON
position.
CAUTION
.When you turn on the headlight
switch again after the lights auto-
matically turn off, the lights will not
turn off automatically. Be sure to
turn the light switch to the OFF
position when you leave the vehicle
for extended periods of time, other-
wise the battery will be discharged.
.Never leave the light switch on
when the engine is not running forextended periods of time even if the
headlights turn off automatically.
Daytime Running Light (DRL) system
The LED portion of the headlights automatically
illuminate at 100% intensity when the engine is
started and the parking brake released. The LED
Daytime Running Light (DRL) operate with the
headlight switch in the OFF position or in the
position. When you turn the headlight
switch to theposition for full illumination,
the LED lights switch from LED DRL to the park
function.
If the parking brake is applied before the engine
is started, the LED DRL do not illuminate. The
LED DRL illuminate when the parking brake is
released. The LED DRL will remain on until the
ignition switch is placed in the OFF position.
It is necessary at dusk to turn the headlight
switch ON for interior controls and switches to
illuminate, as those remain OFF while the switch
is in the OFF position.
WARNING
When the LED DRL system is active, tail
lights on your vehicle are not on. It is
necessary at dusk to turn on yourheadlights. Failure to do so could cause
an accident injuring yourself and
others.
Instruments and controls2-47
Page 144 of 508
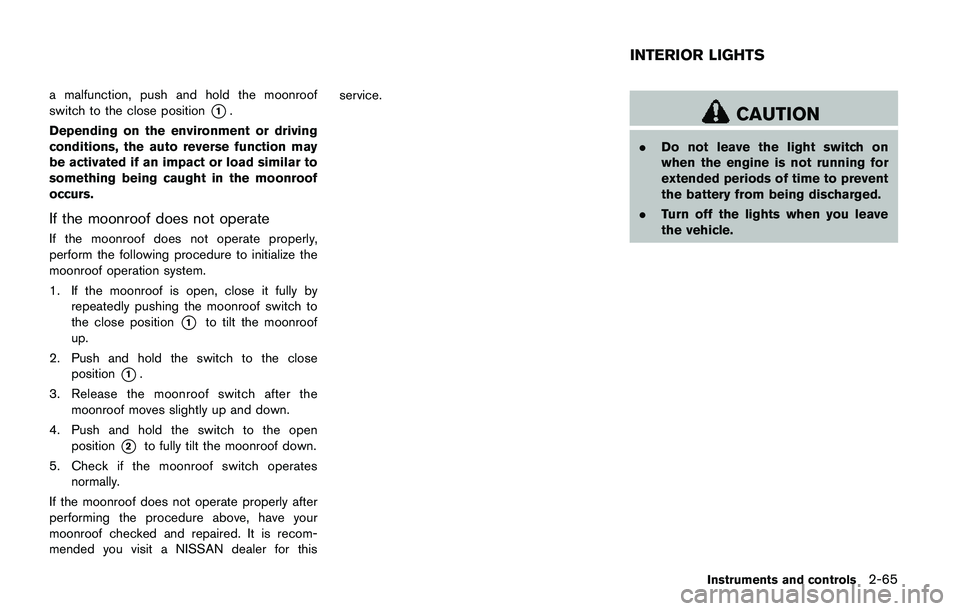
a malfunction, push and hold the moonroof
switch to the close position
*1.
Depending on the environment or driving
conditions, the auto reverse function may
be activated if an impact or load similar to
something being caught in the moonroof
occurs.
If the moonroof does not operate
If the moonroof does not operate properly,
perform the following procedure to initialize the
moonroof operation system.
1. If the moonroof is open, close it fully by
repeatedly pushing the moonroof switch to
the close position
*1to tilt the moonroof
up.
2. Push and hold the switch to the close
position
*1.
3. Release the moonroof switch after the
moonroof moves slightly up and down.
4. Push and hold the switch to the open
position
*2to fully tilt the moonroof down.
5. Check if the moonroof switch operates
normally.
If the moonroof does not operate properly after
performing the procedure above, have your
moonroof checked and repaired. It is recom-
mended you visit a NISSAN dealer for thisservice.
CAUTION
.Do not leave the light switch on
when the engine is not running for
extended periods of time to prevent
the battery from being discharged.
.Turn off the lights when you leave
the vehicle.
Instruments and controls2-65
INTERIOR LIGHTS
Page 145 of 508
2-66Instruments and controls
JVI0626X
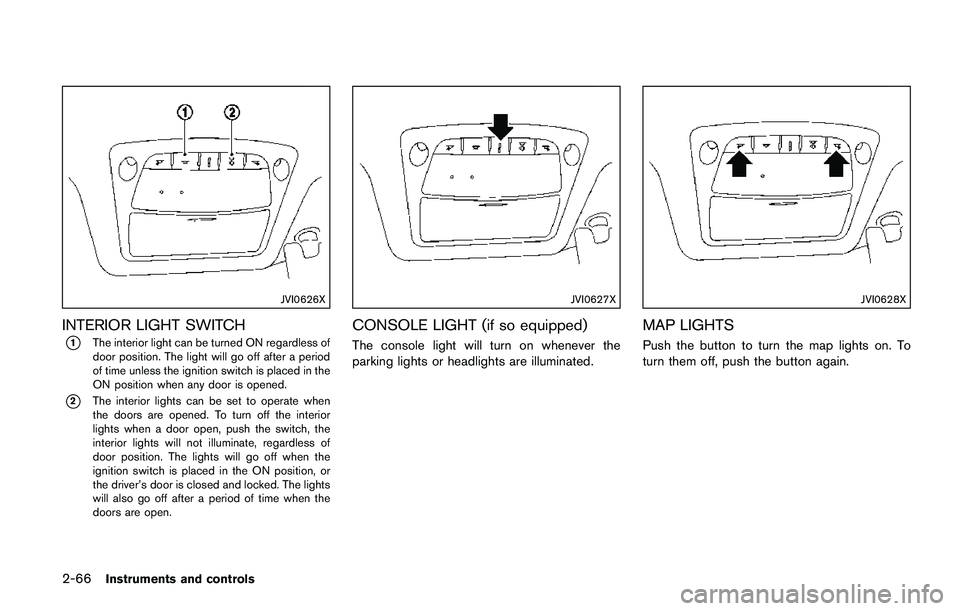
INTERIOR LIGHT SWITCH
*1The interior light can be turned ON regardless of
door position. The light will go off after a period
of time unless the ignition switch is placed in the
ON position when any door is opened.
*2The interior lights can be set to operate when
the doors are opened. To turn off the interior
lights when a door open, push the switch, the
interior lights will not illuminate, regardless of
door position. The lights will go off when the
ignition switch is placed in the ON position, or
the driver’s door is closed and locked. The lights
will also go off after a period of time when the
doors are open.
JVI0627X
CONSOLE LIGHT (if so equipped)
The console light will turn on whenever the
parking lights or headlights are illuminated.
JVI0628X
MAP LIGHTS
Push the button to turn the map lights on. To
turn them off, push the button again.
Page 146 of 508
SIC2063A
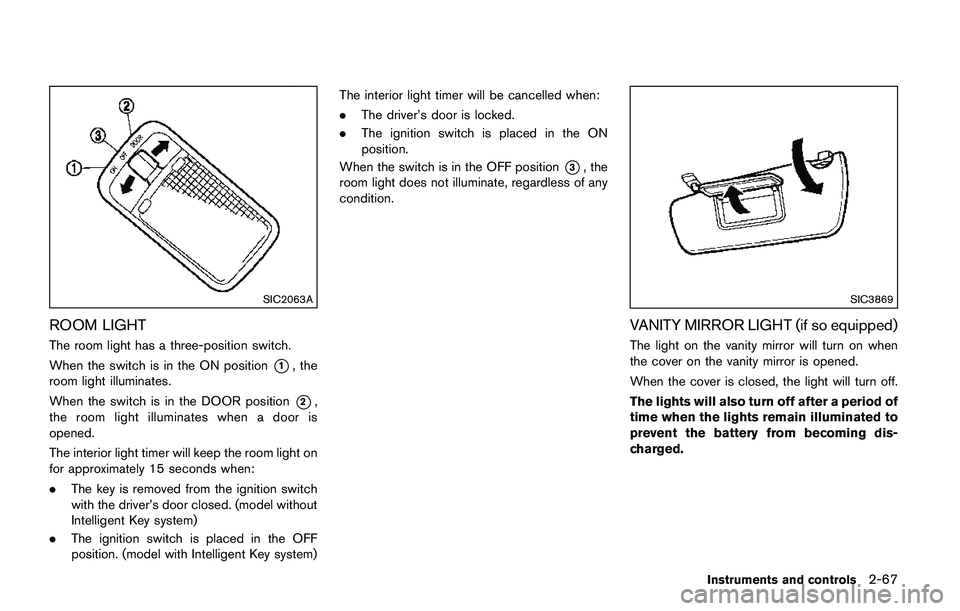
ROOM LIGHT
The room light has a three-position switch.
When the switch is in the ON position
*1, the
room light illuminates.
When the switch is in the DOOR position
*2,
the room light illuminates when a door is
opened.
The interior light timer will keep the room light on
for approximately 15 seconds when:
.The key is removed from the ignition switch
with the driver’s door closed. (model without
Intelligent Key system)
.The ignition switch is placed in the OFF
position. (model with Intelligent Key system)The interior light timer will be cancelled when:
.The driver’s door is locked.
.The ignition switch is placed in the ON
position.
When the switch is in the OFF position
*3, the
room light does not illuminate, regardless of any
condition.
SIC3869
VANITY MIRROR LIGHT (if so equipped)
The light on the vanity mirror will turn on when
the cover on the vanity mirror is opened.
When the cover is closed, the light will turn off.
The lights will also turn off after a period of
time when the lights remain illuminated to
prevent the battery from becoming dis-
charged.
Instruments and controls2-67
Page 217 of 508

4-36Heater, air conditioner, audio and phone systems
sponding temperature control dial.
Also turning the passenger’s side tempera-
ture control dial changes only the front
passenger’s side temperature. (The DUAL
indicator light will illuminate and DUAL will
appear on the display.)
.To cancel the separate temperature setting,
push the DUAL button (the indicator light
will turn off) and the driver’s side tempera-
ture setting will be applied to both the driver
and passenger sides.
Air intake control:
.Push the air recirculation
button to
recirculate interior air inside the vehicle. The
indicator light on the button will come on.
The air recirculation cannot be activated
when the air conditioner is in the front
defrosting mode.
.Push the outside air circulation
button
to draw outside air into the passenger
compartment. The indicator light on the
button will come on.
.To control the air intake automatically, push
and hold either the air recirculation
button or the outside air circulationbutton (whichever button with the indicator
light illuminated) . The indicator lights (both
air recirculation
and outside air circula-
tionbuttons) will flash twice, and thenthe air intake will switch to automatic control.
When the automatic control is set, the
system automatically alternates between
the outside air circulation and the air
recirculation modes. (The indicator light of
the active mode will turn on.)
NOTE:
Even if the system is manually set to the air
recirculation mode, when both outside
temperature and coolant temperature are
low, the system may automatically switch
to the outside air circulation mode.
To turn the system off:
To turn off the heater and air conditioner, push
the ON·OFF button.
Push the ON·OFF button again, the system will
turn on in the mode which was used immediately
before the system was turned off.
Remote engine start logic (if so
equipped)
When the remote engine start function is
activated, the vehicles equipped with the auto-
matic air conditioner and heater may go into
automatic heating or cooling mode depending
on the outside and cabin temperatures. During
this period, the display and the buttons will be
inoperable until the ignition switch is placed in
the ON position. When the temperature is low,the rear defroster and the heated steering wheel
(if so equipped) may also be activated auto-
matically with the activation of the remote engine
start function. (See “Remote engine start” (P.3-
22) .)
Page 320 of 508
detection range.
— When rain, snow, dirt or object
adheres to the windshield in
front of the lane camera unit.
— When the headlights are not
bright due to dirt on the lens or
if the aiming is not adjusted
properly.
— When strong light enters the
lane camera unit. (For example,
the light directly shines on the
front of the vehicle at sunrise or
sunset.)
— When a sudden change in
brightness occurs. (For example,
when the vehicle enters or exits
a tunnel or under a bridge.)
SYSTEM TEMPORARILY UNAVAIL-
ABLE
Condition A:
If the vehicle is parked in direct sunlight under
high temperature conditions (over approximately
1048F (408C)) and then started, the LDW
system may be deactivated automatically, the
LDW indicator will flash and the following
message will appear in the vehicle informationdisplay. - “Unavailable: High Cabin Tempera-
ture”
When the interior temperature is reduced, the
LDW system will resume operating automatically
and the LDW indicator will stop flashing.
Condition B:
The warning function of the LDW system is not
designed to work under the following condi-
tions:
.When you operate the lane change signal
and change traveling lanes in the direction of
the signal. (The LDW system will become
operable again approximately 2 seconds
after the lane change signal is turned off.)
.When the vehicle speed lowers to less than
approximately 37 MPH (60 km/h) .
Action to take:
After the above conditions have finished and the
necessary operating conditions are satisfied, the
LDW system will resume.SYSTEM MALFUNCTION
If the LDW system malfunctions, it will cancel
automatically and “Malfunction” will appear in
the vehicle information display. If “Malfunction”
appears in the vehicle information display, pull
off the road to a safe location and stop the
vehicle. Place the ignition switch in the OFF
position and restart the engine. If “Malfunction”continues to appear in the vehicle information
display, have the system checked. It is recom-
mended that you visit a NISSAN dealer for this
service.
Starting and driving5-35
Page 424 of 508
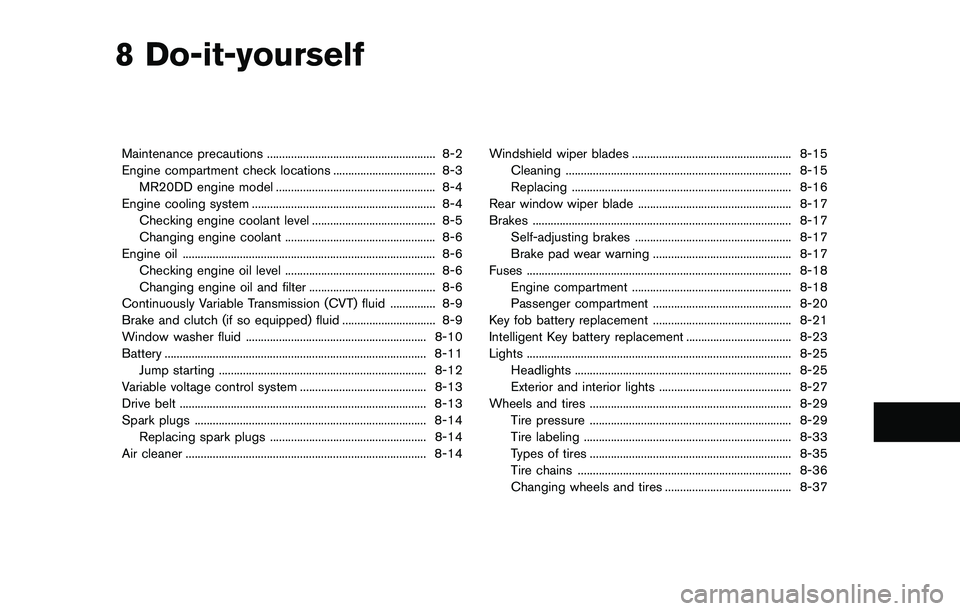
8 Do-it-yourself
Maintenance precautions ........................................................ 8-2
Engine compartment check locations .................................. 8-3
MR20DD engine model ..................................................... 8-4
Engine cooling system ............................................................. 8-4
Checking engine coolant level ......................................... 8-5
Changing engine coolant .................................................. 8-6
Engine oil .................................................................................... 8-6
Checking engine oil level .................................................. 8-6
Changing engine oil and filter .......................................... 8-6
Continuously Variable Transmission (CVT) fluid ............... 8-9
Brake and clutch (if so equipped) fluid ............................... 8-9
Window washer fluid ............................................................ 8-10
Battery ....................................................................................... 8-11
Jump starting ..................................................................... 8-12
Variable voltage control system .......................................... 8-13
Drive belt .................................................................................. 8-13
Spark plugs ............................................................................. 8-14
Replacing spark plugs .................................................... 8-14
Air cleaner ................................................................................ 8-14Windshield wiper blades ..................................................... 8-15
Cleaning ........................................................................... 8-15
Replacing ......................................................................... 8-16
Rear window wiper blade ................................................... 8-17
Brakes ...................................................................................... 8-17
Self-adjusting brakes .................................................... 8-17
Brake pad wear warning .............................................. 8-17
Fuses ........................................................................................ 8-18
Engine compartment ..................................................... 8-18
Passenger compartment .............................................. 8-20
Key fob battery replacement .............................................. 8-21
Intelligent Key battery replacement ................................... 8-23
Lights ........................................................................................ 8-25
Headlights ........................................................................ 8-25
Exterior and interior lights ............................................ 8-27
Wheels and tires ................................................................... 8-29
Tire pressure ................................................................... 8-29
Tire labeling ..................................................................... 8-33
Types of tires ................................................................... 8-35
Tire chains ....................................................................... 8-36
Changing wheels and tires .......................................... 8-37