Speed display NISSAN QASHQAI 2019 Owner´s Manual
[x] Cancel search | Manufacturer: NISSAN, Model Year: 2019, Model line: QASHQAI, Model: NISSAN QASHQAI 2019Pages: 500, PDF Size: 2.38 MB
Page 17 of 500
JVC0581X
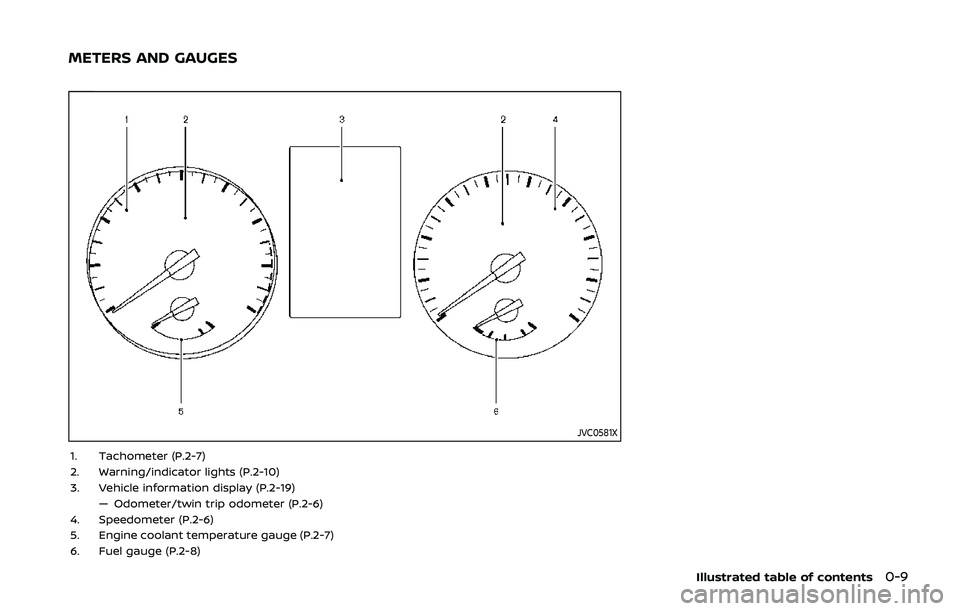
1. Tachometer (P.2-7)
2. Warning/indicator lights (P.2-10)
3. Vehicle information display (P.2-19)— Odometer/twin trip odometer (P.2-6)
4. Speedometer (P.2-6)
5. Engine coolant temperature gauge (P.2-7)
6. Fuel gauge (P.2-8)
Illustrated table of contents0-9
METERS AND GAUGES
Page 81 of 500

2 Instruments and controls
Cockpit ........................................................................\
.......................... 2-3
Instrument panel ........................................................................\
.. 2-4
Meters and gauges ..................................................................... 2-5Speedometer and odometer ........................................ 2-6
Tachometer ........................................................................\
........ 2-7
Engine coolant temperature gauge ....................... 2-7
Fuel gauge ........................................................................\
........... 2-8
Instrument brightness control .................................... 2-9
Continuously Variable Transmission (CVT)
position indicator (if so equipped) ........................... 2-9
Warning lights, indicator lights and
audible reminders ..................................................................... 2-10 Checking lights ..................................................................... 2-11
Warning lights ........................................................................\
2-11
Indicator lights ...................................................................... 2-16
Audible reminders .............................................................. 2-18
Vehicle information display ............................................... 2-19 How to use the vehicle
information display ........................................................... 2-20
Startup display ...................................................................... 2-20
Settings ........................................................................\
............... 2-21
Vehicle information display warnings
and indicators ........................................................................\
2-31
Trip computer ........................................................................\
2-39
Clock and outside air temperature ...................... 2-41 Security systems ....................................................................... 2-42
Vehicle Security System .............................................. 2-42
NISSAN Vehicle Immobilizer System ................. 2-43
Wiper and washer switch ................................................... 2-45 Windshield wiper and washer operation ...... 2-45
Rear window wiper and washer switch ................. 2-46
Rear window and outside mirror
defroster switch ........................................................................\
. 2-47
Headlight and turn signal switch ................................ 2-48 Headlight switch ............................................................... 2-48
Turn signal switch ........................................................... 2-53
Fog light switch (if so equipped) ......................... 2-54
Horn ........................................................................\
............................. 2-54
Heated steering wheel (if so equipped) .................. 2-54
Heated seats (if so equipped) ......................................... 2-55
Dynamic driver assistance switch (models
without ProPILOT assist) (if so equipped) ............. 2-56
Steering assist switch (models with ProPILOT
assist) (if so equipped) .......................................................... 2-57
Vehicle Dynamic Control (VDC) off switch ........... 2-57
Intelligent 4x4 LOCK switch (if so equipped) ...... 2-58
Rear door alert ........................................................................\
.... 2-58
ECO mode switch ..................................................................... 2-59
Power outlet ........................................................................\
......... 2-60 USB (Universal Serial Bus)
charging connector ........................................................ 2-61
Page 85 of 500
JVC0581X
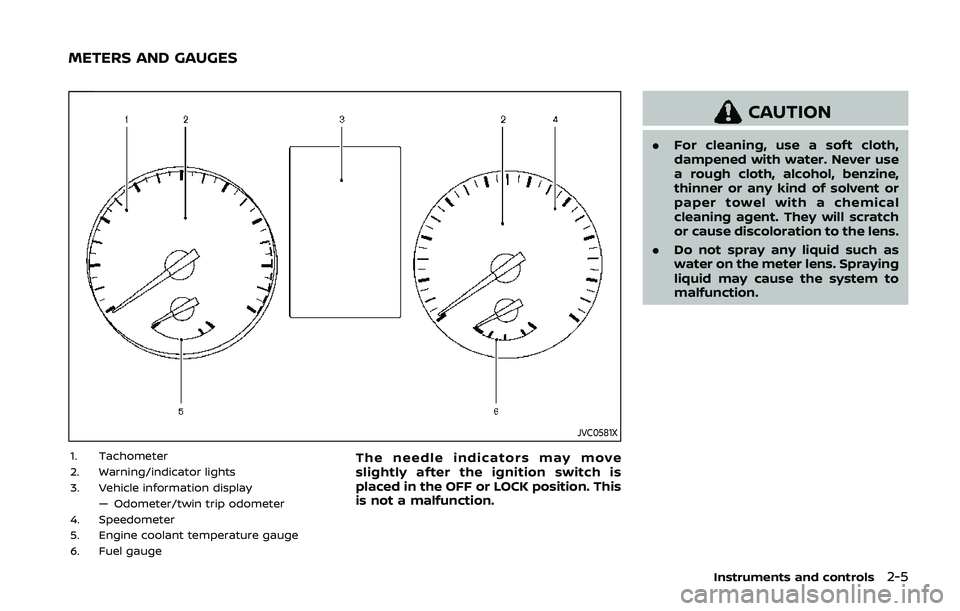
1. Tachometer
2. Warning/indicator lights
3. Vehicle information display— Odometer/twin trip odometer
4. Speedometer
5. Engine coolant temperature gauge
6. Fuel gaugeThe needle indicators may move
slightly after the ignition switch is
placed in the OFF or LOCK position. This
is not a malfunction.
CAUTION
. For cleaning, use a soft cloth,
dampened with water. Never use
a rough cloth, alcohol, benzine,
thinner or any kind of solvent or
paper towel with a chemical
cleaning agent. They will scratch
or cause discoloration to the lens.
. Do not spray any liquid such as
water on the meter lens. Spraying
liquid may cause the system to
malfunction.
Instruments and controls2-5
METERS AND GAUGES
Page 86 of 500
2-6Instruments and controls
JVI1006XSpeedometer
SPEEDOMETER AND ODOMETER
Speedometer
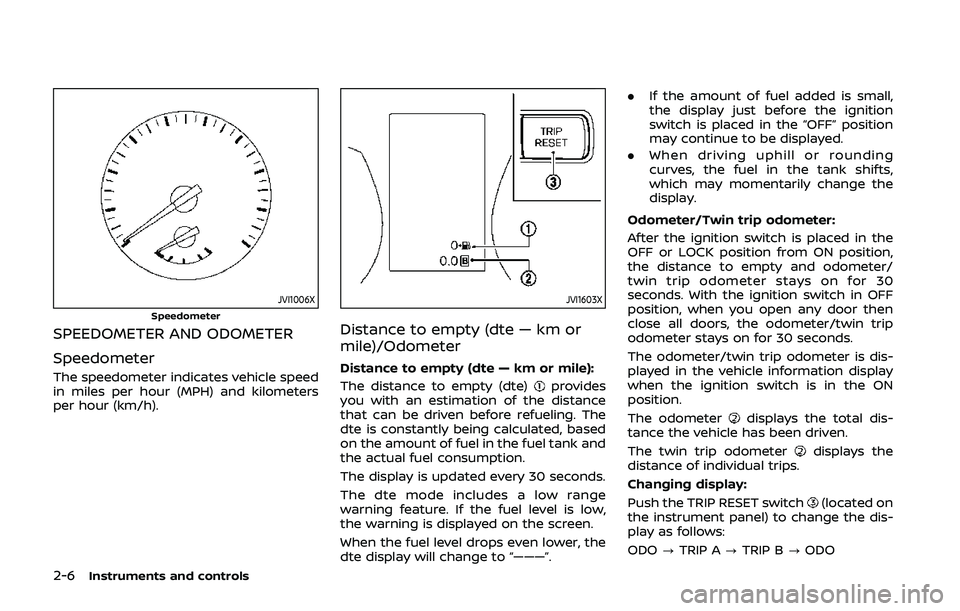
The speedometer indicates vehicle speed
in miles per hour (MPH) and kilometers
per hour (km/h).
JVI1603X
Distance to empty (dte — km or
mile)/Odometer
Distance to empty (dte — km or mile):
The distance to empty (dte)
provides
you with an estimation of the distance
that can be driven before refueling. The
dte is constantly being calculated, based
on the amount of fuel in the fuel tank and
the actual fuel consumption.
The display is updated every 30 seconds.
The dte mode includes a low range
warning feature. If the fuel level is low,
the warning is displayed on the screen.
When the fuel level drops even lower, the
dte display will change to “———”. .
If the amount of fuel added is small,
the display just before the ignition
switch is placed in the “OFF” position
may continue to be displayed.
. When driving uphill or rounding
curves, the fuel in the tank shifts,
which may momentarily change the
display.
Odometer/Twin trip odometer:
After the ignition switch is placed in the
OFF or LOCK position from ON position,
the distance to empty and odometer/
twin trip odometer stays on for 30
seconds. With the ignition switch in OFF
position, when you open any door then
close all doors, the odometer/twin trip
odometer stays on for 30 seconds.
The odometer/twin trip odometer is dis-
played in the vehicle information display
when the ignition switch is in the ON
position.
The odometer
displays the total dis-
tance the vehicle has been driven.
The twin trip odometer
displays the
distance of individual trips.
Changing display:
Push the TRIP RESET switch
(located on
the instrument panel) to change the dis-
play as follows:
ODO ?TRIP A ?TRIP B ?ODO
Page 88 of 500
2-8Instruments and controls
CAUTION
.If the gauge indicates the engine
coolant temperature is near the
hot (H) end of the normal range,
reduce vehicle speed to decrease
the temperature.
. If the gauge is over the normal
range, stop the vehicle as soon as
safely possible and let the engine
idle.
. If the engine is overheated, con-
tinued operation of the vehicle
may seriously damage the en-
gine. (See “If your vehicle over-
heats” (P.6-11) for immediate
action required.)
JVI0640X
FUEL GAUGE
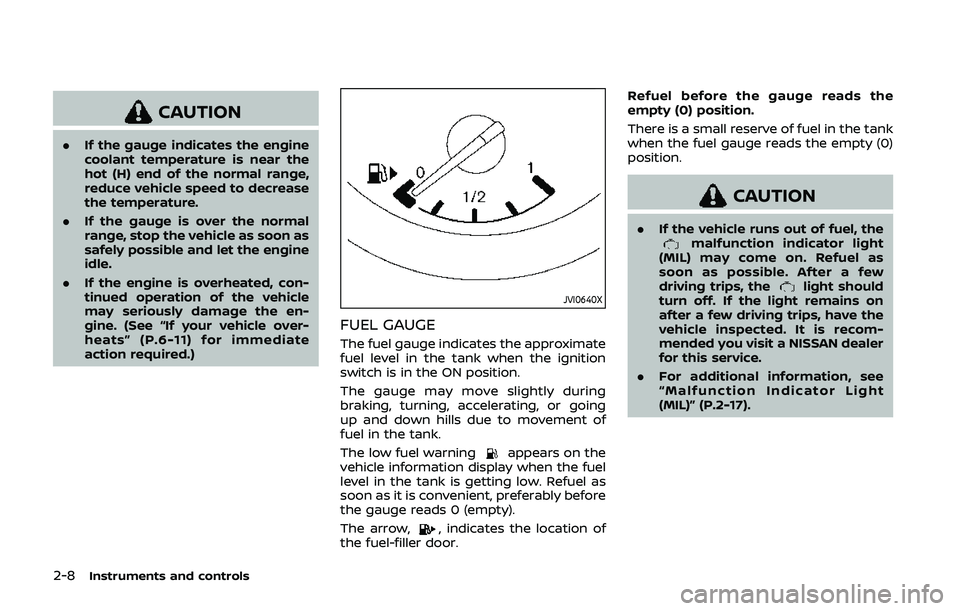
The fuel gauge indicates the approximate
fuel level in the tank when the ignition
switch is in the ON position.
The gauge may move slightly during
braking, turning, accelerating, or going
up and down hills due to movement of
fuel in the tank.
The low fuel warning
appears on the
vehicle information display when the fuel
level in the tank is getting low. Refuel as
soon as it is convenient, preferably before
the gauge reads 0 (empty).
The arrow,
, indicates the location of
the fuel-filler door. Refuel before the gauge reads the
empty (0) position.
There is a small reserve of fuel in the tank
when the fuel gauge reads the empty (0)
position.
CAUTION
.
If the vehicle runs out of fuel, themalfunction indicator light
(MIL) may come on. Refuel as
soon as possible. After a few
driving trips, the
light should
turn off. If the light remains on
after a few driving trips, have the
vehicle inspected. It is recom-
mended you visit a NISSAN dealer
for this service.
. For additional information, see
“Malfunction Indicator Light
(MIL)” (P.2-17).
Page 92 of 500
2-12Instruments and controls
gerous.
. Pressing the brake pedal with the
engine stopped and/or low brake
fluid level may increase your
stopping distance and braking
will require greater pedal effort
as well as pedal travel.
. If the brake fluid level is below the
minimum or MIN mark on the
brake fluid reservoir, do not drive
until the brake system has been
checked. It is recommended you
visit a NISSAN dealer for this
service.
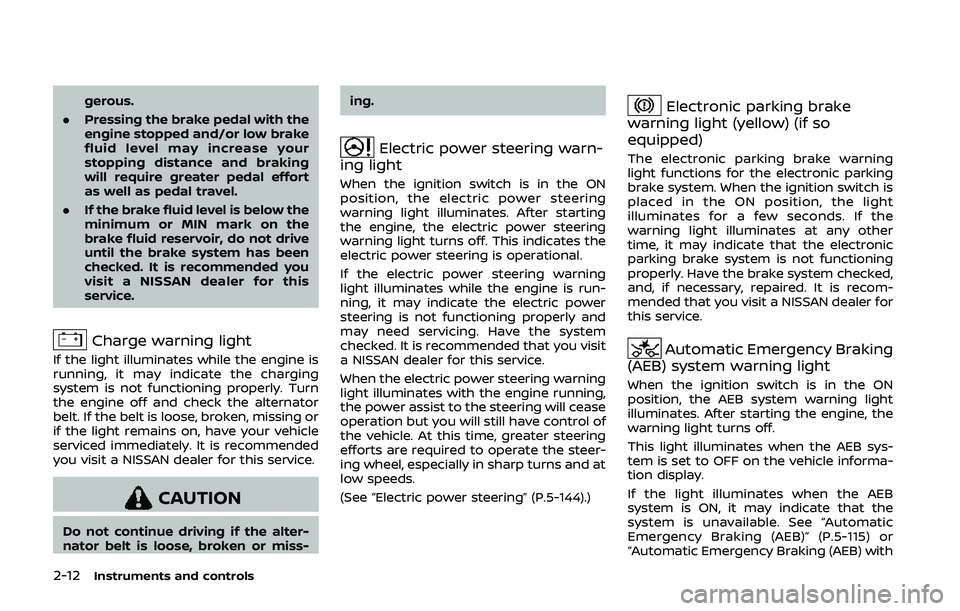
Charge warning light
If the light illuminates while the engine is
running, it may indicate the charging
system is not functioning properly. Turn
the engine off and check the alternator
belt. If the belt is loose, broken, missing or
if the light remains on, have your vehicle
serviced immediately. It is recommended
you visit a NISSAN dealer for this service.
CAUTION
Do not continue driving if the alter-
nator belt is loose, broken or miss- ing.
Electric power steering warn-
ing light
When the ignition switch is in the ON
position, the electric power steering
warning light illuminates. After starting
the engine, the electric power steering
warning light turns off. This indicates the
electric power steering is operational.
If the electric power steering warning
light illuminates while the engine is run-
ning, it may indicate the electric power
steering is not functioning properly and
may need servicing. Have the system
checked. It is recommended that you visit
a NISSAN dealer for this service.
When the electric power steering warning
light illuminates with the engine running,
the power assist to the steering will cease
operation but you will still have control of
the vehicle. At this time, greater steering
efforts are required to operate the steer-
ing wheel, especially in sharp turns and at
low speeds.
(See “Electric power steering” (P.5-144).)
Electronic parking brake
warning light (yellow) (if so
equipped)
The electronic parking brake warning
light functions for the electronic parking
brake system. When the ignition switch is
placed in the ON position, the light
illuminates for a few seconds. If the
warning light illuminates at any other
time, it may indicate that the electronic
parking brake system is not functioning
properly. Have the brake system checked,
and, if necessary, repaired. It is recom-
mended that you visit a NISSAN dealer for
this service.
Automatic Emergency Braking
(AEB) system warning light
When the ignition switch is in the ON
position, the AEB system warning light
illuminates. After starting the engine, the
warning light turns off.
This light illuminates when the AEB sys-
tem is set to OFF on the vehicle informa-
tion display.
If the light illuminates when the AEB
system is ON, it may indicate that the
system is unavailable. See “Automatic
Emergency Braking (AEB)” (P.5-115) or
“Automatic Emergency Braking (AEB) with
Page 93 of 500
pedestrian detection system” (P.5-122).
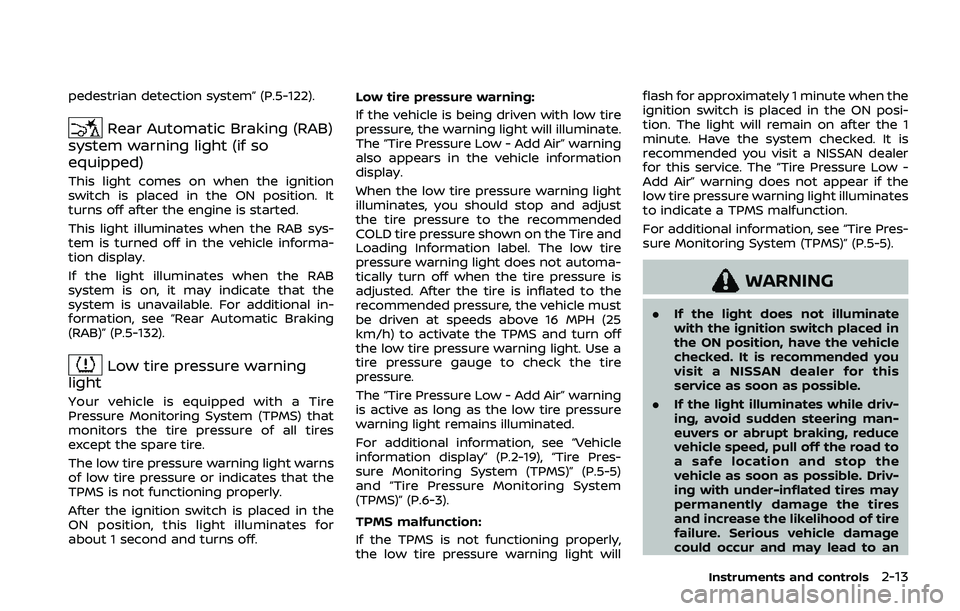
Rear Automatic Braking (RAB)
system warning light (if so
equipped)
This light comes on when the ignition
switch is placed in the ON position. It
turns off after the engine is started.
This light illuminates when the RAB sys-
tem is turned off in the vehicle informa-
tion display.
If the light illuminates when the RAB
system is on, it may indicate that the
system is unavailable. For additional in-
formation, see “Rear Automatic Braking
(RAB)” (P.5-132).
Low tire pressure warning
light
Your vehicle is equipped with a Tire
Pressure Monitoring System (TPMS) that
monitors the tire pressure of all tires
except the spare tire.
The low tire pressure warning light warns
of low tire pressure or indicates that the
TPMS is not functioning properly.
After the ignition switch is placed in the
ON position, this light illuminates for
about 1 second and turns off. Low tire pressure warning:
If the vehicle is being driven with low tire
pressure, the warning light will illuminate.
The “Tire Pressure Low - Add Air” warning
also appears in the vehicle information
display.
When the low tire pressure warning light
illuminates, you should stop and adjust
the tire pressure to the recommended
COLD tire pressure shown on the Tire and
Loading Information label. The low tire
pressure warning light does not automa-
tically turn off when the tire pressure is
adjusted. After the tire is inflated to the
recommended pressure, the vehicle must
be driven at speeds above 16 MPH (25
km/h) to activate the TPMS and turn off
the low tire pressure warning light. Use a
tire pressure gauge to check the tire
pressure.
The “Tire Pressure Low - Add Air” warning
is active as long as the low tire pressure
warning light remains illuminated.
For additional information, see “Vehicle
information display” (P.2-19), “Tire Pres-
sure Monitoring System (TPMS)” (P.5-5)
and “Tire Pressure Monitoring System
(TPMS)” (P.6-3).
TPMS malfunction:
If the TPMS is not functioning properly,
the low tire pressure warning light will flash for approximately 1 minute when the
ignition switch is placed in the ON posi-
tion. The light will remain on after the 1
minute. Have the system checked. It is
recommended you visit a NISSAN dealer
for this service. The “Tire Pressure Low -
Add Air” warning does not appear if the
low tire pressure warning light illuminates
to indicate a TPMS malfunction.
For additional information, see “Tire Pres-
sure Monitoring System (TPMS)” (P.5-5).
WARNING
.
If the light does not illuminate
with the ignition switch placed in
the ON position, have the vehicle
checked. It is recommended you
visit a NISSAN dealer for this
service as soon as possible.
. If the light illuminates while driv-
ing, avoid sudden steering man-
euvers or abrupt braking, reduce
vehicle speed, pull off the road to
a safe location and stop the
vehicle as soon as possible. Driv-
ing with under-inflated tires may
permanently damage the tires
and increase the likelihood of tire
failure. Serious vehicle damage
could occur and may lead to an
Instruments and controls2-13
Page 94 of 500
2-14Instruments and controls
accident and could result in ser-
ious personal injury. Check the
tire pressure for all four tires.
Adjust the tire pressure to the
recommended COLD tire pressure
shown on the Tire and Loading
Information label to turn the low
tire pressure warning light OFF. If
the light still illuminates while
driving after adjusting the tire
pressure, a tire may be flat or
the TPMS may be malfunctioning.
If you have a flat tire, replace it
with a spare tire as soon as
possible. If no tire is flat and all
tires are properly inflated, it is
recommended you consult a
NISSAN dealer.
. Since the spare tire is not
equipped with the TPMS, when a
spare tire is mounted or a wheel
is replaced, the TPMS will not
function and the low tire pressure
warning light will flash for ap-
proximately 1 minute. The light
will remain on after 1 minute.
Have your tires replaced and/or
TPMS system reset as soon as
possible. It is recommended you
visit a NISSAN dealer for these
services. .
Replacing tires with those not
originally specified by NISSAN
could affect the proper operation
of the TPMS.
CAUTION
.The TPMS is not a substitute for
the regular tire pressure check.
Be sure to check the tire pressure
regularly.
. If the vehicle is being driven at
speeds of less than 16 MPH (25
km/h), the TPMS may not operate
correctly.
. Be sure to install the specified
size of tires to the four wheels
correctly.
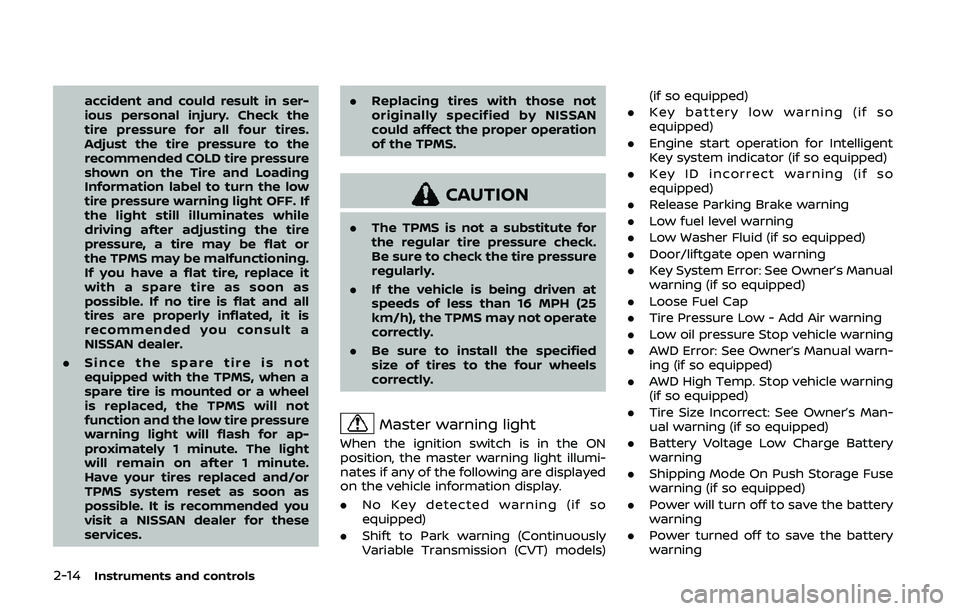
Master warning light
When the ignition switch is in the ON
position, the master warning light illumi-
nates if any of the following are displayed
on the vehicle information display.
. No Key detected warning (if so
equipped)
. Shift to Park warning (Continuously
Variable Transmission (CVT) models) (if so equipped)
. Key battery low warning (if so
equipped)
. Engine start operation for Intelligent
Key system indicator (if so equipped)
. Key ID incorrect warning (if so
equipped)
. Release Parking Brake warning
. Low fuel level warning
. Low Washer Fluid (if so equipped)
. Door/liftgate open warning
. Key System Error: See Owner’s Manual
warning (if so equipped)
. Loose Fuel Cap
. Tire Pressure Low - Add Air warning
. Low oil pressure Stop vehicle warning
. AWD Error: See Owner’s Manual warn-
ing (if so equipped)
. AWD High Temp. Stop vehicle warning
(if so equipped)
. Tire Size Incorrect: See Owner’s Man-
ual warning (if so equipped)
. Battery Voltage Low Charge Battery
warning
. Shipping Mode On Push Storage Fuse
warning (if so equipped)
. Power will turn off to save the battery
warning
. Power turned off to save the battery
warning
Page 97 of 500
system checked, and if necessary re-
paired. It is recommended you visit a
NISSAN dealer for this service.
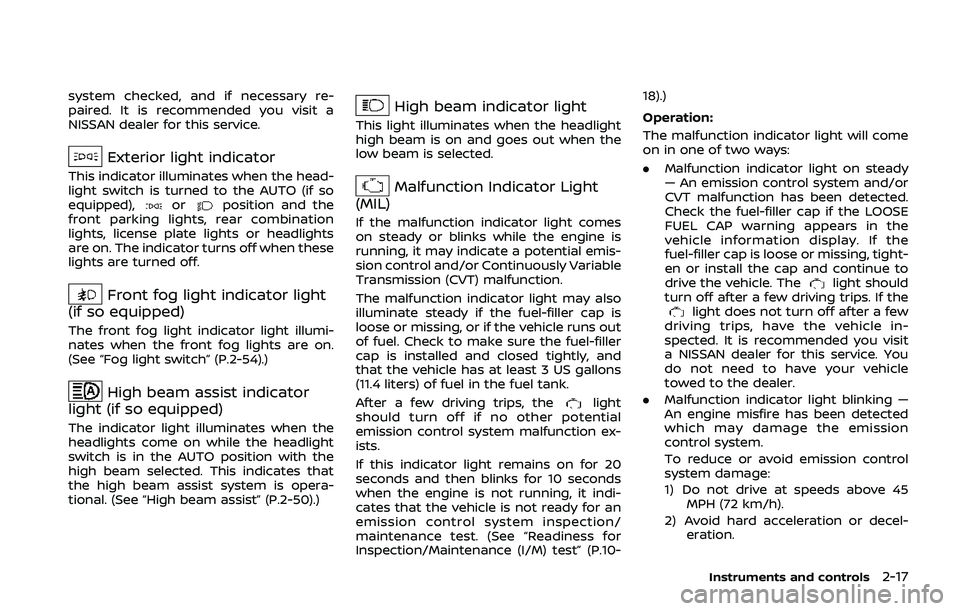
Exterior light indicator
This indicator illuminates when the head-
light switch is turned to the AUTO (if so
equipped),
orposition and the
front parking lights, rear combination
lights, license plate lights or headlights
are on. The indicator turns off when these
lights are turned off.
Front fog light indicator light
(if so equipped)
The front fog light indicator light illumi-
nates when the front fog lights are on.
(See “Fog light switch” (P.2-54).)
High beam assist indicator
light (if so equipped)
The indicator light illuminates when the
headlights come on while the headlight
switch is in the AUTO position with the
high beam selected. This indicates that
the high beam assist system is opera-
tional. (See “High beam assist” (P.2-50).)
High beam indicator light
This light illuminates when the headlight
high beam is on and goes out when the
low beam is selected.
Malfunction Indicator Light
(MIL)
If the malfunction indicator light comes
on steady or blinks while the engine is
running, it may indicate a potential emis-
sion control and/or Continuously Variable
Transmission (CVT) malfunction.
The malfunction indicator light may also
illuminate steady if the fuel-filler cap is
loose or missing, or if the vehicle runs out
of fuel. Check to make sure the fuel-filler
cap is installed and closed tightly, and
that the vehicle has at least 3 US gallons
(11.4 liters) of fuel in the fuel tank.
After a few driving trips, the
light
should turn off if no other potential
emission control system malfunction ex-
ists.
If this indicator light remains on for 20
seconds and then blinks for 10 seconds
when the engine is not running, it indi-
cates that the vehicle is not ready for an
emission control system inspection/
maintenance test. (See “Readiness for
Inspection/Maintenance (I/M) test” (P.10- 18).)
Operation:
The malfunction indicator light will come
on in one of two ways:
.
Malfunction indicator light on steady
— An emission control system and/or
CVT malfunction has been detected.
Check the fuel-filler cap if the LOOSE
FUEL CAP warning appears in the
vehicle information display. If the
fuel-filler cap is loose or missing, tight-
en or install the cap and continue to
drive the vehicle. The
light should
turn off after a few driving trips. If the
light does not turn off after a few
driving trips, have the vehicle in-
spected. It is recommended you visit
a NISSAN dealer for this service. You
do not need to have your vehicle
towed to the dealer.
. Malfunction indicator light blinking —
An engine misfire has been detected
which may damage the emission
control system.
To reduce or avoid emission control
system damage:
1) Do not drive at speeds above 45
MPH (72 km/h).
2) Avoid hard acceleration or decel- eration.
Instruments and controls2-17
Page 99 of 500
.Rear Automatic Braking (RAB)
. Rear Sonar System (RSS)
For additional information, refer to the
“Starting and driving” section of this
manual.
NISSAN Intelligent Key® door buz-
zer (if so equipped)
The Intelligent Key door buzzer sounds if
any one of the following improper opera-
tions is found.
. The Intelligent Key is left inside the
vehicle when locking the doors.
. The Intelligent Key is left outside the
vehicle when operating the vehicle.
When the buzzer sounds, be sure to
check both the vehicle and the Intelligent
Key. For additional information, refer to
“Intelligent Key system” (P.3-11).
Brake pad wear warning
The disc brake pads have audible wear
warnings. When a brake pad requires
replacement, it will make a high pitched
scraping sound when the vehicle is in
motion. This scraping sound will first
occur only when the brake pedal is
depressed. After more wear of the brake
pad, the sound will always be heard even
if the brake pedal is not depressed. Have
the brakes checked as soon as possible if
the warning sound is heard.
Parking brake reminder chime
The parking brake reminder chime will
sound if the vehicle is driven at more than
4 MPH (7 km/h) (models not equipped
with electronic parking brake) or 2 MPH (4
km/h) (models equipped with electronic
parking brake) with the parking brake
applied. Stop the vehicle and release the
parking brake.
Seat belt warning chime
The seat belt warning chime will sound
for about 6 seconds unless the driver’s
seat belt is securely fastened.
JVI0641X
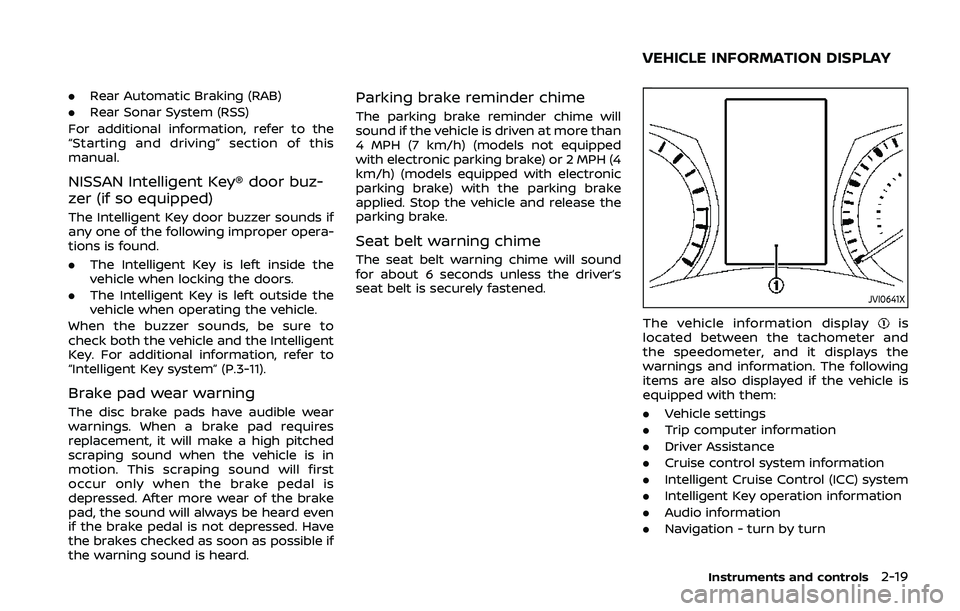
The vehicle information displayis
located between the tachometer and
the speedometer, and it displays the
warnings and information. The following
items are also displayed if the vehicle is
equipped with them:
. Vehicle settings
. Trip computer information
. Driver Assistance
. Cruise control system information
. Intelligent Cruise Control (ICC) system
. Intelligent Key operation information
. Audio information
. Navigation - turn by turn
Instruments and controls2-19
VEHICLE INFORMATION DISPLAY