hold NISSAN QASHQAI 2023 Owner's Manual
[x] Cancel search | Manufacturer: NISSAN, Model Year: 2023, Model line: QASHQAI, Model: NISSAN QASHQAI 2023Pages: 508, PDF Size: 2.47 MB
Page 140 of 508
2-58Instruments and controls
WARNING
When the LED DRL system is active,
tail lights on your vehicle are not on.
It is necessary at dusk to turn on
your headlights. Failure to do so
could cause an accident injuring
yourself and others.
Type B:
The LED portion of the headlights auto-
matically illuminate at 100% intensity
when the engine is started and the
parking brake released. The DRL operate
with the headlight switch in the AUTO
position or
position, the headlight
must be off. When you turn the headlight
switch to the
position for full illumi-
nation, the LED lights switch from LED
DRL to the park function.
If the parking brake is applied before the
engine is started, the LED DRL do not
illuminate. The LED DRL illuminate when
the parking brake is released. The LED
DRL will remain on until the ignition
switch is placed in the OFF position or
the headlight turns on.
JVI1591X
Example
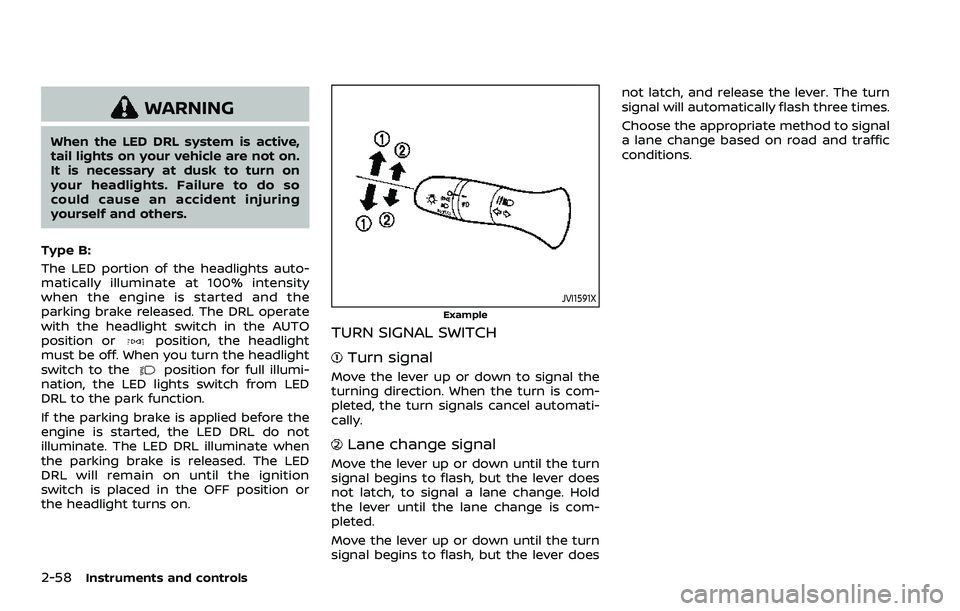
TURN SIGNAL SWITCH
Turn signal
Move the lever up or down to signal the
turning direction. When the turn is com-
pleted, the turn signals cancel automati-
cally.
Lane change signal
Move the lever up or down until the turn
signal begins to flash, but the lever does
not latch, to signal a lane change. Hold
the lever until the lane change is com-
pleted.
Move the lever up or down until the turn
signal begins to flash, but the lever does not latch, and release the lever. The turn
signal will automatically flash three times.
Choose the appropriate method to signal
a lane change based on road and traffic
conditions.
Page 150 of 508
2-68Instruments and controls
from the TCU antenna may ad-
versely affect the operation of the
pacemaker while using the Nis-
sanConnect® Services.
WAC0510X
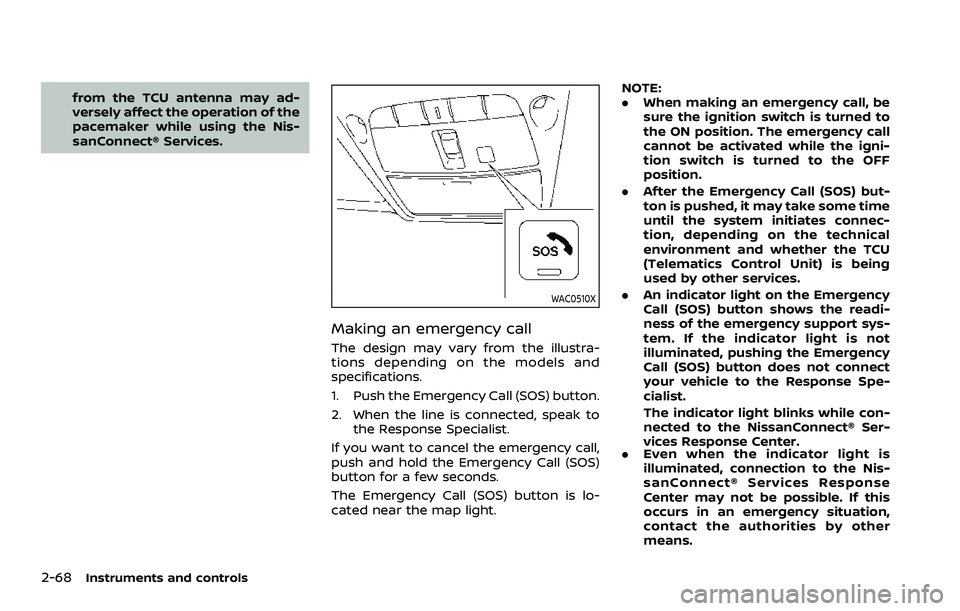
Making an emergency call
The design may vary from the illustra-
tions depending on the models and
specifications.
1. Push the Emergency Call (SOS) button.
2. When the line is connected, speak tothe Response Specialist.
If you want to cancel the emergency call,
push and hold the Emergency Call (SOS)
button for a few seconds.
The Emergency Call (SOS) button is lo-
cated near the map light. NOTE:
.
When making an emergency call, be
sure the ignition switch is turned to
the ON position. The emergency call
cannot be activated while the igni-
tion switch is turned to the OFF
position.
. After the Emergency Call (SOS) but-
ton is pushed, it may take some time
until the system initiates connec-
tion, depending on the technical
environment and whether the TCU
(Telematics Control Unit) is being
used by other services.
. An indicator light on the Emergency
Call (SOS) button shows the readi-
ness of the emergency support sys-
tem. If the indicator light is not
illuminated, pushing the Emergency
Call (SOS) button does not connect
your vehicle to the Response Spe-
cialist.
The indicator light blinks while con-
nected to the NissanConnect® Ser-
vices Response Center.
. Even when the indicator light is
illuminated, connection to the Nis-
sanConnect® Services Response
Center may not be possible. If this
occurs in an emergency situation,
contact the authorities by other
means.
Page 151 of 508
.To avoid disconnecting the line, do
not turn off the engine or the hybrid
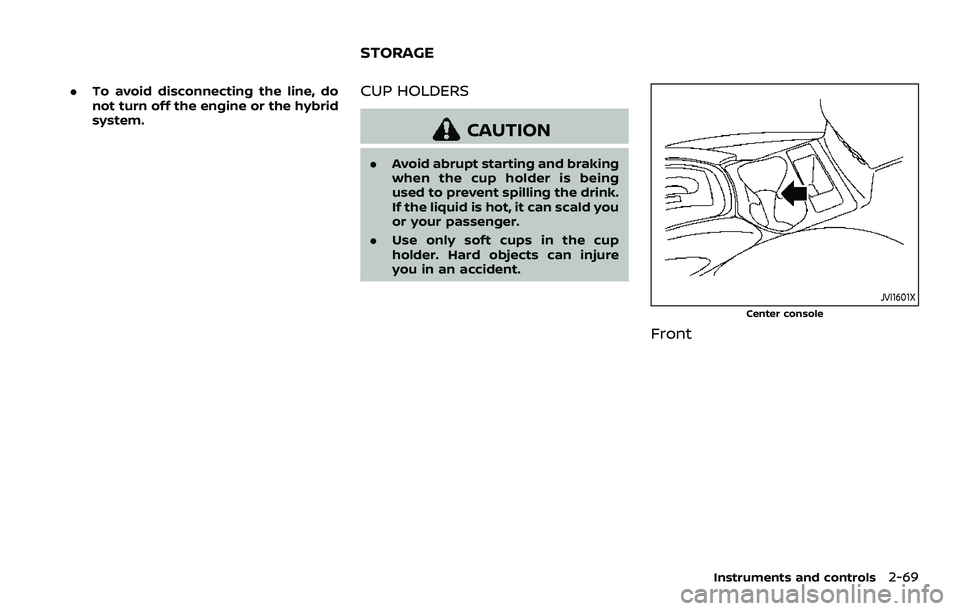
system.CUP HOLDERS
CAUTION
.Avoid abrupt starting and braking
when the cup holder is being
used to prevent spilling the drink.
If the liquid is hot, it can scald you
or your passenger.
. Use only soft cups in the cup
holder. Hard objects can injure
you in an accident.
JVI1601X
Center console
Front
Instruments and controls2-69
STORAGE
Page 152 of 508
2-70Instruments and controls
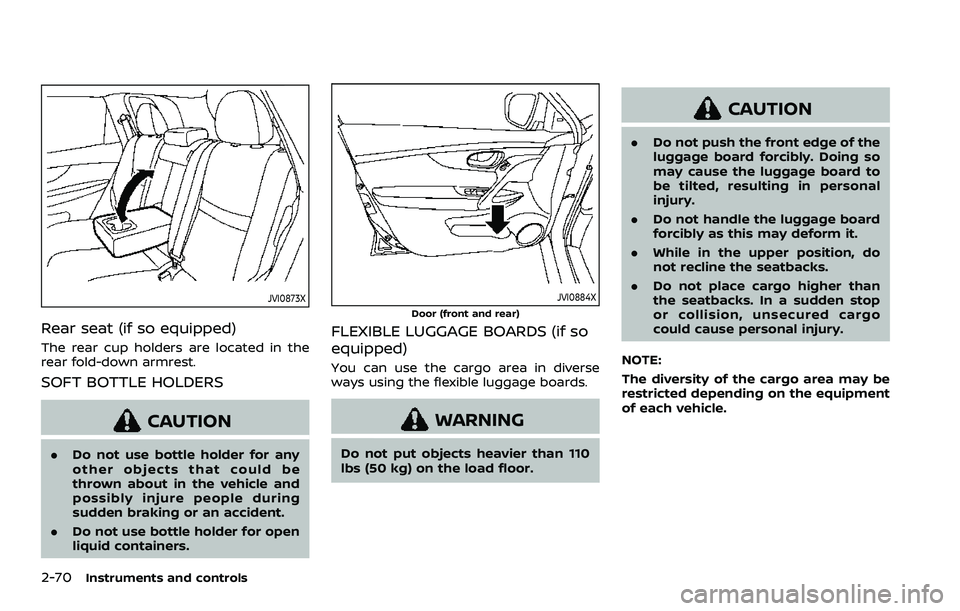
JVI0873X
Rear seat (if so equipped)
The rear cup holders are located in the
rear fold-down armrest.
SOFT BOTTLE HOLDERS
CAUTION
.Do not use bottle holder for any
other objects that could be
thrown about in the vehicle and
possibly injure people during
sudden braking or an accident.
. Do not use bottle holder for open
liquid containers.
JVI0884X
Door (front and rear)
FLEXIBLE LUGGAGE BOARDS (if so
equipped)
You can use the cargo area in diverse
ways using the flexible luggage boards.
WARNING
Do not put objects heavier than 110
lbs (50 kg) on the load floor.
CAUTION
.Do not push the front edge of the
luggage board forcibly. Doing so
may cause the luggage board to
be tilted, resulting in personal
injury.
. Do not handle the luggage board
forcibly as this may deform it.
. While in the upper position, do
not recline the seatbacks.
. Do not place cargo higher than
the seatbacks. In a sudden stop
or collision, unsecured cargo
could cause personal injury.
NOTE:
The diversity of the cargo area may be
restricted depending on the equipment
of each vehicle.
Page 154 of 508
2-72Instruments and controls
JVI0619X
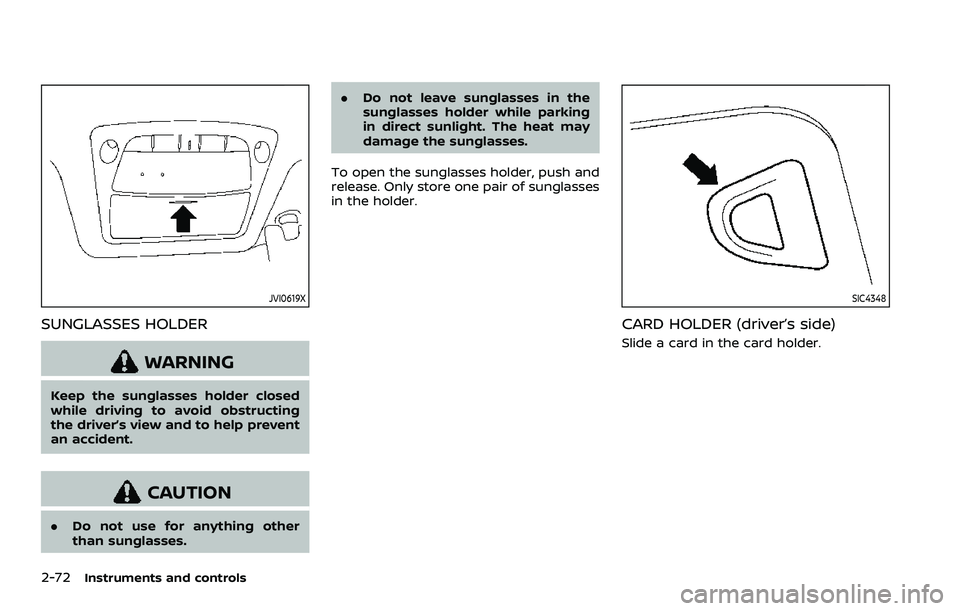
SUNGLASSES HOLDER
WARNING
Keep the sunglasses holder closed
while driving to avoid obstructing
the driver’s view and to help prevent
an accident.
CAUTION
.Do not use for anything other
than sunglasses. .
Do not leave sunglasses in the
sunglasses holder while parking
in direct sunlight. The heat may
damage the sunglasses.
To open the sunglasses holder, push and
release. Only store one pair of sunglasses
in the holder.
SIC4348
CARD HOLDER (driver’s side)
Slide a card in the card holder.
Page 158 of 508
2-76Instruments and controls
POWER WINDOWS
WARNING
.Make sure that all passengers
have their hands, etc. inside the
vehicle while it is in motion and
before closing the windows. Use
the window lock switch to pre-
vent unexpected use of the
power windows.
. To help avoid risk of injury or
death through unintended opera-
tion of the vehicle and or its
systems, including entrapment
in windows or inadvertent door
lock activation, do not leave chil-
dren, people who require the
assistance of others or pets un-
attended in your vehicle. Addi-
tionally, the temperature inside a
closed vehicle on a warm day can
quickly become high enough to
cause a significant risk of injury
or death to people and pets.
The power windows operate when the
ignition switch is in the ON position, or for
about 45 seconds after the ignition
switch is placed in the OFF position. If
the driver’s or front passenger’s door is
opened during this period of about 45 seconds, power to the windows is can-
celed.
SIC4533
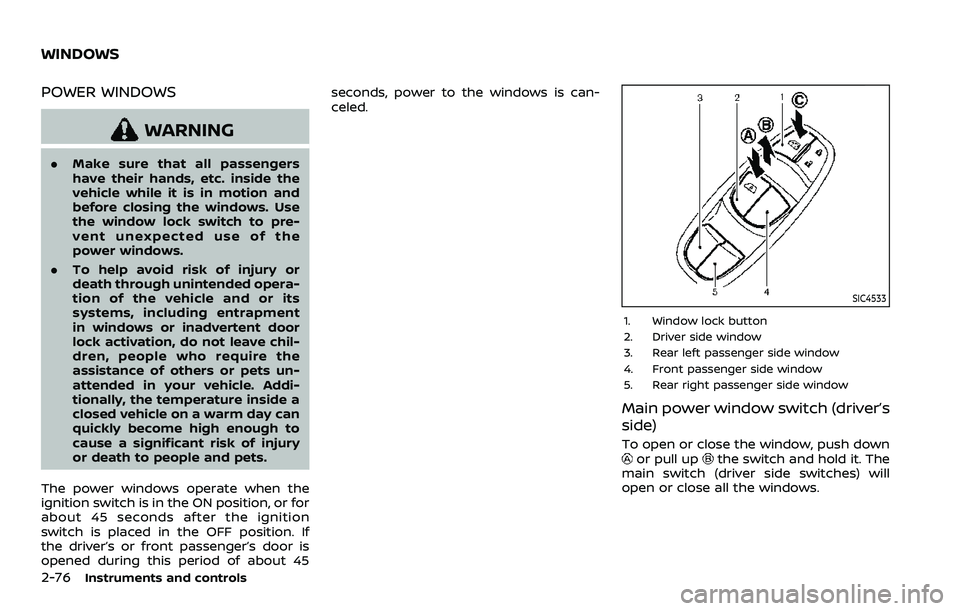
1. Window lock button
2. Driver side window
3. Rear left passenger side window
4. Front passenger side window
5. Rear right passenger side window
Main power window switch (driver’s
side)
To open or close the window, push downor pull upthe switch and hold it. The
main switch (driver side switches) will
open or close all the windows.
WINDOWS
Page 159 of 508
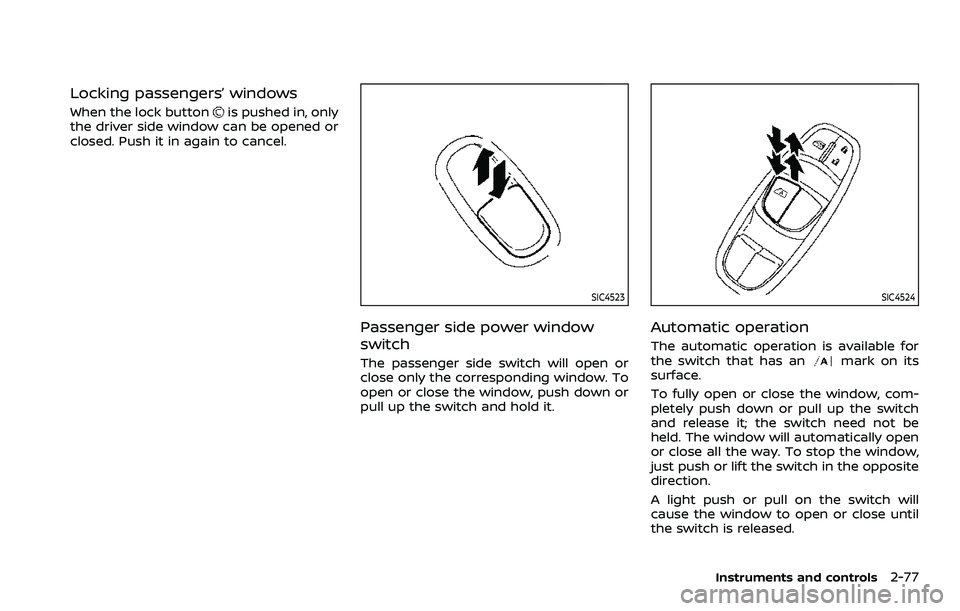
Locking passengers’ windows
When the lock buttonis pushed in, only
the driver side window can be opened or
closed. Push it in again to cancel.
SIC4523
Passenger side power window
switch
The passenger side switch will open or
close only the corresponding window. To
open or close the window, push down or
pull up the switch and hold it.
SIC4524
Automatic operation
The automatic operation is available for
the switch that has anmark on its
surface.
To fully open or close the window, com-
pletely push down or pull up the switch
and release it; the switch need not be
held. The window will automatically open
or close all the way. To stop the window,
just push or lift the switch in the opposite
direction.
A light push or pull on the switch will
cause the window to open or close until
the switch is released.
Instruments and controls2-77
Page 160 of 508
2-78Instruments and controls
Auto-reverse function
WARNING
There are some small distances im-
mediately before the closed position
which cannot be detected. Make sure
that all passengers have their hands,
etc., inside the vehicle before closing
the window.
If the control unit detects something
caught in the window as it is closing, the
window will be immediately lowered.
The auto reverse function can be acti-
vated when the window is closed by
automatic operation when the ignition
switch is in the ON position or for 45
seconds after the ignition switch is placed
in the OFF position.
Depending on the environment or driv-
ing conditions, the auto reverse func-
tion may be activated if an impact or
load similar to something being caught
in the window occurs.
If the windows do not close auto-
matically
If the power window automatic function
(closing only) does not operate properly,
perform the following procedure to initi-
alize the power window system.
1. Start the engine.
2. Close the door.
3. After starting the engine, open the window completely by operating the
power window switch.
4. Pull the power window switch and hold it to close the window, and then
hold the switch more than 3 seconds
after the window is closed completely.
5. Release the power window switch. Operate the window by the automatic
function to confirm the initialization is
complete.
If the power window automatic function
does not operate properly after perform-
ing the procedure above, it is recom-
mended you have your vehicle checked
by a NISSAN dealer.
WARNING
. In an accident you could be
thrown from the vehicle through
an open moonroof. Always use
seat belts and child restraints.
. Do not allow anyone to stand up
or extend any portion of their
body out of the moonroof open-
ing while the vehicle is in motion
or while the moonroof is closing.
CAUTION
.Remove water drops, snow, ice or
sand from the moonroof before
opening.
. Do not place any heavy object on
the moonroof or surrounding
area.
POWER MOONROOF
The moonroof only operates when the
ignition switch is in the ON position.
The moonroof is operational for about 45
seconds, even if the ignition switch is
pushed to the OFF position. If the driver’s
door or the passenger’s door is opened
MOONROOF (if so equipped)
Page 162 of 508
2-80Instruments and controls
matically when the auto reverse function
activates due to a malfunction, push and
hold the moonroof switch to the close
position
.
Depending on the environment or driv-
ing conditions, the auto reverse func-
tion may be activated if an impact or
load similar to something being caught
in the moonroof occurs.
If the moonroof does not operate
If the moonroof does not operate prop-
erly, perform the following procedure to
initialize the moonroof operation system.
1. If the moonroof is open, close it fully by repeatedly pushing the moonroof
switch to the close position
to tilt
the moonroof up.
2. Push and hold the switch to the close position
.
3. Release the moonroof switch after the moonroof moves slightly up and
down.
4. Push and hold the switch to the open position
to fully tilt the moonroof
down.
5. Check if the moonroof switch oper- ates normally.
If the moonroof does not operate prop-
erly after performing the procedure
above, have your moonroof checked and repaired. It is recommended you visit a
NISSAN dealer for this service.
CAUTION
.
Do not leave the light switch on
when the engine is not running
for extended periods of time to
prevent the battery from being
discharged.
. Turn off the lights when you leave
the vehicle.
INTERIOR LIGHTS
Page 166 of 508
2-84Instruments and controls
PROGRAMMING HomeLink®
The following steps show generic instruc-
tions how to program a HomeLink®
button. If you have any questions or are
having difficulty programming your
HomeLink® buttons, refer to the
HomeLink® web site at: www.homelink.
com/nissan or call 1-800-355-3515.
NOTE:
It is also recommended that a new
battery be placed in the hand-held
transmitter of the device being pro-
grammed to HomeLink® for quicker
programming and accurate transmis-
sion of the radio-frequency.
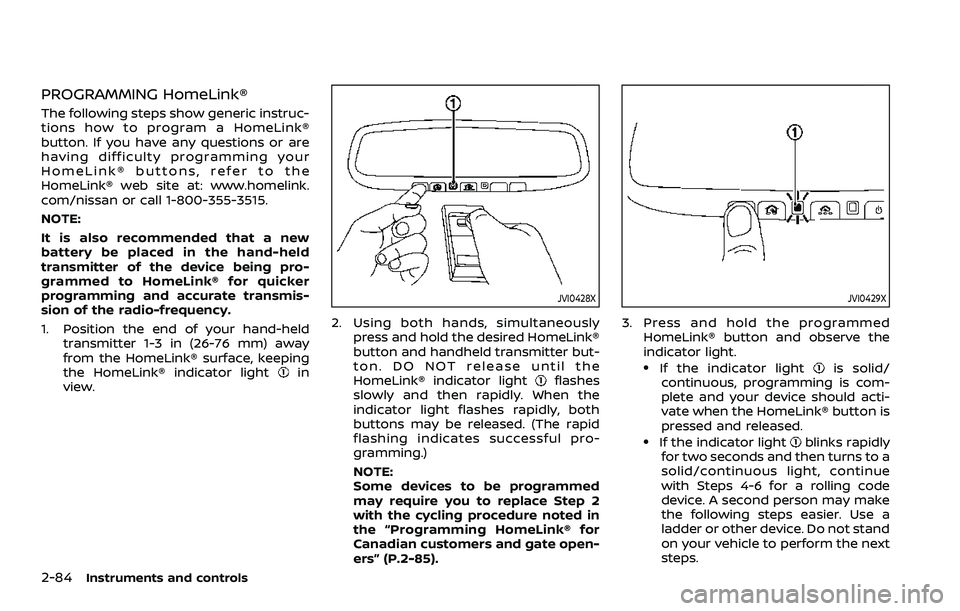
1. Position the end of your hand-heldtransmitter 1-3 in (26-76 mm) away
from the HomeLink® surface, keeping
the HomeLink® indicator light
in
view.
JVI0428X
2. Using both hands, simultaneously
press and hold the desired HomeLink®
button and handheld transmitter but-
ton. DO NOT release until the
HomeLink® indicator light
flashes
slowly and then rapidly. When the
indicator light flashes rapidly, both
buttons may be released. (The rapid
flashing indicates successful pro-
gramming.)
NOTE:
Some devices to be programmed
may require you to replace Step 2
with the cycling procedure noted in
the “Programming HomeLink® for
Canadian customers and gate open-
ers” (P.2-85).
JVI0429X
3. Press and hold the programmed HomeLink® button and observe the
indicator light.
.If the indicator lightis solid/
continuous, programming is com-
plete and your device should acti-
vate when the HomeLink® button is
pressed and released.
.If the indicator lightblinks rapidly
for two seconds and then turns to a
solid/continuous light, continue
with Steps 4-6 for a rolling code
device. A second person may make
the following steps easier. Use a
ladder or other device. Do not stand
on your vehicle to perform the next
steps.