key NISSAN QUEST 1997 V40 / 1.G Owner's Manual
[x] Cancel search | Manufacturer: NISSAN, Model Year: 1997, Model line: QUEST, Model: NISSAN QUEST 1997 V40 / 1.GPages: 247, PDF Size: 2.01 MB
Page 45 of 247

To lock the rear door with the key, turn the
key clockwise as shown in the illustration.
Turning the key fully clockwise unlocks the
rear window on models equipped with the
flip-up rear window. The rear wiper auto-
matically lowers when the key is turned fully
clockwise. Do not force the wiper to lower
by hand.
To close the rear window, firmly push on the
window until it locks in place.
APD0802
2-12
ZX
Page 80 of 247

Warning labels about the supplemental air
bag system are placed in the vehicle.The supplemental air bag warning light,
displaying AIR BAG in the instrument panel,
monitors the circuits of the supplemental air
bag. The circuits monitored by the supple-
mental air bag light are the diagnosis sensor
unit, supplemental air bag modules and all
related wiring.
When the ignition key is in the ON or START
position, the supplemental air bag warning
light illuminates for about 7 seconds and
then turns off. This means the system is
operational.
APD1017APD0554
WARNING LABELS SUPPLEMENTAL AIR BAG
WARNING LIGHT
2-47
ZX
Page 81 of 247
If any of the following conditions occur, the
supplemental air bag needs servicing and
should be taken to your nearest authorized
NISSAN dealer:
1. The supplemental air bag light does not
come on and remain on for 7 seconds
and then go off as described above.
2. The supplemental air bag light flashes
intermittently or remains on.
3. The supplemental air bag light does not
come on at all.
Under these conditions, the Supplemental
Restraint System Air Bag may not operate
properly. It must be checked and repaired.
Take your vehicle to the nearest authorized
NISSAN dealer.
WARNING
If the supplemental air bag warning
light is on, it could mean that the air
bag will not operate in an accident.
Repair and replacement procedure
The supplemental air bag system is de-
signed to inflate on a one-time-only basis.
As a reminder, unless it is damaged, thesupplemental air bag light remains illumi-
nated after inflation has occurred. Repair
and replacement of the supplemental air
bag system should be done only by an
authorized NISSAN dealer.
To ensure long-term functioning, the
system must be inspected 10 years after
the date of manufacture as noted on the
certification label located on the driver
side front pillar.
When maintenance work is required on the
vehicle, the supplemental air bag system
and related parts should be pointed out to
the person conducting the maintenance.
The ignition key should always be in the
LOCK position when working under the
hood or inside the vehicle.
WARNING
cOnce the supplemental air bag in-
flates, the supplemental air bag
module will not function again and
should be replaced by an authorized
NISSAN dealer. The supplemental air
bag module cannot be repaired.cThe supplemental air bag system
should be inspected by an autho-
rized NISSAN dealer if there is any
damage to the front end portion of
the vehicle.
cIf you need to dispose of a supple-
mental air bag or scrap the vehicle,
contact an authorized NISSAN
dealer. Correct supplemental air bag
disposal procedures are set forth in
the appropriate NISSAN Service
Manual. Incorrect disposal proce-
dures could cause personal injury.
2-48
ZX
Page 127 of 247

Servicing air conditioning
The air conditioning system in your NISSAN
vehicle is charged with a refrigerant de-
signed with the environment in mind.
This refrigerant does not harm the
earth's ozone layer.
Special charging equipment and lubricant
are required when servicing your NISSAN
air conditioner. Using improper refrigerants
or lubricants causes severe damage to your
air conditioning system. See ``Air condition-
ing system refrigerant and lubricant recom-
mendations'' in the ``Technical and con-
sumer information'' section of this manual.
Your NISSAN dealer is able to service your
environmentally ``friendly'' air conditioning
system.To turn the radio on, turn the ignition key to
ACC or ON. If you listen to the radio with the
engine not running, turn the key to the ACC
position.
Radio reception is affected by station signal
strength, distance from radio transmitter,
buildings, bridges, mountains and other ex-
ternal influences. Intermittent changes in
reception quality normally are caused by
these external influences.
Clock
For information on setting the clock, refer to
the section ``Instruments and controls''.
AM-FM RADIO WITH CASSETTE
PLAYER
Radio operation
Push the VOL-PUSH ON knob to turn the
radio on. Push the VOL-PUSH ON knob
once more to turn the radio off.
Turn the knob to adjust the volume.
Inserting a cassette tape into the cassette
player while the radio is on turns the radio
off and turns the cassette player on.
AUDIO SYSTEM
3-14
ZX
Page 131 of 247
creases or decreases the level of treble, as
indicated by the number of bar segments
showing in the display window.
Following treble adjustment, the display
window shows the current setting for three
seconds, then returns to the display prior to
adjustment.
BAL
Balance control allows you to adjust the
sound distribution between the right and left
speakers.
Push the BAL button either
or; BAL and the setting indicator bar
appear in the display window. Press the
BAL button
to shift the sound to the
right speakers. The single indicator bar
moves to the right of the display window.
Press the BAL button
to shift the
sound to the left speakers. The single indi-
cator bar moves to the left of the display
window. When the indicator bar is in the
center position the sound is equally distrib-
uted between the right and left speakers.
Following balance adjustment, the display
window shows the current setting for three
seconds, then returns to the display prior to
adjustment.
FADE
Fader control allows you to adjust sound
distribution between the front and rear
speakers.
Push the FADE button either
or; FADE and the setting indicator bar
appear in the display window. Press the
FADE button
to shift the sound to the
front speakers. The single indicator bar
moves to the right of the display window.
Press the FADE button
to shift the
sound to the rear speakers. The single
indicator bar moves to the left of the display
window. When the indicator bar is in the
center position the sound is equally distrib-
uted between the front and rear speakers.
Following fader adjustment, the display win-
dow shows the current setting for three
seconds, then returns to the display prior to
adjustment.
CASSETTE TAPE OPERATIONS
Turn the ignition key to ACC or ON, then
insert the cassette tape into the tape door
by lightly pushing it. Because of the power
loading feature, the cassette tape is auto-
matically pulled into the player and begins
to play.
CAUTION
Do not force the cassette tape into the
tape door. This could damage the
player.
When a cassette is inserted into the audio
system, the word TAPE and a cassette side
symbol (either 1 or 2) illuminate in the
display window.
A cassette tape can be loaded with the
ignition ON whether or not the radio power
is on. Inserting a cassette tape with the
radio power off causes the audio system to
turn on. After the cassette is ejected, the
audio system turns off. Also, the power
antenna (if so equipped) stays in the down
position during cassette tape operation.
The cassette tape automatically changes
directions to play the other side when the
first side is completed.
cTo maintain good quality sound,
NISSAN recommends using cassette
tapes of 60 minutes or shorter in
length.
cCassette tapes should be removed
from the player when not in use. Store
3-18
ZX
Page 133 of 247
Manual antenna
The manual antenna on your vehicle re-
mains in the up position at all times. The
antenna cannot be shortened, but can be
removed. When you need to remove the
antenna, turn its base counterclockwise.
Power antenna (if so equipped)
The power antenna automatically extends
when the radio is turned on, and retracts
when turned off or when a tape or CD is
played. If the radio is left on, the antenna
retracts and extends with the ignition key
OFF-ON operation.
CAUTION
cBefore turning the radio on, make
sure that there is no one near the
antenna outlet and there is enough
space for it to extend.
cTo prevent damage, be sure that the
power antenna is fully retracted be-
fore the vehicle enters an automated
car wash.cDirt and other foreign matter on the
power antenna rod may interrupt its
operation. Clean the rod periodically
with a damp cloth. This type of
cleaning is especially important dur-
ing the winter seasons in areas
where road salt and other chemicals
may be spread on the road surfaces
and splashed onto the antenna rod.
ANTENNA
3-20
ZX
Page 143 of 247
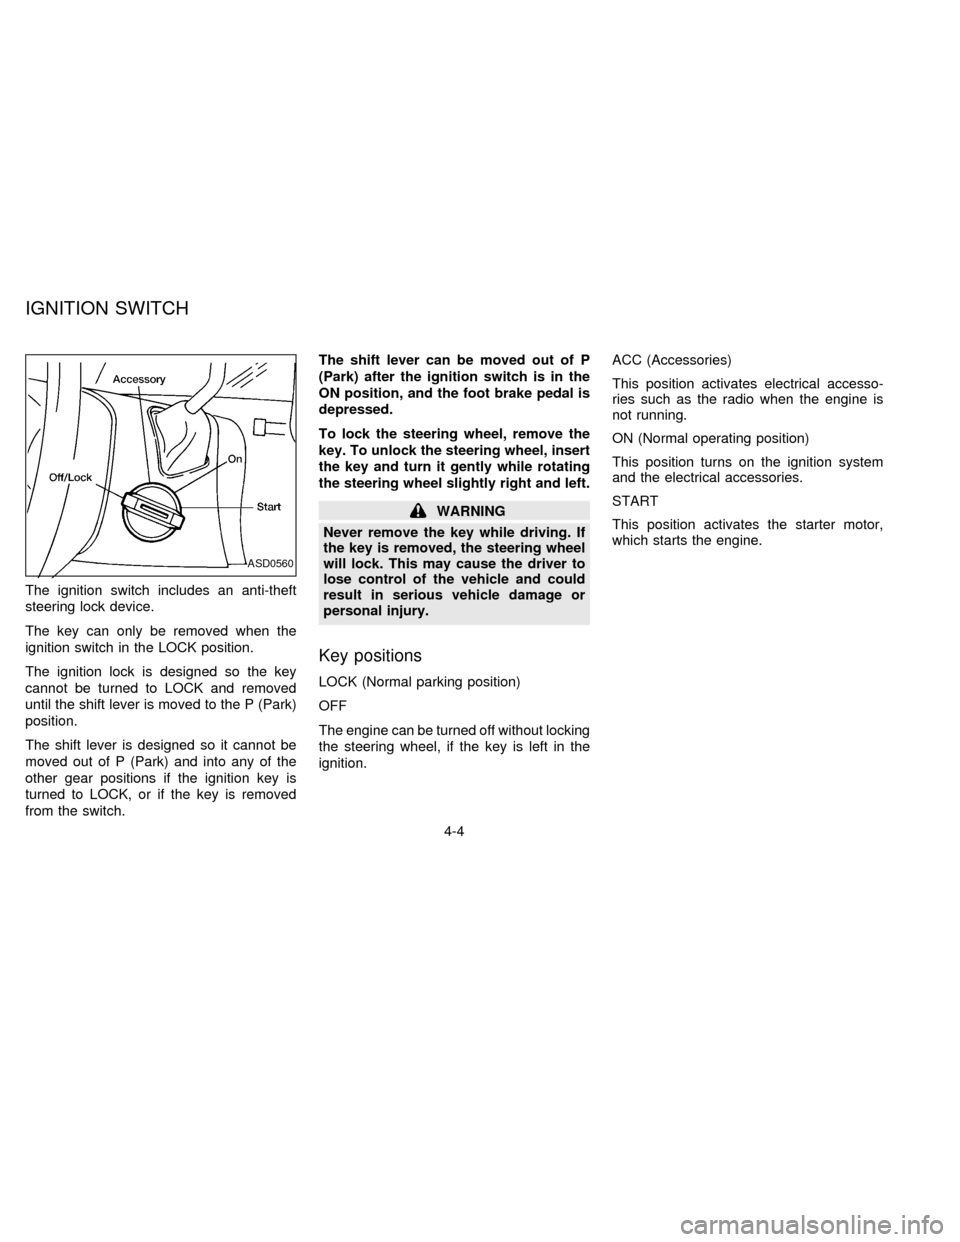
The ignition switch includes an anti-theft
steering lock device.
The key can only be removed when the
ignition switch in the LOCK position.
The ignition lock is designed so the key
cannot be turned to LOCK and removed
until the shift lever is moved to the P (Park)
position.
The shift lever is designed so it cannot be
moved out of P (Park) and into any of the
other gear positions if the ignition key is
turned to LOCK, or if the key is removed
from the switch.The shift lever can be moved out of P
(Park) after the ignition switch is in the
ON position, and the foot brake pedal is
depressed.
To lock the steering wheel, remove the
key. To unlock the steering wheel, insert
the key and turn it gently while rotating
the steering wheel slightly right and left.
WARNING
Never remove the key while driving. If
the key is removed, the steering wheel
will lock. This may cause the driver to
lose control of the vehicle and could
result in serious vehicle damage or
personal injury.
Key positions
LOCK (Normal parking position)
OFF
The engine can be turned off without locking
the steering wheel, if the key is left in the
ignition.ACC (Accessories)
This position activates electrical accesso-
ries such as the radio when the engine is
not running.
ON (Normal operating position)
This position turns on the ignition system
and the electrical accessories.
START
This position activates the starter motor,
which starts the engine.
ASD0560
IGNITION SWITCH
4-4
ZX
Page 144 of 247
cMake sure the area around the vehicle is
clear.
cMaintenance items listed here should be
checked periodically (for example, each
time you check engine oil).
cCheck that all windows and lights are
clean.
cVisually inspect tires for their appearance
and condition. Also check tires for proper
inflation.
cLock all doors.
cPosition seat and adjust head restraints.
cAdjust inside and outside mirrors.
cFasten seat belts and ask all passengers
to do likewise.
cCheck the operation of warning lights
when key is turned to the ON position.The automatic transmission in your vehicle
is electronically controlled by a microcom-
puter to produce maximum power and
smooth operation.
Shown on the following pages are the rec-
ommended operating procedures for this
transmission. Follow these procedures for
maximum vehicle performance and driving
enjoyment.
Starting the vehicle
cAfter starting the engine, fully depress the
foot brake pedal before shifting the selec-
tor lever to the R, N, D, 2 or 1 position. Be
sure the vehicle is fully stopped before
attempting to shift the selector lever.
This automatic transmission is designed
so the foot brake pedal MUST be de-
pressed before shifting from P to any drive
position while the ignition switch is ON.
The shift lever cannot be moved out of P
and into any of the other gear positions if
the ignition key is turned to ACC, LOCK,
or if the key is removed from the switch.
When the battery charge is low, the shift
lever can be moved if the ignition switch
is in the ACC position.1. Keep the foot brake pedal depressed and
shift into a driving gear.
2. Release the parking brake and foot
brake, then gradually start the vehicle in
motion.
WARNING
cDo not depress the accelerator pedal
while shifting from P or N to: R, D,
2 or 1. Always depress the brake
pedal until shifting is completed.
Failure to do so could cause you to
lose control and have an accident.
cCold engine idle speed is high, so
use caution when shifting into a for-
ward or reverse gear before the en-
gine has warmed up.
cNever shift to P or R while the ve-
hicle is moving. This could cause an
accident.
cOn slippery roads, do not downshift.
This may cause a loss of control.
BEFORE STARTING THE
ENGINEDRIVING WITH AN
AUTOMATIC TRANSMISSION
4-5
ZX
Page 145 of 247
CAUTION
When stopping the vehicle on an uphill
grade, do not hold the vehicle by de-
pressing the accelerator pedal. The
foot brakes should be used for this
purpose.
Shifting with automatic transmission
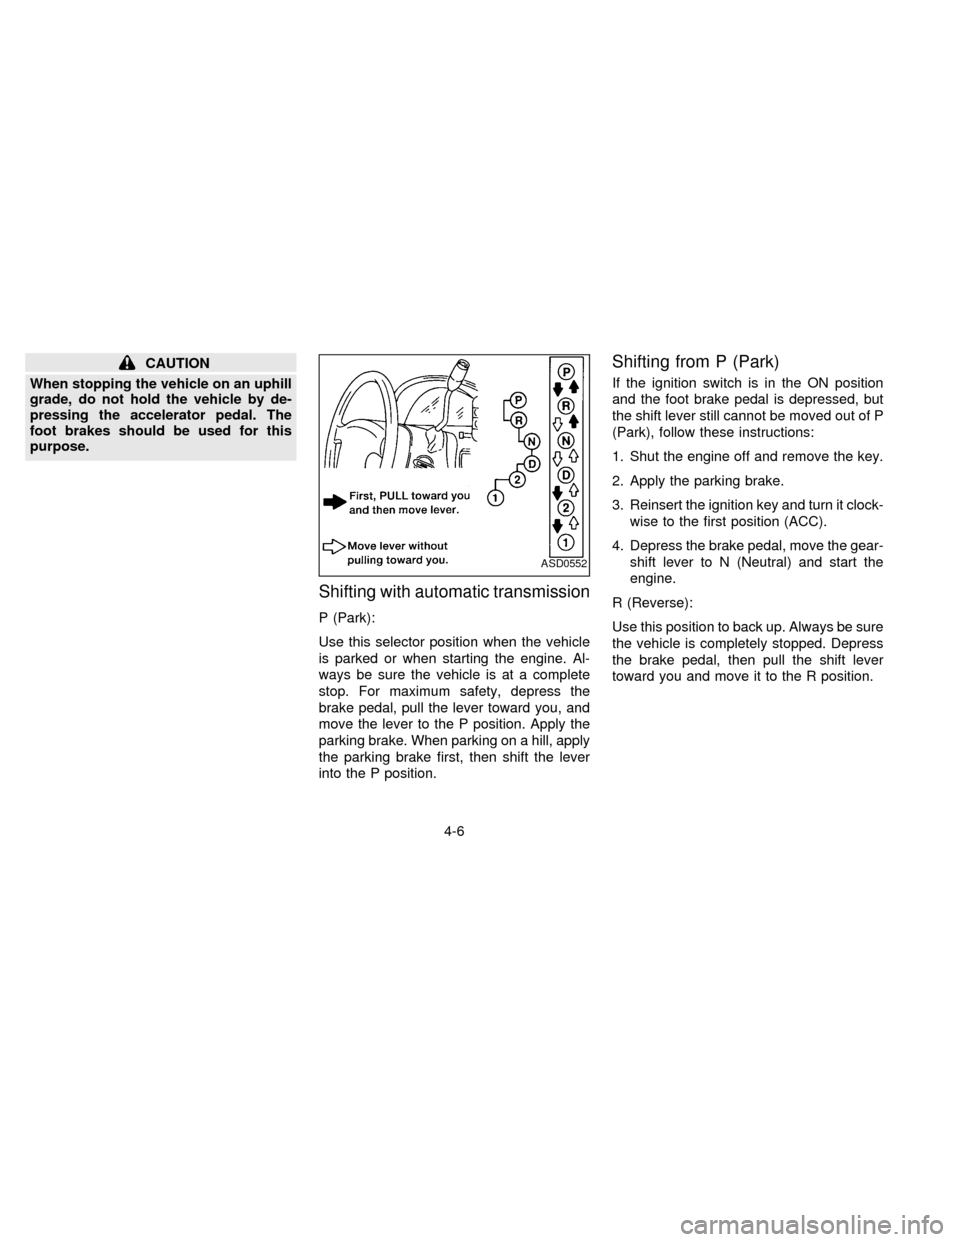
P (Park):
Use this selector position when the vehicle
is parked or when starting the engine. Al-
ways be sure the vehicle is at a complete
stop. For maximum safety, depress the
brake pedal, pull the lever toward you, and
move the lever to the P position. Apply the
parking brake. When parking on a hill, apply
the parking brake first, then shift the lever
into the P position.
Shifting from P (Park)
If the ignition switch is in the ON position
and the foot brake pedal is depressed, but
the shift lever still cannot be moved out of P
(Park), follow these instructions:
1. Shut the engine off and remove the key.
2. Apply the parking brake.
3. Reinsert the ignition key and turn it clock-
wise to the first position (ACC).
4. Depress the brake pedal, move the gear-
shift lever to N (Neutral) and start the
engine.
R (Reverse):
Use this position to back up. Always be sure
the vehicle is completely stopped. Depress
the brake pedal, then pull the shift lever
toward you and move it to the R position.
ASD0552
4-6
ZX
Page 146 of 247

N (Neutral):
Neither forward nor reverse gear is en-
gaged. The engine can be started in this
position. You may shift to N and restart a
stalled engine while the vehicle is moving.
D (Drive):
Use this position for all normal forward
driving.
2 (Second gear):
Use for hill climbing or engine braking on
downhill grades.
Do not downshift into 2 at speeds over 63
MPH (100 km/h). Do not exceed 63 MPH
(100 km/h) in 2.
1 (Low gear):
Use 1 when climbing steep hills slowly or
driving slowly through deep snow, sand or
mud, or for maximum engine braking on
steep downhill grades.
Do not exceed 38 MPH (60 km/h) in 1.
Do not shift into 1 at speeds over 38 MPH
(60 km/h).Accelerator downshift
Ð In D position Ð
For rapid passing or hill climbing, fully depress
the accelerator pedal to the floor. This shifts the
transmission down into third gear, second gear
or first gear, depending on the vehicle speed.
Fail-safe
When the Fail-safe operation occurs, the
next time the key is turned to the ON
position, the O/D OFF light blinks for ap-
proximately 8 seconds after coming on for 2
seconds. While the vehicle can be driven
under these circumstances, please note
that the gears in the automatic transmission
will be locked in 3rd gear.
NOTE: If the vehicle is driven under extreme
conditions, such as excessive wheel spinning
and subsequent hard braking, the Fail-safe
system may be activated. This will occur even
if all electrical circuits are functioning prop-
erly. In this case, turn the ignition key OFF
and wait for 3 seconds. Then turn the key
back to the ON position. The vehicle should
return to its normal operating condition. If it
does not return to its normal operating condi-
tion, have your NISSAN dealer check the
transmission and repair, if necessary.
OVERDRIVE SWITCH
Each time your vehicle is started, the trans-
mission is automatically ``reset'' to overdrive
ON.
ON: For normal driving the overdrive
switch is engaged. The transmission
is upshifted into overdrive as the
vehicle speed increases.
The overdrive does not engage until the
engine has warmed up.
OFF: For driving up and down long slopes
where engine ``braking'' would be
advantageous, push the overdrive
switch. The O/D OFF light illumi-
ASD0561
4-7
ZX