turn signal NISSAN QUEST 2000 V41 / 2.G Owners Manual
[x] Cancel search | Manufacturer: NISSAN, Model Year: 2000, Model line: QUEST, Model: NISSAN QUEST 2000 V41 / 2.GPages: 292, PDF Size: 2.48 MB
Page 87 of 292

2 Instruments and controls
Meters and gauges ................................................2-3
Speedometer and odometer ..................................2-4
Tachometer ............................................................2-4
Engine coolant temperature gauge........................2-4
Fuel gauge .............................................................2-5
Warning/indicator lights and chimes ......................2-6
Checking bulbs .......................................................2-6
Warning lights.........................................................2-6
Indicator lights ........................................................2-8
Chimes .................................................................2-10
Theft warning (if so equipped) .............................2-10
Windshield wiper and washer switch ...................2-12
Rear window wiper and washer switches ............2-13
Rear window defogger switch ..............................2-14
Headlight control switch .......................................2-14
Autolamp switch (if so equipped) .........................2-15
Turn signal switch .............................................2-16
Cornering light ......................................................2-17
Hazard warning flasher switch .............................2-17
Horn ......................................................................2-18
Rear power socket ...............................................2-18
Cigarette lighter and ashtray (accessory) ............2-19Storage .................................................................2-20
Map pockets .........................................................2-20
Conversation mirror ..............................................2-20
Cup holders ..........................................................2-21
Glove box .............................................................2-22
Front seat convenience net (if so equipped) .......2-23
Cargo net..............................................................2-24
Parcel shelf (if so equipped) ................................2-25
Luggage rack .......................................................2-27
Windows ...............................................................2-27
Power windows ....................................................2-27
Power vent windows (if so equipped) ..................2-29
Manual vent windows ...........................................2-29
Sunroof (if so equipped).......................................2-30
Interior lights .........................................................2-31
Luggage ...............................................................2-31
Personal reading light ..........................................2-31
Map lights .............................................................2-32
Illuminated entry system ......................................2-32
Integrated HomeLinkTuniversal transceiver
(if so equipped) ....................................................2-32
Programming HomeLinkT.....................................2-33
ZX
Page 96 of 292
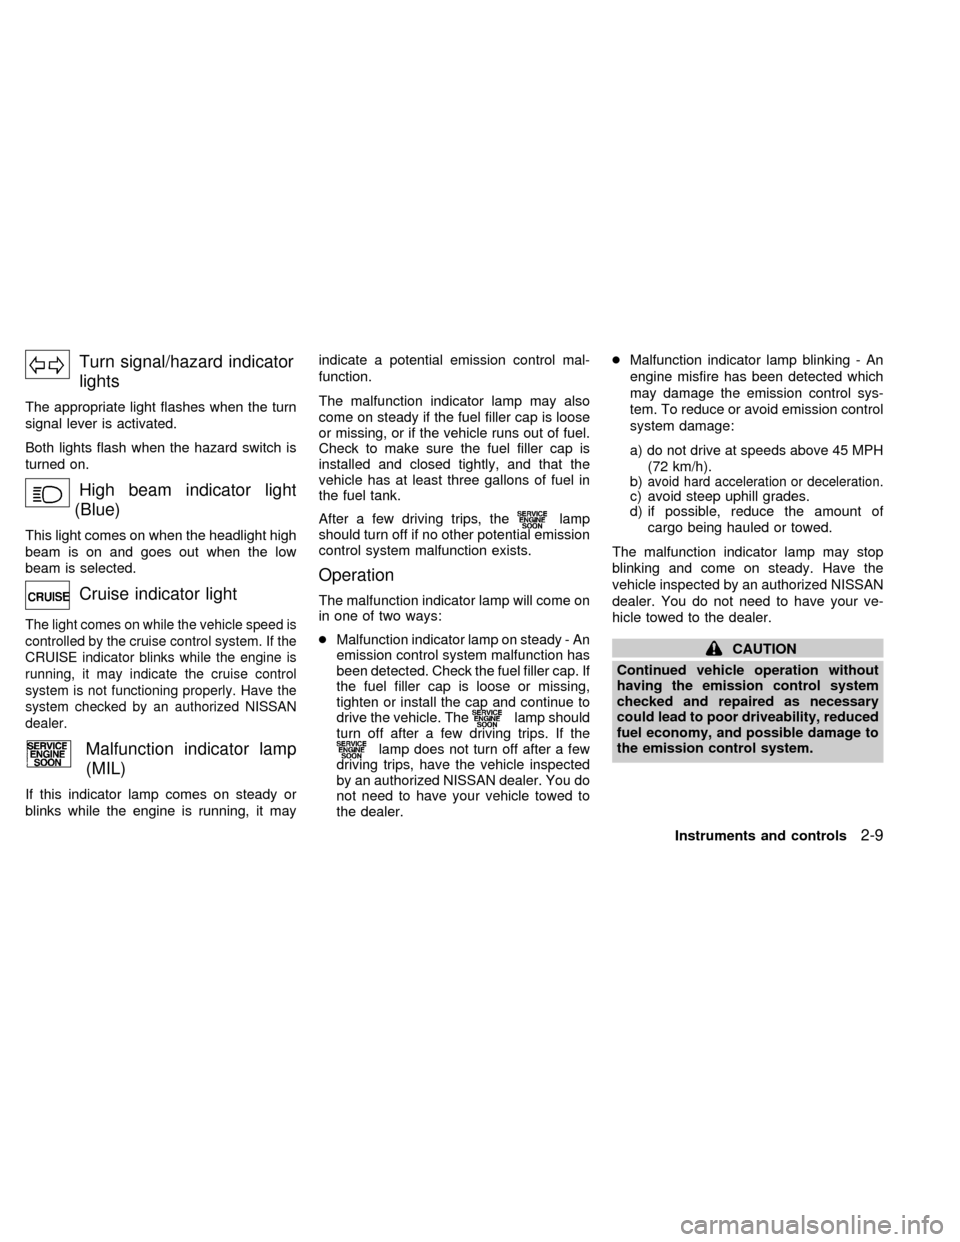
Turn signal/hazard indicator
lights
The appropriate light flashes when the turn
signal lever is activated.
Both lights flash when the hazard switch is
turned on.
High beam indicator light
(Blue)
This light comes on when the headlight high
beam is on and goes out when the low
beam is selected.
Cruise indicator light
The light comes on while the vehicle speed is
controlled by the cruise control system. If the
CRUISE indicator blinks while the engine is
running, it may indicate the cruise control
system is not functioning properly. Have the
system checked by an authorized NISSAN
dealer.
Malfunction indicator lamp
(MIL)
If this indicator lamp comes on steady or
blinks while the engine is running, it mayindicate a potential emission control mal-
function.
The malfunction indicator lamp may also
come on steady if the fuel filler cap is loose
or missing, or if the vehicle runs out of fuel.
Check to make sure the fuel filler cap is
installed and closed tightly, and that the
vehicle has at least three gallons of fuel in
the fuel tank.
After a few driving trips, the
lamp
should turn off if no other potential emission
control system malfunction exists.
Operation
The malfunction indicator lamp will come on
in one of two ways:
cMalfunction indicator lamp on steady - An
emission control system malfunction has
been detected. Check the fuel filler cap. If
the fuel filler cap is loose or missing,
tighten or install the cap and continue to
drive the vehicle. The
lamp should
turn off after a few driving trips. If the
lamp does not turn off after a few
driving trips, have the vehicle inspected
by an authorized NISSAN dealer. You do
not need to have your vehicle towed to
the dealer.cMalfunction indicator lamp blinking - An
engine misfire has been detected which
may damage the emission control sys-
tem. To reduce or avoid emission control
system damage:
a) do not drive at speeds above 45 MPH
(72 km/h).
b)
avoid hard acceleration or deceleration.c) avoid steep uphill grades.
d) if possible, reduce the amount of
cargo being hauled or towed.
The malfunction indicator lamp may stop
blinking and come on steady. Have the
vehicle inspected by an authorized NISSAN
dealer. You do not need to have your ve-
hicle towed to the dealer.
CAUTION
Continued vehicle operation without
having the emission control system
checked and repaired as necessary
could lead to poor driveability, reduced
fuel economy, and possible damage to
the emission control system.
Instruments and controls
2-9
ZX
Page 97 of 292

CHIMES
Key reminder chime
The chime sounds if the driver's door is
opened while the key is left in the ignition
switch. Remove the key and take it with you
when leaving the vehicle.
Light reminder chime
A chime sounds when the driver's door is
opened with the headlight control switch on
(ignition switch is turned OFF).
The chime will not sound when the Auto-
lamp (if so equipped) shut-off delay is acti-
vated. Refer to the ``Autolamp Switch'' in-
structions later in this section.
Turn the headlight control switch to OFF
when you leave the vehicle.
Brake pad wear warning
The disc brake pads have audible wear
warnings. When a brake pad requires re-
placement, it makes a high pitched scraping
sound when the vehicle is in motion whether
or not the brake pedal is depressed. Have
the brakes checked as soon as possible if
the warning sound is heard.The theft warning system provides audio
and visual alarm signals if parts of the
vehicle are disturbed.
Security indicator light
This light will illuminate for the theft warning
system.
This light blinks whenever the ignition
switch is in the LOCK, OFF, or ACC posi-
tion. This function indicates the security
systems equipped on the vehicle are opera-
tional.
IC0005LIC0004
THEFT WARNING
(if so equipped)
2-10Instruments and controls
ZX
Page 101 of 292
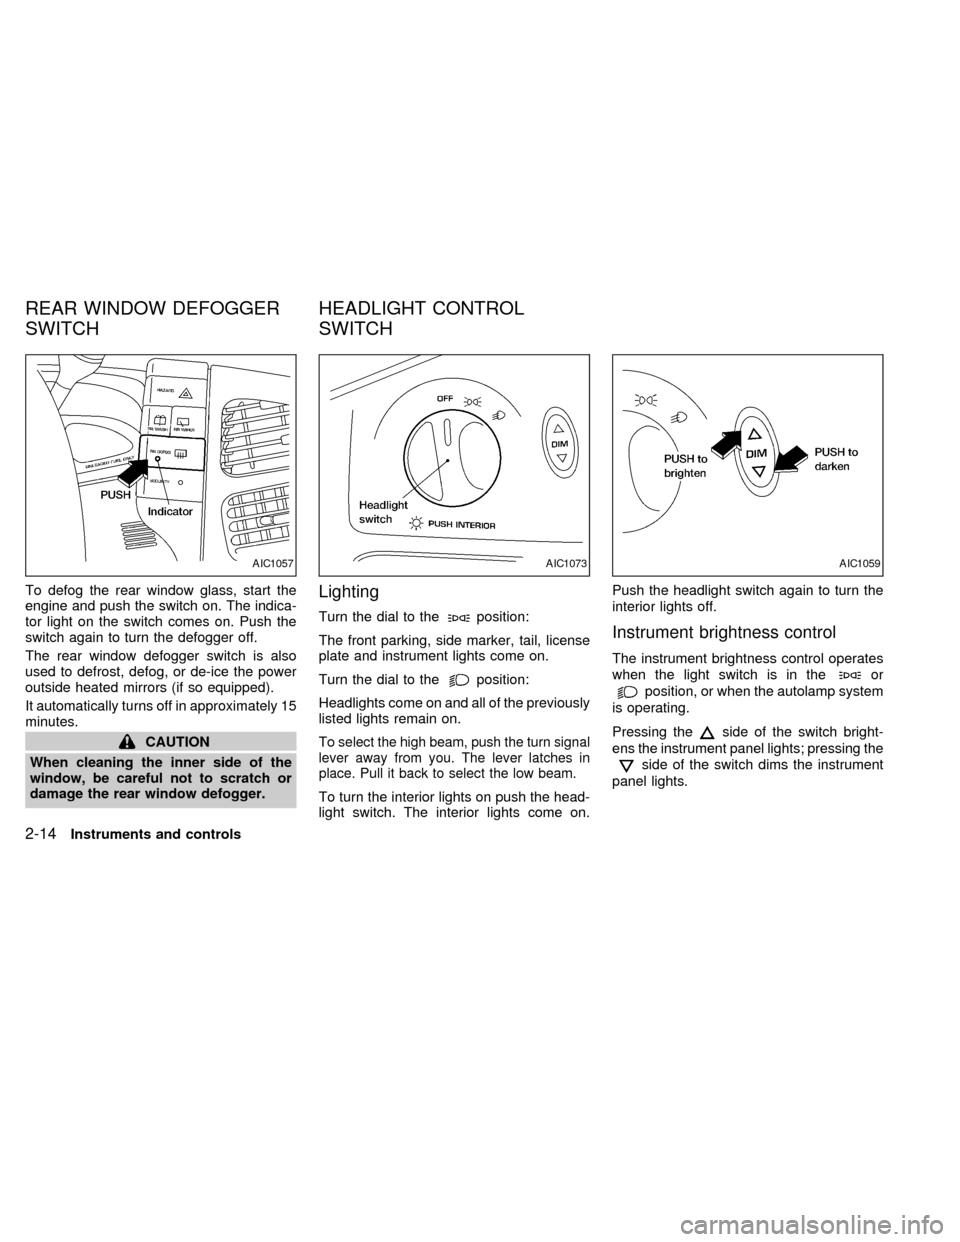
To defog the rear window glass, start the
engine and push the switch on. The indica-
tor light on the switch comes on. Push the
switch again to turn the defogger off.
The rear window defogger switch is also
used to defrost, defog, or de-ice the power
outside heated mirrors (if so equipped).
It automatically turns off in approximately 15
minutes.
CAUTION
When cleaning the inner side of the
window, be careful not to scratch or
damage the rear window defogger.
Lighting
Turn the dial to theposition:
The front parking, side marker, tail, license
plate and instrument lights come on.
Turn the dial to the
position:
Headlights come on and all of the previously
listed lights remain on.
To select the high beam, push the turn signal
lever away from you. The lever latches in
place. Pull it back to select the low beam.
To turn the interior lights on push the head-
light switch. The interior lights come on.Push the headlight switch again to turn the
interior lights off.
Instrument brightness control
The instrument brightness control operates
when the light switch is in the
or
position, or when the autolamp system
is operating.
Pressing the
side of the switch bright-
ens the instrument panel lights; pressing the
side of the switch dims the instrument
panel lights.
AIC1057AIC1073AIC1059
REAR WINDOW DEFOGGER
SWITCHHEADLIGHT CONTROL
SWITCH
2-14Instruments and controls
ZX
Page 102 of 292
Passing signal
Pulling the lever toward you turns the head-
light high beam on. Release it and the
headlight high beam goes off.
Daytime running light system
(Canada only)
The headlights automatically illuminate at a
reduced intensity when the engine is started
with the parking brake released. The day-
time running lights operate with the head-
light switch in the OFF position or in the
position. Turn the headlight switch to
theposition for full illumination when
driving at night.
If the parking brake is applied before the
engine is started, the daytime running lights
do not illuminate. The daytime running lights
illuminate once the parking brake is released.
The daytime running lights will remain on until
the ignition switch is turned OFF.
WARNING
When the daytime running light system
is active, tail lights on your vehicle will
not be on. It is necessary at dusk to
turn on your headlights. Failure to do
so could cause an accident injuring
yourself and others.
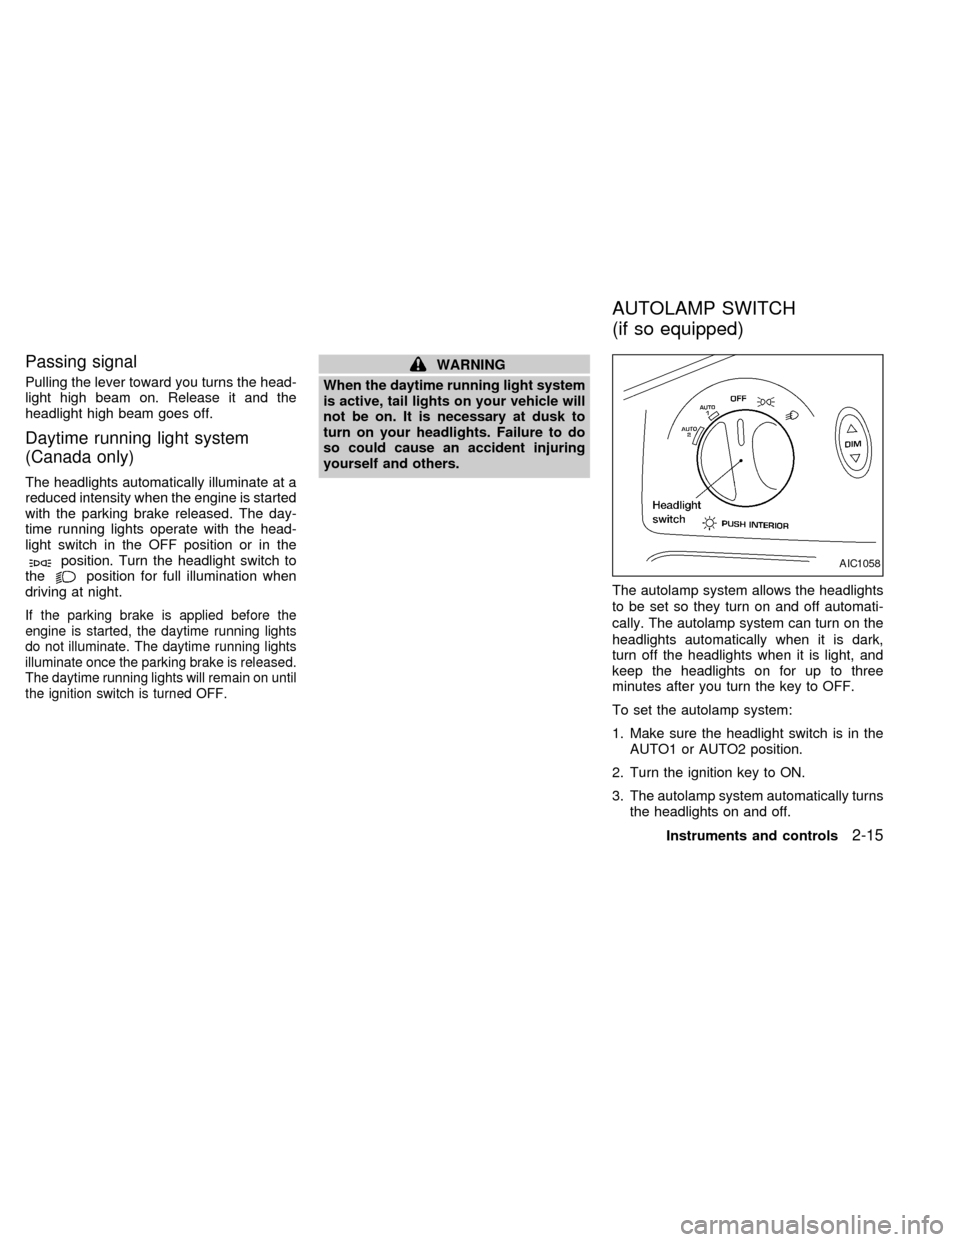
The autolamp system allows the headlights
to be set so they turn on and off automati-
cally. The autolamp system can turn on the
headlights automatically when it is dark,
turn off the headlights when it is light, and
keep the headlights on for up to three
minutes after you turn the key to OFF.
To set the autolamp system:
1. Make sure the headlight switch is in the
AUTO1 or AUTO2 position.
2. Turn the ignition key to ON.
3. The autolamp system automatically turns
the headlights on and off.
AIC1058
AUTOLAMP SWITCH
(if so equipped)
Instruments and controls2-15
ZX
Page 103 of 292

Shut-off delay
The length of time the headlights stay on
after the ignition is turned to OFF depends
on whether the switch is in the AUTO1 or
AUTO2 position. If the switch is in the
AUTO1 position, then the headlights stay on
for less than 1 minute after the ignition is
turned OFF. If the switch is in the AUTO2
position, the headlights stay on approxi-
mately 3 minutes after the ignition is turned
OFF.
To turn the autolamp system off, turn the
switch to the OFF,
,orposition.
Be sure you do not put anything on top
of the photo sensor located in the top left
side of the instrument panel. The photo
sensor controls the autolamp; if it is
covered, the photo sensor reacts as if it
is dark out and the headlights will illumi-
nate.
Turn signal
Move the lever up or down to signal the
turning direction. When the turn is com-
pleted, the turn signal cancels automati-
cally.
Lane change signal
To indicate a lane change, move the lever
up or down to the point where the light
begins to flash, but the lever does not latch.
AIC1087AIC0560
TURN SIGNAL SWITCH
2-16Instruments and controls
ZX
Page 104 of 292
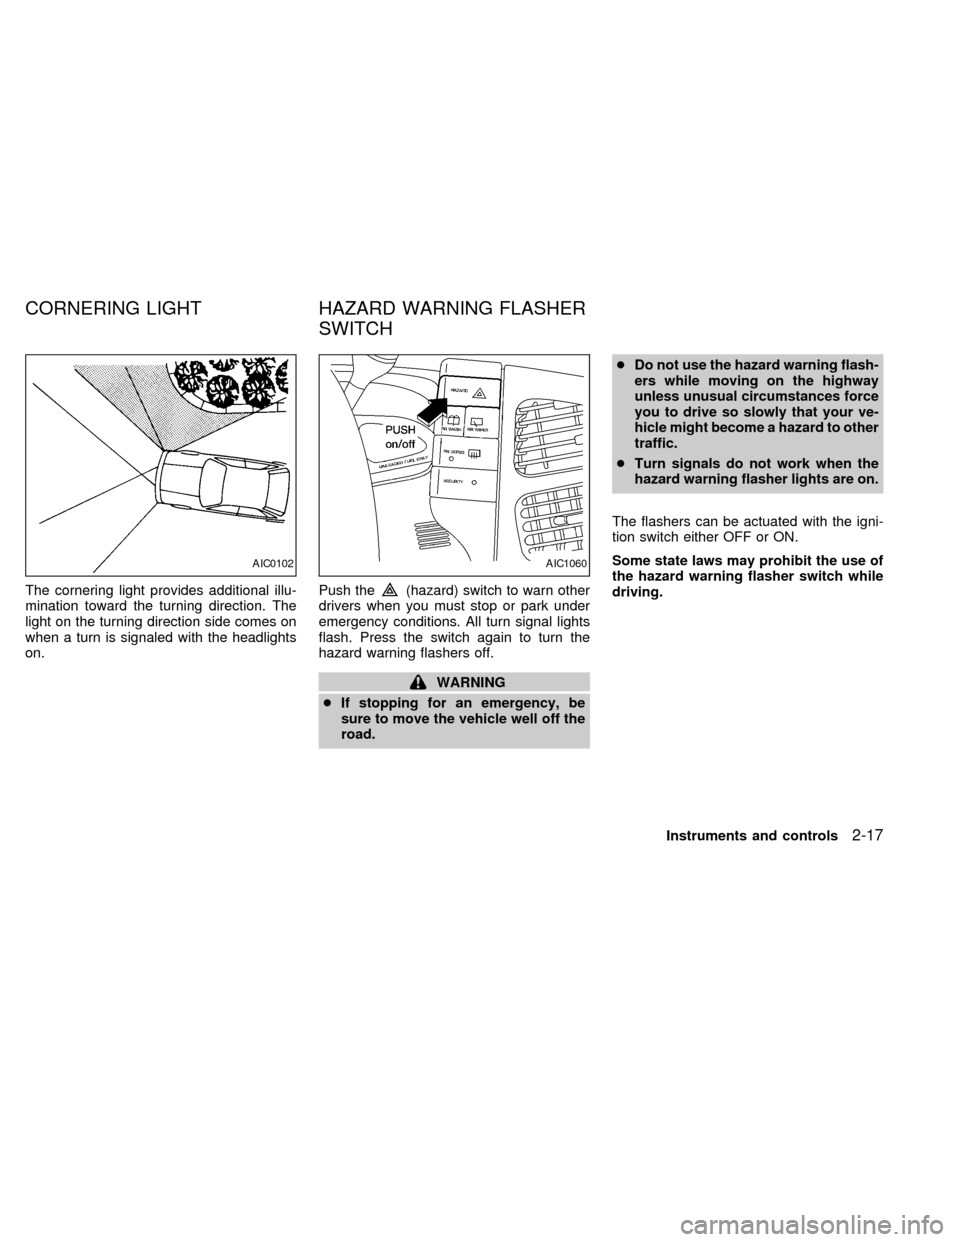
The cornering light provides additional illu-
mination toward the turning direction. The
light on the turning direction side comes on
when a turn is signaled with the headlights
on.Push the(hazard) switch to warn other
drivers when you must stop or park under
emergency conditions. All turn signal lights
flash. Press the switch again to turn the
hazard warning flashers off.
WARNING
cIf stopping for an emergency, be
sure to move the vehicle well off the
road.cDo not use the hazard warning flash-
ers while moving on the highway
unless unusual circumstances force
you to drive so slowly that your ve-
hicle might become a hazard to other
traffic.
cTurn signals do not work when the
hazard warning flasher lights are on.
The flashers can be actuated with the igni-
tion switch either OFF or ON.
Some state laws may prohibit the use of
the hazard warning flasher switch while
driving.
AIC0102AIC1060
CORNERING LIGHT HAZARD WARNING FLASHER
SWITCH
Instruments and controls2-17
ZX
Page 121 of 292

5. Press the desired button until the red
indicator light flashes slowly. Do not re-
lease the button. Continue holding and
press the hand-held transmitter button
through step 6.
6. Hold down both buttons until the red
indicator light on the Integrated
HomeLinkTUniversal Transceiver
flashes rapidly (This may take 1 to 90
seconds). Then release both buttons.
The rapid flashing means that the trans-
ceiver has been successfully pro-
grammed to match your hand-held trans-
mitter. You can now use the Integrated
HomeLinkTUniversal Transceiver in-
stead of your hand-held transmitter.
PROGRAMMING HomelinkTFOR
CANADIAN CUSTOMERS
Prior to 1992, D.O.C. regulations required
many hand-held transmitters to stop trans-
mitting after one or two seconds, even
though you continue to hold down the but-
ton. If you think you have one of these
hand-held transmitters, you should press
and re-press the transmitter button every 2
seconds without ever releasing the Inte-
grated HomeLinkTUniversal Transceiver
button. The indicator light on the IntegratedHomeLinkTUniversal Transceiver should
blink rapidly indicating a successful pro-
gramming procedure. If it returns to the slow
blink of program mode, continue to periodi-
cally reactivate your hand-held transmitter
until a successful programming procedure
is indicated by the rapidly flashing indicator
light.
OPERATING THE INTEGRATED
HomeLinkTUNIVERSAL TRANS-
CEIVER
To operate, simply press the appropriate
button on the Integrated HomeLinkTUniver-
sal Transceiver. The red indicator light illu-
minates while the signal is being transmit-
ted. The effective transmission range of the
Integrated HomeLinkTUniversal Trans-
ceiver may differ from your hand-held trans-
mitter.
PROGRAMMING PROBLEM
DIAGNOSIS
Be sure to keep your original hand-held
transmitter for possible reprogramming if
necessary.
cMake sure batteries in the hand-held
transmitter are fully charged.cHold your hand-held transmitter against
the bottom surface of the Integrated
HomeLinkTUniversal Transceiver so
that you can still see the red indicator
light.
cHold buttons for duration of the program-
ming without interruption.
cRotate your hand-held transmitter end-
over-end and program again. For best
results, place the end opposite the bat-
tery compartment against the Integrated
HomeLinkTUniversal Transceiver when
programming.
2-34Instruments and controls
ZX
Page 157 of 292

FM-AM RADIO WITH CASSETTE
PLAYER
NOTE: Audio control features include com-
mand buttons for CD players which can be
installed as optional equipment to upgradethe audio system. A CD player is not in-
cluded with this system, but can be pur-
chased as an option at any time. Consult
with an authorized NISSAN dealer for fea-
ture availability.
Audio main operation
To turn the radio on, turn the ignition key to
ACC or ON. If you listen to the radio with the
engine not running, turn the key to the ACC
position.
Radio reception is affected by station signal
strength, distance from radio transmitter,
buildings, bridges, mountains, and other
external influences. Intermittent changes in
reception quality normally are caused by
external influences.
Using a cellular phone in or near the
vehicle may influence radio reception
quality.
Power/Volume control
Push the VOL knob to turn the radio on.
Push the VOL knob once more to turn the
radio OFF.
Turn the knob to raise or lower volume. If
the knob is set above a certain volume level
and the ignition is turned off, the volume will
come back on at a nominal listening level
when the ignition is turned back on.
AHA1057
AUDIO SYSTEM
4-16Heater, air conditioner and audio systems
ZX
Page 159 of 292
Clock operation
The clock is on in the display regardless of
what mode, media, or function the radio is in
as long as the ignition is in ACC or ON.
Clock set
Press the RDS/CLK button until SELECT
HOURS is displayed then use the SEL
buttons to change the hour, press
the RDS/CLK button again until SELECT
MINS is displayed then use the SEL
buttons to change the minutes.
The display will return to clock priority mode
in 10 seconds or press the RDS/CLK button
to return to the clock display.
Selecting the desired band
Push the AM or FM buttons to change to AM
or FM band reception.
The FM stereo indicator, ST illuminates during
FM stereo reception. When the stereo broad-
cast signal is weak, the radio automatically
changes from stereo to monaural reception.
FM-AM radio operation
MUTE button
Push the MUTE button to mute out the
radio.TUNE buttons
WARNING
The radio should not be tuned while
driving so full attention may be given to
vehicle operation.
Use the
orbuttons for manual
tuning. To move quickly through the chan-
nels, hold either of the tune buttons down
for more than 0.5 seconds.
AUTO SET
Press the AUTO button while listening to the
radio to activate the auto set feature. When
AUTO is depressed for less than 5 seconds,
the display window momentarily indicates
AUTO ON, and the radio seeks the first six
strong stations for the respective band. The
first six strong stations are then stored in
order in memory buttons one through six.
Only stations in the selected band are set,
and the station seek begins from the last
frequency stored in memory button six. If
AM, FM, SCAN, TUNE, SEEK, AUTO or a
memory button is pushed while auto set is
operating, auto set is canceled and AUTO
OFF shows in the display window.AUTO LOAD
Press the AUTO button for longer than 5
seconds while listening to the radio to acti-
vate the auto load feature. When AUTO is
depressed for longer than 5 seconds, the
display window momentarily indicates
AUTO LOAD, and the radio seeks the first
six strong stations for every band. The first
six strong stations are then stored in order
in memory buttons one through six for each
band (AM, FM1, and FM2).
SEEK tuning
Push the SEEKorbuttons to find the
next broadcast station. Pushing the
SEEKS up andbutton SEEKS down.
Pushing the button again continues the SEEK
function. Once the highest broadcast station
is reached, the radio continues in the SEEK
mode at the lowest station. Once the lowest
broadcast station is reached, the radio con-
tinues in the SEEK mode at the highest
station.
SCAN tuning
Push the SCAN tuning button, SCAN illumi-
nates in the display. SCAN tuning begins
4-18Heater, air conditioner and audio systems
ZX