ignition NISSAN QUEST 2001 V41 / 2.G Owner's Manual
[x] Cancel search | Manufacturer: NISSAN, Model Year: 2001, Model line: QUEST, Model: NISSAN QUEST 2001 V41 / 2.GPages: 304, PDF Size: 2.54 MB
Page 122 of 304
The interior lights operate regardless of
ignition key position.
One interior light is located overhead near
the front seats and one is overhead near the
rear seat.
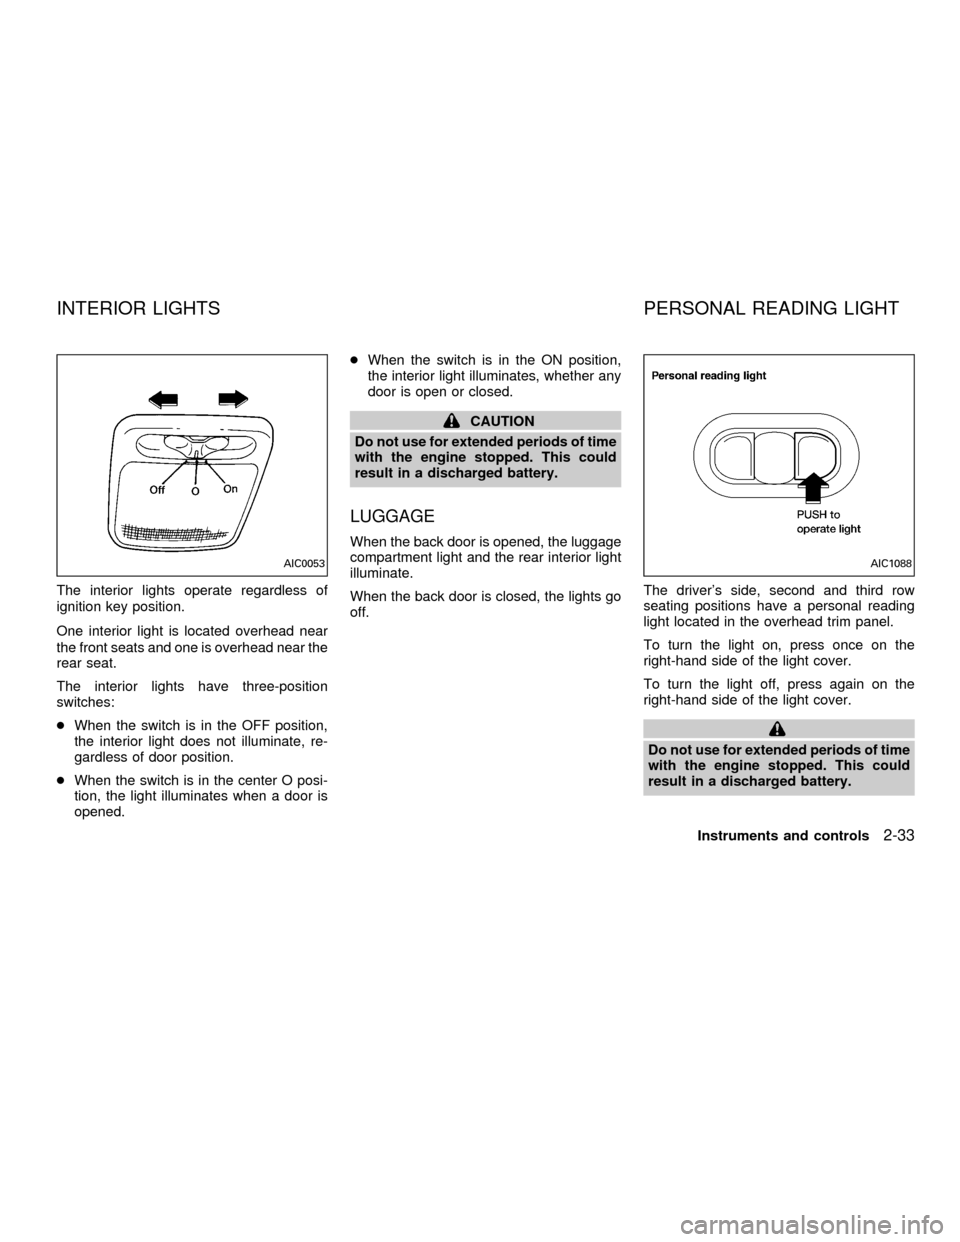
The interior lights have three-position
switches:
cWhen the switch is in the OFF position,
the interior light does not illuminate, re-
gardless of door position.
cWhen the switch is in the center O posi-
tion, the light illuminates when a door is
opened.cWhen the switch is in the ON position,
the interior light illuminates, whether any
door is open or closed.
CAUTION
Do not use for extended periods of time
with the engine stopped. This could
result in a discharged battery.
LUGGAGE
When the back door is opened, the luggage
compartment light and the rear interior light
illuminate.
When the back door is closed, the lights go
off.The driver's side, second and third row
seating positions have a personal reading
light located in the overhead trim panel.
To turn the light on, press once on the
right-hand side of the light cover.
To turn the light off, press again on the
right-hand side of the light cover.
Do not use for extended periods of time
with the engine stopped. This could
result in a discharged battery.
AIC0053AIC1088
INTERIOR LIGHTS PERSONAL READING LIGHT
Instruments and controls2-33
ZX
Page 123 of 304
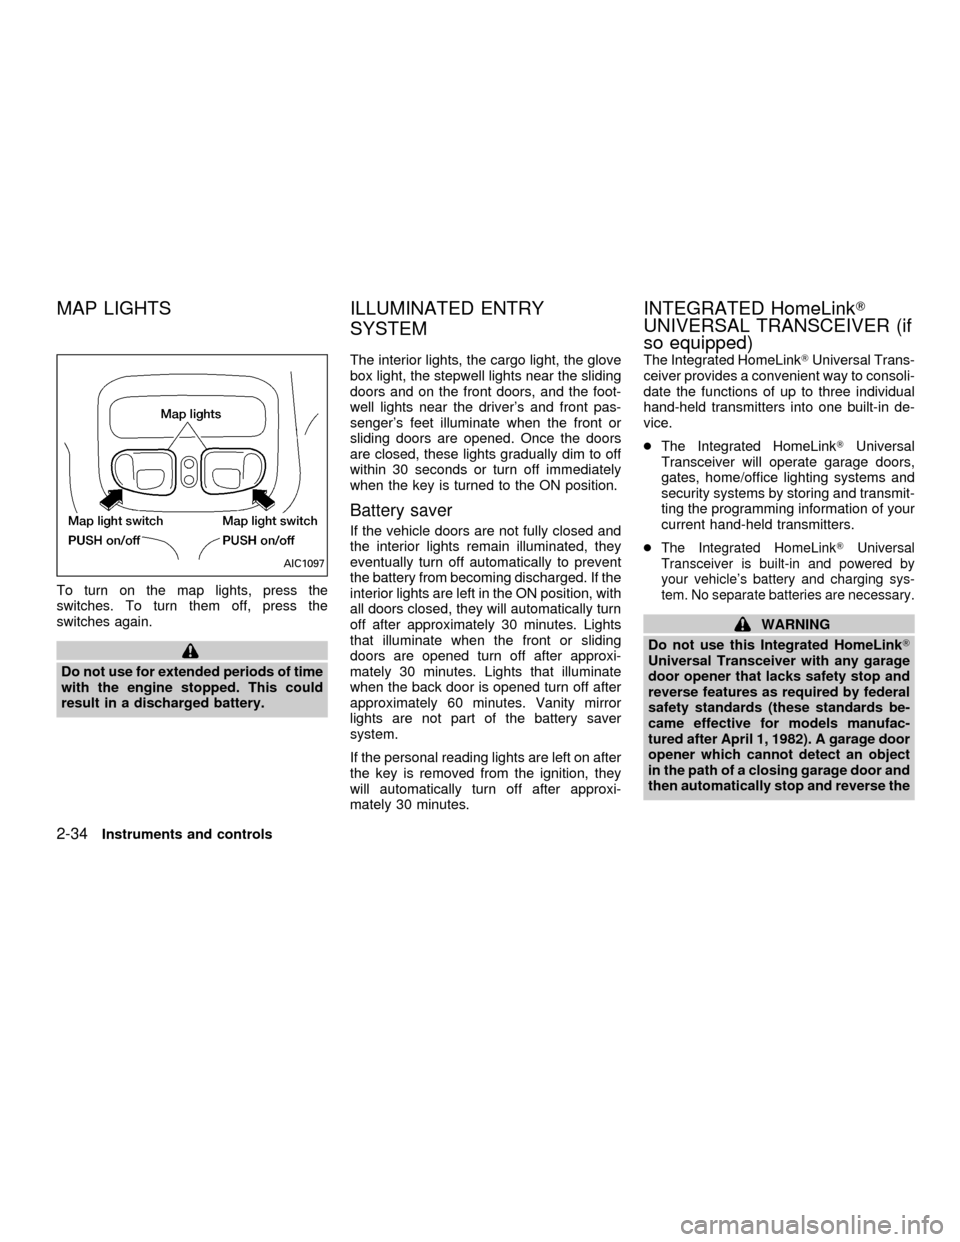
To turn on the map lights, press the
switches. To turn them off, press the
switches again.
Do not use for extended periods of time
with the engine stopped. This could
result in a discharged battery.The interior lights, the cargo light, the glove
box light, the stepwell lights near the sliding
doors and on the front doors, and the foot-
well lights near the driver's and front pas-
senger's feet illuminate when the front or
sliding doors are opened. Once the doors
are closed, these lights gradually dim to off
within 30 seconds or turn off immediately
when the key is turned to the ON position.
Battery saver
If the vehicle doors are not fully closed and
the interior lights remain illuminated, they
eventually turn off automatically to prevent
the battery from becoming discharged. If the
interior lights are left in the ON position, with
all doors closed, they will automatically turn
off after approximately 30 minutes. Lights
that illuminate when the front or sliding
doors are opened turn off after approxi-
mately 30 minutes. Lights that illuminate
when the back door is opened turn off after
approximately 60 minutes. Vanity mirror
lights are not part of the battery saver
system.
If the personal reading lights are left on after
the key is removed from the ignition, they
will automatically turn off after approxi-
mately 30 minutes.The Integrated HomeLinkTUniversal Trans-
ceiver provides a convenient way to consoli-
date the functions of up to three individual
hand-held transmitters into one built-in de-
vice.
cThe Integrated HomeLinkTUniversal
Transceiver will operate garage doors,
gates, home/office lighting systems and
security systems by storing and transmit-
ting the programming information of your
current hand-held transmitters.
c
The Integrated HomeLinkTUniversal
Transceiver is built-in and powered by
your vehicle's battery and charging sys-
tem. No separate batteries are necessary.
WARNING
Do not use this Integrated HomeLinkT
Universal Transceiver with any garage
door opener that lacks safety stop and
reverse features as required by federal
safety standards (these standards be-
came effective for models manufac-
tured after April 1, 1982). A garage door
opener which cannot detect an object
in the path of a closing garage door and
then automatically stop and reverse the
AIC1097
MAP LIGHTS ILLUMINATED ENTRY
SYSTEMINTEGRATED HomeLinkT
UNIVERSAL TRANSCEIVER (if
so equipped)
2-34Instruments and controls
ZX
Page 130 of 304
cAlways be sure that hands and feet
are clear of the door frame to avoid
injury while closing a sliding door.
cWhen opening a sliding door on a
slope, ensure that it is fully open and
that it does not close by itself.
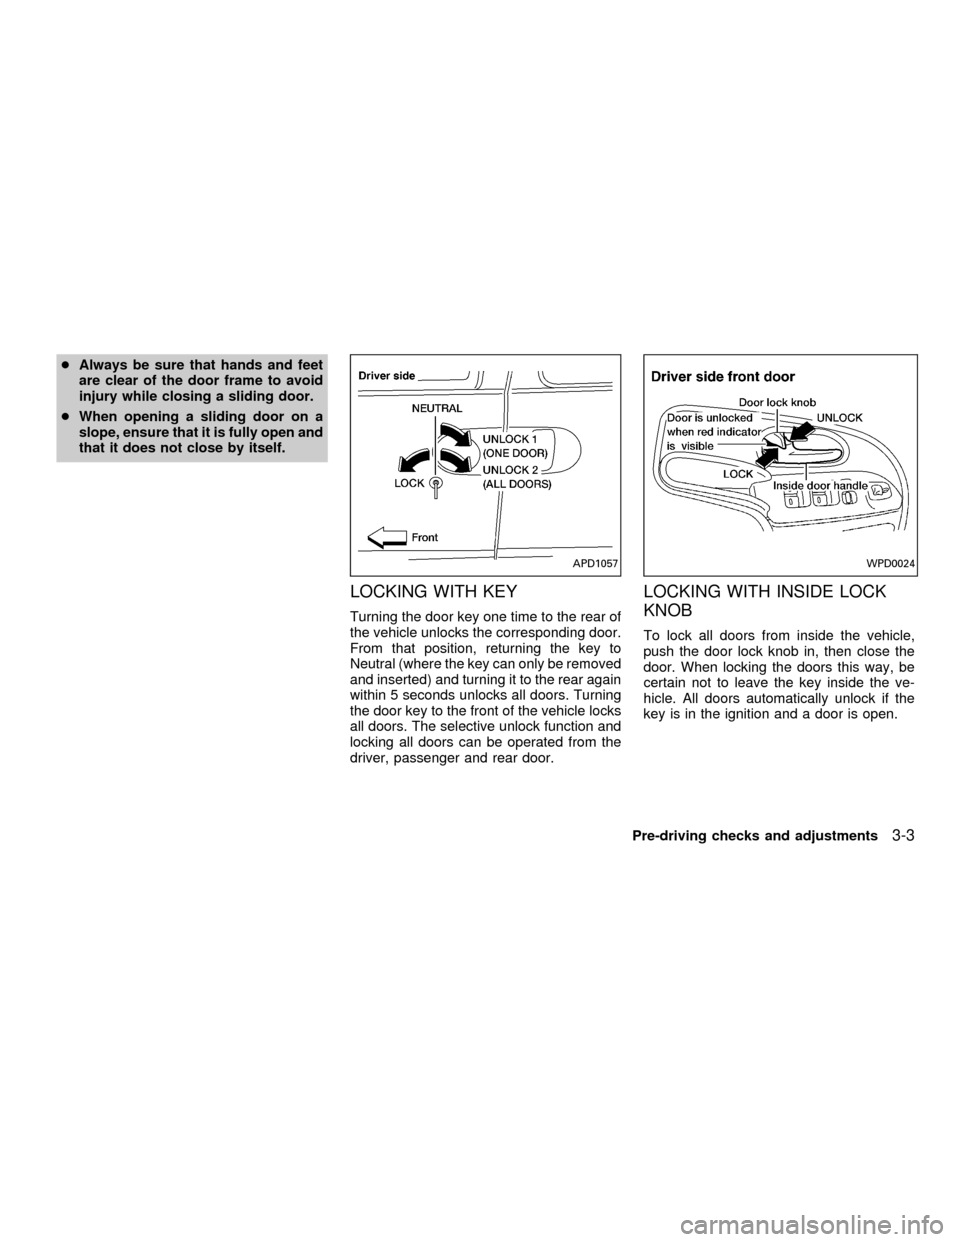
LOCKING WITH KEY
Turning the door key one time to the rear of
the vehicle unlocks the corresponding door.
From that position, returning the key to
Neutral (where the key can only be removed
and inserted) and turning it to the rear again
within 5 seconds unlocks all doors. Turning
the door key to the front of the vehicle locks
all doors. The selective unlock function and
locking all doors can be operated from the
driver, passenger and rear door.
LOCKING WITH INSIDE LOCK
KNOB
To lock all doors from inside the vehicle,
push the door lock knob in, then close the
door. When locking the doors this way, be
certain not to leave the key inside the ve-
hicle. All doors automatically unlock if the
key is in the ignition and a door is open.
APD1057WPD0024
Pre-driving checks and adjustments3-3
ZX
Page 133 of 304
It is possible to lock/unlock all doors, turn
the interior lights on or off, and activate the
panic alarm by using the remote controller
from outside the vehicle.
Be sure to remove the key from the
vehicle before locking the doors and
leaving it.
The remote controller can operate at a
distance of approximately 30 ft (10 m) from
the vehicle. The effective distance depends
on the conditions around the vehicle.
As many as four remote controllers can be
used with one vehicle. For more information
concerning the purchase and use of addi-
tional remote controllers, contact an autho-
rized NISSAN dealer.
CAUTION
Listed below are conditions or occur-
rences which will damage the remote
controller:
cDo not allow the remote controller to
become wet.
cDo not drop the remote controller.
cDo not strike the remote controller
sharply against another object.cDo not place the remote controller
for an extended period in an area
where temperatures exceed 140ÉF
(60ÉC).
HOW TO USE MULTI-REMOTE
CONTROL SYSTEM
Locking doors
1. Close all doors.
2. Push the
button on the multi-remote
controller.
3. All doors lock.
4. The parking lights flash twice and the
horn chirps once to verify all doors are
locked.
Unlocking doors
For memory seat and mirror information
see ``Memory driver seat and mirrors'' later
in this section.
1. Push the
button on the multi-remote
controller. Only the driver door unlocks.
Parking lights flash once.2. The interior lights come on and stay on
for 30 seconds.
3. Push the
button on the multi-remote
controller again within five seconds. The
passenger door, sliding doors, and the
rear door unlock.
The interior lights can be turned off without
waiting 30 seconds by either turning the
ignition to ON or locking the doors with the
multi-remote controller.
Using the panic alarm
If you are near your vehicle and feel threat-
ened, you may activate the panic alarm to
call attention as follows:
1. Push and hold the
button on the
remote controller for at least one full
second.
2. The theft warning alarm (horn) sounds
and the headlights and tail lights flash for
30 seconds.
3. The panic alarm stops when:
cit has run for 30 seconds, or
cthe
or thebutton is pressed, or
c
thebutton is released and re-pushed.
MULTI-REMOTE CONTROL
SYSTEM
3-6Pre-driving checks and adjustments
ZX
Page 141 of 304
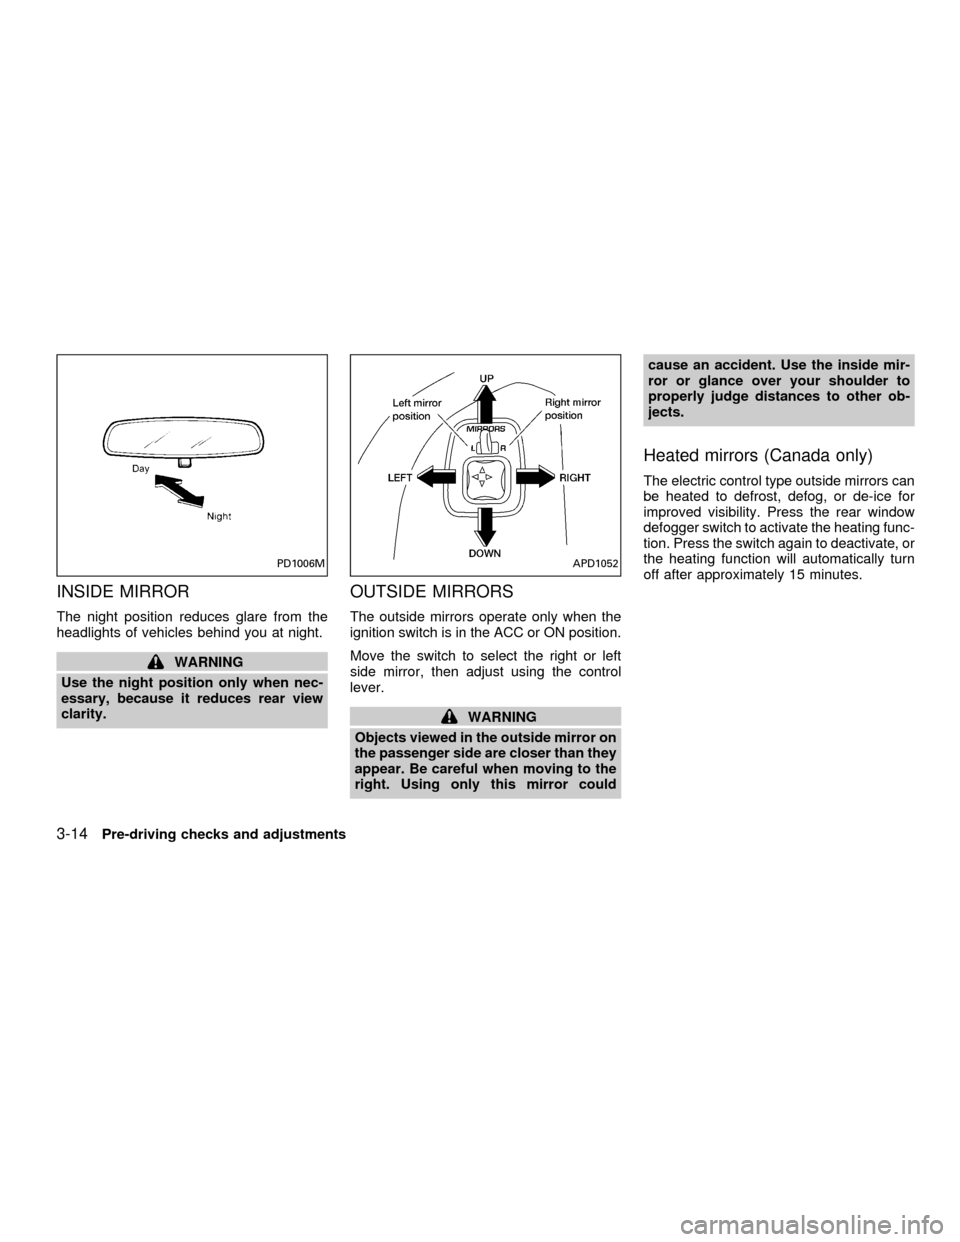
INSIDE MIRROR
The night position reduces glare from the
headlights of vehicles behind you at night.
WARNING
Use the night position only when nec-
essary, because it reduces rear view
clarity.
OUTSIDE MIRRORS
The outside mirrors operate only when the
ignition switch is in the ACC or ON position.
Move the switch to select the right or left
side mirror, then adjust using the control
lever.
WARNING
Objects viewed in the outside mirror on
the passenger side are closer than they
appear. Be careful when moving to the
right. Using only this mirror couldcause an accident. Use the inside mir-
ror or glance over your shoulder to
properly judge distances to other ob-
jects.
Heated mirrors (Canada only)
The electric control type outside mirrors can
be heated to defrost, defog, or de-ice for
improved visibility. Press the rear window
defogger switch to activate the heating func-
tion. Press the switch again to deactivate, or
the heating function will automatically turn
off after approximately 15 minutes.
PD1006MAPD1052
3-14Pre-driving checks and adjustments
ZX
Page 154 of 304
WARNING
cThe air conditioner cooling function
operates only when the engine is
running.
cDo not leave children, impaired
adults, or pets alone in your vehicle.
On hot, sunny days, temperatures in
a closed vehicle could quickly be-
come high enough to cause severe
or possibly fatal injuries to people or
animals.
cDo not use the recirculation mode
for long periods as it may cause theinterior air to become stale and the
windows to fog up.
cPositioning of the heater and air con-
ditioner controls should not be done
while driving, so full attention may
be given to vehicle operation.
The cabin air filter (if so equipped) requires
periodic maintenance. See the ``Do it your-
self'' section for additional information.
The Electronic Automatic Temperature
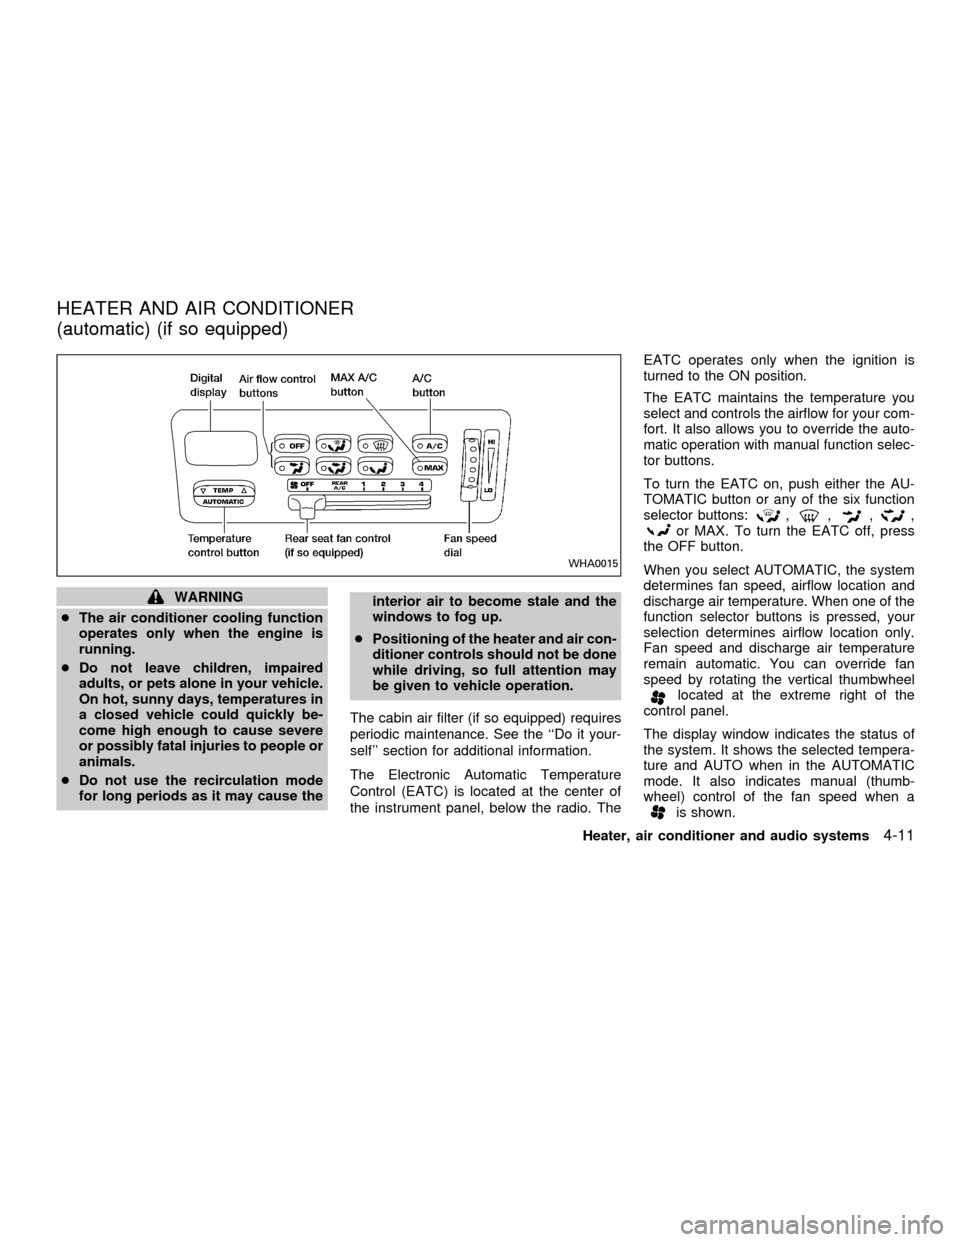
Control (EATC) is located at the center of
the instrument panel, below the radio. TheEATC operates only when the ignition is
turned to the ON position.
The EATC maintains the temperature you
select and controls the airflow for your com-
fort. It also allows you to override the auto-
matic operation with manual function selec-
tor buttons.
To turn the EATC on, push either the AU-
TOMATIC button or any of the six function
selector buttons:
,,,,or MAX. To turn the EATC off, press
the OFF button.
When you select AUTOMATIC, the system
determines fan speed, airflow location and
discharge air temperature. When one of the
function selector buttons is pressed, your
selection determines airflow location only.
Fan speed and discharge air temperature
remain automatic. You can override fan
speed by rotating the vertical thumbwheel
located at the extreme right of the
control panel.
The display window indicates the status of
the system. It shows the selected tempera-
ture and AUTO when in the AUTOMATIC
mode. It also indicates manual (thumb-
wheel) control of the fan speed when a
is shown.
WHA0015
HEATER AND AIR CONDITIONER
(automatic) (if so equipped)
Heater, air conditioner and audio systems4-11
ZX
Page 159 of 304

RADIO
Turn the ignition key to ACC or ON and
press the power on switch to turn on the
radio. If you listen to the radio with the
engine not running, the key should be
turned to the ACC position.
Radio reception is affected by station signal
strength, distance from radio transmitter,
buildings, bridges, mountains and other ex-
ternal influences. Intermittent changes in
reception quality normally are caused by
these external influences.
Using a cellular phone in or near the
vehicle may influence radio reception
quality.
Radio reception
Your NISSAN radio system is equipped with
state-of-the-art electronic circuits to en-
hance radio reception. These circuits are
designed to extend reception range, and to
enhance the quality of that reception.
However there are some general character-
istics of both FM and AM radio signals that
can affect radio reception quality in a mov-
ing vehicle, even when the finest equipment
is used. These characteristics are com-pletely normal in a given reception area,
and do not indicate any malfunction in your
NISSAN radio system.
Reception conditions will constantly change
because of vehicle movement. Buildings,
terrain, signal distance and interference
from other vehicles can work against ideal
reception. Described below are some of the
factors that can affect your radio reception.
FM RADIO RECEPTION
Range: FM range is normally limited to 25 to
30 miles (40 to 48 km), with monaural
(single channel) FM having slightly more
range than stereo FM. External influences
may sometimes interfere with FM station
reception even if the FM station is within 25
miles (40 km). The strength of the FM signal
is directly related to the distance between
the transmitter and receiver. FM signals
follow a line-of-sight path, exhibiting many
of the same characteristics as light. For
example they will reflect off objects.
Fade and drift: As your vehicle moves away
from a station transmitter, the signals will
tend to fade and/or drift.
Static and flutter: During signal interference
from buildings, large hills or due to antennaposition, usually in conjunction with in-
creased distance from the station transmit-
ter, static or flutter can be heard. This can
be reduced by adjusting the treble control
counterclockwise to reduce treble re-
sponse.
Multipath reception: Because of the reflec-
tive characteristics of FM signals, direct and
reflected signals reach the receiver at the
same time. The signals may cancel each
other, resulting in momentary flutter or loss
of sound.
AM RADIO RECEPTION
AM signals, because of their low frequency,
can bend around objects and skip along the
ground. In addition, the signals can be
bounced off the ionosphere and bent back
to earth. Because of these characteristics.
AM signals are also subject to interference
as they travel from transmitter to receiver.
Fading: Occurs while the vehicle is passing
through freeway underpasses or in areas
with many tall buildings. It can also occur for
several seconds during ionospheric turbu-
lence even in areas where no obstacles
exist.
Static: Caused by thunderstorms, electrical
AUDIO SYSTEM
4-16Heater, air conditioner and audio systems
ZX
Page 162 of 304

FM-AM RADIO WITH CASSETTE
PLAYER
NOTE: Audio control features include com-
mand buttons for CD players which can be
installed as optional equipment to upgradethe audio system. A CD player is not in-
cluded with this system, but can be pur-
chased as an option at any time. Consult
with an authorized NISSAN dealer for fea-
ture availability.
Audio main operation
To turn the radio on, turn the ignition key to
ACC or ON. If you listen to the radio with the
engine not running, turn the key to the ACC
position.
Radio reception is affected by station signal
strength, distance from radio transmitter,
buildings, bridges, mountains, and other
external influences. Intermittent changes in
reception quality normally are caused by
external influences.
Using a cellular phone in or near the
vehicle may influence radio reception
quality.
Power/Volume control
Push the VOL knob to turn the radio on.
Push the VOL knob once more to turn the
radio OFF.
Turn the knob to the right to increase vol-
ume or to the left to decrease volume. If the
knob is set above a certain volume level and
the ignition is turned off, the volume will
come back on at a nominal listening level
when the ignition is turned back on.
AHA1057
Heater, air conditioner and audio systems4-19
ZX
Page 164 of 304
Clock operation
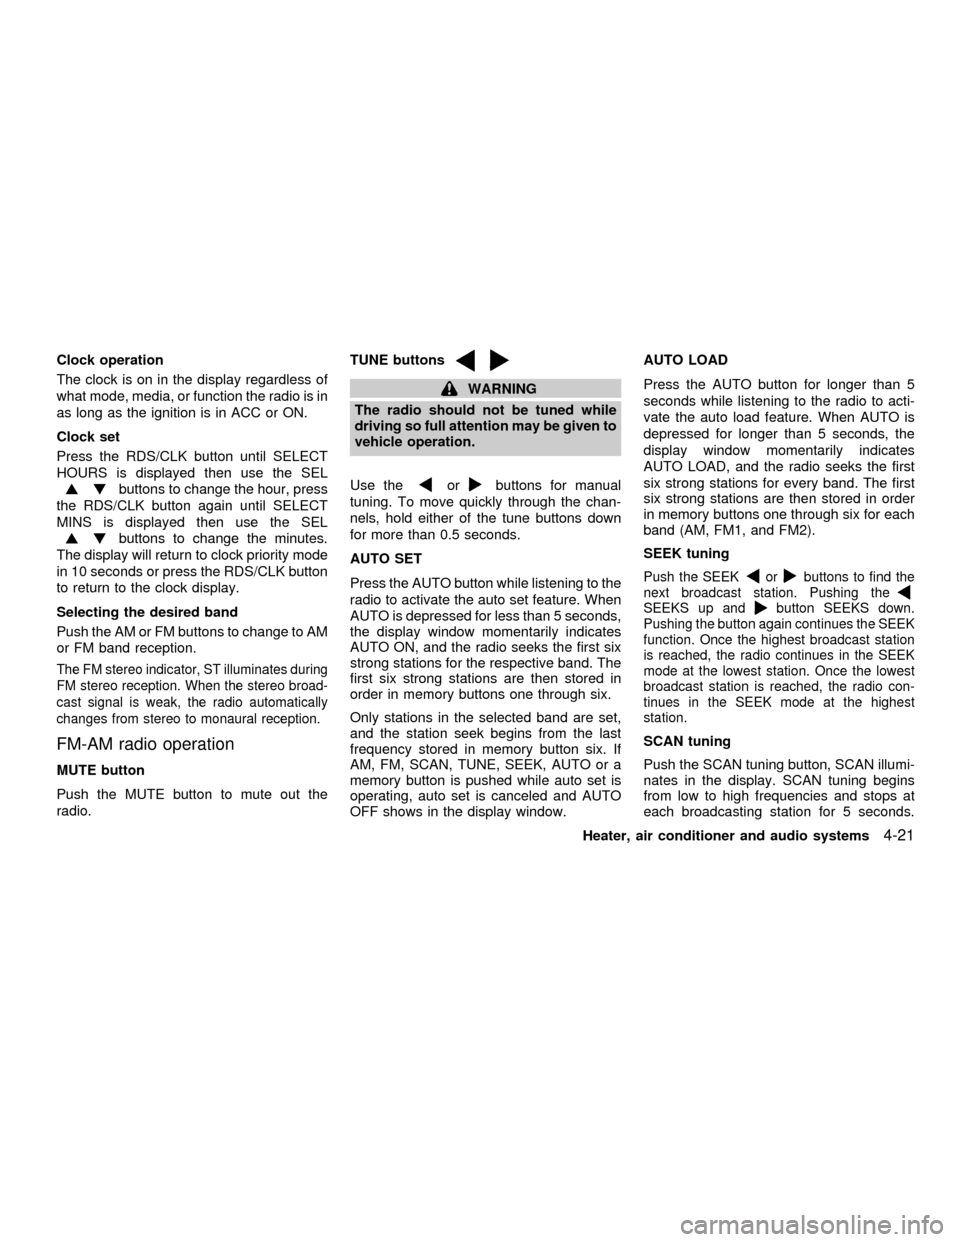
The clock is on in the display regardless of
what mode, media, or function the radio is in
as long as the ignition is in ACC or ON.
Clock set
Press the RDS/CLK button until SELECT
HOURS is displayed then use the SEL
buttons to change the hour, press
the RDS/CLK button again until SELECT
MINS is displayed then use the SEL
buttons to change the minutes.
The display will return to clock priority mode
in 10 seconds or press the RDS/CLK button
to return to the clock display.
Selecting the desired band
Push the AM or FM buttons to change to AM
or FM band reception.
The FM stereo indicator, ST illuminates during
FM stereo reception. When the stereo broad-
cast signal is weak, the radio automatically
changes from stereo to monaural reception.
FM-AM radio operation
MUTE button
Push the MUTE button to mute out the
radio.TUNE buttons
WARNING
The radio should not be tuned while
driving so full attention may be given to
vehicle operation.
Use the
orbuttons for manual
tuning. To move quickly through the chan-
nels, hold either of the tune buttons down
for more than 0.5 seconds.
AUTO SET
Press the AUTO button while listening to the
radio to activate the auto set feature. When
AUTO is depressed for less than 5 seconds,
the display window momentarily indicates
AUTO ON, and the radio seeks the first six
strong stations for the respective band. The
first six strong stations are then stored in
order in memory buttons one through six.
Only stations in the selected band are set,
and the station seek begins from the last
frequency stored in memory button six. If
AM, FM, SCAN, TUNE, SEEK, AUTO or a
memory button is pushed while auto set is
operating, auto set is canceled and AUTO
OFF shows in the display window.AUTO LOAD
Press the AUTO button for longer than 5
seconds while listening to the radio to acti-
vate the auto load feature. When AUTO is
depressed for longer than 5 seconds, the
display window momentarily indicates
AUTO LOAD, and the radio seeks the first
six strong stations for every band. The first
six strong stations are then stored in order
in memory buttons one through six for each
band (AM, FM1, and FM2).
SEEK tuning
Push the SEEKorbuttons to find the
next broadcast station. Pushing the
SEEKS up andbutton SEEKS down.
Pushing the button again continues the SEEK
function. Once the highest broadcast station
is reached, the radio continues in the SEEK
mode at the lowest station. Once the lowest
broadcast station is reached, the radio con-
tinues in the SEEK mode at the highest
station.
SCAN tuning
Push the SCAN tuning button, SCAN illumi-
nates in the display. SCAN tuning begins
from low to high frequencies and stops at
each broadcasting station for 5 seconds.
Heater, air conditioner and audio systems
4-21
ZX
Page 166 of 304

cMusic or programming type such as
``Classical'', ``Country'', or ``Rock''.
cTraffic reports about delays or construc-
tion.
Using RDS
To turn RDS on push the RDS/CLK button
until RDS OFF is displayed, then press the
SEL button until RDS ON is displayed.
To change display type turn RDS ON then
use the SEL button to choose between:
cSHOW TYPE - Music or program type.
cSHOW NAME - Station name or call-
sign.
cSHOW NONE - No text display.
To choose traffic reports press the
RDS/CLK button until TRAFFIC OFF is dis-
played, the use then SEL button to choose
TRAFFIC ON, then use the seek or scan
control to look for a station that may transmit
traffic reports, the radio will display a
``TRAF'' icon to show it is in traffic mode and
tuned to a station that may transmit traffic
reports. If the radio searches through the
whole band and then returns to the previous
station it was originally playing there are nostations in the area that are transmitting
traffic reports.
If a cassette or compact disc is being played
while the traffic option is on and the station
previously tuned into displays a traffic bul-
letin the radio will pause the cassette or
compact disc and broadcast the bulletin,
then resume playing the cassette or com-
pact disc.
Using RDS to search for programming type
Certain areas have a limited number of
stations that transmit RDS. Many stations
transmit call letters and frequencies only.
Searching or scanning by program type
may yield a limited number of selections.
Press the RDS/CLK button until FIND
CLASSIC is displayed, then use the SEL
button to choose between CLASSIC,
COUNTRY, INFO, JAZZ, OLDIES, R&B,
RELIGUS (Religious), ROCK, SOFT and
TOP40. When you have chosen a program
type, use the SEEK, SCAN, or AUTOSET
controls to look for a station transmitting that
kind of program. If the radio searches
through the whole band and then returns to
the previous station it was originally playing
there are no stations in the area that aretransmitting that type of programming.
Cassette tape player operation
Turn the ignition to ACC or ON, and care-
fully insert a cassette tape into the tape
door. The cassette tape automatically pulls
into the player and begins to play.
When a casssette is inserted into the audio
system, the word TAPE and a cassette side
symbol (either one or two) illuminates in the
display.
If the radio is already operating it automati-
cally turns off and the cassette tape begins
to play. The cassette tape automatically
changes direction to play the other side
when the first side is complete.
PLAY/STOP
Push the AM or FM buttons while the cas-
sette tape is playing to stop the tape. Push
the TAPE button to play the tape.
Changing the direction of tape play
Push the SIDE 1-2 select button to switch
sides on the tape. The display will change
from TAPE 1 PLAY to TAPE 2 PLAY.
Heater, air conditioner and audio systems
4-23
ZX