belt NISSAN QUEST 2001 V41 / 2.G Workshop Manual
[x] Cancel search | Manufacturer: NISSAN, Model Year: 2001, Model line: QUEST, Model: NISSAN QUEST 2001 V41 / 2.GPages: 304, PDF Size: 2.54 MB
Page 81 of 304

In addition, these integrated child safety
seats must only be used by children who
meet the following requirements:
cAGE:
At least one year old
cSEATED HEIGHT:
Top of child's shoulders must be below
the shoulder harness openings of the
integrated child seat.
Children less than one year old should be
restrained in an appropriate separate child
restraint. Children whose shoulders are
above the shoulder harness openings of
integrated child seat should also be re-
strained in an appropriate separate child
restraint or in the appropriate vehicle seat
belt system. Refer to ``Child Restraints'' and
``Precautions On Seat Belt Usage'' in this
section for important child safety information.
Using the Integrated Child Safety
Seats
WARNING:
cNever use the vehicle seat belts to
restrain a child in an integratedchild safety seat. Use only the shoul-
der harness and belt buckle which is
part of the integrated child safety
seat. Never use the integrated child-
safety seat as a booster cushion
with the vehicle seat belts.
ARS1215
1-74Seats, restraints and supplemental air bag systems
ZX
Page 82 of 304
cBefore placing the child in the inte-
grated child safety seat, confirm that
the bench seatback is securely
locked and the seatback release le-
ver is in full down position.
cAlways make sure the integrated
child safety seat belts are properly
positioned on your child. The child
should sit straight up and back
against the bench seat. The shoulder
harnesses should be centered over
the shoulders and fastened with the
chest clip. The belt buckle should be
between the legs and latched to the
shoulder belt tongue. Snugly adjust
the belts around your child. Failure
to properly position the child can
increase the risk or severity of injury
to the child in an accident.
CAUTION
Remember that a child restraint left in a
closed vehicle can become very hot.
Check the seating surface and buckles
before placing your child in the child
restraint.
Securing the child
Before using the integrated child safety
seats, carefully read the shoulder har-
ness, seatback release, and integrated
child safety seat cushion labels.
The following steps apply to both the left
and right integrated child safety seats.
1. Be sure your child meets all of the re-
quired age, weight and height require-
ments for the safe use of the integrated
child safety seat.
2. Be sure the second row bench seat is
securely latched to the floor of the ve-
hicle. Refer to ``Flexible seating'' in this
section for proper seat installation proce-
dures.
3. Be sure the second row bench seatback
is locked by grasping it and trying to rock
it back and forth. Also, check that the
seatback release lever is in the full down
position.
Seats, restraints and supplemental air bag systems
1-75
ZX
Page 83 of 304

4. Pull the cushion release strap and lower
the intregrated child safety seat cushion
completely.NOTE: The head restraints on the pas-
senger bench seat equipped with the
integrated child safety seats, are not
adjustable or removable.5. If connected, separate the two halves of
the shoulder harness from the belt
buckle. Also if connected, disconnect the
chest clip and lay the shoulder harness
halves aside.
ARS1201
APD0814
1-76Seats, restraints and supplemental air bag systems
ZX
Page 84 of 304

6. Place the child on the integrated child
safety seat. Place the belt buckle be-
tween the child's legs.7.Place the left shoulder harness over the
child's left shoulder. Insert the left shoulder
harness tongue into the left side of the belt
buckle. Confirm that the left shoulder har-
ness tongue indicator is green. The shoul-
der harness tongues only fit into the proper
sides of the belt buckle.
8.Place the right shoulder harness over the
child's right shoulder. Insert the right shoul-
der harness tongue into the right side of the
belt buckle. Confirm that the right shoulder
harness tongue indicator is green. The
shoulder harness tongues only fit into the
proper sides of the belt buckle.
APD0815APD0816APD0817
Seats, restraints and supplemental air bag systems1-77
ZX
Page 86 of 304

shoulder harness retractor is in the emer-
gency locking mode.
WARNING
The automatic locking mode (child re-
straint mode) must be reactivated each
time you place a child in the integrated
child safety seats.
In addition to the automatic locking retrac-
tors, the integrated child safety seat shoul-
der harnesses are equipped with emer-
gency locking retractors. The automatic
locking mode is best to use, especially for
children who need help staying properly
positioned in the seat and its harnesses (for
example, children who are younger and
smaller), because the belts are always
locked. In the emergency locking mode, the
shoulder belts only lock in a sudden stop or
accident, allowing a child more freedom of
movement. Use the emergency locking
mode only if you judge your child able to
remain properly positioned in the integrated
child safety seat.
Removing the child
1. Release the chest clip.
2. Release the left and right shoulder har-ness tongues from the belt buckle by
pressing the red belt buckle button.
3. Move the left and right shoulder har-
nesses aside and assist the child from
the integrated child safety seat.
Storing the Integrated Child Safety
Seat
1. Be sure the shoulder harnesses are fully
retracted and resting inside the inte-
grated child safety seat recess. It is not
necessary to reconnect the shoulder har-
nesses and belt buckle prior to storing
the integrated child safety seat.
2. While holding onto, but not pulling, the
cushion release strap, rotate the cushion
upward until it fits flush with the second
row seat back cushion and locks into
position.
3. Be sure the integrated child safety seat is
locked in the stowed position by grasping
the safety seat cushion and attempting to
lower it without pulling the cushion re-
lease strap. If the integrated child safety
seat is not locked in the stowed position,
repeat steps one through three.
Integrated Child Safety Seat main-
tenance
cTo clean the shoulder harnesses and belt
buckle webbing, apply a mild soap solu-
tion or any solution recommended for
cleaning upholstery or carpets. Then
brush the webbing, wipe it with a cloth
and allow it to dry in the shade. Do not
allow the shoulder harnesses to retract
until they are completely dry.
cThe integrated child safety seats cloth
removable pads may be cleaned with
mild soap and water. The cloth remov-
able pads are attached to the seats with
fastener strips, and may be easily re-
moved. The pads are machine washable.
Fo best results, machine wash in cold
water in the gentle cycle. Tumble dry on
low heat. Do not use chlorine bleach, and
do not dry clean.
CAUTION
Failure to follow the washing instruc-
tions provided on the cloth removable
pads may result in premature wear or
damage.
Seats, restraints and supplemental air bag systems
1-79
ZX
Page 87 of 304
cPeriodically inspect the belt and metal
components of the integrated child safety
seats, such as the buckles, tongues,
shoulder harness webbings, and latching
indicators. Periodically check the func-
tion of the integrated child safety seat
shoulder harness retractor functions. If
loose parts, deterioration, cuts, frays,
malfunctions or other damage to the belt
webbings or metal parts are found, see
an authorized NISSAN dealer for repairs.
Inspection after an accident
If your vehicle was involved in an accident,
before using the integrated child safety
seats, all related components should be
inspected for damage by an authorized NIS-
SAN dealer. Damage to the integrated child
safety seat or related components must be
repaired.
1-80Seats, restraints and supplemental air bag systems
ZX
Page 96 of 304
Turn signal/hazard indicator lightsCharge warning lightOverdrive off indicator light
(automatic transmission only)
Brake warning lightLow fuel warning lightMalfunction indicator lamp (MIL)
High beam indicator lightLow washer fluid warning lightAnti-lock brake warning light
Seat belt reminder light and chimeCRUISE main switch indicator lightSupplemental air bag warning light
Engine oil pressure warning lightCruise SET indicator lightDoor open warning light (if so
equipped)
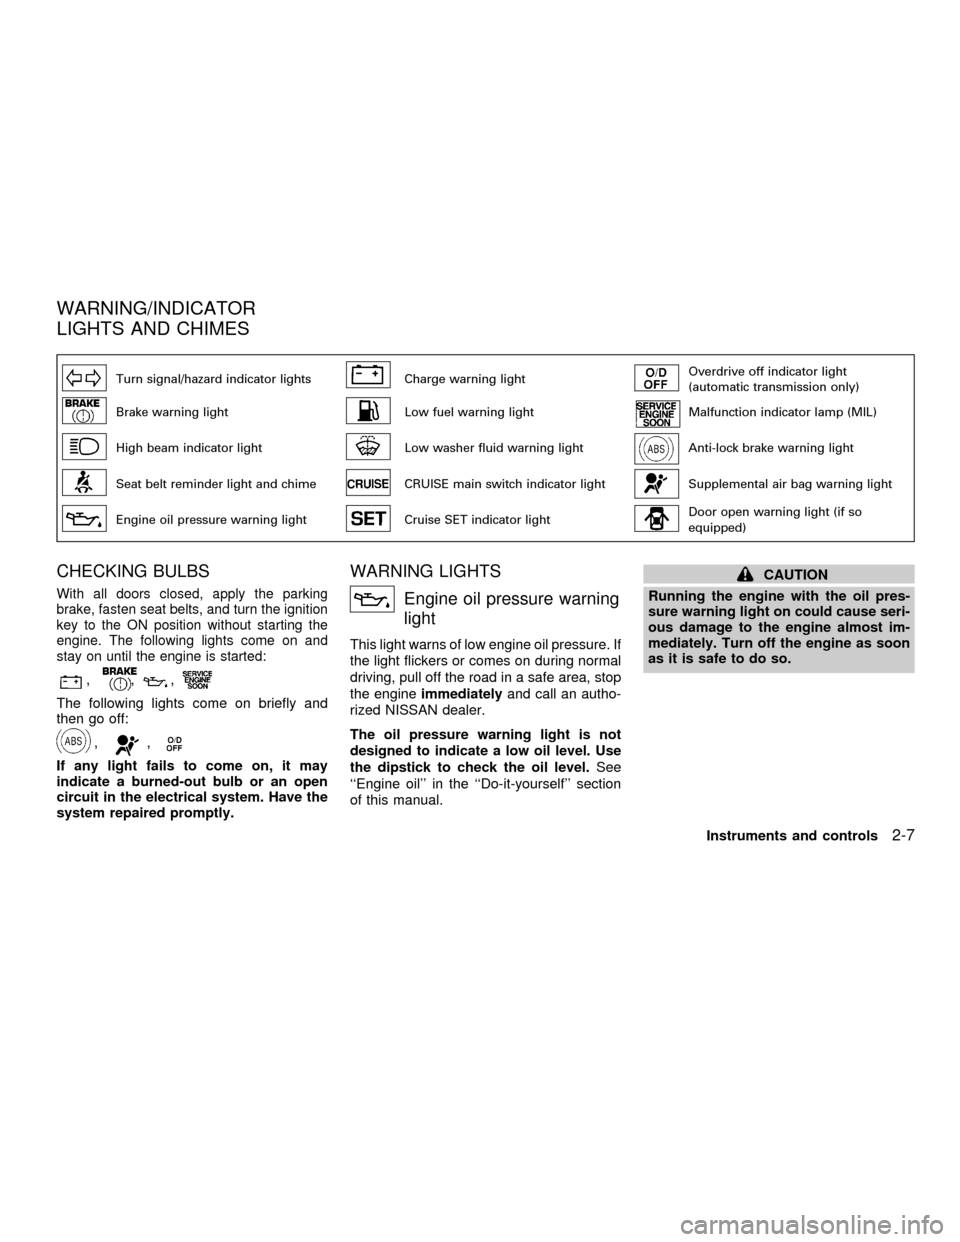
CHECKING BULBS
With all doors closed, apply the parking
brake, fasten seat belts, and turn the ignition
key to the ON position without starting the
engine. The following lights come on and
stay on until the engine is started:
,,,
The following lights come on briefly and
then go off:
,,
If any light fails to come on, it may
indicate a burned-out bulb or an open
circuit in the electrical system. Have the
system repaired promptly.
WARNING LIGHTS
Engine oil pressure warning
light
This light warns of low engine oil pressure. If
the light flickers or comes on during normal
driving, pull off the road in a safe area, stop
the engineimmediatelyand call an autho-
rized NISSAN dealer.
The oil pressure warning light is not
designed to indicate a low oil level. Use
the dipstick to check the oil level.See
``Engine oil'' in the ``Do-it-yourself'' section
of this manual.
CAUTION
Running the engine with the oil pres-
sure warning light on could cause seri-
ous damage to the engine almost im-
mediately. Turn off the engine as soon
as it is safe to do so.
WARNING/INDICATOR
LIGHTS AND CHIMES
Instruments and controls2-7
ZX
Page 97 of 304
Charge warning light
If the light comes on while the engine is
running, it may indicate the charging system
is not functioning properly. Turn the engine
off and check the generator belt. If the belt is
loose, broken, missing, or if the light re-
mains on, see an authorized NISSAN
dealer immediately.
CAUTION
Do not continue driving if the belt is
loose, broken or missing.
Door open warning light
This light comes on when any of the doors
are not closed securely while the ignition
key is ON.
Seat belt warning light and
chime
The light and chime remind you to fasten
your seat belts. If the driver's seat belt is
NOT securely fastened when the ignition
key is turned to ON or START, the chime
sounds for approximately 6 seconds and
the light illuminates.Refer to ``Seat belts'' in the ``Seats, re-
straints and supplemental air bag systems''
section of this manual for precautions on
seat belt usage.
Supplemental air bag
warning light
When the ignition key is in the ON or START
position, the supplemental air bag warning
light illuminates for about 7 seconds and then
turns off. This means the Air Bag Supple-
mental Restraint System is operational.
If any of the following conditions occur, the
supplemental air bag and pre-tensioner
seat belt systems need servicing and your
vehicle should be taken to an authorized
NISSAN dealer:
cThe supplemental air bag warning light
remains on after approximately 7 sec-
onds.
cThe supplemental air bag warning light
flashes intermittently.
cThe supplemental air bag warning light
does not come on at all.
Under these conditions, the air bag supple-
mental restraint system and/or pre-tensioner
seat belts may not function properly. Foradditional details, see ``Supplemental re-
straint system'' in the ``Seats, restraints and
supplemental air bag systems'' section of
this manual.
WARNING
If the supplemental air bag warning
light is on, it could mean that the
supplemental air bag will not operate in
an accident.
Low washer fluid warning
light
This light comes on when the washer fluid is
at a low level. Add washer fluid as neces-
sary. See the ``Do-it-yourself'' section of this
manual.
Brake warning light
This light functions for both the parking
brake and the foot brake systems.
When the ignition key is in the ON position,
the light comes on when the parking brake
is applied, and also warns of a low brake
fluid level. If the light comes on while the
engine is running with the parking brake not
2-8Instruments and controls
ZX
Page 121 of 304
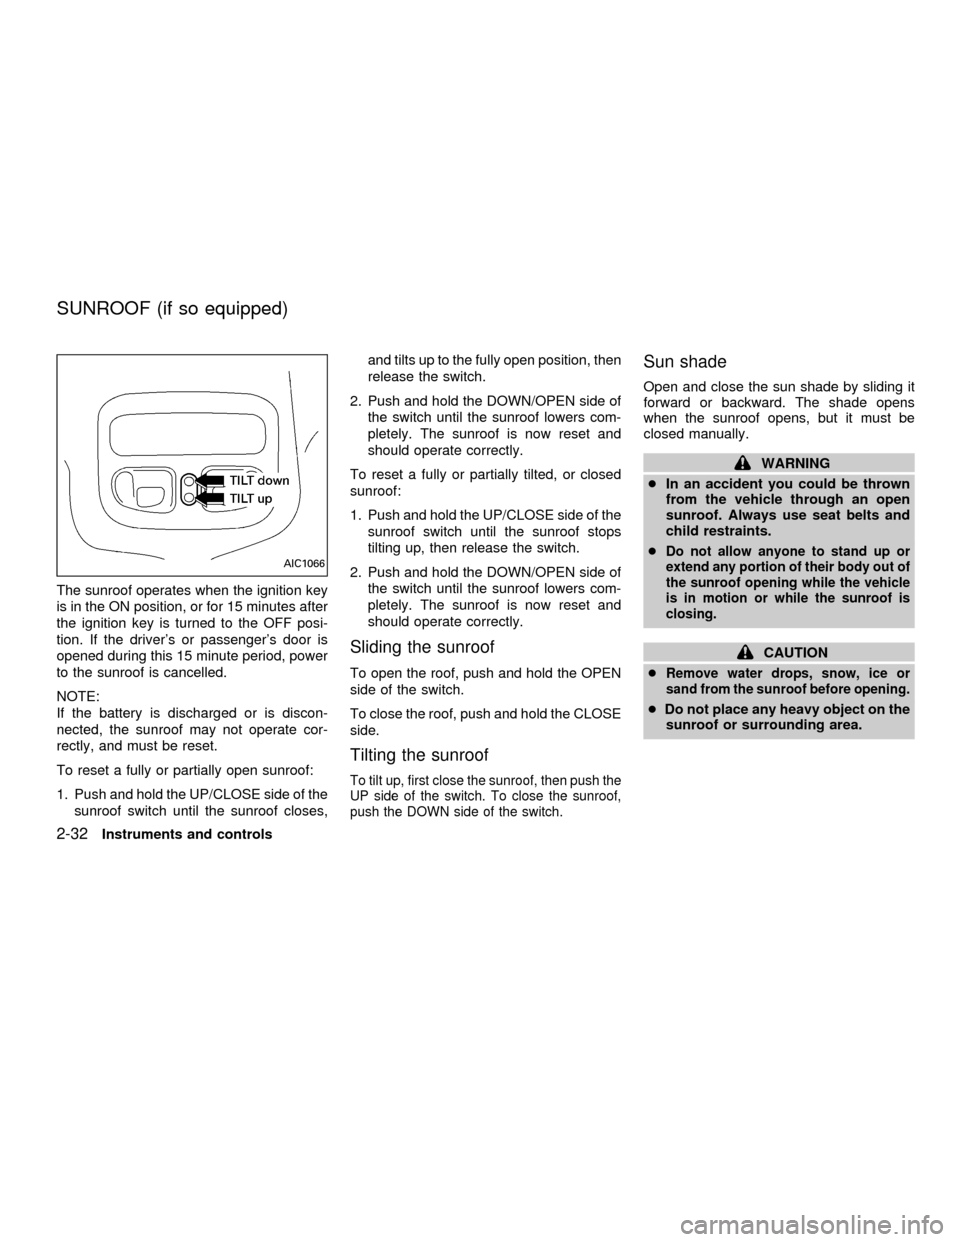
The sunroof operates when the ignition key
is in the ON position, or for 15 minutes after
the ignition key is turned to the OFF posi-
tion. If the driver's or passenger's door is
opened during this 15 minute period, power
to the sunroof is cancelled.
NOTE:
If the battery is discharged or is discon-
nected, the sunroof may not operate cor-
rectly, and must be reset.
To reset a fully or partially open sunroof:
1. Push and hold the UP/CLOSE side of the
sunroof switch until the sunroof closes,and tilts up to the fully open position, then
release the switch.
2. Push and hold the DOWN/OPEN side of
the switch until the sunroof lowers com-
pletely. The sunroof is now reset and
should operate correctly.
To reset a fully or partially tilted, or closed
sunroof:
1. Push and hold the UP/CLOSE side of the
sunroof switch until the sunroof stops
tilting up, then release the switch.
2. Push and hold the DOWN/OPEN side of
the switch until the sunroof lowers com-
pletely. The sunroof is now reset and
should operate correctly.
Sliding the sunroof
To open the roof, push and hold the OPEN
side of the switch.
To close the roof, push and hold the CLOSE
side.
Tilting the sunroof
To tilt up, first close the sunroof, then push the
UP side of the switch. To close the sunroof,
push the DOWN side of the switch.
Sun shade
Open and close the sun shade by sliding it
forward or backward. The shade opens
when the sunroof opens, but it must be
closed manually.
WARNING
cIn an accident you could be thrown
from the vehicle through an open
sunroof. Always use seat belts and
child restraints.
c
Do not allow anyone to stand up or
extend any portion of their body out of
the sunroof opening while the vehicle
is in motion or while the sunroof is
closing.
CAUTION
c
Remove water drops, snow, ice or
sand from the sunroof before opening.
cDo not place any heavy object on the
sunroof or surrounding area.
AIC1066
SUNROOF (if so equipped)
2-32Instruments and controls
ZX
Page 129 of 304

A key number plate is supplied with your
key. Record the key number and keep it in a
safe place (such as your wallet), NOT IN
THE CAR. NISSAN does not record key
numbers so it is very important to keep track
of your key number plate.
A key number is necessary only when you
have lost all vehicle keys and do not have
one to duplicate. If you still have a key, this
key can be duplicated by an authorized
NISSAN dealer or locksmith shop.Two keys are supplied with your vehicle Ð
one has a plastic head and one is all metal.
Both keys perform the same functions.
WARNING
c
Always have the doors locked while
driving. Along with the use of seat
belts, this provides greater safety in
the event of an accident by helping to
prevent persons from being thrown
from the vehicle. This also helps keep
children and others from unintention-
ally opening the doors, and will help
keep out intruders.
cBefore opening any door, always
look for and avoid oncoming traffic.
c
Do not leave children unattended in-
side the vehicle. They could unknow-
ingly activate switches or controls.
Unattended children could become
involved in serious accidents.
CAUTION
cAlways use the door handle to open
or close a sliding door. Do not at-
tempt to open or close the doors by
merely placing your hand on the
door edge or door slide roller, as this
may cause injury.
APD1042
KEYS DOORS
3-2Pre-driving checks and adjustments
ZX