key battery NISSAN QUEST 2004 V42 / 3.G Owners Manual
[x] Cancel search | Manufacturer: NISSAN, Model Year: 2004, Model line: QUEST, Model: NISSAN QUEST 2004 V42 / 3.GPages: 320, PDF Size: 5.6 MB
Page 83 of 320
Turn off the engine, and start it again by
slowly turning the ignition key (quickly do-
ing so may cause the ABS light to stay on
when there is nothing wrong) . If the light
stays on, have the system checked by a
NISSAN dealer.
If an abnormality occurs in the system, the anti-
lock function ceases, but the regular braking
system continues to operate.
If the light comes on while you are driving,
contact a NISSAN dealer for repair.
orBrake warning light
This light functions for both the parking brake and
the foot brake systems.
When the ignition key is in the ON position, the
light comes on when the parking brake is applied,
and also warns of a low brake fluid level. If the
light comes on while the engine is running with
the parking brake not applied, stop the vehicle
and perform the following:
1. Check the brake fluid level. Add brake fluid
as necessary. See “Brake fluid” in the “Main-
tenance and do-it-yourself” section of this
manual.2. If the brake fluid level is correct, have the
brake system checked by a NISSAN dealer.
WARNING
cYour vehicle is equipped with an auto-
matic engine cooling fan. It may come
on at any time without warning, even if
the ignition key is in the OFF position
and the engine is not running. To avoid
injury, always disconnect the negative
battery cable before working near the
fan.
cPressing the brake pedal with the en-
gine stopped and/or a low brake fluid
level may increase your stopping dis-
tance and braking will require greater
pedal effort as well as pedal travel.
cIf the brake fluid level is below the
MINIMUM or MIN mark on the brake
fluid reservoir, do not drive until the
brake system has been checked at a
NISSAN dealer.
Charge warning light
If this light comes on while the engine is running,
it may indicate the charging system is not func-
tioning properly. Turn the engine off and checkthe generator belt. If the belt is loose, broken,
missing, or if the light remains on, see a NISSAN
dealer immediately.
CAUTION
Do not continue driving if the generator
belt is loose, broken or missing.
Door open warning light
This light comes on when any of the doors are not
closed securely while the ignition key is in the ON
position.
Engine oil pressure warning
light
This light warns of low engine oil pressure. If the
light flickers or comes on during normal driving,
pull off the road in a safe area, stop the engine
immediatelyand call a NISSAN dealer or other
authorized repair shop.
The engine oil pressure warning light is not
designed to indicate a low oil level.Use the
dipstick to check the oil level. See “Engine oil” in
the “Maintenance and do-it-yourself” section of
this manual.
Instruments and controls2-7
ZREVIEW COPY:Ð2004 Quest(van)
Owners Manual(owners)ÐUSA English(nna)
10/08/03Ðtbrooks
X
Page 93 of 320

NOTE:
Autolight activation sensitivity and the
time delay for autolight shutoff can be ad-
justed. See “Personalized settings menu”
(vehicles without navigation system) or
“Vehicle electronic systems” (vehicles with
navigation system) in the “Display screen,
heater, air conditioner and audio systems”
section later in this manual.
To turn on the autolight system:
1. Make sure the headlight switch is in the
AUTO position.
2. Turn the ignition key to ON.
3. The autolight system automatically turns the
headlights on and off.
Initially, if the ignition switch is turned OFF and a
door is opened and left open, the headlights
remain on for 5 minutes. During that 5 minutes:
cif all doors are closed, the headlights remain
on for 45 seconds, then turn off.
cif another door is opened, then the 5 minute
timer is reset.
To turn the autolight system off, turn the switch to
the OFF,
,orposition.Be sure you do not put anything on top of
the autolight sensor located on top of the
instrument panel. The autolight sensor
controls the autolight; if it is covered, the
autolight sensor reacts as if it is dark out
and the headlights will illuminate. If this
occurs while parked with the engine off
and the key in the ON position, your vehi-
cle’s battery could become discharged.
Headlight beam select
s1To select the high beam function, push the
lever forward. The high beam lights come on
and the
light illuminates.
s2Pull the lever back to select the low beam.
s3Pulling and releasing the lever flashes the
headlight high beams on and off.
Battery saver system
If the ignition switch is turned OFF while the
headlight switch is in theorposi-
tion, the headlights will turn off after 5 minutes.
LIC0390
Instruments and controls2-17
ZREVIEW COPY:Ð2004 Quest(van)
Owners Manual(owners)ÐUSA English(nna)
10/08/03Ðtbrooks
X
Page 99 of 320
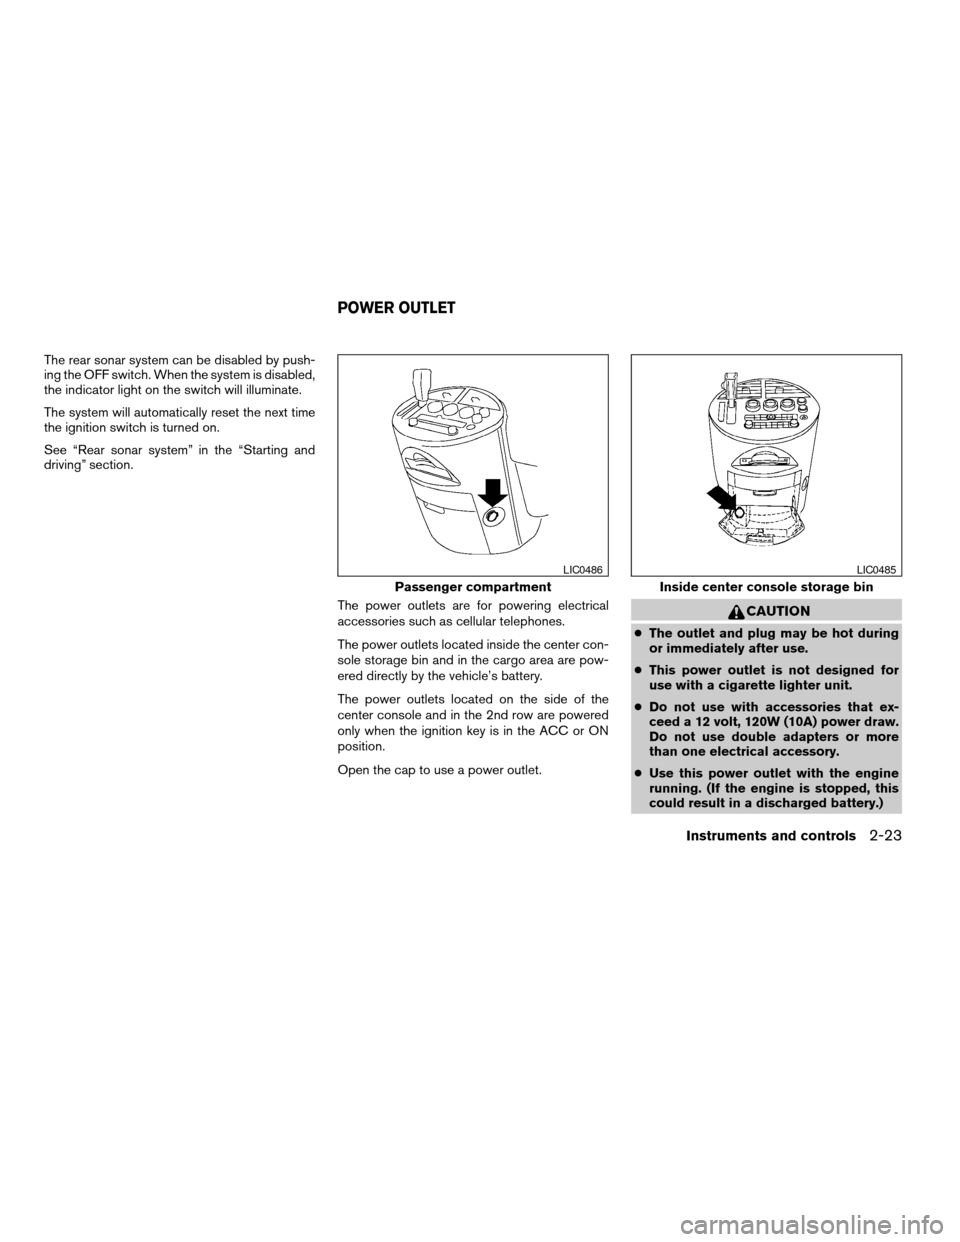
The rear sonar system can be disabled by push-
ing the OFF switch. When the system is disabled,
the indicator light on the switch will illuminate.
The system will automatically reset the next time
the ignition switch is turned on.
See “Rear sonar system” in the “Starting and
driving” section.
The power outlets are for powering electrical
accessories such as cellular telephones.
The power outlets located inside the center con-
sole storage bin and in the cargo area are pow-
ered directly by the vehicle’s battery.
The power outlets located on the side of the
center console and in the 2nd row are powered
only when the ignition key is in the ACC or ON
position.
Open the cap to use a power outlet.
CAUTION
cThe outlet and plug may be hot during
or immediately after use.
cThis power outlet is not designed for
use with a cigarette lighter unit.
cDo not use with accessories that ex-
ceed a 12 volt, 120W (10A) power draw.
Do not use double adapters or more
than one electrical accessory.
cUse this power outlet with the engine
running. (If the engine is stopped, this
could result in a discharged battery.)
Passenger compartment
LIC0486
Inside center console storage bin
LIC0485
POWER OUTLET
Instruments and controls2-23
ZREVIEW COPY:Ð2004 Quest(van)
Owners Manual(owners)ÐUSA English(nna)
10/08/03Ðtbrooks
X
Page 115 of 320
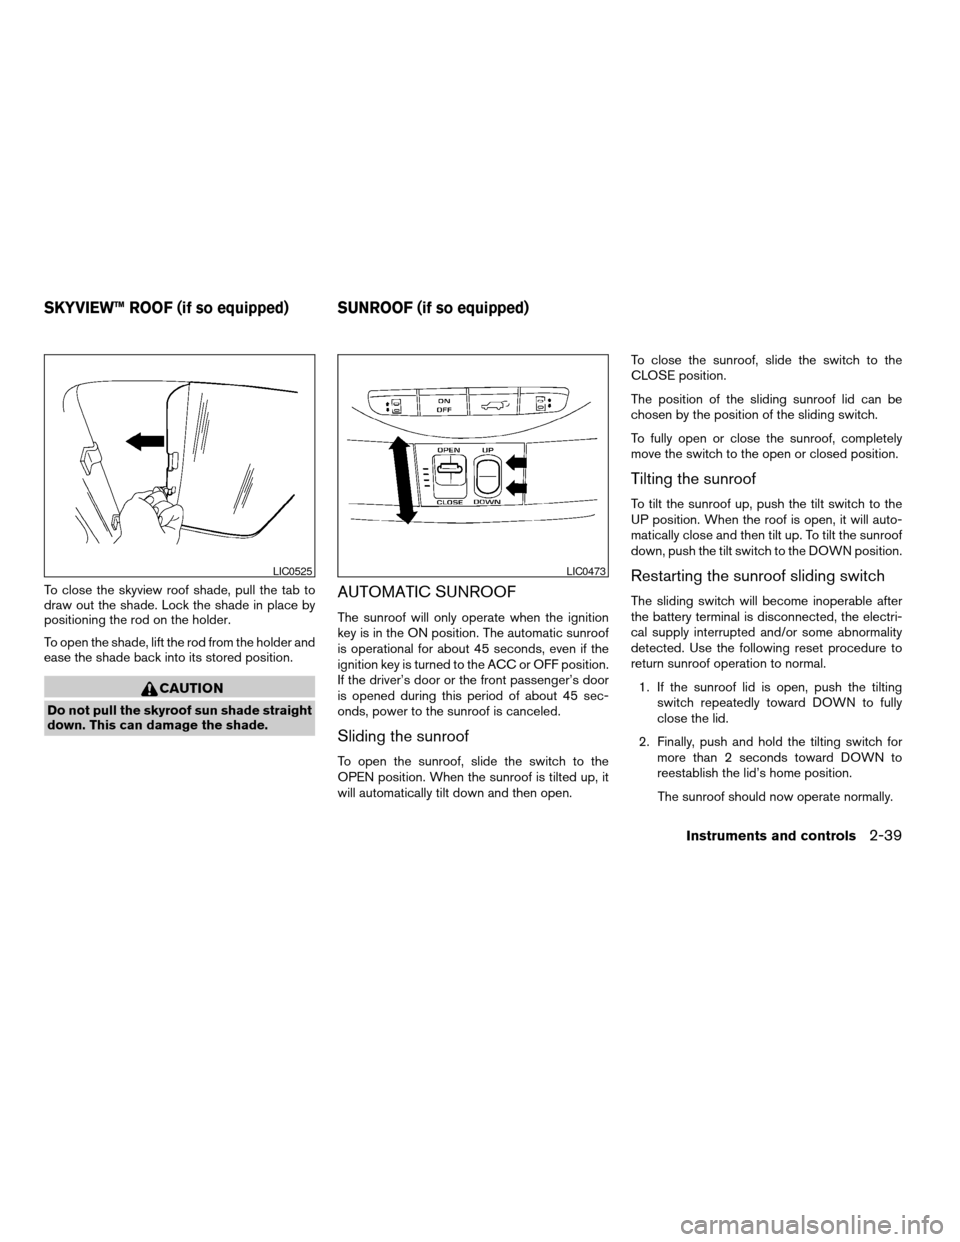
To close the skyview roof shade, pull the tab to
draw out the shade. Lock the shade in place by
positioning the rod on the holder.
To open the shade, lift the rod from the holder and
ease the shade back into its stored position.
CAUTION
Do not pull the skyroof sun shade straight
down. This can damage the shade.
AUTOMATIC SUNROOF
The sunroof will only operate when the ignition
key is in the ON position. The automatic sunroof
is operational for about 45 seconds, even if the
ignition key is turned to the ACC or OFF position.
If the driver’s door or the front passenger’s door
is opened during this period of about 45 sec-
onds, power to the sunroof is canceled.
Sliding the sunroof
To open the sunroof, slide the switch to the
OPEN position. When the sunroof is tilted up, it
will automatically tilt down and then open.To close the sunroof, slide the switch to the
CLOSE position.
The position of the sliding sunroof lid can be
chosen by the position of the sliding switch.
To fully open or close the sunroof, completely
move the switch to the open or closed position.
Tilting the sunroof
To tilt the sunroof up, push the tilt switch to the
UP position. When the roof is open, it will auto-
matically close and then tilt up. To tilt the sunroof
down, push the tilt switch to the DOWN position.
Restarting the sunroof sliding switch
The sliding switch will become inoperable after
the battery terminal is disconnected, the electri-
cal supply interrupted and/or some abnormality
detected. Use the following reset procedure to
return sunroof operation to normal.
1. If the sunroof lid is open, push the tilting
switch repeatedly toward DOWN to fully
close the lid.
2. Finally, push and hold the tilting switch for
more than 2 seconds toward DOWN to
reestablish the lid’s home position.
The sunroof should now operate normally.
LIC0525LIC0473
SKYVIEW™ ROOF (if so equipped) SUNROOF (if so equipped)
Instruments and controls2-39
ZREVIEW COPY:Ð2004 Quest(van)
Owners Manual(owners)ÐUSA English(nna)
10/08/03Ðtbrooks
X
Page 117 of 320

The lights on demand switch allows the driver to
select one of three lighting modes for the room
lights. The room lights are the map lights, per-
sonal lights and puddle lamps (if so equipped) .
The lights on demand switch operates regardless
of ignition switch position.
: The room lights illuminate. The lights will
turn off automatically after 30 minutes to prevent
the battery from becoming discharged.
OFF: The room lights do not illuminate.
: The room lights illuminate when a door is
opened.If the lights on demand switch is in the
position, the lights will stay on for about 30 sec-
onds when:
cThe doors are unlocked by the keyfob, a key
or the power door lock switch while all doors
are closed and the ignition switch is in the
OFF position.
cThe driver’s door is opened and then closed
while the key is removed from the ignition
switch.
cThe key is removed from the ignition switch
while all doors are closed.
The room lights will turn off while the 30 second
timer is activated when:
cThe driver’s door is locked by the keyfob, a
key, or the power door lock switch.
cThe ignition switch is turned ON.
The lights will turn off automatically after 30 min-
utes while doors are open to prevent the battery
from becoming discharged.NOTE:
The foot well and door step lights illumi-
nate when the driver and passenger doors
are open regardless of the lights on de-
mand switch position. These lights will turn
off automatically after 30 minutes while
doors are open to prevent the battery from
becoming discharged.
LIC0472
LIGHTS ON DEMAND SWITCH
Instruments and controls2-41
ZREVIEW COPY:Ð2004 Quest(van)
Owners Manual(owners)ÐUSA English(nna)
10/08/03Ðtbrooks
X
Page 123 of 320

3 Pre-driving checks and adjustments
Keys .............................................3-2
Nissan vehicle immobilizer system (NVIS)
keys..........................................3-2
Doors............................................3-3
Locking with key................................3-3
Locking with inside lock knob....................3-4
Locking with power door lock switch.............3-5
Operating the manual sliding door
(if so equipped)................................3-5
Using the main ON/OFF switch for the
power sliding door..............................3-6
Operating the power sliding door
(if so equipped)................................3-7
Child safety sliding door lock....................3-9
Remote keyless entry system.......................3-9
How to use remote keyless entry system.........3-10
Battery replacement...........................3-13
Hood...........................................3-14
Back door.......................................3-15
Operating the manual back door................3-15
Using the main ON/OFF switch for the
power back door..............................3-16Operating the power back door
(if so equipped)...............................3-16
Back door release.............................3-18
Fuel filler lid......................................3-20
Opener operation..............................3-20
Fuel filler cap..................................3-20
Steering wheel...................................3-21
Tilt operation..................................3-21
Pedal position adjustment (if so equipped)..........3-22
Sun visors.......................................3-22
Vanity mirrors.................................3-23
Mirrors..........................................3-23
Inside mirror (if so equipped)....................3-23
Automatic anti-glare inside mirror
(if so equipped)...............................3-23
Outside mirrors...............................3-24
Automatic drive positioner (if so equipped)..........3-25
Memory storage function.......................3-26
Entry/exit function.............................3-27
System operation..............................3-28
ZREVIEW COPY:Ð2004 Quest(van)
Owners Manual(owners)ÐUSA English(nna)
10/08/03Ðtbrooks
X
Page 129 of 320
OPERATING THE POWER SLIDING
DOOR (if so equipped)
WARNING
cMake sure that all passengers have
their hands, etc. inside the vehicle be-
fore closing the sliding doors.
cDo not leave children unattended inside
the vehicle. They could unknowingly ac-
tivate switches or controls. Unattended
children could become involved in seri-
ous accidents.NOTE:
To open, close or reverse a power sliding
door, the shift selector lever must be in P
(Park) . Also, the power sliding doors will
not operate if battery voltage is low.
Power Assist:
If the main on/off switch is ON and a sliding door
is unlocked and manually moved toward the open
or close position using the inside or outside
handle, the power assist feature will be activated
and the door will complete its motion automati-
cally.Power Open:
The door automatically moves from the fully
closed position to the fully open position in ap-
proximately 4 seconds. The power open feature
can be activated by the switches on the keyfob,
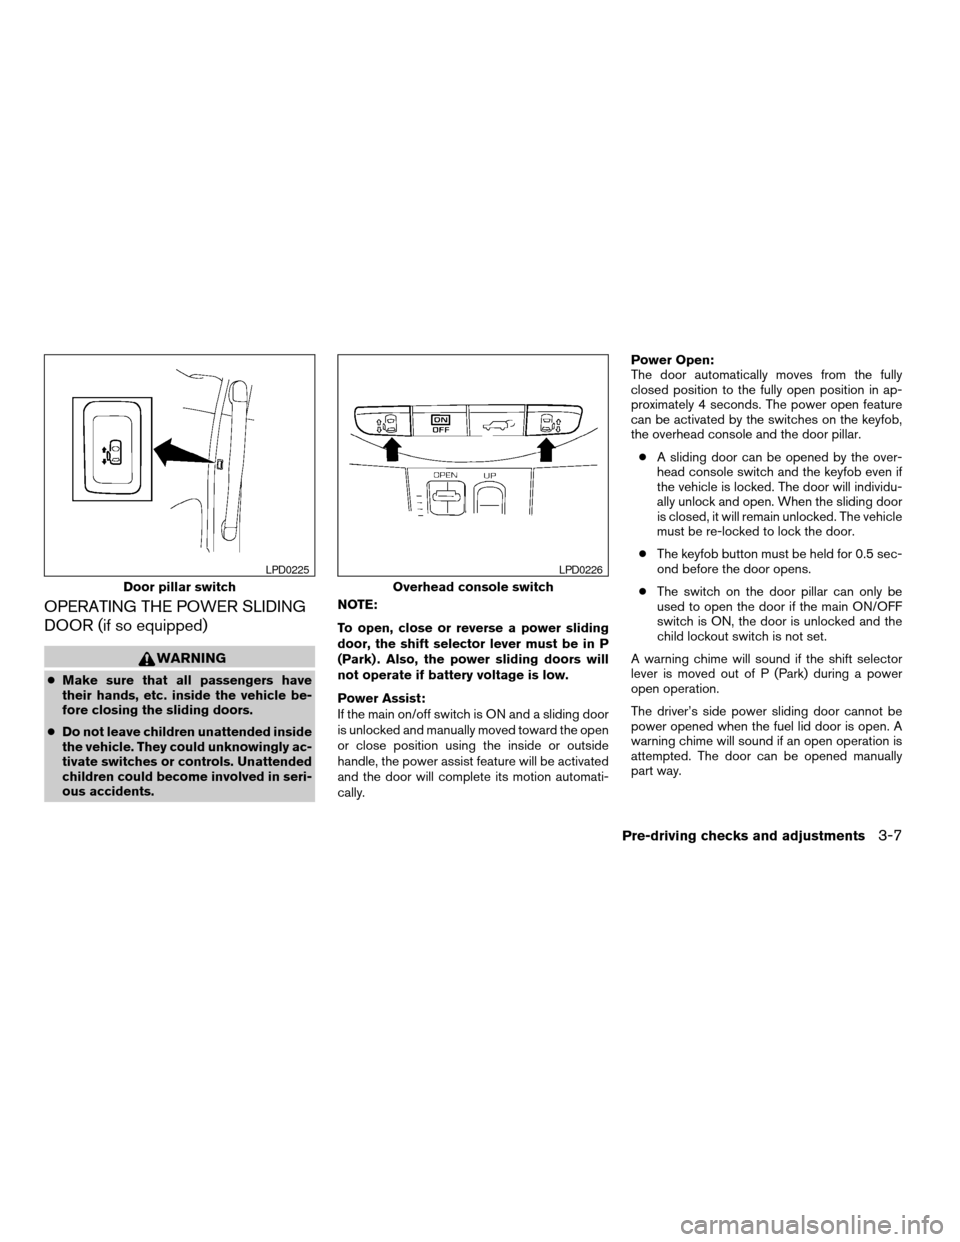
the overhead console and the door pillar.
cA sliding door can be opened by the over-
head console switch and the keyfob even if
the vehicle is locked. The door will individu-
ally unlock and open. When the sliding door
is closed, it will remain unlocked. The vehicle
must be re-locked to lock the door.
cThe keyfob button must be held for 0.5 sec-
ond before the door opens.
cThe switch on the door pillar can only be
used to open the door if the main ON/OFF
switch is ON, the door is unlocked and the
child lockout switch is not set.
A warning chime will sound if the shift selector
lever is moved out of P (Park) during a power
open operation.
The driver’s side power sliding door cannot be
power opened when the fuel lid door is open. A
warning chime will sound if an open operation is
attempted. The door can be opened manually
part way.
Door pillar switch
LPD0225
Overhead console switch
LPD0226
Pre-driving checks and adjustments3-7
ZREVIEW COPY:Ð2004 Quest(van)
Owners Manual(owners)ÐUSA English(nna)
10/08/03Ðtbrooks
X
Page 130 of 320
Power Close:
The door automatically moves from the fully open
position to the secondary position. When the
sliding door reaches the secondary position, the
cinching motor engages and pulls the door to its
primary latch position. Power close takes ap-
proximately 5 seconds. The power close feature
can be activated by the switches on the keyfob,
the overhead console and the door pillar.
cIf the inside or outside handle is activated
while the cinching motor is engaged, the
cinching motor will disengage and release
the latch.
cThe keyfob button must be held for 0.5 sec-
ond before the door closes.
cThe switch on the door pillar can only be
used to close the door if the main ON/OFF
switch is ON.
Reverse:
The door will reverse direction immediately dur-
ing power open or power close if the keyfob,
overhead console or door pillar switch is
pressed. A chime will sound to announce the
reversal.
Auto Reverse:
If an obstacle is detected during power open or
power close, a warning chime will sound and the
door will reverse direction and return to the fullopen or full close position. If a second obstacle is
detected, the door motion will stop and the clutch
mode will be engaged.
WARNING
There are some small distances immedi-
ately before the closed position which
cannot be detected. Make sure that all
passengers have their hands, etc., inside
the vehicle before closing the door.
Clutch Mode:
To help prevent unexpected slams due to gravity,
the clutch mode is engaged intermittently for up
to 6 seconds when power open or close is inter-
rupted due to multiple obstacles, low battery
voltage or the main ON/OFF switch turned to
OFF. The door must then be opened or closed
manually.
Restarting the power sliding door
Some power sliding door functions will become
disabled after the battery terminal is discon-
nected and/or the electrical supply is interrupted.
The following procedure must be used to restart
the power sliding door so that all functions are
enabled.
1. Turn the main on/off switch to ON.2. If the power sliding door is open, press and
hold the power sliding door switch on the
overhead console until the door closes.
3. Release the switch.
4. Press and hold the power sliding door
switch on the overhead console until the
door opens as far as it can.
5. Release the switch.
6. Press and hold the power sliding door
switch on the overhead console until the
door closes.
7. Release the switch.
The power sliding door should now work prop-
erly.
NOTE:
The restarting procedure must be com-
pleted for both the left-hand and right-
hand power sliding doors (if so equipped) .
3-8Pre-driving checks and adjustments
ZREVIEW COPY:Ð2004 Quest(van)
Owners Manual(owners)ÐUSA English(nna)
10/08/03Ðtbrooks
X
Page 131 of 320

CHILD SAFETY SLIDING DOOR
LOCK
The child safety lock helps prevent the sliding
door from being opened accidentally, especially
when small children are in the vehicle.The child safety lock levers are located on the
edge of the sliding doors.
When the lever is in the lock position, the
door can be opened only from the outside,
by the overhead console switch or using
the keyfob.It is possible to lock/unlock all doors, turn on the
interior lights and puddle lamps (if so equipped) ,
and activate the panic alarm by using the keyfob
from outside the vehicle.
Some settings for the keyfob, such as horn beep
and unlock driver’s door 1st, can be adjusted.
Refer to “Personalized settings menu” (vehicles
without navigation) or “Vehicle electronic sys-
tems” (vehicles with navigation system) in the
“Display screen, heater, air conditioner and audio
systems” section later in this manual.
Be sure to remove the key from the vehicle
before locking the doors.
The keyfob can operate at a distance of approxi-
mately 33 ft (10 m) from the vehicle. The effective
distance depends upon the conditions around
the vehicle.
As many as 5 keyfobs can be used with one
vehicle. For information concerning the purchase
and use of additional keyfobs, contact a NISSAN
dealer.
The keyfob will not function when:
cthe battery is discharged
cthe distance between the vehicle and the
keyfob is over 33 ft (10 m)
The panic alarm will not activate when the
key is in the ignition switch.
LPD0231
REMOTE KEYLESS ENTRY SYSTEM
Pre-driving checks and adjustments3-9
ZREVIEW COPY:Ð2004 Quest(van)
Owners Manual(owners)ÐUSA English(nna)
10/08/03Ðtbrooks
X
Page 135 of 320

Using the interior lights
Push thebutton on the keyfob once to turn
on the interior lights and puddle lamps (if so
equipped) .
The interior lights and puddle lamps (if so
equipped) can be turned off without waiting 30
seconds by inserting the key into the ignition,
locking the doors with the keyfob or pushing the
interior light button to OFF.
BATTERY REPLACEMENT
Replace the battery in the keyfob as follows:
s1Open the lid using a coin.
s2Remove the battery.
s3Install a new battery with the “+” facing
down.
Recommended battery: Sanyo CR2025 or
equivalent.
s4Close the lid securely.
LPD0214
Pre-driving checks and adjustments3-13
ZREVIEW COPY:Ð2004 Quest(van)
Owners Manual(owners)ÐUSA English(nna)
10/08/03Ðtbrooks
X