check engine NISSAN QUEST 2005 V42 / 3.G Owner's Guide
[x] Cancel search | Manufacturer: NISSAN, Model Year: 2005, Model line: QUEST, Model: NISSAN QUEST 2005 V42 / 3.GPages: 328, PDF Size: 5.75 MB
Page 263 of 328
WARNING
cWhen the engine is running, keep
hands, jewelry and clothing away from
any moving parts such as the cooling
fan and drive belts.
cAutomatic transmission fluid is poison-
ous and should be stored carefully in
marked containers out of the reach of
children.
TEMPERATURE CONDITIONS FOR
CHECKING
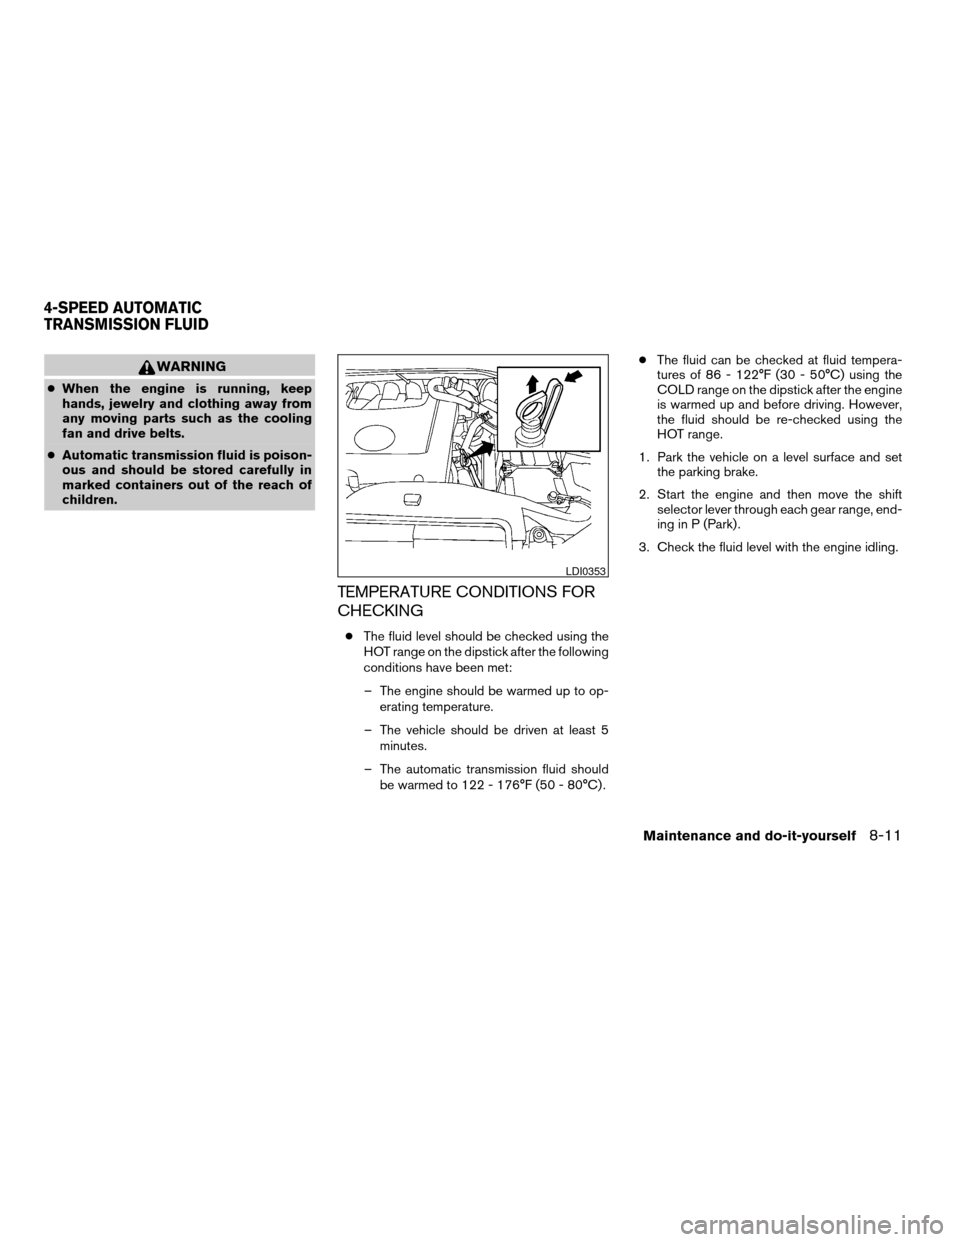
cThe fluid level should be checked using the
HOT range on the dipstick after the following
conditions have been met:
– The engine should be warmed up to op-
erating temperature.
– The vehicle should be driven at least 5
minutes.
– The automatic transmission fluid should
be warmed to 122 - 176°F (50 - 80°C) .cThe fluid can be checked at fluid tempera-
tures of 86 - 122°F (30 - 50°C) using the
COLD range on the dipstick after the engine
is warmed up and before driving. However,
the fluid should be re-checked using the
HOT range.
1. Park the vehicle on a level surface and set
the parking brake.
2. Start the engine and then move the shift
selector lever through each gear range, end-
ing in P (Park) .
3. Check the fluid level with the engine idling.
LDI0353
4-SPEED AUTOMATIC
TRANSMISSION FLUID
Maintenance and do-it-yourself8-11
ZREVIEW COPYÐ2005 Quest(van)
Owners ManualÐUSA_English(nna)
07/21/04Ðdebbie
X
Page 264 of 328
4. Remove the dipstick and wipe it clean with
lint-free paper.
5. Reinsert the dipstick into the dipstick tube
as far as it will go.
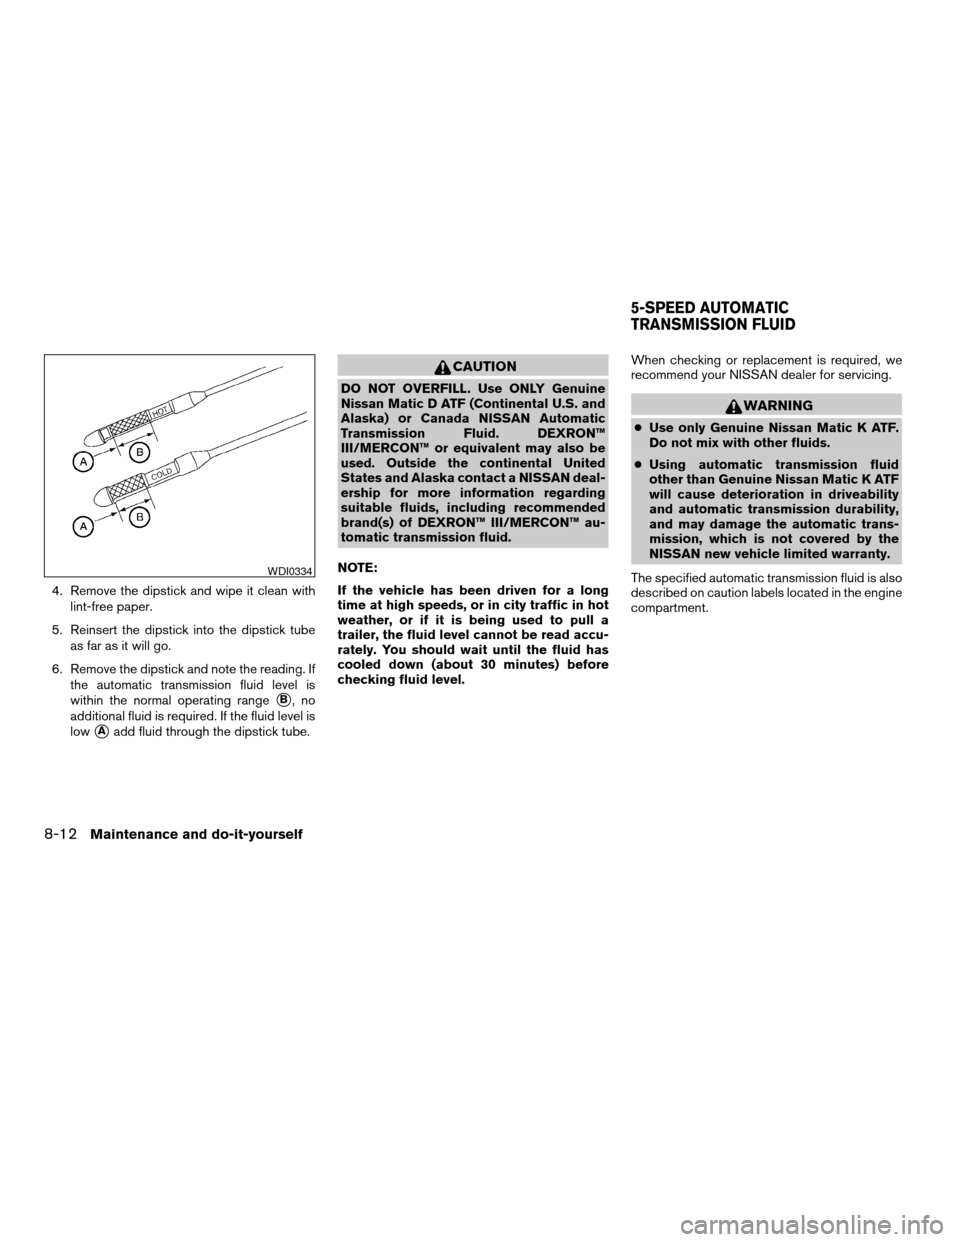
6. Remove the dipstick and note the reading. If
the automatic transmission fluid level is
within the normal operating range
sB,no
additional fluid is required. If the fluid level is
low
sAadd fluid through the dipstick tube.
CAUTION
DO NOT OVERFILL. Use ONLY Genuine
Nissan Matic D ATF (Continental U.S. and
Alaska) or Canada NISSAN Automatic
Transmission Fluid. DEXRON™
III/MERCON™ or equivalent may also be
used. Outside the continental United
States and Alaska contact a NISSAN deal-
ership for more information regarding
suitable fluids, including recommended
brand(s) of DEXRON™ III/MERCON™ au-
tomatic transmission fluid.
NOTE:
If the vehicle has been driven for a long
time at high speeds, or in city traffic in hot
weather, or if it is being used to pull a
trailer, the fluid level cannot be read accu-
rately. You should wait until the fluid has
cooled down (about 30 minutes) before
checking fluid level.When checking or replacement is required, we
recommend your NISSAN dealer for servicing.
WARNING
cUse only Genuine Nissan Matic K ATF.
Do not mix with other fluids.
cUsing automatic transmission fluid
other than Genuine Nissan Matic K ATF
will cause deterioration in driveability
and automatic transmission durability,
and may damage the automatic trans-
mission, which is not covered by the
NISSAN new vehicle limited warranty.
The specified automatic transmission fluid is also
described on caution labels located in the engine
compartment.
WDI0334
5-SPEED AUTOMATIC
TRANSMISSION FLUID
8-12Maintenance and do-it-yourself
ZREVIEW COPYÐ2005 Quest(van)
Owners ManualÐUSA_English(nna)
07/21/04Ðdebbie
X
Page 268 of 328
Vehicles operated in high temperatures or under
severe conditions require frequent checks of the
battery fluid level.
JUMP STARTING
If jump starting is necessary, see “Jump starting”
in the “In case of emergency” section of this
manual. If the engine does not start by jump
starting, the battery may have to be replaced.
Contact a NISSAN dealer.
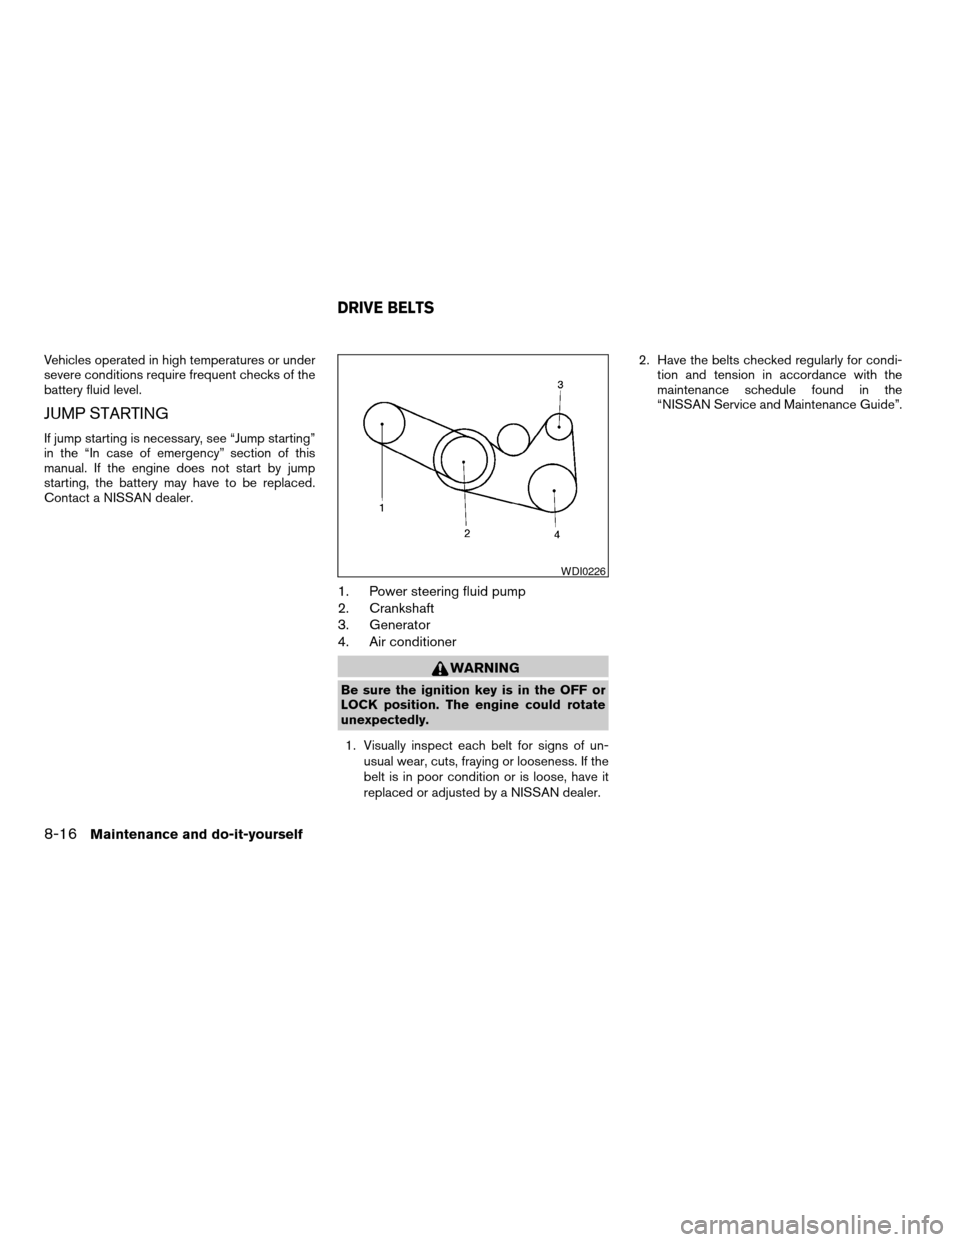
1. Power steering fluid pump
2. Crankshaft
3. Generator
4. Air conditioner
WARNING
Be sure the ignition key is in the OFF or
LOCK position. The engine could rotate
unexpectedly.
1. Visually inspect each belt for signs of un-
usual wear, cuts, fraying or looseness. If the
belt is in poor condition or is loose, have it
replaced or adjusted by a NISSAN dealer.2. Have the belts checked regularly for condi-
tion and tension in accordance with the
maintenance schedule found in the
“NISSAN Service and Maintenance Guide”.
WDI0226
DRIVE BELTS
8-16Maintenance and do-it-yourself
ZREVIEW COPYÐ2005 Quest(van)
Owners ManualÐUSA_English(nna)
07/21/04Ðdebbie
X
Page 274 of 328
CHECKING PARKING BRAKE
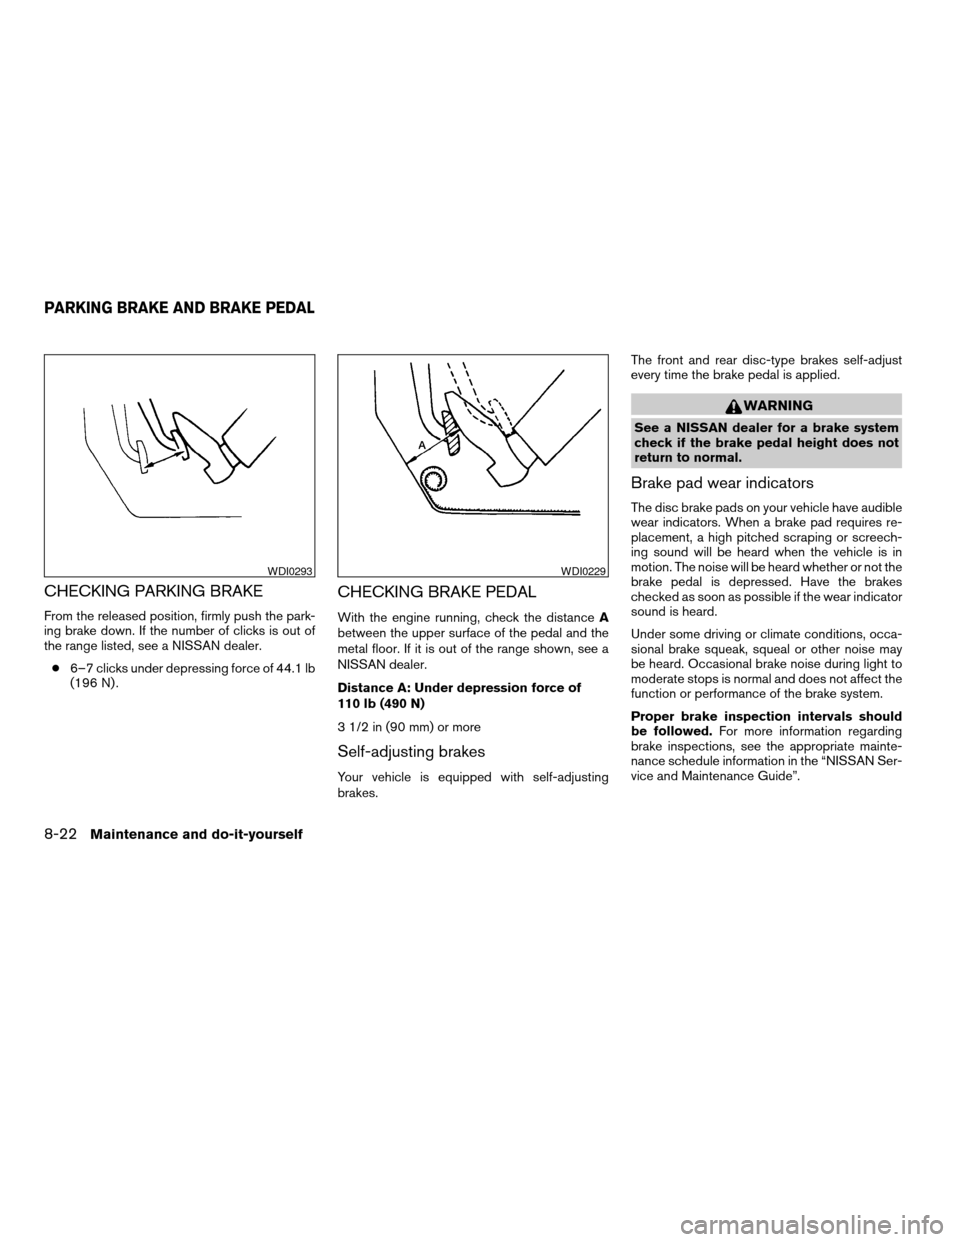
From the released position, firmly push the park-
ing brake down. If the number of clicks is out of
the range listed, see a NISSAN dealer.
c6–7 clicks under depressing force of 44.1 lb
(196 N) .
CHECKING BRAKE PEDAL
With the engine running, check the distanceA
between the upper surface of the pedal and the
metal floor. If it is out of the range shown, see a
NISSAN dealer.
Distance A: Under depression force of
110 lb (490 N)
3 1/2 in (90 mm) or more
Self-adjusting brakes
Your vehicle is equipped with self-adjusting
brakes.The front and rear disc-type brakes self-adjust
every time the brake pedal is applied.
WARNING
See a NISSAN dealer for a brake system
check if the brake pedal height does not
return to normal.
Brake pad wear indicators
The disc brake pads on your vehicle have audible
wear indicators. When a brake pad requires re-
placement, a high pitched scraping or screech-
ing sound will be heard when the vehicle is in
motion. The noise will be heard whether or not the
brake pedal is depressed. Have the brakes
checked as soon as possible if the wear indicator
sound is heard.
Under some driving or climate conditions, occa-
sional brake squeak, squeal or other noise may
be heard. Occasional brake noise during light to
moderate stops is normal and does not affect the
function or performance of the brake system.
Proper brake inspection intervals should
be followed.For more information regarding
brake inspections, see the appropriate mainte-
nance schedule information in the “NISSAN Ser-
vice and Maintenance Guide”.
WDI0293WDI0229
PARKING BRAKE AND BRAKE PEDAL
8-22Maintenance and do-it-yourself
ZREVIEW COPYÐ2005 Quest(van)
Owners ManualÐUSA_English(nna)
07/21/04Ðdebbie
X
Page 275 of 328
BRAKE BOOSTER
Check the brake booster function as follows:
1. With the engine off, press and release the
brake pedal several times. When brake
pedal movement (distance of travel) remains
the same from one pedal application to the
next, continue on to the next step.
2. While depressing the brake pedal, start the
engine. The pedal height should drop a little.
3. With the brake pedal depressed, stop the
engine. Keep the pedal depressed for about
30 seconds. The pedal height should not
change.
4. Run the engine for one minute without de-
pressing the brake pedal, then turn it off.
Depress the brake pedal several times. The
pedal travel distance will decrease gradually
with each depression as the vacuum is re-
leased from the booster.
If the brakes do not operate properly, have the
brakes checked by a NISSAN dealer.
ENGINE COMPARTMENT
CAUTION
Never use a fuse of a higher or lower
amperage rating than specified on the
fuse box cover. This could damage the
electrical system or cause a fire.
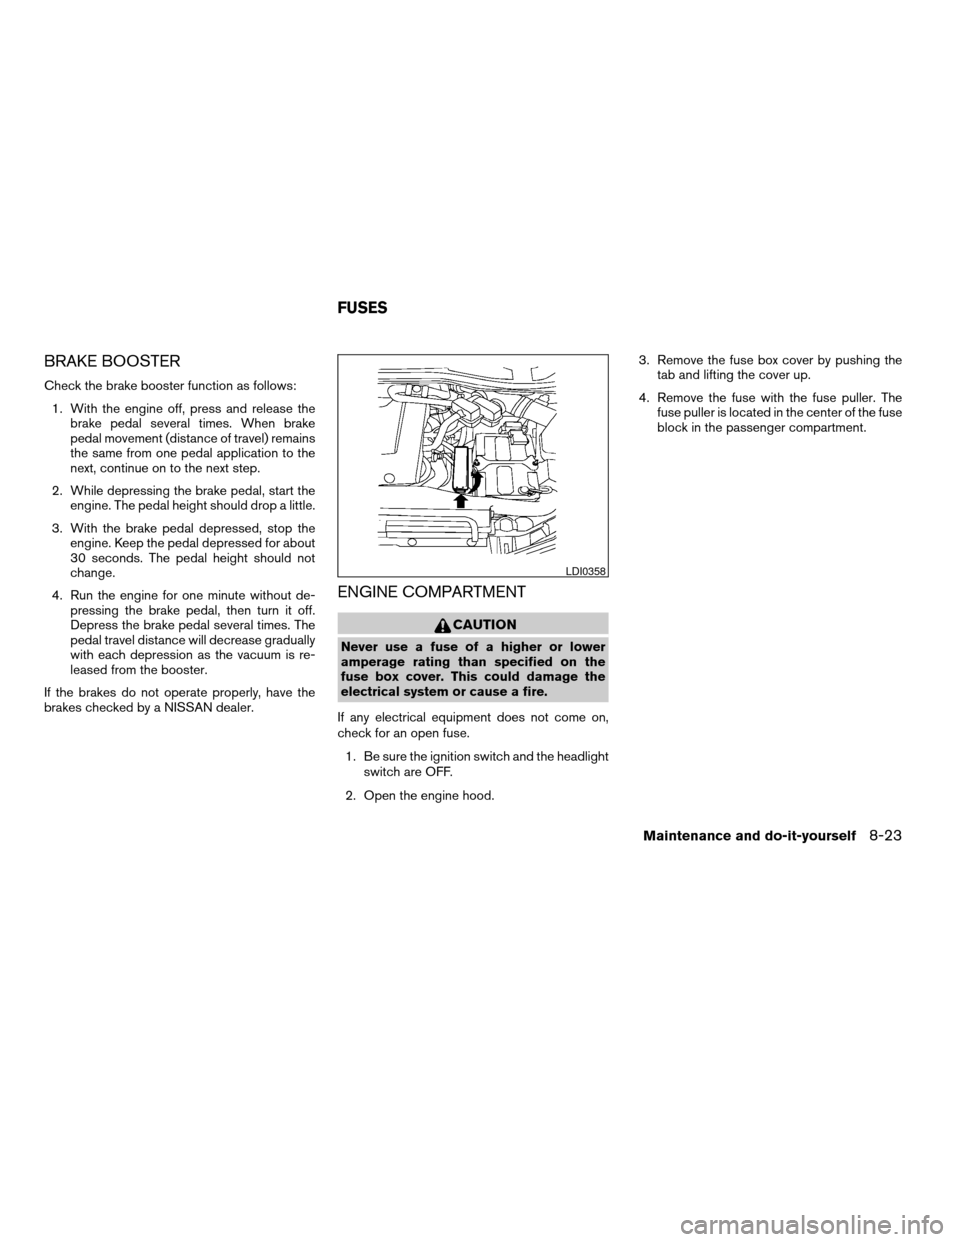
If any electrical equipment does not come on,
check for an open fuse.
1. Be sure the ignition switch and the headlight
switch are OFF.
2. Open the engine hood.3. Remove the fuse box cover by pushing the
tab and lifting the cover up.
4. Remove the fuse with the fuse puller. The
fuse puller is located in the center of the fuse
block in the passenger compartment.
LDI0358
FUSES
Maintenance and do-it-yourself8-23
ZREVIEW COPYÐ2005 Quest(van)
Owners ManualÐUSA_English(nna)
07/21/04Ðdebbie
X
Page 296 of 328

Aftermarket fuel additives
NISSAN does not recommend the use of any
aftermarket fuel additives (for example, fuel injec-
tor cleaner, octane booster, intake valve deposit
removers, etc.) which are sold commercially.
Many of these additives intended for gum, varnish
or deposit removal may contain active solvents or
similar ingredients that can be harmful to the fuel
system and engine.
Octane rating tips
Using unleaded gasoline with an octane
rating lower than recommended can cause
persistent, heavy “spark knock.” (“Spark
knock” is a metallic rapping noise.) If se-
vere, this can lead to engine damage. If you
detect a persistent heavy spark knock even
when using gasoline of the stated octane
rating, or if you hear steady spark knock
while holding a steady speed on level
roads, have a NISSAN dealer correct the
condition. Failure to correct the condition
is misuse of the vehicle, for which NISSAN
is not responsible.
Incorrect ignition timing may result in spark
knock, after-run and/or overheating, which may
cause excessive fuel consumption or enginedamage. If any of the above symptoms are en-
countered, have your vehicle checked at a
NISSAN dealer.
However, now and then you may notice
light spark knock for a short time while
accelerating or driving up hills. This is not a
cause for concern, because you get the
greatest fuel benefit when there is light
spark knock for a short time under heavy
engine load.
9-4Technical and consumer information
ZREVIEW COPYÐ2005 Quest(van)
Owners ManualÐUSA_English(nna)
07/21/04Ðdebbie
X
Page 309 of 328
Trailer lights should comply with federal and/or
local regulations. For assistance in hooking up
trailer lights, contact a NISSAN dealer or repu-
table trailer dealer. A genuine NISSAN trailer tow
harness is available from your NISSAN dealer.
Trailer brakes
If your trailer is equipped with a braking system,
make sure it conforms to federal and/or local
regulations and that it is properly installed.
WARNING
Never connect a trailer brake system di-
rectly to the vehicle brake system.
Pre-towing tips
cBe certain your vehicle maintains a level
position when a loaded and/or unloaded
trailer is hitched. Do not drive the vehicle if it
has an abnormal nose-up or nose-down
condition; check for improper tongue load,
overload, worn suspension or other possible
causes of either condition.
cAlways secure items in the trailer to prevent
load shift while driving.
cLoad the trailer so approximately 60% of the
trailer load is in the front half and 40% is in
the back half.cCheck your hitch, trailer tire pressure, ve-
hicle tire pressure, trailer light operation, and
trailer wheel lug nuts every time you attach a
trailer to the vehicle.
cBe certain your rearview mirrors conform to
all federal, state or local regulations. If not,
install any mirrors required for towing before
driving the vehicle.
Trailer towing tips
In order to gain skill and an understanding of the
vehicle’s behavior, you should practice turning,
stopping and backing up in an area which is free
from traffic. Steering stability and braking perfor-
mance will be somewhat different than under
normal driving conditions.
cAlways secure items in the trailer to prevent
load shift while driving.
cAvoid abrupt starts, acceleration or stops.
cAvoid sharp turns or lane changes.
cAlways drive your vehicle at a moderate
speed. Some states or provinces have spe-
cific speed limits for vehicles that are towing
trailers. Obey the local speed limits.
cWhen backing up, hold the bottom of the
steering wheel with one hand. Move your
hand in the direction in which you want the
trailer to go. Make small corrections andback up slowly. If possible, have someone
guide you when you are backing up.
cAlways block the wheels on both vehicle and
trailer when parking. Parking on a slope is
not recommended; however, if you must do
so, and if your vehicle is equipped with an
automatic transmission, first block the
wheels and apply the parking brake, and
then move the transmission shift selector
lever into the P (Park) position. If you move
the shift selector lever to the P (Park) posi-
tion before blocking the wheels and applying
the parking brake, transmission damage
could occur.
cWhen going down a hill, shift into a lower
gear and use the engine braking effect.
When going up a long grade, downshift the
transmission to a lower gear and reduce
speed to reduce chances of engine over-
loading and/or overheating.
cIf the engine coolant rises to an extremely
high temperature when the air conditioner
system is on, turn off the air conditioner.
Coolant heat can be additionally vented by
opening the windows, switching the fan
control to high and setting the temperature
control to the HOT position.
cTrailer towing requires more fuel than normal
circumstances.
Technical and consumer information9-17
ZREVIEW COPYÐ2005 Quest(van)
Owners ManualÐUSA_English(nna)
07/22/04Ðdebbie
X
Page 310 of 328
cAvoid towing a trailer for your vehicle’s first
500 miles (805 km) .
cFor the first 500 miles that you do tow, do
not drive over 50 MPH (80 km/h) .
cHave your vehicle serviced more often than
at intervals specified in the recommended
Maintenance Schedule in the “NISSAN Ser-
vice and Maintenance Guide”.
cWhen making a turn, your trailer wheels will
be closer to the inside of the turn than your
vehicle wheels. To compensate for this,
make a larger than normal turning radius
during the turn.
cCrosswinds and rough roads will adversely
affect vehicle/trailer handling, possibly caus-
ing vehicle sway. When being passed by
larger vehicles, be prepared for possible
changes in crosswinds that could affect ve-
hicle handling. If swaying does occur, firmly
grip the steering wheel, steer straight ahead,
and immediately (but gradually) reduce ve-
hicle speed. This combination will help sta-
bilize the vehicle. Never increase speed.
cBe careful when passing other vehicles.
Passing while towing a trailer requires con-
siderably more distance than normal pass-
ing. Remember, the length of the trailer mustalso pass the other vehicle before you can
safely change lanes.
cTo maintain engine braking efficiency and
electrical charging performance, do not use
5th gear (manual transmission) or overdrive
(automatic transmission) .
cAvoid holding the brake pedal down too long
or too frequently. This could cause the
brakes to overheat, resulting in reduced
braking efficiency.
cIncrease your following distance to allow for
greater stopping distances while towing a
trailer. Anticipate stops and brake gradually.
cDo not use cruise control while towing a
trailer.
cCheck your hitch, trailer wiring harness con-
nections, and trailer wheel lug nuts after 50
miles (80 km) of travel and at every break.
cWhen stopped in traffic for long periods of
time in hot weather, put the vehicle in the P
(Park) position.
When towing a trailer, transmission
oil/fluid should be changed more fre-
quently. For additional information, see the
“Maintenance and do-it-yourself” section
earlier in this manual.FLAT TOWING
Towing your vehicle with all four wheels on the
ground is sometimes called flat towing. This
method is sometimes used when towing a vehicle
behind a recreational vehicle, such as a motor
home.
CAUTION
cFailure to follow these guidelines can
result in severe transmission damage.
cWhenever flat towing your vehicle, al-
ways tow forward, never backward.
cDO NOT tow any automatic transmis-
sion vehicle with all four wheels on the
ground (flat towing) . Doing so WILL
DAMAGE internal transmission parts
due to lack of transmission lubrication.
cFor emergency towing procedures refer
to “Towing recommended by NISSAN”
in the “In case of emergency” section of
this manual.
Automatic Transmission
To tow a vehicle equipped with an automatic
transmission, an appropriate vehicle dollyMUST
be placed under the towed vehicle’s drive
wheels.Alwaysfollow the dolly manufacturer’s
recommendations when using their product.
9-18Technical and consumer information
ZREVIEW COPYÐ2005 Quest(van)
Owners ManualÐUSA_English(nna)
07/22/04Ðdebbie
X
Page 312 of 328

Your NISSAN vehicle is covered by the following
emission warranties:
For USA
1. Emission Defects Warranty
2. Emissions Performance Warranty
Details of these warranties may be found with
other vehicle warranties in your Warranty Infor-
mation Booklet which comes with your NISSAN
vehicle. If you did not receive a Warranty Informa-
tion Booklet, or it is lost, you may obtain a re-
placement by writing to:
cNissan North America, Inc.
Consumer Affairs Department
P.O. Box 191
Gardena, CA 90248-0191
For Canada
Emission Control System Warranty
Details of these warranties may be found with
other vehicle warranties in your Warranty Infor-
mation Booklet which comes with your NISSAN
vehicle. If you did not receive a Warranty Informa-
tion Booklet, or it is lost, you may obtain a re-
placement by writing to:
cNissan Canada Inc.
5290 Orbitor Drive
Mississauga, Ontario, L4W 4Z5If you believe that your vehicle has a de-
fect which could cause a crash or could
cause injury or death, you should immedi-
ately inform the National Highway Traffic
Safety Administration (NHTSA) in addi-
tion to notifying NISSAN.
If NHTSA receives similar complaints, it
may open an investigation, and if it finds
that a safety defect exists in a group of
vehicles, it may order a recall and remedy
campaign. However, NHTSA cannot be-
come involved in individual problems be-
tween you, your dealer, or NISSAN.
To contact NHTSA, you may call the Auto
Safety Hotline toll-free at 1-888-327-
4236. You may also write to: NHTSA,
U.S. Department of Transportation,
Washington, D.C. 20590. You can also
obtain other information about motor ve-
hicle safety from the Hotline.
You may notify NISSAN by contacting our
Consumer Affairs Department, toll-free, at
1-800-NISSAN-1.Due to legal requirements in some states and
Canadian Provinces, your vehicle may be re-
quired to be in what is called the “ready condi-
tion” for an Inspection/Maintenance (I/M) test of
the emission control system.
The vehicle is set to the “ready condition” when it
is driven through certain driving patterns. Usually,
the ready condition can be obtained by ordinary
usage of the vehicle.
If a powertrain system component is repaired or
the battery is disconnected, the vehicle may be
reset to a “not ready” condition. Before taking the
I/M test, check the vehicle’s
inspection/maintenance test readiness condi-
tion. Turn the ignition switch ON without starting
the engine. If the Malfunction Indicator Lamp
(MIL) comes on steady for 20 seconds and then
blinks for 10 seconds , the I/M test condition is
9not ready9. If the MIL does not blink after 20
seconds, the I/M test condition is9ready.9If the
MIL indicates the vehicle is in a9not ready9con-
dition, drive the vehicle through the following
pattern to set the vehicle to the ready condition. If
you cannot or do not want to perform the driving
pattern, a NISSAN dealer can conduct it for you.
EMISSION CONTROL SYSTEM
WARRANTYREPORTING SAFETY DEFECTS (US
only)READINESS FOR INSPECTION/
MAINTENANCE (I/M) TEST
9-20Technical and consumer information
ZREVIEW COPYÐ2005 Quest(van)
Owners ManualÐUSA_English(nna)
07/22/04Ðdebbie
X
Page 317 of 328

10 Index
A
Active head restraint...............1-8
Adjusting pedal position............3-20
Air bag
(See supplemental restraint
system).....................1-48
Air bag system
Front (See supplemental front impact
air bag system)...............1-55
Side and curtain (See supplemental side
air bag and curtain side-impact air bag
system)...................1-60
Air bag warning labels.............1-62
Air bag warning light...........1-63, 2-10
Air cleaner housing filter............8-17
Air conditioner
Air conditioner operation..........4-21
Air conditioner service...........4-31
Air conditioner specification label.....9-11
Air conditioner system refrigerant and
lubrication recommendations........9-6
Heater and air conditioner
controls................4-18, 4-28
Rear seat air conditioner..........4-30
Servicing air conditioner..........4-31
Air flow charts..................4-22
Alarm system
(See vehicle security system).........2-13
Anchor point locations.............1-39
Antenna.....................4-44Anti-lock brake system (ABS).........5-16
Anti-lock brake warning light..........2-7
Audible reminders................2-13
Audio system..................4-31
AM-FM-SAT radio with compact disc (CD)
changer...................4-35
AM-FM-SAT radio with compact disc (CD)
player....................4-35
Compact Disc (CD) changer.......4-39
Compact disc (CD) player.........4-38
Radio....................4-31
Rear audio controls.............4-43
Steering wheel audio control switch. . . .4-42
Autolight switch.................2-19
Automatic
Automatic drive positioner.........3-24
Automatic power window switch.....2-39
Automatic transmission fluid (ATF). . . .8-11
Automatic transmission position indicator
light.....................2-10
Driving with automatic transmission.....5-7
Transmission selector lever lock release . .5-9
Automatic anti-glare inside mirror.......3-22
B
Back door....................3-14
Back door release...............3-17
Battery......................8-14
Charge warning light.............2-8Battery replacement
(See remote keyless entry system)......8-25
Before starting the engine............5-6
Belts (See drive belts).............8-16
Bench seat adjustment (3rd row). . . .1-8, 1-12
Brake
Anti-lock brake system (ABS).......5-16
Brake booster................8-23
Brake fluid..................8-13
Brake light (See stop light).........8-27
Brake pedal.................8-22
Brake system................5-16
Brake warning light..............2-8
Brake wear indicators........2-13, 8-22
Parking brake check............8-22
Parking brake operation..........5-11
Self-adjusting brakes............8-22
Break-in schedule................5-13
Brightness control
Instrument panel..............2-21
Brightness/Contrast button........4-7, 4-17
Control panel buttons.........4-7, 4-17
Bulb check/instrument panel..........2-7
Bulb replacement................8-27
C
Capacities and recommended
fuel/lubricants...................9-2
Captain’s chair adjustment (2nd row)......1-6
Car phone or CB radio.............4-54
ZREVIEW COPYÐ2005 Quest(van)
Owners ManualÐUSA_English(nna)
08/04/04Ðtbrooks
X