turn signal NISSAN QUEST 2008 V42 / 3.G User Guide
[x] Cancel search | Manufacturer: NISSAN, Model Year: 2008, Model line: QUEST, Model: NISSAN QUEST 2008 V42 / 3.GPages: 376, PDF Size: 5.21 MB
Page 106 of 376

TURN SIGNAL SWITCH
Turn signal
s1Move the lever up or down to signal the
turning direction. When the turn is com-
pleted, the turn signals cancel automatically.
Lane change signal
s2To signal a lane change, move the lever up or
down to the point where the indicator light
begins to flash, but the lever does not latch.
FOG LIGHT SWITCH (if so equipped)
To turn the fog lights on, turn the headlight switch
to theposition, then turn the fog light
switch to theposition.
To turn the fog lights on with the headlight switch
in the AUTO position (if so equipped) , the head-
lights must be on, then turn the fog light switch to
the
position.
To turn the fog lights off, turn the fog light switch
to the OFF position.The headlights must be on and the low beams
selected for the fog lights to operate. The fog
lights automatically turn off when the high beam
headlights are selected.
LIC0563LIC0393
2-22Instruments and controls
ZREVIEW COPYÐ2008 Quest(van)
Owners ManualÐUSA_English(nna)
06/29/07Ðdebbie
X
Page 107 of 376

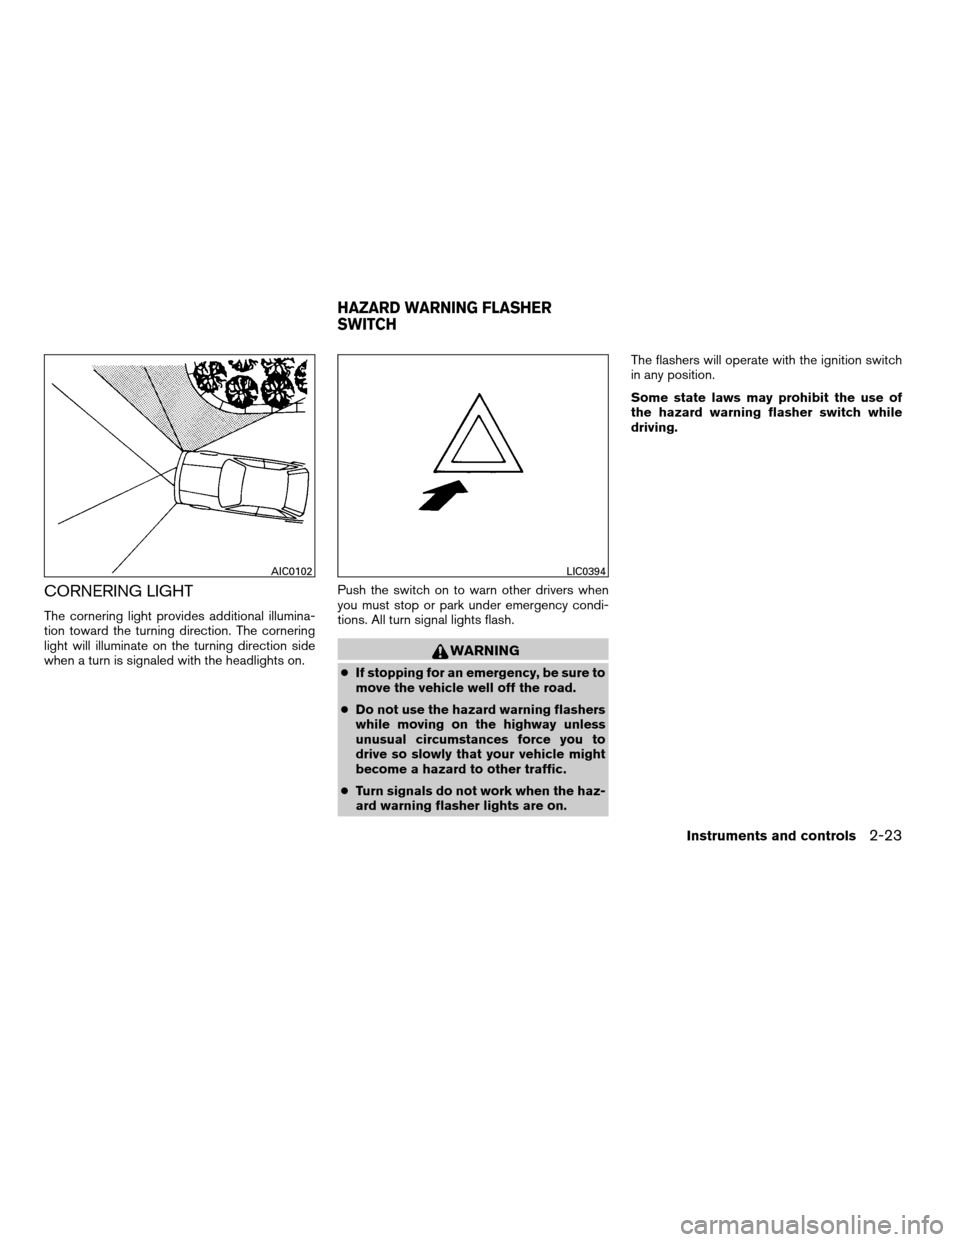
CORNERING LIGHT
The cornering light provides additional illumina-
tion toward the turning direction. The cornering
light will illuminate on the turning direction side
when a turn is signaled with the headlights on.Push the switch on to warn other drivers when
you must stop or park under emergency condi-
tions. All turn signal lights flash.
WARNING
cIf stopping for an emergency, be sure to
move the vehicle well off the road.
cDo not use the hazard warning flashers
while moving on the highway unless
unusual circumstances force you to
drive so slowly that your vehicle might
become a hazard to other traffic.
cTurn signals do not work when the haz-
ard warning flasher lights are on.The flashers will operate with the ignition switch
in any position.
Some state laws may prohibit the use of
the hazard warning flasher switch while
driving.
AIC0102LIC0394
HAZARD WARNING FLASHER
SWITCH
Instruments and controls2-23
ZREVIEW COPYÐ2008 Quest(van)
Owners ManualÐUSA_English(nna)
06/29/07Ðdebbie
X
Page 129 of 376

PROGRAMMING HOMELINKT
1. To begin, press and hold the two outer
HomeLinkTbuttons (to clear the memory)
until the indicator light
s1blinks (after 20
seconds) . Release both buttons.
2. Position the end of the hand-held transmitter
1 - 3 inches (26 - 76 mm) away from the
HomeLinkTsurface.3. Using both hands, simultaneously press and
hold both the HomeLinkTbutton you want to
program and the hand-held transmitter but-
ton.
DO NOT release the buttons until step 4 has
been completed.4. Hold down both buttons until the indicator
light on the HomeLinkTflashes, changing
from a “slow blink” to a “rapidly flashing
blink”. This could take up to 90 seconds.
When the indicator light flashes rapidly, both
buttons may be released. The rapidly flash-
ing light indicates successful programming.
To activate the garage door or other pro-
grammed device, press and hold the pro-
grammed HomeLinkTbutton — releasing
when the device begins to activate.
5. If the indicator light on the HomeLinkTblinks
rapidly for 2 seconds and then turns solid,
HomeLinkThas picked up a “rolling code”
garage door opener signal. You will need to
proceed with the next steps to train the
HomeLinkTto complete the programming
which may require a ladder and another per-
son for convenience.
6. Press and release the “smart” or “learn” pro-
gram button located on the garage door
opener’s motor to activate the “training
mode”. This button is usually located near
the antenna wire that hangs down from the
motor. If the wire originates from under a
light lens, you will need to remove the lens to
access the program button.
WIC0986WIC0987
Instruments and controls2-45
ZREVIEW COPYÐ2008 Quest(van)
Owners ManualÐUSA_English(nna)
06/29/07Ðdebbie
X
Page 205 of 376

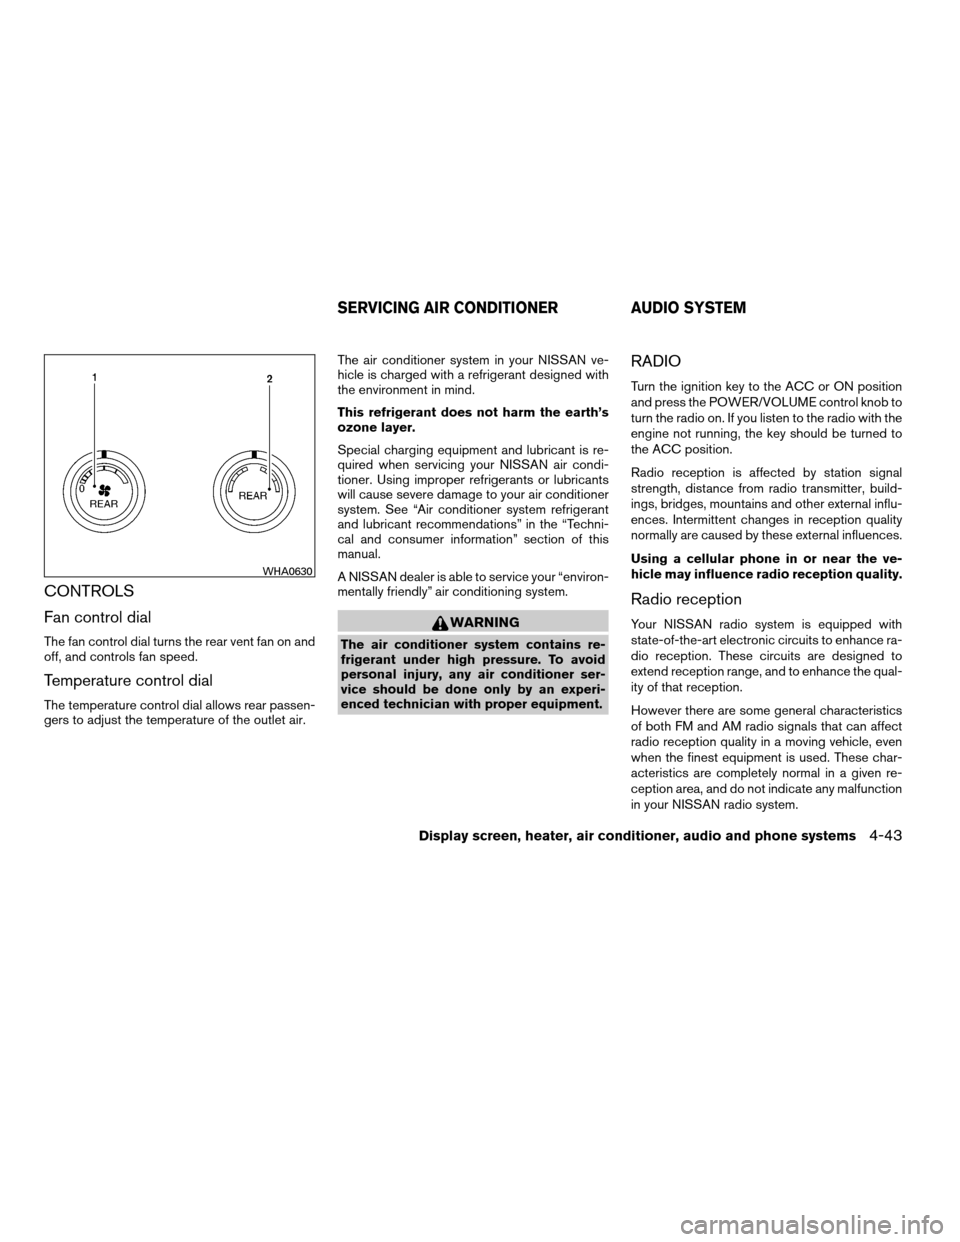
CONTROLS
Fan control dial
The fan control dial turns the rear vent fan on and
off, and controls fan speed.
Temperature control dial
The temperature control dial allows rear passen-
gers to adjust the temperature of the outlet air.The air conditioner system in your NISSAN ve-
hicle is charged with a refrigerant designed with
the environment in mind.
This refrigerant does not harm the earth’s
ozone layer.
Special charging equipment and lubricant is re-
quired when servicing your NISSAN air condi-
tioner. Using improper refrigerants or lubricants
will cause severe damage to your air conditioner
system. See “Air conditioner system refrigerant
and lubricant recommendations” in the “Techni-
cal and consumer information” section of this
manual.
A NISSAN dealer is able to service your “environ-
mentally friendly” air conditioning system.
WARNING
The air conditioner system contains re-
frigerant under high pressure. To avoid
personal injury, any air conditioner ser-
vice should be done only by an experi-
enced technician with proper equipment.
RADIO
Turn the ignition key to the ACC or ON position
and press the POWER/VOLUME control knob to
turn the radio on. If you listen to the radio with the
engine not running, the key should be turned to
the ACC position.
Radio reception is affected by station signal
strength, distance from radio transmitter, build-
ings, bridges, mountains and other external influ-
ences. Intermittent changes in reception quality
normally are caused by these external influences.
Using a cellular phone in or near the ve-
hicle may influence radio reception quality.
Radio reception
Your NISSAN radio system is equipped with
state-of-the-art electronic circuits to enhance ra-
dio reception. These circuits are designed to
extend reception range, and to enhance the qual-
ity of that reception.
However there are some general characteristics
of both FM and AM radio signals that can affect
radio reception quality in a moving vehicle, even
when the finest equipment is used. These char-
acteristics are completely normal in a given re-
ception area, and do not indicate any malfunction
in your NISSAN radio system.
WHA0630
SERVICING AIR CONDITIONER AUDIO SYSTEM
Display screen, heater, air conditioner, audio and phone systems4-43
ZREVIEW COPYÐ2008 Quest(van)
Owners ManualÐUSA_English(nna)
06/29/07Ðdebbie
X
Page 208 of 376

CHECK DISC:
cConfirm that the CD is inserted cor-
rectly (the label side is facing up,
etc.) .
cConfirm that the CD is not bent or
warped and it is free of scratches.
PRESS EJECT:
This is an error due to excessive tem-
perature inside the player. Remove the
CD by pressing the EJECT button. After
a short time, reinsert the CD. The CD
can be played when the temperature of
the player returns to normal.
UNPLAYABLE:
The file is unplayable in this audio sys-
tem (only MP3 CD) .
Compact Disc with MP3
Terms:
cMP3 — MP3 is short for Moving Pictures
Experts Group Audio Layer 3. MP3 is the
most well-known compressed digital audio
file format. This format allows for near “CD
quality” sound, but at a fraction of the size of
normal audio files. MP3 conversion of an
audio track from CD-ROM can reduce the
file size by approximately a 10:1 ratio withvirtually no perceptible loss in quality. MP3
compression removes the redundant and
irrelevant parts of a sound signal that the
human ear doesn’t hear.
cBit rate — Bit rate denotes the number of
bits per second used by a digital music file.
The size and quality of a compressed digital
audio file is determined by the bit rate used
when encoding the file.
cSampling frequency — Sampling frequency
is the rate at which the samples of a signal
are converted from analog to digital (A/D
conversion) per second.
cID3 tag — The ID3 tag is the part of the
encoded MP3 file that contains information
about the digital music file such as song title,
artist, album title, encoding bit rate, track
time duration, etc. ID3 tag information is
displayed on the Album/Artist/Track title line
on the display.
Playback order:
Playback order of the CD with compressed files
(MP3) is as illustrated.
cThe names of folders not containing MP3
files are not shown in the display.
Playback order chartWHA1090
4-46Display screen, heater, air conditioner, audio and phone systems
ZREVIEW COPYÐ2008 Quest(van)
Owners ManualÐUSA_English(nna)
06/29/07Ðdebbie
X
Page 214 of 376

To change the default display mode press the
AUDIO button to display mode and press the
TUNE button to select the following display
modes: Channel numberÃ!Channel name
Ã!NameÃ!Title. Once the display mode is
selected press the AUDIO button again to store
the setting. If the AUDIO button is not pressed
after 8 seconds the display will refresh with the
last selected display mode setting.
cChannel number mode displays the channel
number of the selected satellite radio sta-
tion.
cChannel name mode displays the channel
name of the selected satellite radio station.
cName mode displays the name of the artist,
host or weather condition of the selected
satellite radio station.
cTitle mode displays the song title, show
name, or temperature of the selected satel-
lite radio station.
FM/AM/SAT radio operation
FM/AM/SAT band select:
Pressing the FM·AM or SAT (satellite - if so
equipped) radio select button will change the
band as follows:
AMÃ!FM or SAT*When FM·AM or SAT* radio select button is
pressed while the ignition switch is in the ACC or
ON, the radio will come on at the station last
played.
The last station played will also come on when
the POWER/VOLUME control knob is pressed
ON.
*No satellite radio reception is available and “NO
SAT” is displayed when the SAT button is
pressed unless optional satellite receiver and
antenna are installed, and an XMTsatellite radio
service subscription is active. Satellite radio is
not available in Alaska, Hawaii and Guam.
If a compact disc is playing when the FM·AM or
SAT* radio select button is pressed, the compact
disc will automatically be turned off and the last
radio station played will come on.
The FM stereo indicator ST will glow during FM
stereo reception. When the stereo broadcast
signal is weak, the radio will automatically change
from stereo to monaural reception.
TUNE (Tuning):
To manually tune the radio, press the TUNE
button
or.
To move quickly through the channels, hold either
the
orbutton down for more than
1.5 seconds.
SEEK tuning:
Press the SEEK/TRACK button
orfor less than 1.5 seconds to tune from high to low
or low to high frequencies and stop at the next
broadcasting station.
SCAN RPT tuning:
Press the SCAN RPT button for more than 1.5
seconds to stop at each broadcasting station
(AM, FM or SAT if so equipped) for 5 seconds.
Pressing the button again during this 5 second
period will stop SCAN tuning and the radio will
remain tuned to that station. If the SCAN RPT
button is not pressed within 5 seconds, SCAN
tuning moves to the next station.
Station memory operations:
18 stations can be set for the FM, AM and SAT
radio to the A, B and C preset button in any
combination of AM, FM or SAT* stations.
1. Press the PRESET A·B·C button to change
between storage banks. The radio displays
the icon A, B or C to indicate which set of
presets are active.
2. Tune to the desired station using manual,
SEEK or SCAN tuning. Press and hold any
of the desired station memory buttons (1 –
6) until a beep sound is heard. (The radio
mutes when the select button is pressed) .
4-52Display screen, heater, air conditioner, audio and phone systems
ZREVIEW COPYÐ2008 Quest(van)
Owners ManualÐUSA_English(nna)
06/29/07Ðcathy
X
Page 220 of 376

Display satellite radio display mode (if so
equipped)
To change the text displayed when listening to
satellite radio (if so equipped) press the DISP
button. The DISP button will scroll through the
broadcast information as follows: NameÃ!
TitleÃ!Current display mode.
To change the default display mode press the
AUDIO button to display mode and press the
TUNE button to select the following display
modes: Channel numberÃ!Channel name
Ã!NameÃ!Title. Once the display mode is
selected press the AUDIO button again to store
the setting. If the AUDIO button is not pressed
after 8 seconds the display will refresh with the
last selected display mode setting.
cChannel number mode displays the channel
number of the selected satellite radio sta-
tion.
cChannel name mode displays the channel
name of the selected satellite radio station.
cName mode displays the name of the artist,
host or weather condition of the selected
satellite radio station.
cTitle mode displays the song title, show
name, or temperature of the selected satel-
lite radio station.FM/AM/SAT radio operation
FM/AM/SAT band select:
Pressing the FM·AM or SAT (satellite - if so
equipped) radio select button will change the
band as follows:
AMÃ!FM or SAT*
When FM·AM or SAT* radio select button is
pressed while the ignition switch is in the ACC or
ON, the radio will come on at the station last
played.
The last station played will also come on when
the POWER/VOLUME control knob is pressed
ON.
*No satellite radio reception is available and “NO
SAT” is displayed when the SAT button is
pressed unless optional satellite receiver and
antenna are installed, and an XMTsatellite radio
service subscription is active. Satellite radio is
not available in Alaska, Hawaii and Guam.
If a compact disc is playing when the FM·AM or
SAT* radio select button is pressed, the compact
disc will automatically be turned off and the last
radio station played will come on.
The FM stereo indicator ST will glow during FM
stereo reception. When the stereo broadcast
signal is weak, the radio will automatically change
from stereo to monaural reception.
TUNE (Tuning):
To manually tune the radio, press the
TUNE/FLDR·CAT button
or.
To move quickly through the channels, hold either
the
orbutton down for more than
1.5 seconds.
SEEK tuning:
Press the SEEK/TRACK button
orfor less than 1.5 seconds to tune from high to low
or low to high frequencies and stop at the next
broadcasting station.
SCAN RPT tuning (Type A only):
Press the SCAN RPT button for more than 1.5
seconds to stop at each broadcasting station
(AM, FM or SAT if so equipped) for 5 seconds.
Pressing the button again during this 5 second
period will stop SCAN tuning and the radio will
remain tuned to that station. If the SCAN RPT
button is not pressed within 5 seconds, SCAN
tuning moves to the next station.
SCAN tuning (Type B only):
Press the SCAN button for more than 1.5 sec-
onds to stop at each broadcasting station for 5
seconds. Pressing the button again during this 5
second period will stop SCAN tuning and the
radio will remain tuned to that station. If the
4-58Display screen, heater, air conditioner, audio and phone systems
ZREVIEW COPYÐ2008 Quest(van)
Owners ManualÐUSA_English(nna)
06/29/07Ðcathy
X
Page 238 of 376

Your NISSAN is equipped with the BluetoothT
Hands-Free Phone System. If you have an ap-
proved BluetoothTenabled cellular phone, you
can set up the wireless connection between your
cellular phone and the in-vehicle phone module.
With BluetoothTwireless technology, you canmake or receive a hands-free telephone call with
your cellular phone in the vehicle.
Once your cellular phone is paired to the in-
vehicle phone module, no other phone connect-
ing procedure is required. Your phone is auto-
matically connected with the in-vehicle phonemodule when the ignition switch is turned to the
ON position with the paired cellular phone turned
on and carried in the vehicle.
You can register up to 5 different BluetoothT
cellular phones to the in-vehicle phone module.
However, you can talk on only one cellular phone
at a time.
Before using the BluetoothTHands-Free Phone
System, refer to the following notes.
cSet up the wireless connection between a
cellular phone and the in-vehicle phone
module before using the hands-free phone
system.
cSome BluetoothTenabled cellular phones
may not be recognized by the in-vehicle
phone module. Please visit
www.nissanusa.com/bluetooth for a recom-
mended phone list and pairing.
cYou will not be able to use a hands-free
phone under the following conditions:
– Your vehicle is outside of the cellular ser-
vice area.
– Your vehicle is in an area where it is
difficult to receive a cellular signal; such
as in a tunnel, in an underground parking
garage, near a tall building or in a moun-
tainous area.
LHA0638
4-76Display screen, heater, air conditioner, audio and phone systems
ZREVIEW COPYÐ2008 Quest(van)
Owners ManualÐUSA_English(nna)
06/29/07Ðdebbie
X
Page 256 of 376

cThe low tire pressure warning light does not
automatically turn off when the tire pressure
is adjusted. After the tire is inflated to the
recommended pressure, the vehicle must be
driven at speeds above 16 MPH (25 km/h)
to activate the TPMS and turn off the low tire
pressure warning light. Use a tire pressure
gauge to check the tire pressure.
cTire pressure rises and falls depending on
the heat caused by the vehicle’s operation
and the outside temperature. Low outside
temperature can lower the temperature of
the air inside the tire which can cause a
lower tire inflation pressure. This may cause
the low tire pressure warning light to illumi-
nate. If the warning light illuminates in low
ambient temperature, check the tire pres-
sure for all four tires.
cYou can also check the pressure of all tires
(except the spare tire) on the display screen.
The order of the tire pressure figures dis-
played on the screen does not correspond
with the actual order of the tire position. See
“Tire pressure information” in the “Display
screen, heater, air conditioner and audio and
phone systems” section.For additional information, see “Low tire pressure
warning light” in the “Instruments and controls”
section and “Tire Pressure Monitoring System
(TPMS)” in the “In case of emergency” section.
WARNING
cIf the low tire pressure warning light
illuminates while driving, avoid sudden
steering maneuvers or abrupt braking,
reduce vehicle speed, pull off the road
to a safe location and stop the vehicle
as soon as possible. Driving with under-
inflated tires may permanently damage
the tires and increase the likelihood of
tire failure. Serious vehicle damage
could occur and may lead to an acci-
dent and could result in serious per-
sonal injury. Check the tire pressure for
all four tires. Adjust the tire pressure to
the recommended COLD tire pressure
shown on the Tire and Loading Informa-
tion label to turn the low tire pressure
warning light OFF. If you have a flat tire,
replace it with a spare tire as soon as
possible. (See “Flat tire” in the “In case
of emergency” section for changing a
flat tire.)cWhen a spare tire is mounted or a wheel
is replaced, tire pressure will not be
indicated, the TPMS will not function
and the low tire pressure warning light
will flash for approximately 1 minute.
The light will remain on after 1 minute.
Contact your NISSAN dealer as soon as
possible for tire replacement and/or
system resetting.
cReplacing tires with those not originally
specified by NISSAN could affect the
proper operation of the TPMS.
cDo not inject any tire liquid or aerosol
tire sealant into the tires, as this may
cause a malfunction of the tire pressure
sensors.
CAUTION
Do not place metalized film or any metal
parts (antenna, etc.) on the windows. This
may cause poor reception of the signals
from the tire pressure sensors, and the
TPMS will not function properly.
Some devices and transmitters may temporarily
interfere with the operation of the TPMS and
cause the low tire pressure warning light to illu-
minate.
5-4Starting and driving
ZREVIEW COPYÐ2008 Quest(van)
Owners ManualÐUSA_English(nna)
06/29/07Ðdebbie
X
Page 278 of 376

TIRE PRESSURE MONITORING
SYSTEM (TPMS)
This vehicle is equipped with the Tire Pressure
Monitoring System (TPMS) . It monitors tire pres-
sure of all tires except the spare. When the low
tire pressure warning light is lit, one or more of
your tires is significantly under-inflated. If
equipped, the system also displays pressure of
all tires (except the spare tire) on the display
screen by sending a signal from a sensor that is
installed in each wheel. If the vehicle is being
driven with low tire pressure, the TPMS will acti-
vate and warn you of it by the low tire pressure
warning light. This system will activate only when
the vehicle is driven at speeds above 16 MPH
(25 km/h) . For more details, refer to
“Warning/indicator lights and audible reminders”
in the “Instruments and controls” section, “Tire
pressure information” in the “Display screen,
heater, air conditioner and audio systems” sec-
tion and “Tire Pressure Monitoring System
(TPMS)” in the “Starting and driving” section.
WARNING
cIf the low tire pressure warning light
illuminates while driving, avoid sudden
steering maneuvers or abrupt braking,
reduce vehicle speed, pull off the road
to a safe location and stop the vehicle
as soon as possible. Driving with under-
inflated tires may permanently damage
the tires and increase the likelihood of
tire failure. Serious vehicle damage
could occur and may lead to an acci-
dent and could result in serious per-
sonal injury. Check the tire pressure for
all four tires. Adjust the tire pressure to
the recommended COLD tire pressure
shown on the Tire and Loading Informa-
tion label to turn the low tire pressure
warning light OFF. If you have a flat tire,
replace it with a spare tire as soon as
possible.
cWhen a spare tire is mounted or a wheel
is replaced, tire pressure will not be
indicated, the TPMS will not function
and the low tire pressure warning light
will flash for approximately 1 minute.
The light will remain on after 1 minute.
Contact your NISSAN dealer as soon as
possible for tire replacement and/or
system resetting.cReplacing tires with those not originally
specified by NISSAN could affect the
proper operation of the TPMS.
cDo not inject any tire liquid or aerosol
tire sealant into the tires, as this may
cause a malfunction of the tire pressure
sensors.
CHANGING A FLAT TIRE
If you have a flat tire, follow the instructions be-
low.
Stopping the vehicle
1. Safely move the vehicle off the road and
away from traffic.
2. Turn on the hazard warning flashers.
3. Park on a level surface and apply the parking
brake. Move the shift selector lever to P
(Park) .
4. Turn off the engine.
5. Raise the hood to warn other traffic and to
signal professional road assistance person-
nel that you need assistance.
6. Have all passengers get out of the vehicle
and stand in a safe place, away from traffic
and clear of the vehicle.
FLAT TIRE
6-2In case of emergency
ZREVIEW COPYÐ2008 Quest(van)
Owners ManualÐUSA_English(nna)
06/29/07Ðdebbie
X