lock NISSAN QUEST 2017 RE52 / 4.G Owner's Manual
[x] Cancel search | Manufacturer: NISSAN, Model Year: 2017, Model line: QUEST, Model: NISSAN QUEST 2017 RE52 / 4.GPages: 520, PDF Size: 2.5 MB
Page 61 of 520
1-42Safety — Seats, seat belts and supplemental restraint system
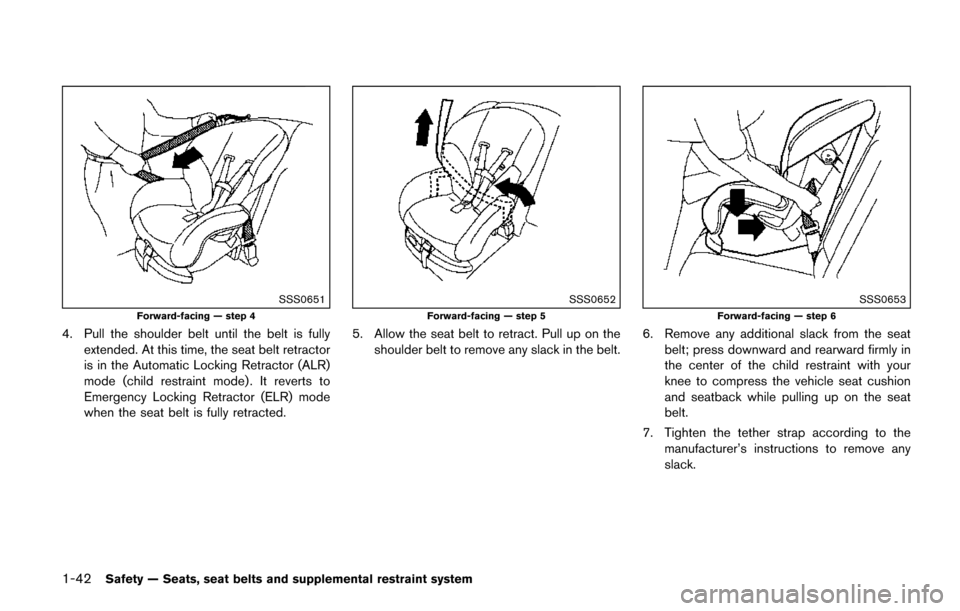
SSS0651
Forward-facing — step 4
4. Pull the shoulder belt until the belt is fullyextended. At this time, the seat belt retractor
is in the Automatic Locking Retractor (ALR)
mode (child restraint mode) . It reverts to
Emergency Locking Retractor (ELR) mode
when the seat belt is fully retracted.
SSS0652
Forward-facing — step 5
5. Allow the seat belt to retract. Pull up on theshoulder belt to remove any slack in the belt.
SSS0653
Forward-facing — step 6
6. Remove any additional slack from the seatbelt; press downward and rearward firmly in
the center of the child restraint with your
knee to compress the vehicle seat cushion
and seatback while pulling up on the seat
belt.
7. Tighten the tether strap according to the manufacturer’s instructions to remove any
slack.
Page 62 of 520
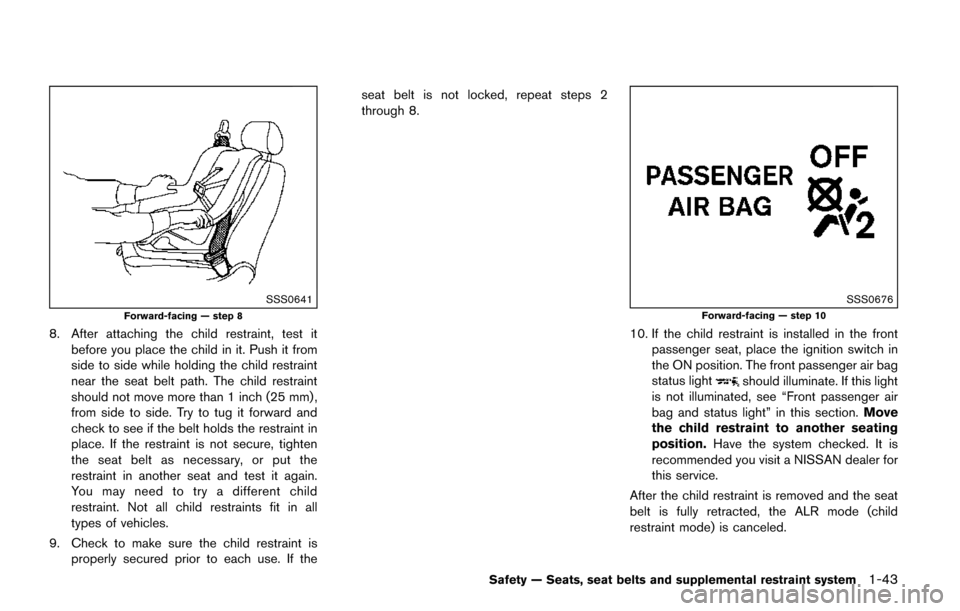
SSS0641
Forward-facing — step 8
8. After attaching the child restraint, test itbefore you place the child in it. Push it from
side to side while holding the child restraint
near the seat belt path. The child restraint
should not move more than 1 inch (25 mm) ,
from side to side. Try to tug it forward and
check to see if the belt holds the restraint in
place. If the restraint is not secure, tighten
the seat belt as necessary, or put the
restraint in another seat and test it again.
You may need to try a different child
restraint. Not all child restraints fit in all
types of vehicles.
9. Check to make sure the child restraint is properly secured prior to each use. If the seat belt is not locked, repeat steps 2
through 8.
SSS0676
Forward-facing — step 10
10. If the child restraint is installed in the front
passenger seat, place the ignition switch in
the ON position. The front passenger air bag
status light
should illuminate. If this light
is not illuminated, see “Front passenger air
bag and status light” in this section. Move
the child restraint to another seating
position. Have the system checked. It is
recommended you visit a NISSAN dealer for
this service.
After the child restraint is removed and the seat
belt is fully retracted, the ALR mode (child
restraint mode) is canceled.
Safety — Seats, seat belts and supplemental restraint system1-43
Page 65 of 520
1-46Safety — Seats, seat belts and supplemental restraint system
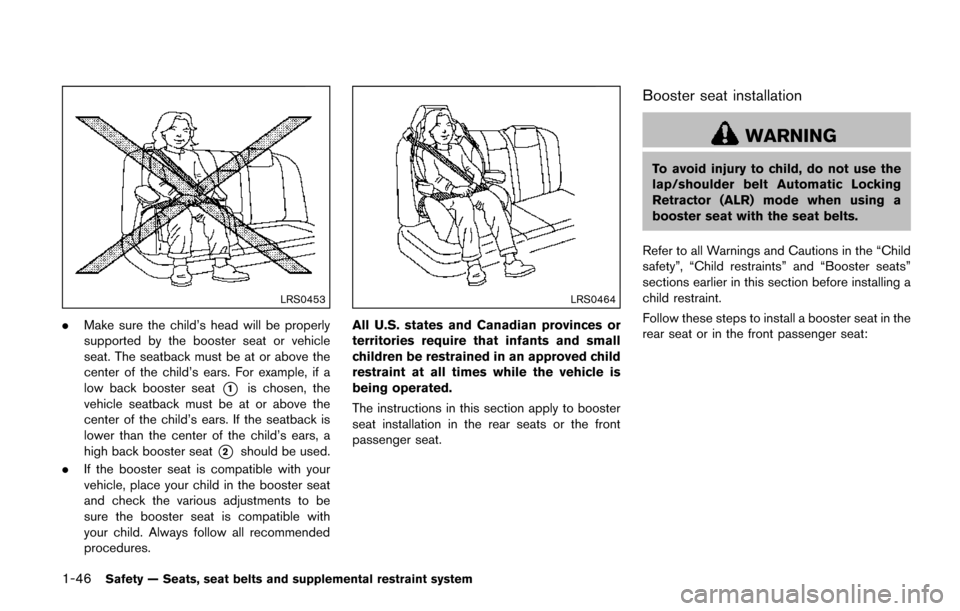
LRS0453
.Make sure the child’s head will be properly
supported by the booster seat or vehicle
seat. The seatback must be at or above the
center of the child’s ears. For example, if a
low back booster seat
*1is chosen, the
vehicle seatback must be at or above the
center of the child’s ears. If the seatback is
lower than the center of the child’s ears, a
high back booster seat
*2should be used.
. If the booster seat is compatible with your
vehicle, place your child in the booster seat
and check the various adjustments to be
sure the booster seat is compatible with
your child. Always follow all recommended
procedures.
LRS0464
All U.S. states and Canadian provinces or
territories require that infants and small
children be restrained in an approved child
restraint at all times while the vehicle is
being operated.
The instructions in this section apply to booster
seat installation in the rear seats or the front
passenger seat.
Booster seat installation
WARNING
To avoid injury to child, do not use the
lap/shoulder belt Automatic Locking
Retractor (ALR) mode when using a
booster seat with the seat belts.
Refer to all Warnings and Cautions in the “Child
safety”, “Child restraints” and “Booster seats”
sections earlier in this section before installing a
child restraint.
Follow these steps to install a booster seat in the
rear seat or in the front passenger seat:
Page 77 of 520
1-58Safety — Seats, seat belts and supplemental restraint system
Steps:
1. Adjust the seat as outlined. (See “Seats”(P.1-2) .) Sit upright, leaning against the
seatback, and centered on the seat cushion
with your feet comfortably extended to the
floor.
2. Make sure there are no objects on your lap.
3. Fasten the seat belt as outlined. (See “Seat belts” (P.1-15) .)
4. Remain in this position for 30 seconds allowing the system to classify the front
passenger before the vehicle is put into
motion.
5. Ensure proper classification by checking the front passenger air bag status light.
NOTE:
This vehicle’s occupant classification sen-
sor system locks the classification during
driving so it is important that you confirm
that the front passenger is properly classi-
fied prior to driving. Also, the occupant
classification sensor system may recalcu-
late the weight of the occupant when the
vehicle comes to a stop (i.e. stop light, stop
sign, etc.) , so the front passenger seat
occupant should continue to remain
seated as outlined above. Troubleshooting:
If you think the front passenger air bag status
light is incorrect:
1. If the light is ON with no front passenger and no
objects on the front passenger seat:
This may be due to the following conditions that
may be interfering with the weight sensors:
.An object weighing over 9.1 lbs. (4 kg)
hanging on the seat or placed in the
seatback pocket.
. A child restraint or other object pressing
against the rear of the seatback.
. A rear passenger pushing or pulling on the
back of the front passenger seat.
. Forcing the front seat or seatback against an
object on the seat or floor behind it.
. An object placed under the front passenger
seat.
. An object placed between the seat cushion
and center console or between the seat
cushion and the door.
If the vehicle is moving, please come to a stop
when it is safe to do so. Check and correct any
of the above conditions. Restart the vehicle and
wait 1 minute.
NOTE:
A system check will be performed during
which the front passenger air bag status light will remain lit for about 7 seconds
initially.
If the light is still ON after this, the vehicle should
be checked as soon as possible. It is recom-
mended you visit a NISSAN dealer for this
service.2. If the light is ON with an adult occupying the
front passenger seat:
.Occupant is a small adult — the front
passenger air bag status light is functioning
as intended. The front passenger air bag is
suppressed.
However, if the occupant is not a small adult,
then this may be due to the following conditions
that may be interfering with the weight sensors:
. Occupant is not sitting upright, leaning
against the seatback, and centered on the
seat cushion with his/her feet comfortably
extended to the floor.
. A child restraint or other object pressing
against the rear of the seatback.
. A rear passenger pushing or pulling on the
back of the front passenger seat.
. Forcing the front seat or seatback against an
object on the seat or floor behind it.
. An object placed under the front passenger
seat.
Page 83 of 520
1-64Safety — Seats, seat belts and supplemental restraint system
SPA1097
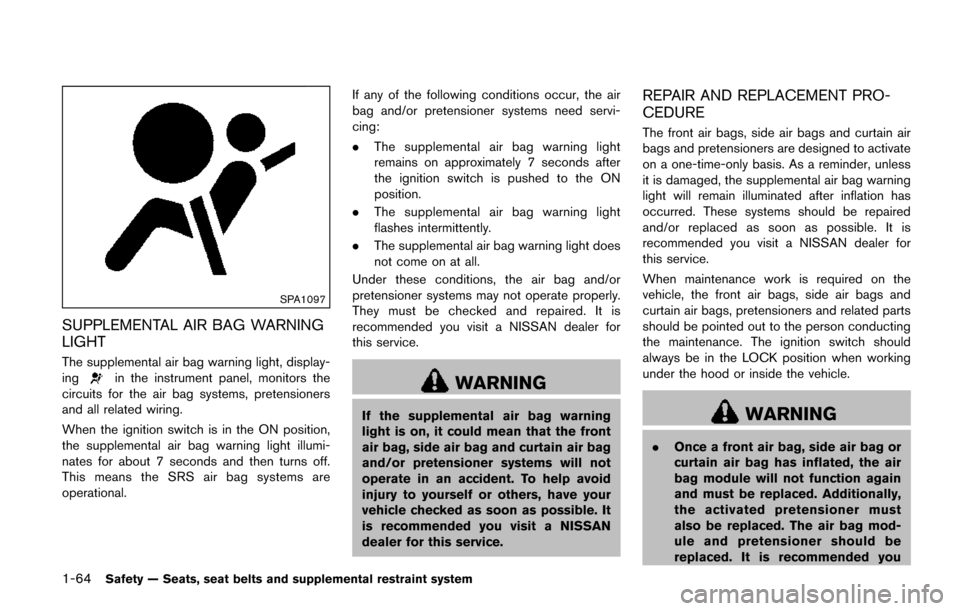
SUPPLEMENTAL AIR BAG WARNING
LIGHT
The supplemental air bag warning light, display-
ingin the instrument panel, monitors the
circuits for the air bag systems, pretensioners
and all related wiring.
When the ignition switch is in the ON position,
the supplemental air bag warning light illumi-
nates for about 7 seconds and then turns off.
This means the SRS air bag systems are
operational. If any of the following conditions occur, the air
bag and/or pretensioner systems need servi-
cing:
.
The supplemental air bag warning light
remains on approximately 7 seconds after
the ignition switch is pushed to the ON
position.
. The supplemental air bag warning light
flashes intermittently.
. The supplemental air bag warning light does
not come on at all.
Under these conditions, the air bag and/or
pretensioner systems may not operate properly.
They must be checked and repaired. It is
recommended you visit a NISSAN dealer for
this service.WARNING
If the supplemental air bag warning
light is on, it could mean that the front
air bag, side air bag and curtain air bag
and/or pretensioner systems will not
operate in an accident. To help avoid
injury to yourself or others, have your
vehicle checked as soon as possible. It
is recommended you visit a NISSAN
dealer for this service.
REPAIR AND REPLACEMENT PRO-
CEDURE
The front air bags, side air bags and curtain air
bags and pretensioners are designed to activate
on a one-time-only basis. As a reminder, unless
it is damaged, the supplemental air bag warning
light will remain illuminated after inflation has
occurred. These systems should be repaired
and/or replaced as soon as possible. It is
recommended you visit a NISSAN dealer for
this service.
When maintenance work is required on the
vehicle, the front air bags, side air bags and
curtain air bags, pretensioners and related parts
should be pointed out to the person conducting
the maintenance. The ignition switch should
always be in the LOCK position when working
under the hood or inside the vehicle.
WARNING
. Once a front air bag, side air bag or
curtain air bag has inflated, the air
bag module will not function again
and must be replaced. Additionally,
the activated pretensioner must
also be replaced. The air bag mod-
ule and pretensioner should be
replaced. It is recommended you
Page 98 of 520
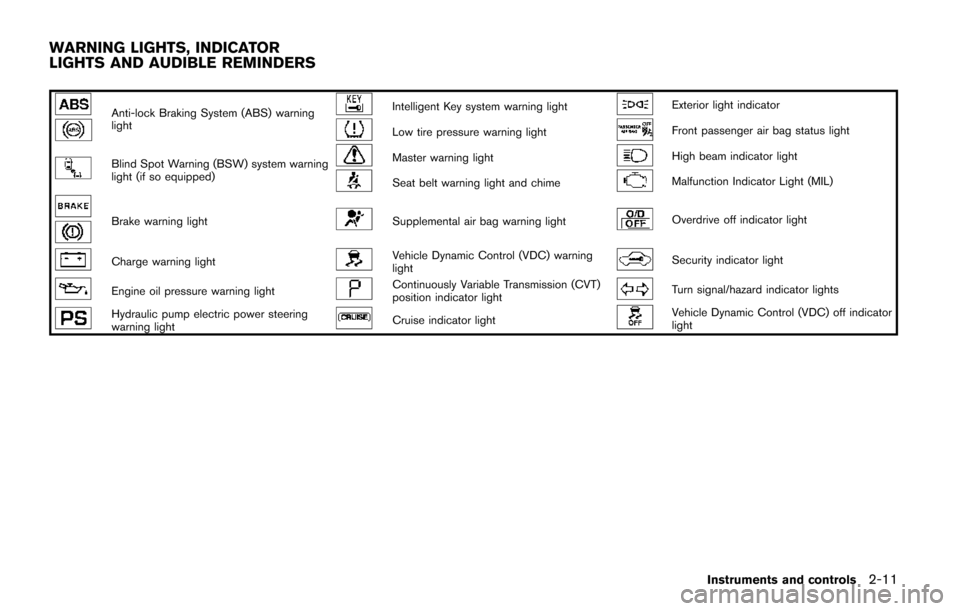
Anti-lock Braking System (ABS) warning
lightIntelligent Key system warning lightExterior light indicator
Low tire pressure warning lightFront passenger air bag status light
Blind Spot Warning (BSW) system warning
light (if so equipped)Master warning lightHigh beam indicator light
Seat belt warning light and chimeMalfunction Indicator Light (MIL)
Brake warning lightSupplemental air bag warning lightOverdrive off indicator light
Charge warning lightVehicle Dynamic Control (VDC) warning
lightSecurity indicator light
Engine oil pressure warning lightContinuously Variable Transmission (CVT)
position indicator lightTurn signal/hazard indicator lights
Hydraulic pump electric power steering
warning lightCruise indicator lightVehicle Dynamic Control (VDC) off indicator
light
Instruments and controls2-11
WARNING LIGHTS, INDICATOR
LIGHTS AND AUDIBLE REMINDERS
Page 99 of 520
2-12Instruments and controls
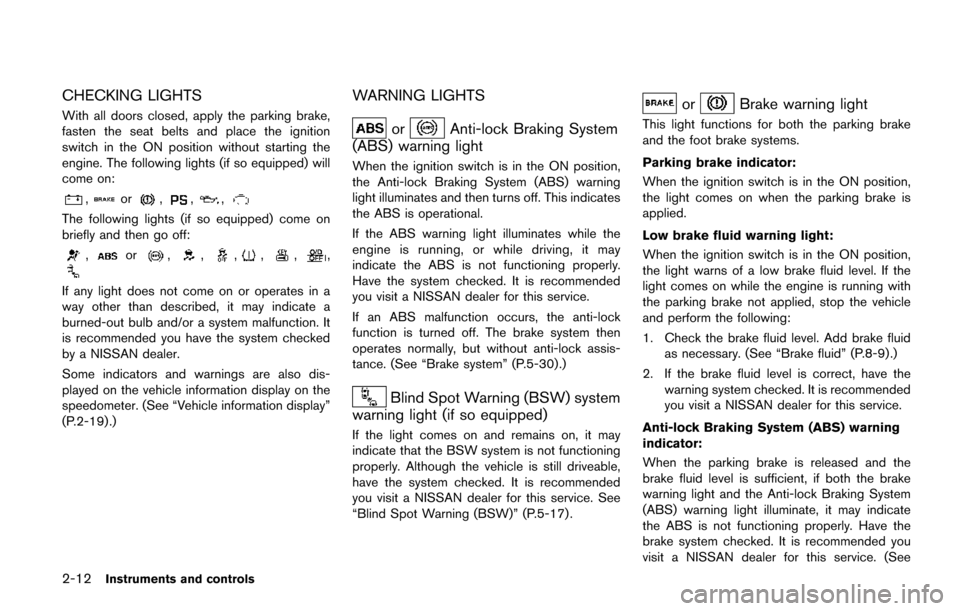
CHECKING LIGHTS
With all doors closed, apply the parking brake,
fasten the seat belts and place the ignition
switch in the ON position without starting the
engine. The following lights (if so equipped) will
come on:
,or,,,
The following lights (if so equipped) come on
briefly and then go off:
,or,,,,,,
If any light does not come on or operates in a
way other than described, it may indicate a
burned-out bulb and/or a system malfunction. It
is recommended you have the system checked
by a NISSAN dealer.
Some indicators and warnings are also dis-
played on the vehicle information display on the
speedometer. (See “Vehicle information display”
(P.2-19) .)
WARNING LIGHTS
orAnti-lock Braking System
(ABS) warning light
When the ignition switch is in the ON position,
the Anti-lock Braking System (ABS) warning
light illuminates and then turns off. This indicates
the ABS is operational.
If the ABS warning light illuminates while the
engine is running, or while driving, it may
indicate the ABS is not functioning properly.
Have the system checked. It is recommended
you visit a NISSAN dealer for this service.
If an ABS malfunction occurs, the anti-lock
function is turned off. The brake system then
operates normally, but without anti-lock assis-
tance. (See “Brake system” (P.5-30).)
Blind Spot Warning (BSW) system
warning light (if so equipped)
If the light comes on and remains on, it may
indicate that the BSW system is not functioning
properly. Although the vehicle is still driveable,
have the system checked. It is recommended
you visit a NISSAN dealer for this service. See
“Blind Spot Warning (BSW)” (P.5-17) .
orBrake warning light
This light functions for both the parking brake
and the foot brake systems.
Parking brake indicator:
When the ignition switch is in the ON position,
the light comes on when the parking brake is
applied.
Low brake fluid warning light:
When the ignition switch is in the ON position,
the light warns of a low brake fluid level. If the
light comes on while the engine is running with
the parking brake not applied, stop the vehicle
and perform the following:
1. Check the brake fluid level. Add brake fluid
as necessary. (See “Brake fluid” (P.8-9) .)
2. If the brake fluid level is correct, have the warning system checked. It is recommended
you visit a NISSAN dealer for this service.
Anti-lock Braking System (ABS) warning
indicator:
When the parking brake is released and the
brake fluid level is sufficient, if both the brake
warning light and the Anti-lock Braking System
(ABS) warning light illuminate, it may indicate
the ABS is not functioning properly. Have the
brake system checked. It is recommended you
visit a NISSAN dealer for this service. (See
Page 100 of 520
“Anti-lock Braking System (ABS) warning light”
(P.2-12) .)
WARNING
.Your brake system may not be
working properly if the warning light
is on. Driving could be dangerous. If
you judge it to be safe, drive care-
fully to the nearest service station
for repairs. Otherwise, have your
vehicle towed because driving it
could be dangerous.
. Pressing the brake pedal with the
engine stopped and/or low brake
fluid level may increase your stop-
ping distance and braking will re-
quire greater pedal effort as well as
pedal travel.
. If the brake fluid level is below the
minimum or MIN mark on the brake
fluid reservoir, do not drive until the
brake system has been checked. It
is recommended you visit a NISSAN
dealer for this service.
Charge warning light
If the light comes on while the engine is running,
it may indicate the charging system is not
functioning properly. Turn the engine off and
check the alternator belt. If the belt is loose,
broken, missing or if the light remains on, have
your vehicle serviced immediately. It is recom-
mended you visit a NISSAN dealer for this
service.
CAUTION
Do not continue driving if the alternator
belt is loose, broken or missing.
Engine oil pressure warning light
This light warns of low engine oil pressure. If the
light flickers or comes on during normal driving,
pull off the road in a safe area, stop the engine
immediately and call a NISSAN dealer or other
authorized repair shop.
The engine oil pressure warning light is
not designed to indicate a low oil level.
Use the dipstick to check the oil level. (See
“Engine oil” (P.8-5).)
CAUTION
Running the engine with the engine oil
pressure warning light on could cause
serious damage to the engine almost
immediately. Such damage is not cov-
ered by warranty. Turn off the engine as
soon as it is safe to do so.
Hydraulic pump electric power
steering warning light
When the ignition switch is in the ON position,
the hydraulic pump electric power steering
warning light illuminates. After starting the
engine, the hydraulic pump electric power
steering warning light turns off. This indicates
that the electric power steering is operational.
If the hydraulic pump electric power steering
warning light illuminates while the engine is
running, it may indicate the hydraulic pump
electric power steering is not functioning prop-
erly and may need servicing. It is recommended
you have the hydraulic pump electric power
steering checked by a NISSAN dealer. (See
“Hydraulic pump electric power steering” (P.5-
30) .)
Instruments and controls2-13
Page 105 of 520
2-18Instruments and controls
CAUTION
Continued vehicle operation without
having the emission control system
and/or CVT system checked and re-
paired as necessary could lead to poor
driveability, reduced fuel economy, and
possible damage to the emission con-
trol system.
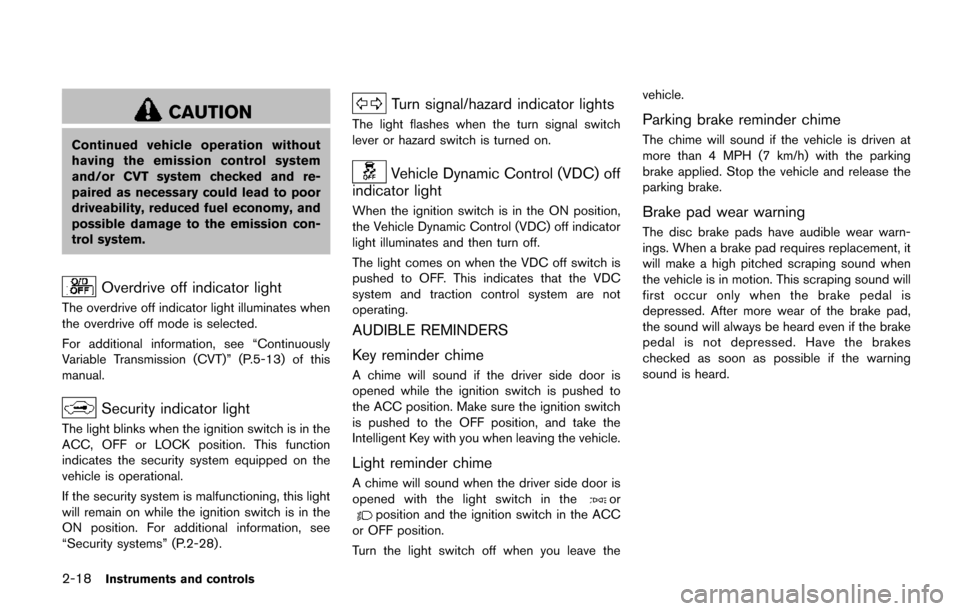
Overdrive off indicator light
The overdrive off indicator light illuminates when
the overdrive off mode is selected.
For additional information, see “Continuously
Variable Transmission (CVT)” (P.5-13) of this
manual.
Security indicator light
The light blinks when the ignition switch is in the
ACC, OFF or LOCK position. This function
indicates the security system equipped on the
vehicle is operational.
If the security system is malfunctioning, this light
will remain on while the ignition switch is in the
ON position. For additional information, see
“Security systems” (P.2-28) .
Turn signal/hazard indicator lights
The light flashes when the turn signal switch
lever or hazard switch is turned on.
Vehicle Dynamic Control (VDC) off
indicator light
When the ignition switch is in the ON position,
the Vehicle Dynamic Control (VDC) off indicator
light illuminates and then turn off.
The light comes on when the VDC off switch is
pushed to OFF. This indicates that the VDC
system and traction control system are not
operating.
AUDIBLE REMINDERS
Key reminder chime
A chime will sound if the driver side door is
opened while the ignition switch is pushed to
the ACC position. Make sure the ignition switch
is pushed to the OFF position, and take the
Intelligent Key with you when leaving the vehicle.
Light reminder chime
A chime will sound when the driver side door is
opened with the light switch in theorposition and the ignition switch in the ACC
or OFF position.
Turn the light switch off when you leave the vehicle.
Parking brake reminder chime
The chime will sound if the vehicle is driven at
more than 4 MPH (7 km/h) with the parking
brake applied. Stop the vehicle and release the
parking brake.
Brake pad wear warning
The disc brake pads have audible wear warn-
ings. When a brake pad requires replacement, it
will make a high pitched scraping sound when
the vehicle is in motion. This scraping sound will
first occur only when the brake pedal is
depressed. After more wear of the brake pad,
the sound will always be heard even if the brake
pedal is not depressed. Have the brakes
checked as soon as possible if the warning
sound is heard.
Page 108 of 520
OPERATIONAL INDICATORS
1. Engine start operation indicator
This indicator appears when the shift lever is in
the P (Park) position.
This indicator means that the engine will start by
pushing the ignition switch with the brake pedal
depressed.
You can start the engine directly in any position.
2. NO KEY warning
This warning appears in either of the following
conditions.
No key inside the vehicle:
The warning appears when the door is closed
with the Intelligent Key left outside the vehicle
and the ignition switch in the ACC or ON
position. Make sure that the Intelligent Key is
inside the vehicle.
Unregistered key:
The warning appears when the ignition switch is
pushed from the LOCK position and the key
cannot be recognized by the system. You cannot
start the engine with an unregistered key. Use
the registered key.
See “Intelligent Key system” (P.3-13) for more
details.
3. SHIFT “P” warning
This warning appears when the ignition switch is
pushed to stop the engine with the shift lever in
any position except the P (Park) position.
If this warning appears, move the shift lever to
the P (Park) position or push the ignition switch
to the ON position.
An inside warning chime will also sound. (See
“Intelligent Key system” (P.3-13) .)
4. “PUSH” warning
This warning appears when the shift lever is
moved to the P (Park) position with the ignition
switch in the ACC position after the SHIFT “P”
warning appears.
To push the ignition switch to the OFF position,
perform the following procedure:
SHIFT “P” warning?(Move the shift lever to
“P”) ?PUSH warning ?(Push the ignition
switch ?ignition switch position is turned to
ON) ?PUSH warning ?(Push the ignition
switch ?ignition switch position is turned to
OFF)
5. Key battery discharge indicator
This indicator appears when the key battery is
running out of power.
If this indicator appears, replace the battery with
a new one. (See “Intelligent Key battery replace-
ment” (P.8-20) .)
6. Engine start operation for Intelligent
Key system indicator
This indicator appears when the Intelligent Key
battery is running out of power and when the
Intelligent Key System and vehicle are not
communicating normally.
If this indicator appears, touch the ignition
switch with the Intelligent Key while depressing
the brake pedal. (See “Intelligent Key battery
discharge” (P.5-11).)
7. Parking brake release warning
This warning appears when the vehicle speed is
above 4 MPH (7 km/h) and the parking brake is
applied. Stop the vehicle and release the
parking brake.
Instruments and controls2-21