buttons NISSAN QUEST 2017 RE52 / 4.G Quick Reference Guide
[x] Cancel search | Manufacturer: NISSAN, Model Year: 2017, Model line: QUEST, Model: NISSAN QUEST 2017 RE52 / 4.GPages: 32, PDF Size: 2.01 MB
Page 18 of 32

16
HEATER AND AIR CONDITIONER (automatic) (if so equipped)
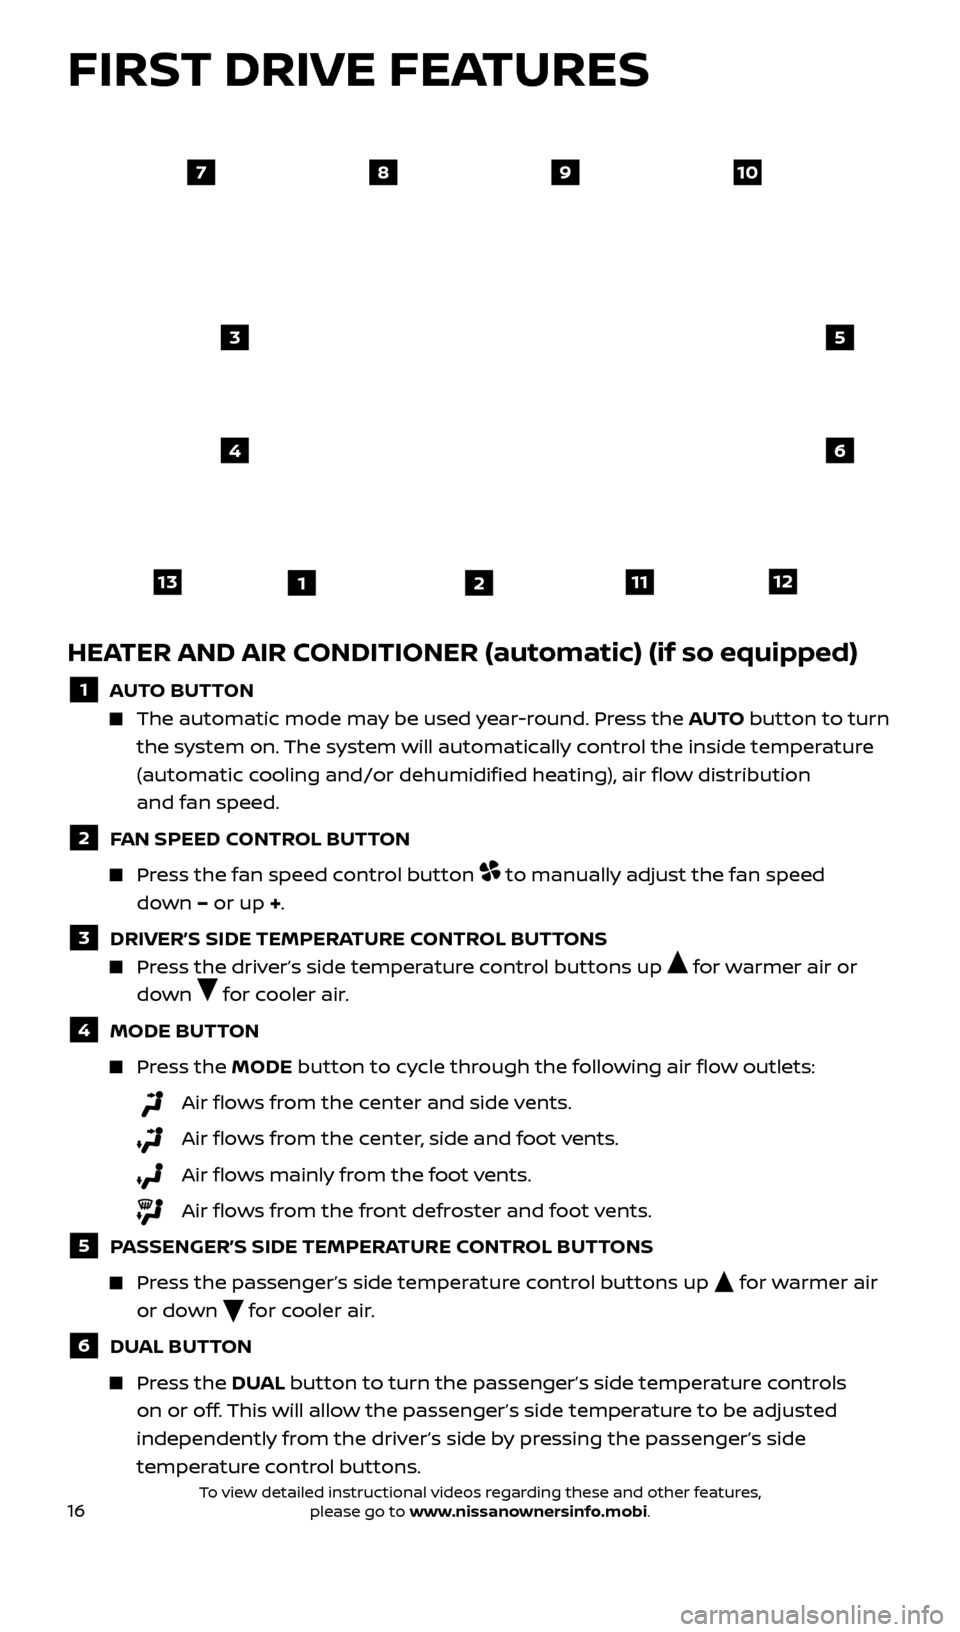
1 AUTO BUTTON
The automatic mode may be used year-round. Press the AUTO button to turn
the system on. The system will automatically control the inside temperature
(automatic cooling and/or dehumidified heating), air flow distribution
and fan speed.
2 FAN SPEED CONTROL BUTTON
Press the fan speed control button to manually adjust the fan speed
down – or up +.
3 DRIVER’S SIDE TEMPERATURE CONTROL BUTTONS
Press the driver’s side temperature control buttons up for warmer air or
down
for cooler air.
4 MODE BUT TON
Press the MODE button to cycle through the following air flow outlets:
Air flows from the center and side vents.
Air flo ws from the center, side and foot vents.
Air flo ws mainly from the foot vents.
Air flo ws from the front defroster and foot vents.
5 PASSENGER’S SIDE TEMPERATURE CONTROL BUTTONS
Press the passenger’s side temperature control buttons up for warmer air
or down
for cooler air.
6 DUAL BUTTON
Press the DU AL button to turn the passenger’s side temperature controls
on or off. This will allow the passenger’s side temperature to be adjusted
independently from the driver’s side by pressing the passenger’s side
temperature control buttons.
97810
3
4
5
6
11311122
FIRST DRIVE FEATURES
2512696_17a_Quest_US_pQRG_092016.indd 169/20/16 4:47 PM
To view detailed instructional videos regarding these and other features, please go to www.nissanownersinfo.mobi.
Page 19 of 32

17
7 AIR RECIRCULATION BUTTON
Press the air recirculation button to recirculate interior air inside the
vehicle. The indicator light on the button will illuminate. This system is used to
avoid certain outside odors and to help adjust the inside vehicle temperature
more effectively.
The air recirculation mode cannot be activated when the climate control system is in the front defroster mode
FRONT or in the front defroster and
foot vent mode
.8 AUTO-RECIRCULATION BUTTON
Press the auto-recirculation button AUTO to switch to the automatic air
intake control mode. The indicator light on the button will illuminate.
In this mode, the sensor detects certain odors and gases to
automatically switch between the air recirculation mode and the outside air
circulation mode.
The auto-r ecirculation mode cannot be activated when the air flow control
is in the front defroster mode
FRONT or in the front defroster and foot
outlet mode
.9 DEFROSTING/DEFOGGING FRONT AND SIDE WINDOWS
Press the front defroster button FRONT to turn the system on.
The A/C automatically turns on when the front defroster mode is selected.
This feature removes humidity from the air.
Press the temperature control buttons or to set the desired temperature.
To defrost the front and side windows quickly, set the temperature controls
and fan speed controls to their maximum settings.
10 DEFROSTING REAR WINDOW AND OUTSIDE MIRRORS (if so equipped)
Push the r ear window defroster switch REAR to turn the system on or off.
This function automatically turns off af ter approximately 15 minutes.
11 A/C BUTTON
Press the A/C button to turn the air conditioner system on or off. This system
helps cool and dehumidify the air inside the cabin and defog the windows.
12 REAR BUT TON
To control the rear automatic air conditioning system with the front air
conditioner control panel, press the REAR button.
When the r ear automatic air conditioning
system is on, the indicator light on the REAR
button will illuminate and the front display
will switch to the rear air conditioner screen.
To adjust the front air conditioning system, press the REAR button again or wait 10 seconds.
The rear passenger controls are unavailable when REAR is shown on
the front display.
13 ON•OFF BUT TON
Press the ON•OFF button to turn the climate control system on or off.Please see your Owner’s Manual for important safety information, system limitations, and additional
operating and feature information.
For more information, refer to the “Instruments and controls (section 2)” and the“Monitor, heater, air
conditioner, audio, phone and voice recognition systems (section 4)” of your Owner’s Manual.
2512696_17a_Quest_US_pQRG_092016.indd 179/20/16 4:47 PM
To view detailed instructional videos regarding these and other features, please go to www.nissanownersinfo.mobi.
Page 20 of 32

18
65
3
12
FM/AM/SiriusXM® SATELLITE RADIO WITH CD/DVD PLAYER
(if so equipped)
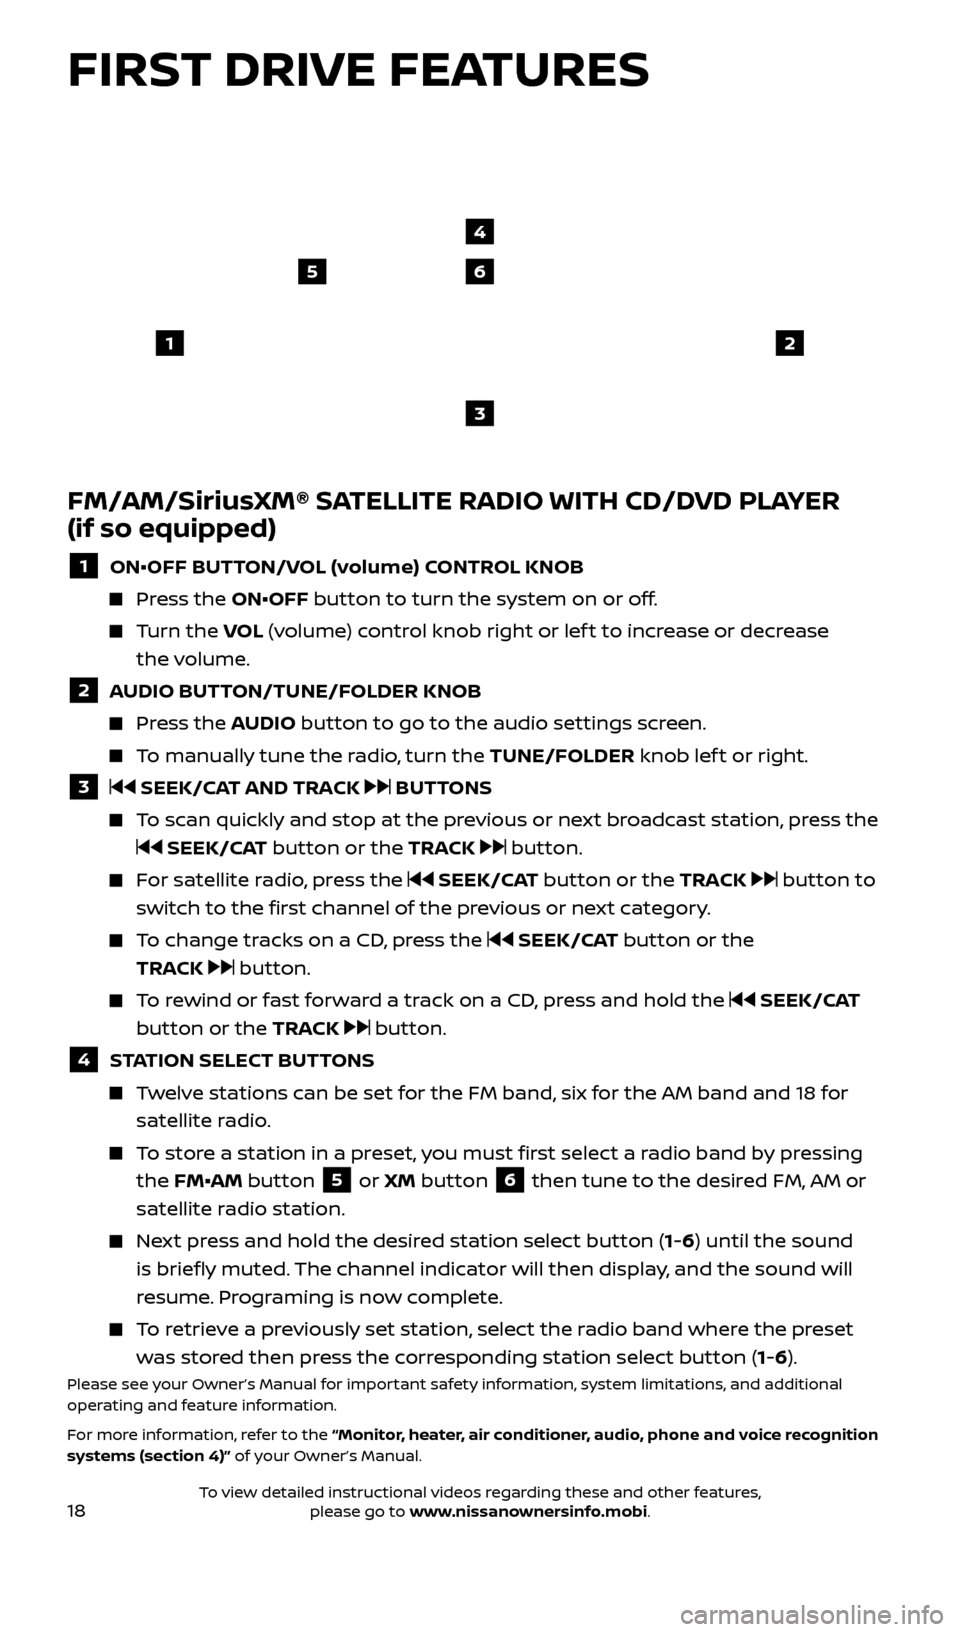
1 ON•OFF BUTTON/VOL (volume) CONTROL KNOB
Press the ON•OFF button to turn the system on or off.
Turn the VO L (volume) control knob right or lef t to increase or decrease
the volume.
2 AUDIO BUTTON/TUNE/FOLDER KNOB
Press the AUDIO button to go to the audio settings screen.
To manually tune the radio, turn the TUNE/FOLDER knob lef t or right.
3 SEEK/CAT AND TRACK BUTTONS
To scan quickly and stop at the previous or next broadcast station, press the
SEEK/CAT button or the TRACK button.
For satellite radio, press the SEEK/CAT button or the TRACK button to
switch to the first channel of the previous or next category.
To change tracks on a CD, press the SEEK/CAT button or the
TRACK
button.
To rewind or fast forward a track on a CD, press and hold the SEEK/CAT
button or the TRACK
button.
4 STATION SELECT BUTTONS
Twelve stations can be set for the FM band, six for the AM band and 18 for satellite radio.
To store a station in a preset, you must first select a radio band by pressing the FM•AM button
5 or XM button 6 then tune to the desired FM, AM or
satellite radio station.
Next press and hold the desired station select button (1-6) until the sound is briefly muted. The channel indicator will then display, and the sound will
resume. Programing is now complete.
To retrieve a previously set station, select the radio band where the preset was stored then press the corresponding station select button (1-6).
Please see your Owner’s Manual for important safety information, system limitations, and additional
operating and feature information.
For more information, refer to the “Monitor, heater, air conditioner, audio, phone and voice recognition
systems (section 4)” of your Owner’s Manual.
4
FIRST DRIVE FEATURES
2512696_17a_Quest_US_pQRG_092016.indd 189/20/16 4:47 PM
To view detailed instructional videos regarding these and other features, please go to www.nissanownersinfo.mobi.