rear view mirror NISSAN ROGUE 2010 Owner´s Manual
[x] Cancel search | Manufacturer: NISSAN, Model Year: 2010, Model line: ROGUE, Model: NISSAN ROGUE 2010Pages: 328, PDF Size: 2.84 MB
Page 12 of 328
Black plate (8,1)
Model "S35-D" EDITED: 2009/ 9/ 4
SSI0351
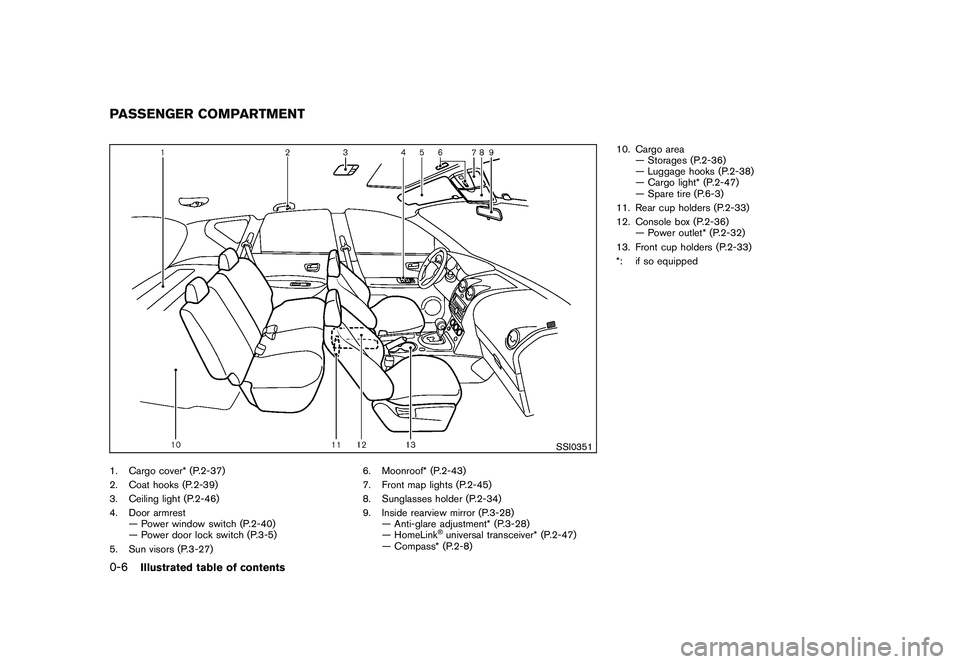
1. Cargo cover* (P.2-37)
2. Coat hooks (P.2-39)
3. Ceiling light (P.2-46)
4. Door armrest— Power window switch (P.2-40)
— Power door lock switch (P.3-5)
5. Sun visors (P.3-27) 6. Moonroof* (P.2-43)
7. Front map lights (P.2-45)
8. Sunglasses holder (P.2-34)
9. Inside rearview mirror (P.3-28)
— Anti-glare adjustment* (P.3-28)
— HomeLink
®universal transceiver* (P.2-47)
— Compass* (P.2-8) 10. Cargo area
— Storages (P.2-36)
— Luggage hooks (P.2-38)
— Cargo light* (P.2-47)
— Spare tire (P.6-3)
11. Rear cup holders (P.2-33)
12. Console box (P.2-36) — Power outlet* (P.2-32)
13. Front cup holders (P.2-33)
*: if so equipped
PASSENGER COMPARTMENT0-6
Illustrated table of contents
Page 99 of 328
Black plate (95,1)
Model "S35-D" EDITED: 2009/ 9/ 4
SIC2275
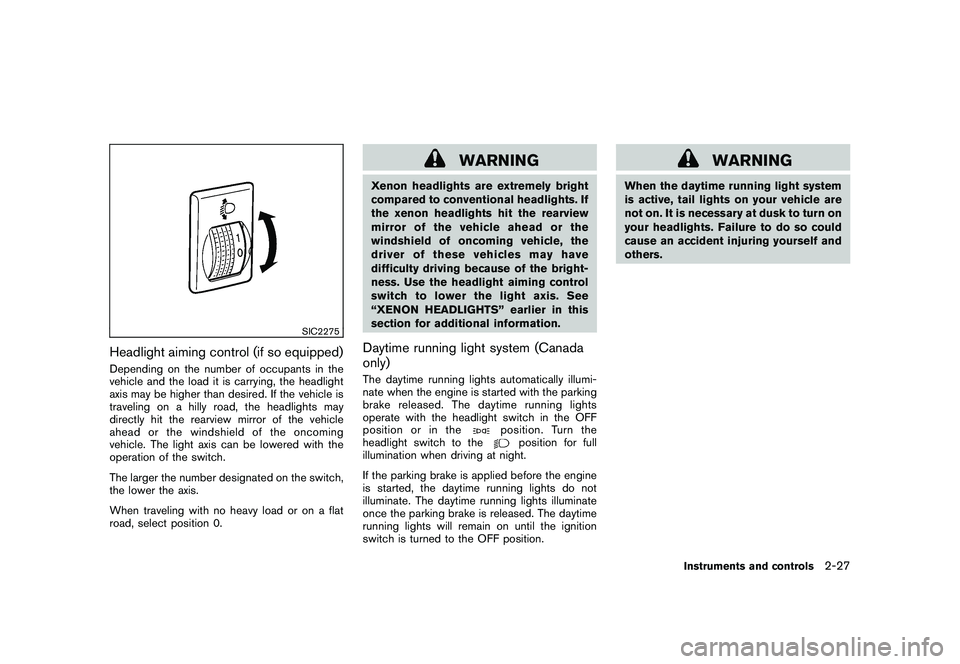
Headlight aiming control (if so equipped)Depending on the number of occupants in the
vehicle and the load it is carrying, the headlight
axis may be higher than desired. If the vehicle is
traveling on a hilly road, the headlights may
directly hit the rearview mirror of the vehicle
ahead or the windshield of the oncoming
vehicle. The light axis can be lowered with the
operation of the switch.
The larger the number designated on the switch,
the lower the axis.
When traveling with no heavy load or on a flat
road, select position 0.
WARNING
Xenon headlights are extremely bright
compared to conventional headlights. If
the xenon headlights hit the rearview
mirror of the vehicle ahead or the
windshield of oncoming vehicle, the
driver of these vehicles may have
difficulty driving because of the bright-
ness. Use the headlight aiming control
switch to lower the light axis. See
“XENON HEADLIGHTS” earlier in this
section for additional information.Daytime running light system (Canada
only)The daytime running lights automatically illumi-
nate when the engine is started with the parking
brake released. The daytime running lights
operate with the headlight switch in the OFF
position or in the
position. Turn the
headlight switch to the
position for full
illumination when driving at night.
If the parking brake is applied before the engine
is started, the daytime running lights do not
illuminate. The daytime running lights illuminate
once the parking brake is released. The daytime
running lights will remain on until the ignition
switch is turned to the OFF position.
WARNING
When the daytime running light system
is active, tail lights on your vehicle are
not on. It is necessary at dusk to turn on
your headlights. Failure to do so could
cause an accident injuring yourself and
others.
Instruments and controls
2-27
Page 150 of 328
Black plate (148,1)
Model "S35-D" EDITED: 2009/ 9/ 4
SPA1792
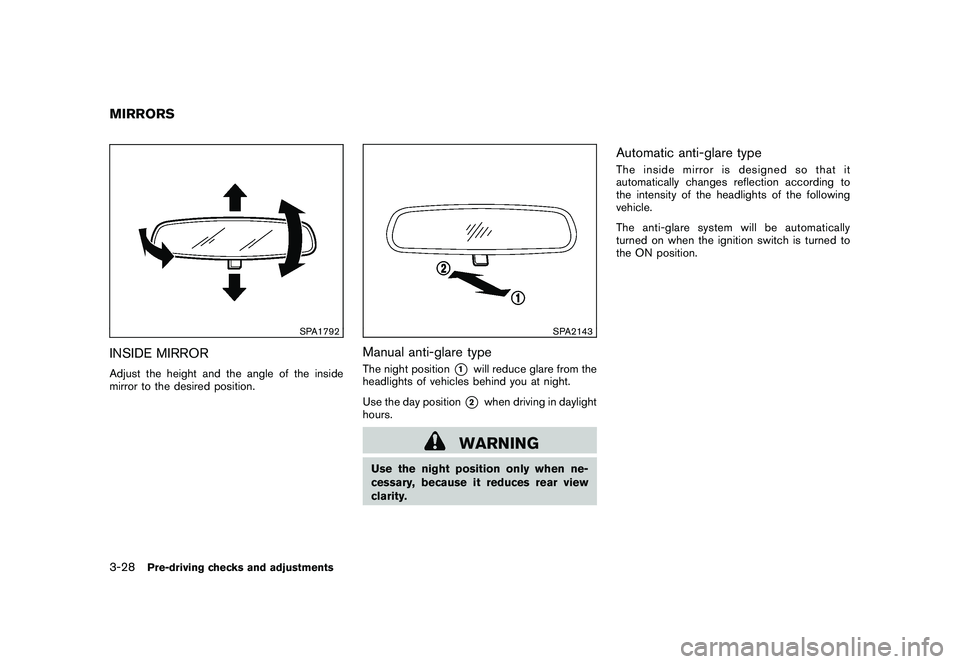
INSIDE MIRRORAdjust the height and the angle of the inside
mirror to the desired position.
SPA2143
Manual anti-glare typeThe night position
*1
will reduce glare from the
headlights of vehicles behind you at night.
Use the day position*2
when driving in daylight
hours.
WARNING
Use the night position only when ne-
cessary, because it reduces rear view
clarity.
Automatic anti-glare typeThe inside mirror is designed so that it
automatically changes reflection according to
the intensity of the headlights of the following
vehicle.
The anti-glare system will be automatically
turned on when the ignition switch is turned to
the ON position.
MIRRORS3-28
Pre-driving checks and adjustments
Page 151 of 328
Black plate (149,1)
Model "S35-D" EDITED: 2009/ 9/ 4
SPA2422
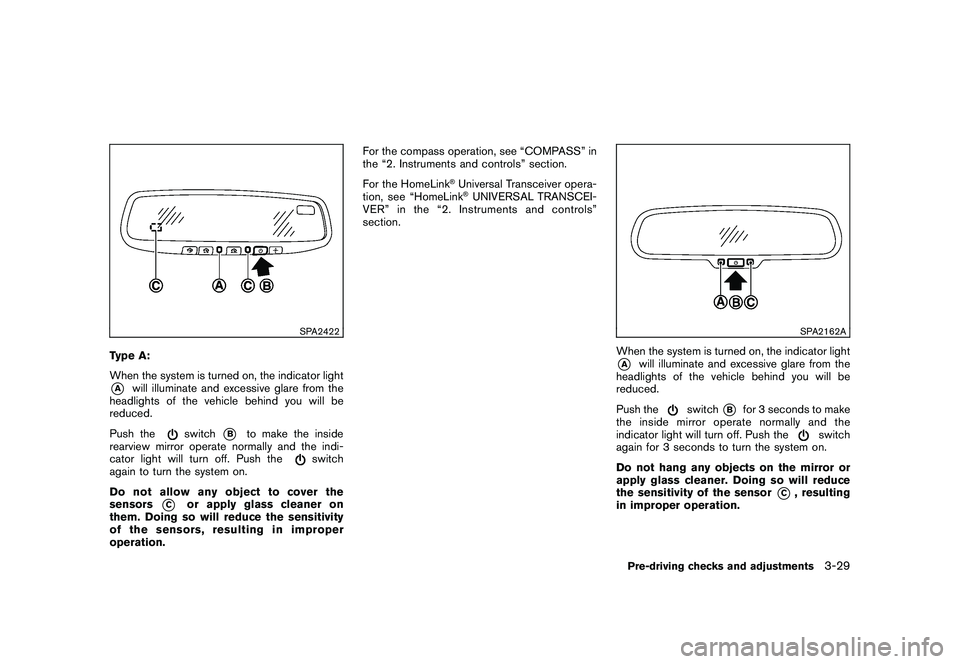
Type A:
When the system is turned on, the indicator light*A
will illuminate and excessive glare from the
headlights of the vehicle behind you will be
reduced.
Push the
switch
*B
to make the inside
rearview mirror operate normally and the indi-
cator light will turn off. Push the
switch
again to turn the system on.
Do not allow any object to cover the
sensors
*C
or apply glass cleaner on
them. Doing so will reduce the sensitivity
of the sensors, resulting in improper
operation. For the compass operation, see “COMPASS” in
the “2. Instruments and controls” section.
For the HomeLink
®Universal Transceiver opera-
tion, see “HomeLink®UNIVERSAL TRANSCEI-
VER” in the “2. Instruments and controls”
section.
SPA2162A
When the system is turned on, the indicator light*A
will illuminate and excessive glare from the
headlights of the vehicle behind you will be
reduced.
Push the
switch
*B
for 3 seconds to make
the inside mirror operate normally and the
indicator light will turn off. Push the
switch
again for 3 seconds to turn the system on.
Do not hang any objects on the mirror or
apply glass cleaner. Doing so will reduce
the sensitivity of the sensor
*C
, resulting
in improper operation.
Pre-driving checks and adjustments
3-29
Page 152 of 328
Black plate (150,1)
Model "S35-D" EDITED: 2009/ 9/ 4
SPA1390
OUTSIDE MIRRORS
WARNING
Objects viewed in the outside mirror on
the passenger side are closer than they
appear. Be careful when moving to the
right. Using only this mirror could cause
an accident. Use the inside mirror or
glance over your shoulder to properly
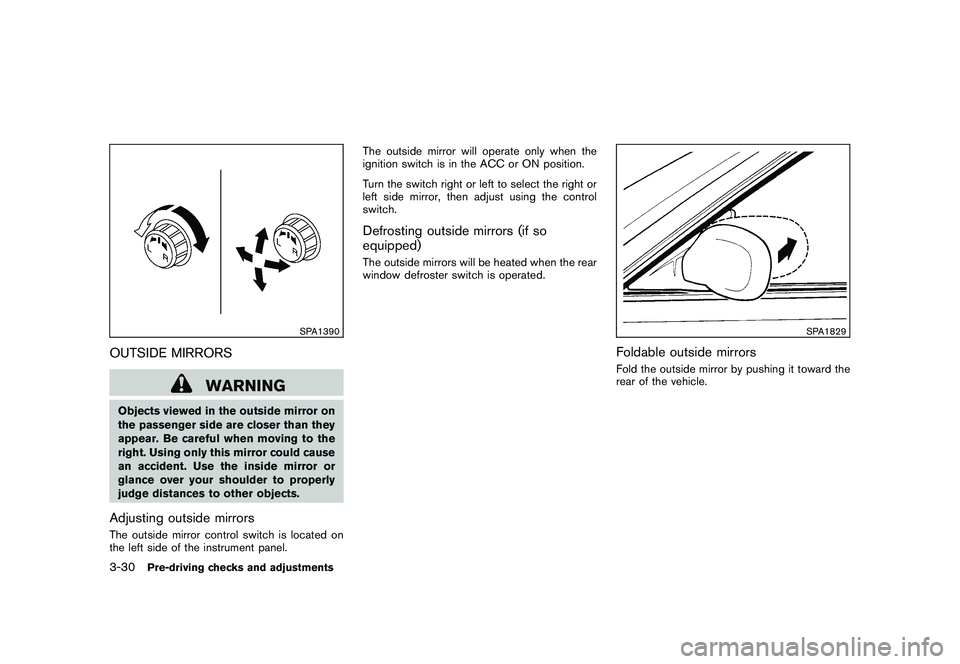
judge distances to other objects.Adjusting outside mirrorsThe outside mirror control switch is located on
the left side of the instrument panel.The outside mirror will operate only when the
ignition switch is in the ACC or ON position.
Turn the switch right or left to select the right or
left side mirror, then adjust using the control
switch.
Defrosting outside mirrors (if so
equipped)The outside mirrors will be heated when the rear
window defroster switch is operated.
SPA1829
Foldable outside mirrorsFold the outside mirror by pushing it toward the
rear of the vehicle.
3-30
Pre-driving checks and adjustments
Page 313 of 328
Black plate (315,1)
Model "S35-D" EDITED: 2009/ 9/ 4
Trailer lights
CAUTION
When splicing into the vehicle electrical
system, a commercially available
power-type module/converter must be
used to provide power for all trailer
lighting. This unit uses the vehicle
battery as a direct power source for all
trailer lights while using the vehicle tail
light, stoplight and turn signal circuits
as a signal source. The module/con-
verter must draw no more than 15
milliamps from the stop and tail lamp
circuits. Using a module/converter that
exceeds these power requirements may
damage the vehicle’s electrical system.
See a reputable trailer dealer to obtain
the proper equipment and to have it
installed.
Trailer lights should comply with federal and/or
local regulations. For assistance in hooking up
trailer lights, contact a NISSAN dealer or
reputable trailer dealer.Trailer brakesIf your trailer is equipped with a braking system,
make sure it conforms to federal and/or local
regulations and that it is properly installed.
WARNING
Never connect a trailer brake system
directly to the vehicle brake system.Pre-towing tips. Be certain your vehicle maintains a level
position when a loaded or unloaded trailer is
hitched. Do not drive the vehicle if it has an
abnormal nose-up or nose-down condition;
check for improper tongue load, overload,
worn suspension or other possible causes
of either condition.
. Always secure items in the trailer to prevent
load shift while driving.
. Keep the cargo load as low as possible in
the trailer to keep the trailer center of gravity
low.
. Load the trailer so approximately 60% of the
trailer load is in the front half and 40% is in
the back half. Also make sure the load is
balanced side to side.
. Check your hitch, trailer tire pressure,
vehicle tire pressure, trailer light operation,
and trailer wheel lug nuts every time you
attach a trailer to the vehicle.
. Be certain your rearview mirrors conform to
all federal, state or local regulations. If not, install any mirrors required for towing before
driving the vehicle.
. Determine the overall height of the vehicle
and trailer so the required clearance is
known.
Trailer towing tipsIn order to gain skill and an understanding of the
vehicle’s behavior, you should practice turning,
stopping and backing up in an area which is free
from traffic. Steering stability, and braking
performance will be somewhat different than
under normal driving conditions.
.Always secure items in the trailer to prevent
load shift while driving.
. Lock the trailer hitch coupler with a pin or
lock to prevent the coupler from inadver-
tently becoming unlatched.
. Avoid abrupt starts, acceleration or stops.
. Avoid sharp turns or lane changes.
. Always drive your vehicle at a moderate
speed. Some states or provinces have
specific speed limits for vehicles that are
towing trailers. Obey the local speed limits.
. When backing up, hold the bottom of the
steering wheel with one hand. Move your
hand in the direction in which you want the
trailer to go. Make small corrections andTechnical and consumer information
9-23