trailer NISSAN ROGUE SPORT 2017 Owners Manual
[x] Cancel search | Manufacturer: NISSAN, Model Year: 2017, Model line: ROGUE SPORT, Model: NISSAN ROGUE SPORT 2017Pages: 512, PDF Size: 3.33 MB
Page 173 of 512

3-28Pre-driving checks and adjustments
WARNING
.Gasoline is extremely flammable
and highly explosive under cer-
tain conditions. You could be
burned or seriously injured if it is
misused or mishandled. Always
stop engine and do not smoke or
allow open flames or sparks near
the vehicle when refueling.
. Do not attempt to top off the fuel
tank after the fuel pump nozzle
shuts off automatically. Contin-
ued refueling may cause fuel
overflow, resulting in fuel spray
and possibly a fire.
. Use only an original equipment
type fuel-filler cap as a replace-
ment. It has a built-in safety valve
needed for proper operation of
the fuel system and emission
control system. An incorrect cap
can result in a serious malfunc-
tion and possible injury. It could
also cause the malfunction indi-
cator light to come on.
. Never pour fuel into the throttle
body to attempt to start your
vehicle. .
Do not fill a portable fuel contain-
er in the vehicle or trailer. Static
electricity can cause an explosion
of flammable liquid, vapor or gas
in any vehicle or trailer. To reduce
the risk of serious injury or death
when filling portable fuel contain-
ers:
— Always place the container on
the ground when filling.
— Do not use electronic devices when filling.
— Keep the pump nozzle in con- tact with the container while
you are filling it.
— Use only approved portable fuel containers for flammable
liquid.
CAUTION
. If fuel is spilled on the vehicle
body, flush it away with water to
avoid paint damage.
. Insert the cap straight into the
fuel-filler tube, then tighten until
the fuel-filler cap clicks. Failure to
tighten the fuel-filler cap properly
may cause the
malfunction indicator light (MIL) to illuminate.
If the
light illuminates be-
cause the fuel-filler cap is loose
or missing, tighten or install the
cap and continue to drive the
vehicle. The
light should turn
off after a few driving trips. If the
light does not turn off after a
few driving trips, have the vehicle
inspected. It is recommended you
visit a NISSAN dealer for this
service.
For additional information, see
“Malfunction Indicator Light
(MIL)” (P.2-16).
. The LOOSE FUEL CAP warning
message will be displayed if the
fuel-filler cap is not properly tigh-
tened. It may take a few driving
trips for the message to be dis-
played. Failure to tighten the fuel-
filler cap properly after the LOOSE
FUEL CAP warning message is
displayed may cause the
Malfunction Indicator Light (MIL)
to illuminate.
Page 484 of 512

10 Technical and consumer information
Capacities and
recommended fluids/lubricants .................................... 10-2Fuel information .................................................................. 10-3
Engine oil and oil filter recommendation ........ 10-5
Air conditioning system refrigerant and
lubricant recommendations ...................................... 10-6
Specifications ........................................................................\
........ 10-7 Engine ........................................................................\
.................. 10-7
Wheels and tires .................................................................. 10-7
Dimensions and weights .............................................. 10-8
When traveling or registering in
another country ........................................................................\
. 10-8
Vehicle identification .............................................................. 10-8 Vehicle Identification Number (VIN) plate ....... 10-8
Vehicle identification number
(chassis number) ................................................................. 10-9
Engine serial number ....................................................... 10-9
F.M.V.S.S./C.M.V.S.S. certification label ................. 10-9
Emission control information label .................. 10-10
Tire and Loading Information label ................. 10-10
Air conditioner specification label ..................... 10-10
Installing front license plate ......................................... 10-11 Vehicle loading information ......................................... 10-11
Terms ........................................................................\
............. 10-11
Vehicle load capacity ................................................ 10-12
Securing the load ......................................................... 10-13
Loading tips ...................................................................... 10-13
Measurement of weights ....................................... 10-14
Towing a trailer ...................................................................... 10-14
Flat towing ........................................................................\
......... 10-15 Flat towing for All–Wheel Drive vehicle (if
so equipped) ..................................................................... 10-15
Flat towing for Front-Wheel Drive vehicle
(if so equipped) ............................................................... 10-15
Uniform tire quality grading ........................................ 10-16
Treadwear ........................................................................\
.. 10-16
Traction AA, A, B and C ........................................... 10-16
Temperature A, B and C ......................................... 10-16
Emission control system warranty ......................... 10-17
Reporting safety defects ................................................ 10-17
Readiness for Inspection/Maintenance
(I/M) test ........................................................................\
............... 10-18
Event Data Recorders (EDR) ......................................... 10-19
Owner’s manual/service manual
order information ................................................................. 10-19
Page 494 of 512

JVT0524X
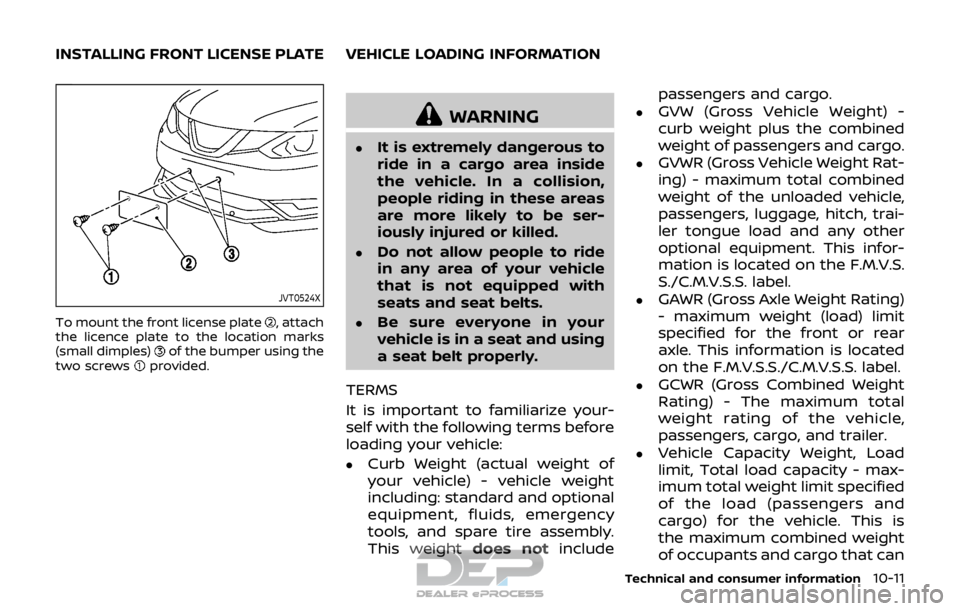
To mount the front license plate, attach
the licence plate to the location marks
(small dimples)
of the bumper using the
two screwsprovided.
WARNING
.It is extremely dangerous to
ride in a cargo area inside
the vehicle. In a collision,
people riding in these areas
are more likely to be ser-
iously injured or killed.
.Do not allow people to ride
in any area of your vehicle
that is not equipped with
seats and seat belts.
.Be sure everyone in your
vehicle is in a seat and using
a seat belt properly.
TERMS
It is important to familiarize your-
self with the following terms before
loading your vehicle:
.Curb Weight (actual weight of
your vehicle) - vehicle weight
including: standard and optional
equipment, fluids, emergency
tools, and spare tire assembly.
This weight does notinclude passengers and cargo.
.GVW (Gross Vehicle Weight) -
curb weight plus the combined
weight of passengers and cargo.
.GVWR (Gross Vehicle Weight Rat-
ing) - maximum total combined
weight of the unloaded vehicle,
passengers, luggage, hitch, trai-
ler tongue load and any other
optional equipment. This infor-
mation is located on the F.M.V.S.
S./C.M.V.S.S. label.
.GAWR (Gross Axle Weight Rating)
- maximum weight (load) limit
specified for the front or rear
axle. This information is located
on the F.M.V.S.S./C.M.V.S.S. label.
.GCWR (Gross Combined Weight
Rating) - The maximum total
weight rating of the vehicle,
passengers, cargo, and trailer.
.Vehicle Capacity Weight, Load
limit, Total load capacity - max-
imum total weight limit specified
of the load (passengers and
cargo) for the vehicle. This is
the maximum combined weight
of occupants and cargo that can
Technical and consumer information10-11
INSTALLING FRONT LICENSE PLATE VEHICLE LOADING INFORMATION
Page 495 of 512

10-12Technical and consumer information
be loaded into the vehicle. If the
vehicle is used to tow a trailer,
the trailer tongue weight must
be included as part of the cargo
load. This information is located
on the Tire and Loading Infor-
mation label.
.Cargo capacity - permissible
weight of cargo, the subtracted
weight of occupants from the
load limit.
VEHICLE LOAD CAPACITY
Do not exceed the load limit of your
vehicle shown as “The combined
weight of occupants and cargo” on
the Tire and Loading Information
label. Do not exceed the number of
occupants shown as “Seating Ca-
pacity” on the Tire and Loading
Information label.
To get “the combined weight of
occupants and cargo”, add the
weight of all occupants, then add
the total luggage weight. Examples
are shown in the following illustra-
tion.
STI0447
Steps for determining correct load
limit
1.Locate the statement “The com-
bined weight of occupants and
cargo should never exceed XXX
kg or XXX lbs” on your vehicle’s
placard.
2.Determine the combined weight
of the driver and passengers
that will be riding in your vehicle.
3.Subtract the combined weight
of the driver and passengers
from XXX kg or XXX lbs.
Page 497 of 512

10-14Technical and consumer information
WARNING
.Properly secure all cargo
with ropes or straps to help
prevent it from sliding or
shifting. Do not place cargo
higher than the seatbacks.
In a sudden stop or collision,
unsecured cargo could
cause personal injury.
.Do not load your vehicle any
heavier than the GVWR or
the maximum front and rear
GAWRs. If you do, parts of
your vehicle can break, tire
damage could occur, or it
can change the way your
vehicle handles. This could
result in loss of control and
cause personal injury.
.Overloading not only can
shorten the life of your ve-
hicle and the tire, but can
cause unsafe vehicle hand-
ling and longer braking dis-
tances. This may cause a
premature tire failure, whichcould result in a serious
accident and personal in-
jury. Failures caused by
overloading are not covered
by the vehicle’s warranty.
MEASUREMENT OF WEIGHTS
Secure loose items to prevent
weight shifts that could affect the
balance of your vehicle. When the
vehicle is loaded, drive to a scale
and weigh the front and the rear
wheels separately to determine
axle loads. Individual axle loads
should not exceed either of the
Gross Axle Weight Ratings (GAWR).
The total of the axle loads should
not exceed the Gross Vehicle
Weight Rating (GVWR). These rat-
ings are given on the vehicle certi-
fication label. If weight ratings are
exceeded, move or remove items to
bring all weights below the ratings. Do not tow a trailer with your
vehicle. TOWING A TRAILER
Page 509 of 512

11-6
Siri® Eyes Free ................................................................ 4-79
Soft bottle holders...................................................... 2-54
Spare tire............................................................. 8-40, 10-7
Spark plugs....................................................................... 8-14
Speedometer ...................................................................... 2-6
SRSPrecautions on SRS ............................................ 1-40
Standard maintenance ............................................... 9-7
Starting Before starting the engine............................ 5-17
Jump starting ............................................................. 6-9
Precautions when starting
and driving.................................................................... 5-4
Push starting............................................................ 6-11
Starting the engine.............................. 5-18, 5-19
Status light, Front passenger air bag ......... 1-48
Steering Electric power steering................................ 5-105
Heated steering wheel ..................................... 2-49
Steering wheel switch for
audio controls ......................................................... 4-75
Tilt/telescopic steering .................................... 3-29
Storage ........................................................................\
........ 2-54
Sun visors ........................................................................\
.. 3-30
Sunglasses holder....................................................... 2-56
Supplemental air bag warning labels ......... 1-56
Supplemental air bag
warning light .................................................... 1-57, 2-15
Supplemental Restraint System (SRS) ........ 1-40
Switch Audio control steering wheel switch ..... 4-75
Blind Spot Warning (BSW) switch ............ 2-51
Fog light switch ..................................................... 2-48
Hazard warning flasher switch .................... 6-2
Headlight switch ................................................... 2-43
Ignition switch ........................................................ 5-12
Intelligent 4x4 LOCK switch ........................ 2-52 Intelligent Auto Headlight switch ............ 2-43
Intelligent Lane Intervention (I-LI)
switch ........................................................................\
... 2-51
Power door lock switch ..................................... 3-7
Rear window and outside mirror
defroster switch .................................................... 2-42
Turn signal switch ............................................... 2-48
Vehicle dynamic control (VDC)
off switch .................................................................... 2-52
T
Tachometer........................................................................\
.. 2-7
Temperature gauge, Engine coolant
temperature gauge ....................................................... 2-7
Theft (NISSAN Vehicle Immobilizer
System), Engine start ............................................... 2-38
Three-way catalyst......................................................... 5-4
Tilt/telescopic steering ........................................... 3-29
Tire pressure, Low tire pressure
warning light ................................................................... 2-13
Tires
Flat tire........................................................................\
..... 6-3
Low tire pressure warning system ........... 5-5
Tire and Loading
information label................................ 8-31, 10-10
Tire chains.................................................................. 8-36
Tire dressing................................................................ 7-4
Tire pressure ............................................................ 8-29
Tire pressure monitoring
system (TPMS)................................................. 5-5, 6-3
Tire rotation.............................................................. 8-37
Types of tires ........................................................... 8-35
Uniform tire quality grading .................... 10-16
Wheel/tire size ........................................................ 10-7
Wheels and tires .................................................... 8-29
Touch screen ...................................................................... 4-4 Towing
Tow truck towing................................................. 6-13
Towing a trailer.................................................. 10-14
TPMS, Tire pressure monitoring system....... 5-5 TPMS with Easy Fill Tire Alert......................... 5-7
TPMS, Tire pressure warning system .............. 6-3
Trailer towing .............................................................. 10-14
Transmission Continuously Variable Transmission ..... 5-13
Continuously Variable Transmission
(CVT) fluid....................................................................... 8-9
Driving with CVT (Continuously
Variable Transmission)..................................... 5-20
Driving with manual transmission.......... 5-25
Transmission shift lever lock release ..... 5-24
Transmitter (See remote keyless
entry system) ...................................................................... 3-8
Transmitter, With Intelligent Key system
(See Intelligent Key system) ................................ 3-18
Traveling or registering in
another country ........................................................... 10-8
Trip computer ................................................................ 2-34
Trip odometer ................................................................ 2-34
Turn signal switch ...................................................... 2-48
U
Underbody cleaning ...................................................... 7-3
Uniform tire quality grading ............................ 10-16
USB (Universal Serial Bus)
connection port............................................................ 4-74
V
Vanity mirror ................................................................... 3-33
Vanity mirror lights .................................................... 2-67
Variable voltage control system ..................... 8-13