NISSAN ROGUE SPORT 2019 Owners Manual
Manufacturer: NISSAN, Model Year: 2019, Model line: ROGUE SPORT, Model: NISSAN ROGUE SPORT 2019Pages: 500, PDF Size: 2.37 MB
Page 141 of 500
.When not in use, be sure to close
the cap. Do not allow water or any
liquid to contact the outlet.
WAC0094X
USB (Universal Serial Bus) CHAR-
GING CONNECTOR
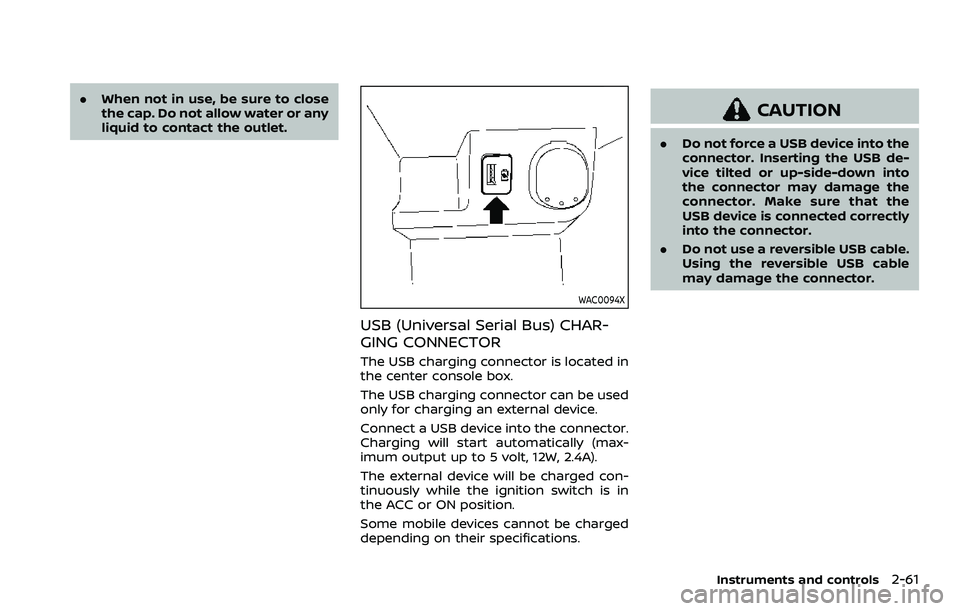
The USB charging connector is located in
the center console box.
The USB charging connector can be used
only for charging an external device.
Connect a USB device into the connector.
Charging will start automatically (max-
imum output up to 5 volt, 12W, 2.4A).
The external device will be charged con-
tinuously while the ignition switch is in
the ACC or ON position.
Some mobile devices cannot be charged
depending on their specifications.
CAUTION
.Do not force a USB device into the
connector. Inserting the USB de-
vice tilted or up-side-down into
the connector may damage the
connector. Make sure that the
USB device is connected correctly
into the connector.
. Do not use a reversible USB cable.
Using the reversible USB cable
may damage the connector.
Instruments and controls2-61
Page 142 of 500
2-62Instruments and controls
CUP HOLDERS
CAUTION
.Avoid abrupt starting and braking
when the cup holder is being
used to prevent spilling the drink.
If the liquid is hot, it can scald you
or your passenger.
. Use only soft cups in the cup
holder. Hard objects can injure
you in an accident.
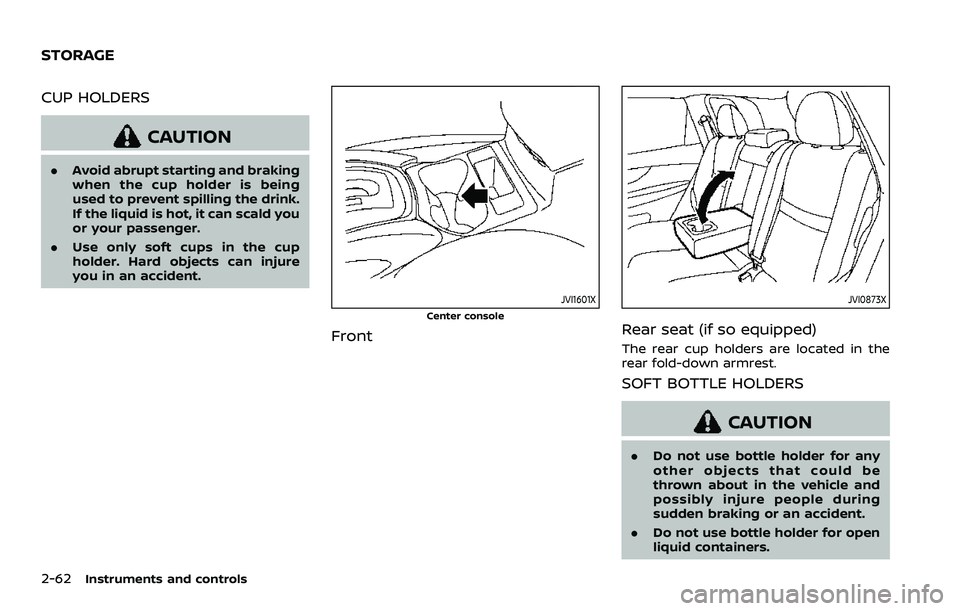
JVI1601X
Center console
Front
JVI0873X
Rear seat (if so equipped)
The rear cup holders are located in the
rear fold-down armrest.
SOFT BOTTLE HOLDERS
CAUTION
.Do not use bottle holder for any
other objects that could be
thrown about in the vehicle and
possibly injure people during
sudden braking or an accident.
. Do not use bottle holder for open
liquid containers.
STORAGE
Page 143 of 500
JVI0884X
Door (front and rear)
CARGO AREA
You can use the cargo area in diverse
ways using the flexible luggage boards.
WARNING
Do not put objects heavier than 110
lbs (50 kg) on the load floor.
CAUTION
.Do not push the front edge of the
luggage board forcibly. Doing so may cause the luggage board to
be tilted, resulting in personal
injury.
. Do not handle the luggage board
forcibly as this may deform it.
. While in the upper position, do
not recline the seatbacks.
. Do not place cargo higher than
the seatbacks. In a sudden stop
or collision, unsecured cargo
could cause personal injury.
NOTE:
The diversity of the cargo area may be
restricted depending on the equipment
of each vehicle.
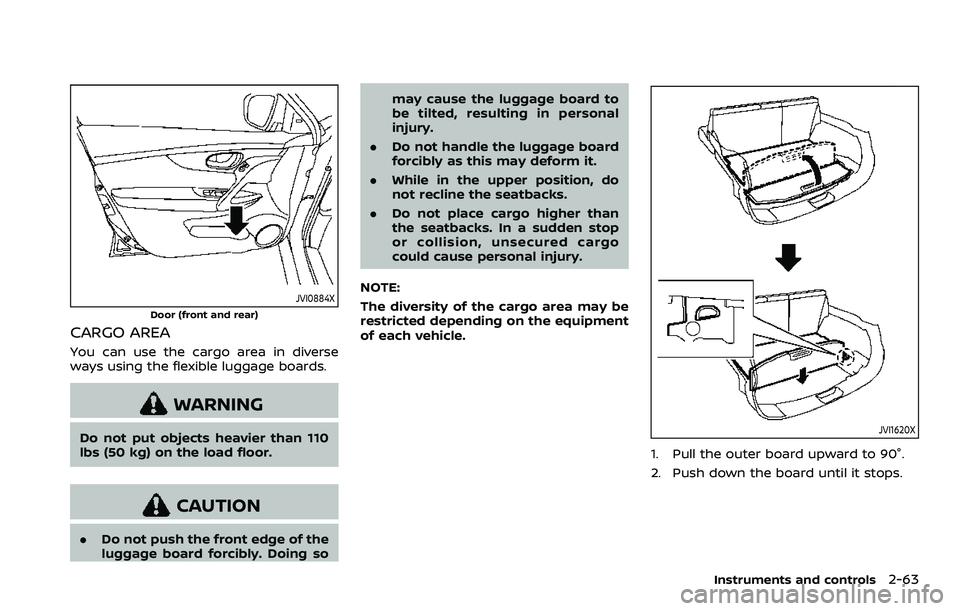
JVI1620X
1. Pull the outer board upward to 90°.
2. Push down the board until it stops.
Instruments and controls2-63
Page 144 of 500
2-64Instruments and controls
JVI0888X
GLOVE BOX
WARNING
Keep glove box lid closed while driv-
ing to help prevent injury in an
accident or a sudden stop.
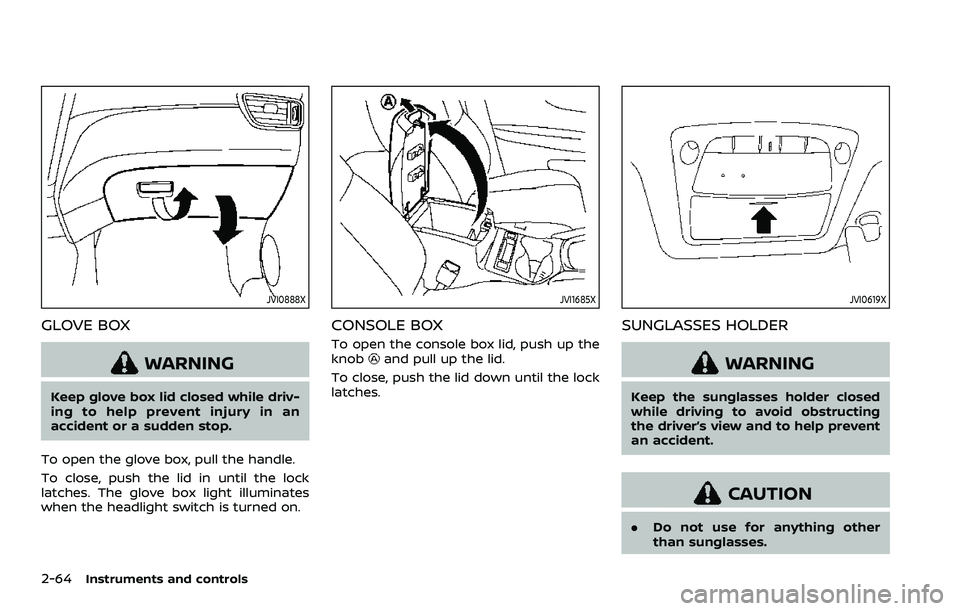
To open the glove box, pull the handle.
To close, push the lid in until the lock
latches. The glove box light illuminates
when the headlight switch is turned on.
JVI1685X
CONSOLE BOX
To open the console box lid, push up the
knoband pull up the lid.
To close, push the lid down until the lock
latches.
JVI0619X
SUNGLASSES HOLDER
WARNING
Keep the sunglasses holder closed
while driving to avoid obstructing
the driver’s view and to help prevent
an accident.
CAUTION
. Do not use for anything other
than sunglasses.
Page 145 of 500
.Do not leave sunglasses in the
sunglasses holder while parking
in direct sunlight. The heat may
damage the sunglasses.
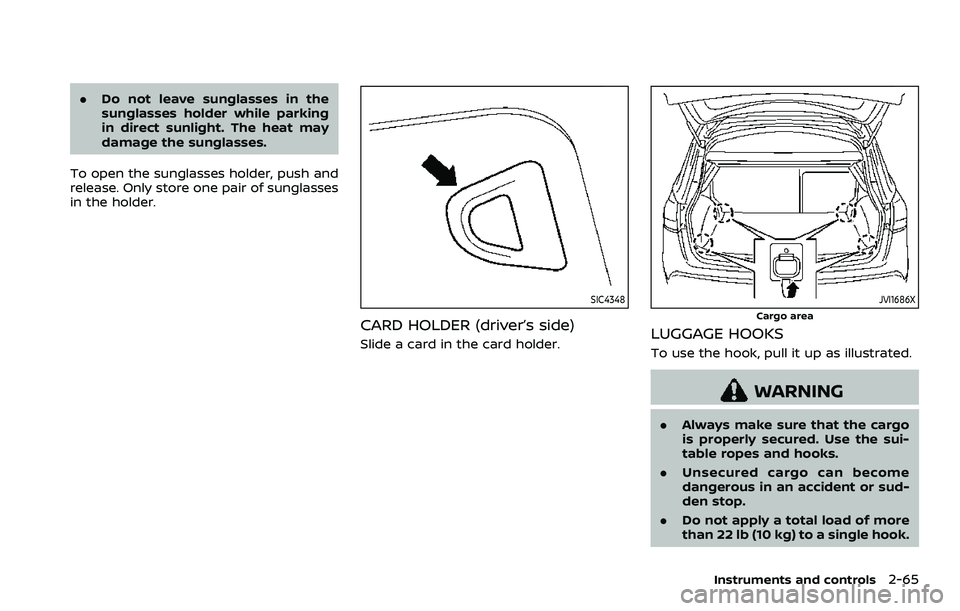
To open the sunglasses holder, push and
release. Only store one pair of sunglasses
in the holder.
SIC4348
CARD HOLDER (driver’s side)
Slide a card in the card holder.
JVI1686X
Cargo area
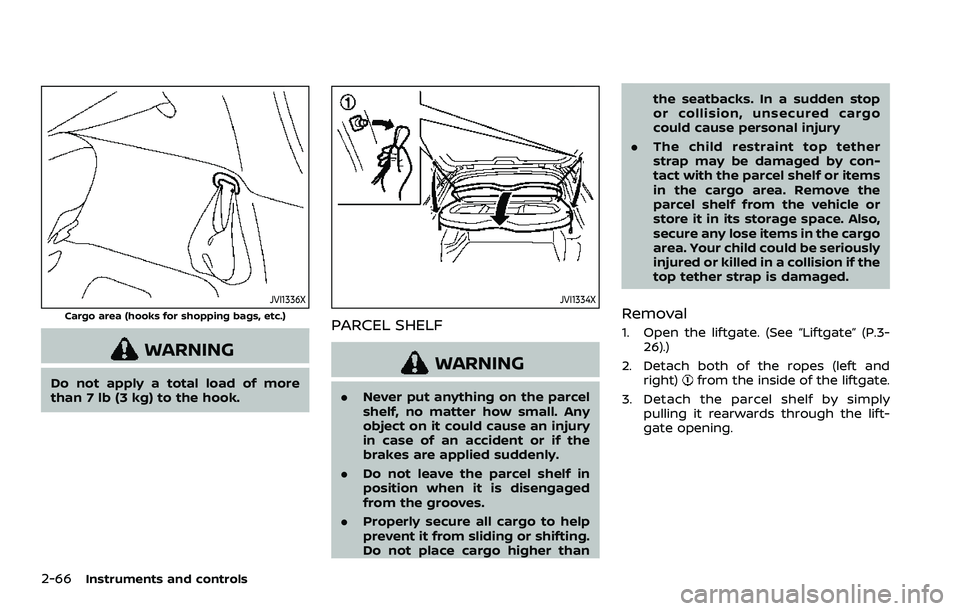
LUGGAGE HOOKS
To use the hook, pull it up as illustrated.
WARNING
. Always make sure that the cargo
is properly secured. Use the sui-
table ropes and hooks.
. Unsecured cargo can become
dangerous in an accident or sud-
den stop.
. Do not apply a total load of more
than 22 lb (10 kg) to a single hook.
Instruments and controls2-65
Page 146 of 500
2-66Instruments and controls
JVI1336X
Cargo area (hooks for shopping bags, etc.)
WARNING
Do not apply a total load of more
than 7 lb (3 kg) to the hook.
JVI1334X
PARCEL SHELF
WARNING
.Never put anything on the parcel
shelf, no matter how small. Any
object on it could cause an injury
in case of an accident or if the
brakes are applied suddenly.
. Do not leave the parcel shelf in
position when it is disengaged
from the grooves.
. Properly secure all cargo to help
prevent it from sliding or shifting.
Do not place cargo higher than the seatbacks. In a sudden stop
or collision, unsecured cargo
could cause personal injury
. The child restraint top tether
strap may be damaged by con-
tact with the parcel shelf or items
in the cargo area. Remove the
parcel shelf from the vehicle or
store it in its storage space. Also,
secure any lose items in the cargo
area. Your child could be seriously
injured or killed in a collision if the
top tether strap is damaged.
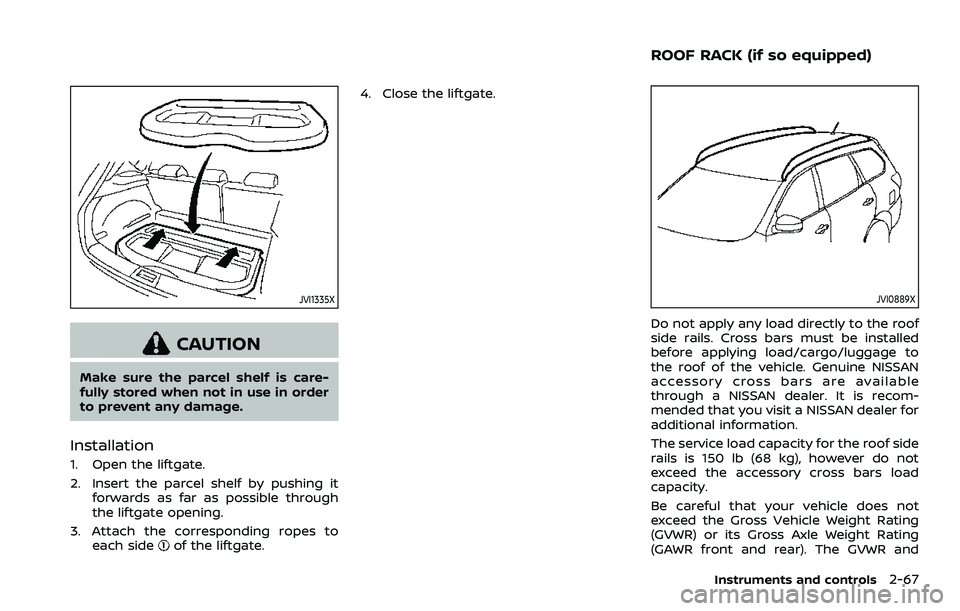
Removal
1. Open the liftgate. (See “Liftgate” (P.3-
26).)
2. Detach both of the ropes (left and right)
from the inside of the liftgate.
3. Detach the parcel shelf by simply pulling it rearwards through the lift-
gate opening.
Page 147 of 500
JVI1335X
CAUTION
Make sure the parcel shelf is care-
fully stored when not in use in order
to prevent any damage.
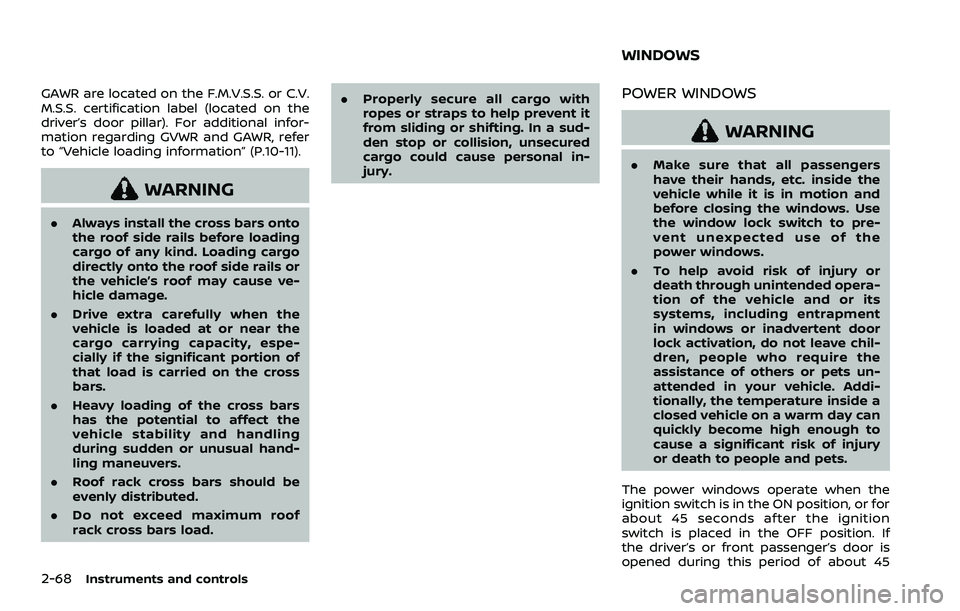
Installation
1. Open the liftgate.
2. Insert the parcel shelf by pushing itforwards as far as possible through
the liftgate opening.
3. Attach the corresponding ropes to each side
of the liftgate. 4. Close the liftgate.
JVI0889X
Do not apply any load directly to the roof
side rails. Cross bars must be installed
before applying load/cargo/luggage to
the roof of the vehicle. Genuine NISSAN
accessory cross bars are available
through a NISSAN dealer. It is recom-
mended that you visit a NISSAN dealer for
additional information.
The service load capacity for the roof side
rails is 150 lb (68 kg), however do not
exceed the accessory cross bars load
capacity.
Be careful that your vehicle does not
exceed the Gross Vehicle Weight Rating
(GVWR) or its Gross Axle Weight Rating
(GAWR front and rear). The GVWR and
Instruments and controls2-67
ROOF RACK (if so equipped)
Page 148 of 500
2-68Instruments and controls
GAWR are located on the F.M.V.S.S. or C.V.
M.S.S. certification label (located on the
driver’s door pillar). For additional infor-
mation regarding GVWR and GAWR, refer
to “Vehicle loading information” (P.10-11).
WARNING
.Always install the cross bars onto
the roof side rails before loading
cargo of any kind. Loading cargo
directly onto the roof side rails or
the vehicle’s roof may cause ve-
hicle damage.
. Drive extra carefully when the
vehicle is loaded at or near the
cargo carrying capacity, espe-
cially if the significant portion of
that load is carried on the cross
bars.
. Heavy loading of the cross bars
has the potential to affect the
vehicle stability and handling
during sudden or unusual hand-
ling maneuvers.
. Roof rack cross bars should be
evenly distributed.
. Do not exceed maximum roof
rack cross bars load. .
Properly secure all cargo with
ropes or straps to help prevent it
from sliding or shifting. In a sud-
den stop or collision, unsecured
cargo could cause personal in-
jury.
POWER WINDOWS
WARNING
.Make sure that all passengers
have their hands, etc. inside the
vehicle while it is in motion and
before closing the windows. Use
the window lock switch to pre-
vent unexpected use of the
power windows.
. To help avoid risk of injury or
death through unintended opera-
tion of the vehicle and or its
systems, including entrapment
in windows or inadvertent door
lock activation, do not leave chil-
dren, people who require the
assistance of others or pets un-
attended in your vehicle. Addi-
tionally, the temperature inside a
closed vehicle on a warm day can
quickly become high enough to
cause a significant risk of injury
or death to people and pets.
The power windows operate when the
ignition switch is in the ON position, or for
about 45 seconds after the ignition
switch is placed in the OFF position. If
the driver’s or front passenger’s door is
opened during this period of about 45
WINDOWS
Page 149 of 500
seconds, power to the windows is can-
celed.
SIC4533
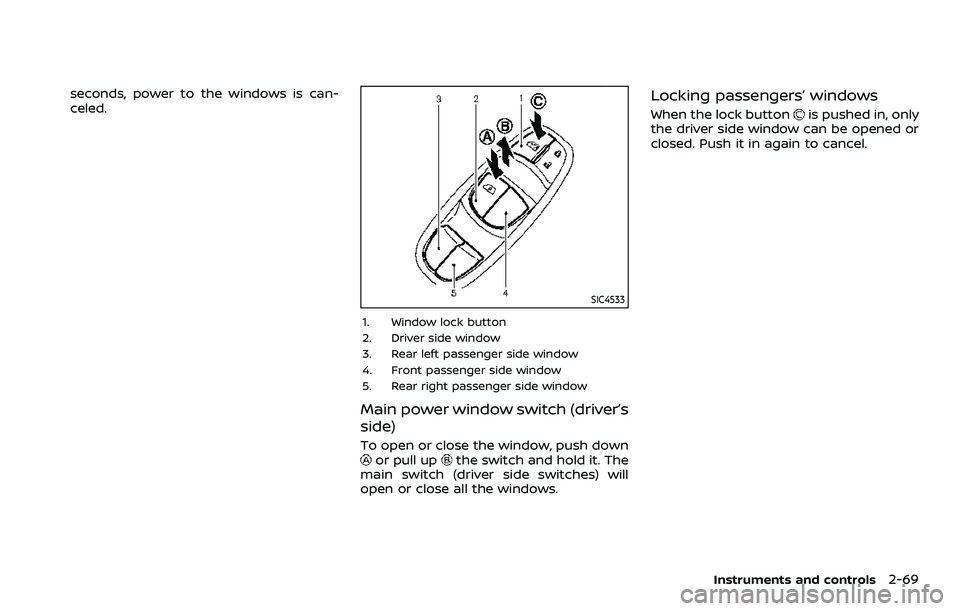
1. Window lock button
2. Driver side window
3. Rear left passenger side window
4. Front passenger side window
5. Rear right passenger side window
Main power window switch (driver’s
side)
To open or close the window, push downor pull upthe switch and hold it. The
main switch (driver side switches) will
open or close all the windows.
Locking passengers’ windows
When the lock buttonis pushed in, only
the driver side window can be opened or
closed. Push it in again to cancel.
Instruments and controls2-69
Page 150 of 500
2-70Instruments and controls
SIC4523
Passenger side power window
switch
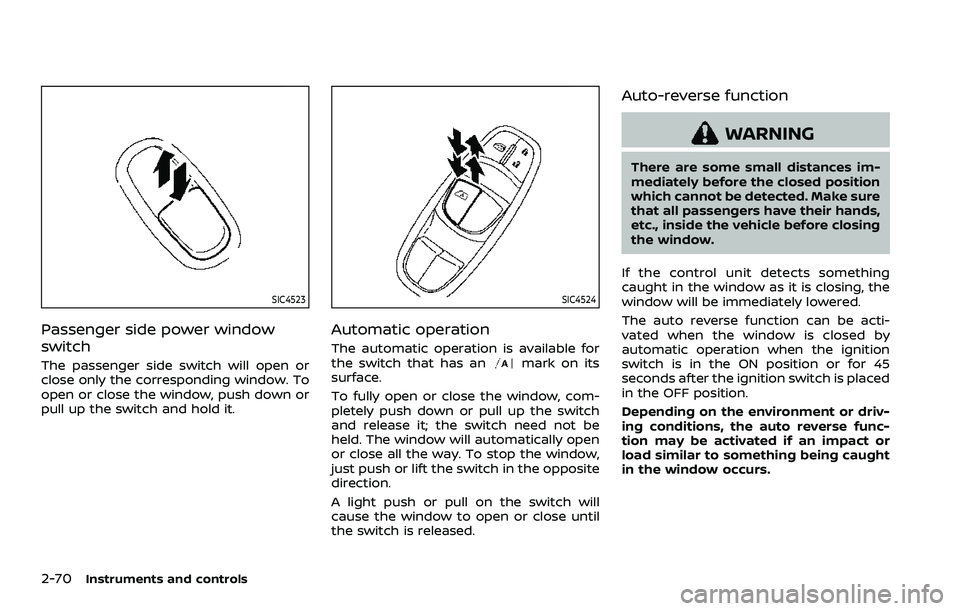
The passenger side switch will open or
close only the corresponding window. To
open or close the window, push down or
pull up the switch and hold it.
SIC4524
Automatic operation
The automatic operation is available for
the switch that has anmark on its
surface.
To fully open or close the window, com-
pletely push down or pull up the switch
and release it; the switch need not be
held. The window will automatically open
or close all the way. To stop the window,
just push or lift the switch in the opposite
direction.
A light push or pull on the switch will
cause the window to open or close until
the switch is released.
Auto-reverse function
WARNING
There are some small distances im-
mediately before the closed position
which cannot be detected. Make sure
that all passengers have their hands,
etc., inside the vehicle before closing
the window.
If the control unit detects something
caught in the window as it is closing, the
window will be immediately lowered.
The auto reverse function can be acti-
vated when the window is closed by
automatic operation when the ignition
switch is in the ON position or for 45
seconds after the ignition switch is placed
in the OFF position.
Depending on the environment or driv-
ing conditions, the auto reverse func-
tion may be activated if an impact or
load similar to something being caught
in the window occurs.