heating NISSAN ROGUE SPORT 2022 Owners Manual
[x] Cancel search | Manufacturer: NISSAN, Model Year: 2022, Model line: ROGUE SPORT, Model: NISSAN ROGUE SPORT 2022Pages: 508, PDF Size: 2.43 MB
Page 143 of 508
JVR0322X
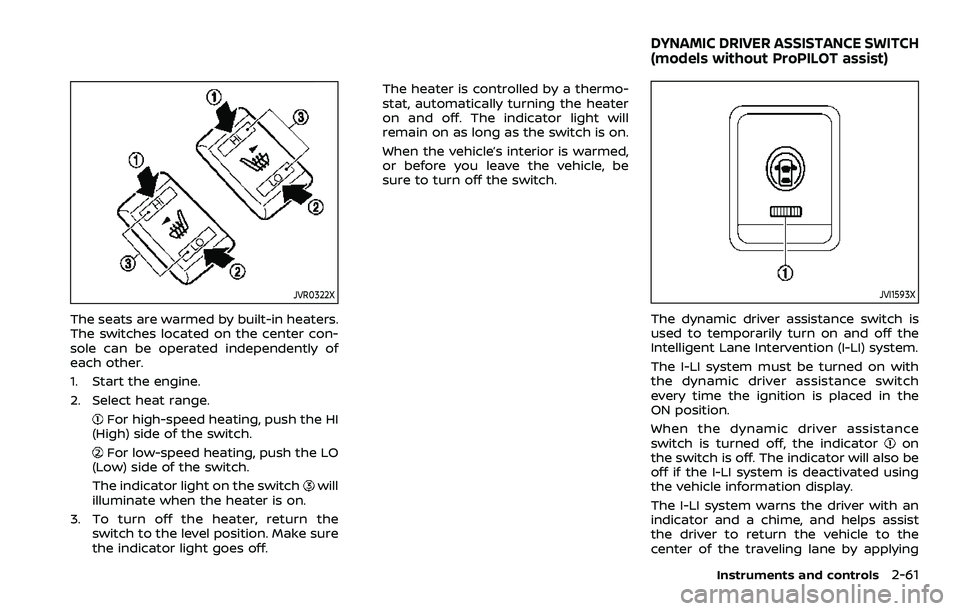
The seats are warmed by built-in heaters.
The switches located on the center con-
sole can be operated independently of
each other.
1. Start the engine.
2. Select heat range.
For high-speed heating, push the HI
(High) side of the switch.
For low-speed heating, push the LO
(Low) side of the switch.
The indicator light on the switch
will
illuminate when the heater is on.
3. To turn off the heater, return the switch to the level position. Make sure
the indicator light goes off. The heater is controlled by a thermo-
stat, automatically turning the heater
on and off. The indicator light will
remain on as long as the switch is on.
When the vehicle’s interior is warmed,
or before you leave the vehicle, be
sure to turn off the switch.
JVI1593X
The dynamic driver assistance switch is
used to temporarily turn on and off the
Intelligent Lane Intervention (I-LI) system.
The I-LI system must be turned on with
the dynamic driver assistance switch
every time the ignition is placed in the
ON position.
When the dynamic driver assistance
switch is turned off, the indicator
on
the switch is off. The indicator will also be
off if the I-LI system is deactivated using
the vehicle information display.
The I-LI system warns the driver with an
indicator and a chime, and helps assist
the driver to return the vehicle to the
center of the traveling lane by applying
Instruments and controls2-61
DYNAMIC DRIVER ASSISTANCE SWITCH
(models without ProPILOT assist)
Page 232 of 508
4-26Monitor, heater, air conditioner, audio and phone systems
JVH0879X
REAR VENTILATORS (if so equipped)
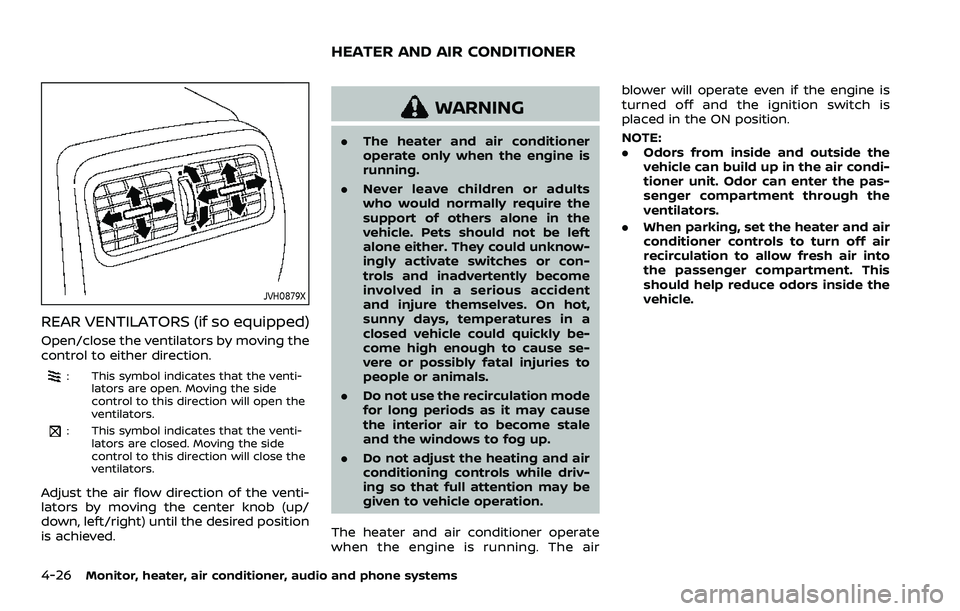
Open/close the ventilators by moving the
control to either direction.
: This symbol indicates that the venti-lators are open. Moving the side
control to this direction will open the
ventilators.
: This symbol indicates that the venti-lators are closed. Moving the side
control to this direction will close the
ventilators.
Adjust the air flow direction of the venti-
lators by moving the center knob (up/
down, left/right) until the desired position
is achieved.
WARNING
.The heater and air conditioner
operate only when the engine is
running.
. Never leave children or adults
who would normally require the
support of others alone in the
vehicle. Pets should not be left
alone either. They could unknow-
ingly activate switches or con-
trols and inadvertently become
involved in a serious accident
and injure themselves. On hot,
sunny days, temperatures in a
closed vehicle could quickly be-
come high enough to cause se-
vere or possibly fatal injuries to
people or animals.
. Do not use the recirculation mode
for long periods as it may cause
the interior air to become stale
and the windows to fog up.
. Do not adjust the heating and air
conditioning controls while driv-
ing so that full attention may be
given to vehicle operation.
The heater and air conditioner operate
when the engine is running. The air blower will operate even if the engine is
turned off and the ignition switch is
placed in the ON position.
NOTE:
.
Odors from inside and outside the
vehicle can build up in the air condi-
tioner unit. Odor can enter the pas-
senger compartment through the
ventilators.
. When parking, set the heater and air
conditioner controls to turn off air
recirculation to allow fresh air into
the passenger compartment. This
should help reduce odors inside the
vehicle.
HEATER AND AIR CONDITIONER
Page 234 of 508
4-28Monitor, heater, air conditioner, audio and phone systems
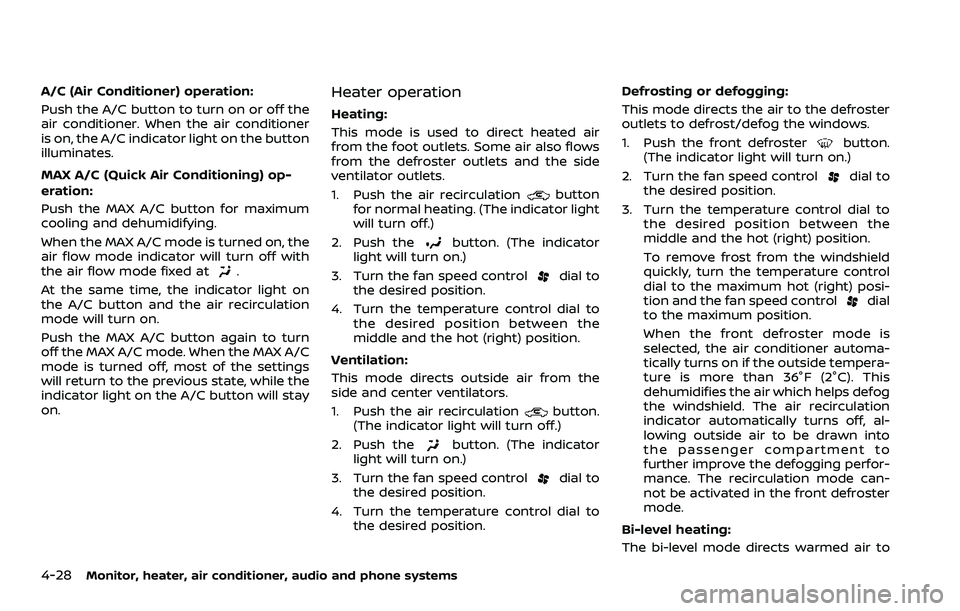
A/C (Air Conditioner) operation:
Push the A/C button to turn on or off the
air conditioner. When the air conditioner
is on, the A/C indicator light on the button
illuminates.
MAX A/C (Quick Air Conditioning) op-
eration:
Push the MAX A/C button for maximum
cooling and dehumidifying.
When the MAX A/C mode is turned on, the
air flow mode indicator will turn off with
the air flow mode fixed at
.
At the same time, the indicator light on
the A/C button and the air recirculation
mode will turn on.
Push the MAX A/C button again to turn
off the MAX A/C mode. When the MAX A/C
mode is turned off, most of the settings
will return to the previous state, while the
indicator light on the A/C button will stay
on.
Heater operation
Heating:
This mode is used to direct heated air
from the foot outlets. Some air also flows
from the defroster outlets and the side
ventilator outlets.
1. Push the air recirculation
button
for normal heating. (The indicator light
will turn off.)
2. Push the
button. (The indicator
light will turn on.)
3. Turn the fan speed control
dial to
the desired position.
4. Turn the temperature control dial to the desired position between the
middle and the hot (right) position.
Ventilation:
This mode directs outside air from the
side and center ventilators.
1. Push the air recirculation
button.
(The indicator light will turn off.)
2. Push the
button. (The indicator
light will turn on.)
3. Turn the fan speed control
dial to
the desired position.
4. Turn the temperature control dial to the desired position. Defrosting or defogging:
This mode directs the air to the defroster
outlets to defrost/defog the windows.
1. Push the front defroster
button.
(The indicator light will turn on.)
2. Turn the fan speed control
dial to
the desired position.
3. Turn the temperature control dial to the desired position between the
middle and the hot (right) position.
To remove frost from the windshield
quickly, turn the temperature control
dial to the maximum hot (right) posi-
tion and the fan speed control
dial
to the maximum position.
When the front defroster mode is
selected, the air conditioner automa-
tically turns on if the outside tempera-
ture is more than 36°F (2°C). This
dehumidifies the air which helps defog
the windshield. The air recirculation
indicator automatically turns off, al-
lowing outside air to be drawn into
the passenger compartment to
further improve the defogging perfor-
mance. The recirculation mode can-
not be activated in the front defroster
mode.
Bi-level heating:
The bi-level mode directs warmed air to
Page 235 of 508
the side and center ventilators and to the
front and rear floor outlets.
1. Push the air recirculation
button.
(The indicator light will turn off.)
2. Push the
button. (The indicator
light will turn on.)
3. Turn the fan speed control
dial to
the desired position.
4. Turn the temperature control dial to the desired position.
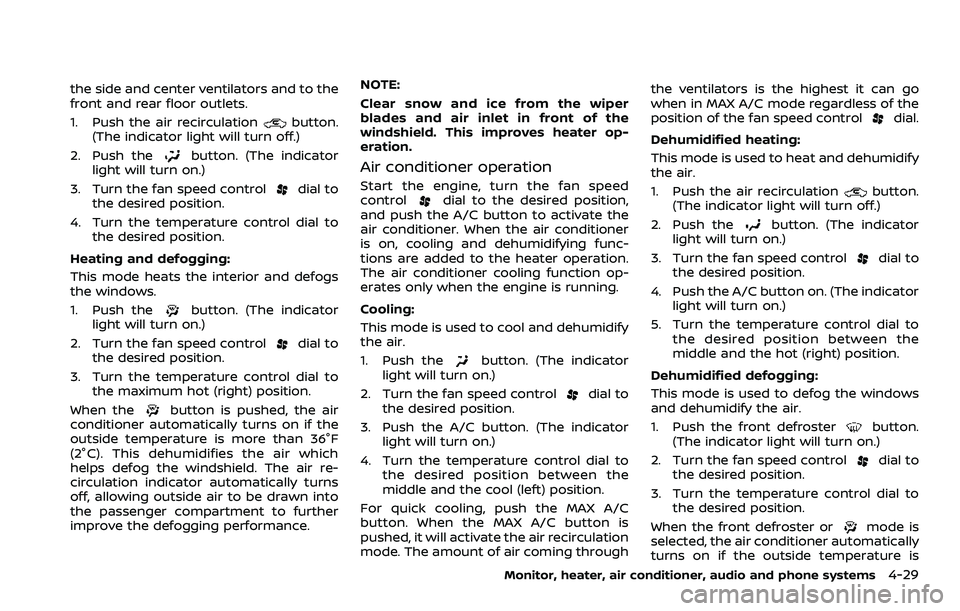
Heating and defogging:
This mode heats the interior and defogs
the windows.
1. Push the
button. (The indicator
light will turn on.)
2. Turn the fan speed control
dial to
the desired position.
3. Turn the temperature control dial to the maximum hot (right) position.
When the
button is pushed, the air
conditioner automatically turns on if the
outside temperature is more than 36°F
(2°C). This dehumidifies the air which
helps defog the windshield. The air re-
circulation indicator automatically turns
off, allowing outside air to be drawn into
the passenger compartment to further
improve the defogging performance. NOTE:
Clear snow and ice from the wiper
blades and air inlet in front of the
windshield. This improves heater op-
eration.
Air conditioner operation
Start the engine, turn the fan speed
controldial to the desired position,
and push the A/C button to activate the
air conditioner. When the air conditioner
is on, cooling and dehumidifying func-
tions are added to the heater operation.
The air conditioner cooling function op-
erates only when the engine is running.
Cooling:
This mode is used to cool and dehumidify
the air.
1. Push the
button. (The indicator
light will turn on.)
2. Turn the fan speed control
dial to
the desired position.
3. Push the A/C button. (The indicator light will turn on.)
4. Turn the temperature control dial to the desired position between the
middle and the cool (left) position.
For quick cooling, push the MAX A/C
button. When the MAX A/C button is
pushed, it will activate the air recirculation
mode. The amount of air coming through the ventilators is the highest it can go
when in MAX A/C mode regardless of the
position of the fan speed control
dial.
Dehumidified heating:
This mode is used to heat and dehumidify
the air.
1. Push the air recirculation
button.
(The indicator light will turn off.)
2. Push the
button. (The indicator
light will turn on.)
3. Turn the fan speed control
dial to
the desired position.
4. Push the A/C button on. (The indicator light will turn on.)
5. Turn the temperature control dial to the desired position between the
middle and the hot (right) position.
Dehumidified defogging:
This mode is used to defog the windows
and dehumidify the air.
1. Push the front defroster
button.
(The indicator light will turn on.)
2. Turn the fan speed control
dial to
the desired position.
3. Turn the temperature control dial to the desired position.
When the front defroster or
mode is
selected, the air conditioner automatically
turns on if the outside temperature is
Monitor, heater, air conditioner, audio and phone systems4-29
Page 236 of 508
4-30Monitor, heater, air conditioner, audio and phone systems
more than 36°F (2°C). This dehumidifies
the air which helps defog the windshield.
The air recirculation mode automatically
turns off, allowing outside air to be drawn
into the passenger compartment to
further improve the defogging perfor-
mance.
The air conditioner is always on in front
defroster or
mode, regardless of
whether the indicator light is on or off.
NOTE:
. The air conditioner system should
be operated for approximately 10
minutes at least once a month. This
helps prevent damage to the air
conditioner system due to the lack
of lubrication.
. A visible mist may be seen coming
from the ventilators in hot, humid
conditions as the air is cooled ra-
pidly. This does not indicate a mal-
function.
. If the engine coolant temperature
becomes too high, the air recircula-
tion mode will be activated and the
indicator light will come on automa-
tically.
. If the engine coolant temperature
gauge indicates engine coolant tem-
perature over the normal range, turn
the air conditioner off. (See “If your
vehicle overheats” (P.6-16).)
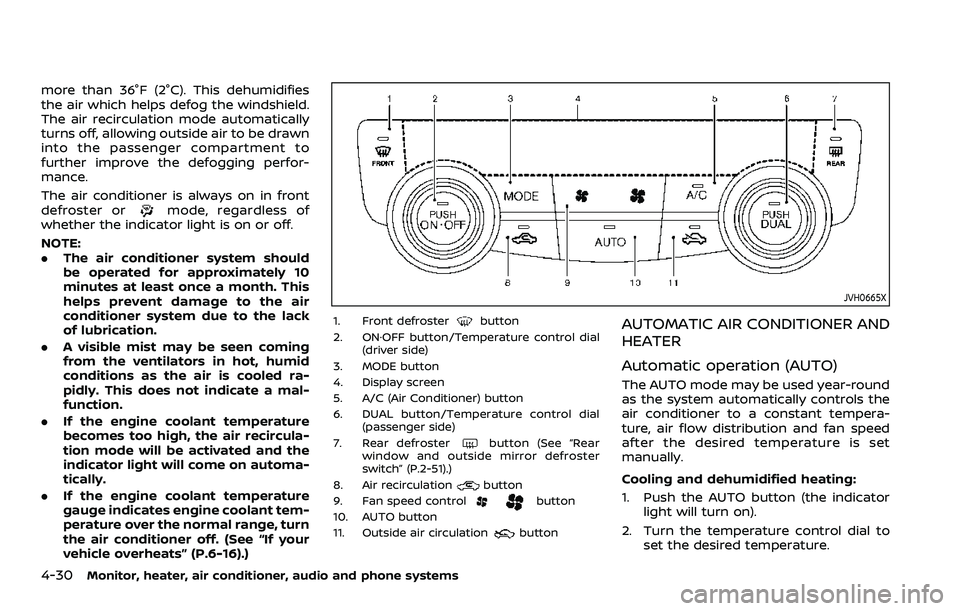
JVH0665X
1. Front defrosterbutton
2. ON·OFF button/Temperature control dial (driver side)
3. MODE button
4. Display screen
5. A/C (Air Conditioner) button
6. DUAL button/Temperature control dial (passenger side)
7. Rear defroster
button (See “Rear
window and outside mirror defroster
switch” (P.2-51).)
8. Air recirculation
button
9. Fan speed controlbutton
10. AUTO button
11. Outside air circulation
button
AUTOMATIC AIR CONDITIONER AND
HEATER
Automatic operation (AUTO)
The AUTO mode may be used year-round
as the system automatically controls the
air conditioner to a constant tempera-
ture, air flow distribution and fan speed
after the desired temperature is set
manually.
Cooling and dehumidified heating:
1. Push the AUTO button (the indicator light will turn on).
2. Turn the temperature control dial to set the desired temperature.
Page 238 of 508
4-32Monitor, heater, air conditioner, audio and phone systems
Air intake control:
.Push the air recirculation
button
to recirculate interior air inside the
vehicle. The indicator light on the
button will come on.
The air recirculation cannot be acti-
vated when the air conditioner is in
the front defrosting mode.
. Push the outside air circulation
button to draw outside air into the
passenger compartment. The indica-
tor light on the button will come on.
. To control the air intake automatically,
push and hold either the air recircula-
tion
button or the outside air
circulationbutton (whichever but-
ton with the indicator light illumi-
nated). The indicator lights (both air
recirculation
and outside air cir-
culationbuttons) will flash twice,
and then the air intake will switch to
automatic control. When the auto-
matic control is set, the system auto-
matically alternates between the
outside air circulation and the air
recirculation modes. (The indicator
light of the active mode will turn on.)
NOTE:
Even if the system is manually set to the
air recirculation mode, when both out-
side temperature and coolant tempera-
ture are low, the system may automatically switch to the outside air
circulation mode.
To turn the system off:
To turn off the heater and air conditioner,
push the ON·OFF button.
Push the ON·OFF button again, the sys-
tem will turn on in the mode which was
used immediately before the system was
turned off.
Remote engine start logic (if so
equipped)
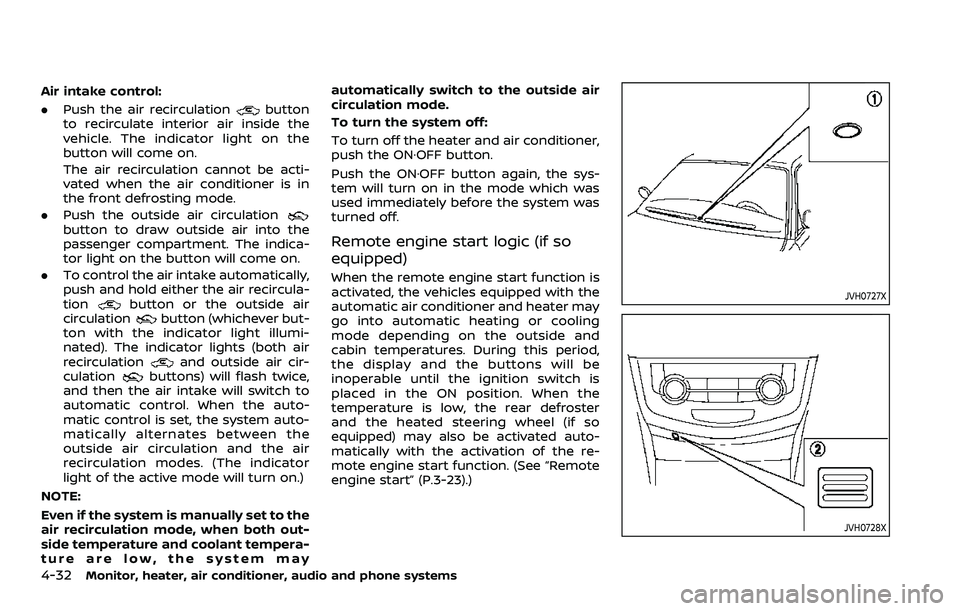
When the remote engine start function is
activated, the vehicles equipped with the
automatic air conditioner and heater may
go into automatic heating or cooling
mode depending on the outside and
cabin temperatures. During this period,
the display and the buttons will be
inoperable until the ignition switch is
placed in the ON position. When the
temperature is low, the rear defroster
and the heated steering wheel (if so
equipped) may also be activated auto-
matically with the activation of the re-
mote engine start function. (See “Remote
engine start” (P.3-23).)
JVH0727X
JVH0728X
Page 269 of 508
NOTE:
.A buzzer will sound if the vehicle is
driven without releasing the parking
brake. See “Audible reminders” (P.2-
18).
. While the electronic parking brake is
applied or released, an operating
sound is heard from the lower side
of the rear seat. This is normal and
does not indicate a malfunction.
. When the electronic parking brake is
frequently applied and released in a
short period of time, the parking
brake may not operate in order to
prevent the parking brake system
from overheating. If this occurs,
operate the electronic parking brake
switch again after waiting approxi-
mately 1 minute.
. If the electronic parking brake must
be applied while driving in an emer-
gency, pull up and hold the parking
brake switch. When you release the
parking brake switch, the parking
brake will be released.
. While pulling up the electronic park-
ing brake switch during driving, the
parking brake is applied and a chime
sounds. The electronic parking
brake indicator light in the meter
and in the parking brake switch
illuminate. This does not indicate a
malfunction. The electronic parking brake indicator light in the meter
and in the parking brake switch turn
off when the parking brake is re-
leased.
. When pulling the electronic parking
brake switch up with the ignition
switch in the OFF or ACC position,
the parking brake switch indicator
light will continue to illuminate for a
short period of time.The automatic brake hold function main-
tains the braking force without the driver
having to depress the brake pedal when
the vehicle is stopped at a traffic light or
intersection. As soon as the driver de-
presses the accelerator pedal again, the
automatic brake hold function is deacti-
vated and the braking force is released.
The operating status of the automatic
brake hold can be displayed on the
vehicle information display.
WARNING
.The automatic brake hold func-
tion is not designed to hold the
vehicle on a steep hill or slippery
road. Never use the automatic
brake hold when the vehicle is
stopped on a steep hill or slippery
road. Failure to do so may cause
the vehicle to move.
. When the automatic brake hold
function is activated but fails to
maintain the vehicle at a stand-
still, depress the brake pedal to
stop the vehicle. If the vehicle
unexpectedly moves due to out-
side conditions, the chime may
sound and automatic brake hold
warning may illuminate in the
vehicle information display.
Starting and driving5-29
AUTOMATIC BRAKE HOLD (if so equipped)
Page 320 of 508
5-80Starting and driving
with these system limitations could
result in serious injury or death:
.The ICC system is primarily in-
tended for use on straight, dry,
open roads with light traffic. It is
not advisable to use the ICC
system in city traffic or congested
areas.
. The ICC system will not adapt
automatically to road conditions.
This system should be used in
evenly flowing traffic. Do not use
the system on roads with sharp
curves or on icy roads, in heavy
rain or in fog.
. As there is a performance limit to
the distance control function,
never rely solely on the ICC sys-
tem. This system does not correct
careless, inattentive or absent-
minded driving or overcome poor
visibility in rain, fog, or other bad
weather. Decelerate the vehicle
speed by depressing the brake
pedal, depending on the distance
to the vehicle ahead and the
surrounding circumstances in or-
der to maintain a safe distance
between vehicles.
. When the ICC system automati-
cally brings the vehicle to a stop, your vehicle can automatically
accelerate if the vehicle is
stopped for less than approxi-
mately 3 seconds. Be prepared
to stop your vehicle if necessary.
. Always pay attention to the op-
eration of the vehicle and be
ready to manually control the
proper following distance. The
ICC system may not be able to
maintain the selected distance
between vehicles (following dis-
tance) or selected vehicle speed
under some circumstances.
. The system may not detect the
vehicle in front of you in certain
road or weather conditions. To
avoid accidents, never use the ICC
system under the following con-
ditions:
— On roads with heavy, high-
speed traffic or sharp curves
— On slippery road surfaces such as on ice or snow, etc.
— During bad weather (rain, fog, snow, etc.)
— When rain, snow or dirt adhere to the bumper around the
distance sensor — On steep downhill roads (the
vehicle may go beyond the set
vehicle speed and frequent
braking may result in over-
heating the brakes)
— On repeated uphill and down- hill roads
— When traffic conditions make it difficult to keep a proper
distance between vehicles be-
cause of frequent accelera-
tion or deceleration
— Interference by other radar sources.
. In some road or traffic conditions,
a vehicle or object can unexpect-
edly come into the sensor detec-
tion zone and cause automatic
braking. Always stay alert and
avoid using the ICC system where
not recommended in this warn-
ing section.
The ICC system will not detect the
following objects:
. Stationary or slow moving vehicles
. Pedestrians or objects in the roadway
. Oncoming vehicles in the same lane
Page 368 of 508
5-128Starting and driving
curb..HEADED UPHILL WITH CURB:
Turn the wheels away from the
curb and move the vehicle back
until the curb side wheel gently
touches the curb.
.HEADED UPHILL OR DOWNHILL, NOCURB:
Turn the wheels toward the side of
the road so the vehicle will move
away from the center of the road if
it moves.
4. Models with Intelligent Key system:
Place the ignition switch in the OFF
position.
Models without Intelligent Key sys-
tem:
Place the ignition switch in the LOCK
position and remove the key.
WARNING
.If the engine is not running or is
turned off while driving, the
power assist for the steering will
not work. Steering will be harder
to operate.
. When the electric power steering
warning light illuminates with the
engine running, the power assist
for the steering will cease opera-
tion. You will still have control of
the vehicle but the steering will
be harder to operate.
The electric power steering is designed to
provide power assist while driving to
operate the steering wheel with light
force.
When the steering wheel is operated
repeatedly or continuously while parking
or driving at a very low speed, the power
assist for the steering wheel will be
reduced. This is to prevent overheating
of the electric power steering and protect
it from getting damaged. While the power
assist is reduced, steering wheel opera-
tion will become heavy. When the tem-
perature of the electric power steering
goes down, the power assist level will
return to normal. Avoid repeating such steering wheel operations that could
cause the electric power steering to over-
heat.
You may hear a noise when the steering
wheel is operated quickly. However, this is
not a malfunction.
If the electric power steering warning
light
illuminates while the engine is
running, it may indicate the electric
power steering is not functioning prop-
erly and may need servicing. Have the
electric power steering checked. It is
recommended that you visit a NISSAN
dealer for this service. (See “Electric power
steering warning light” (P.2-14).)
When the electric power steering warning
light illuminates with the engine running,
the power assist for the steering will
cease operation. You will still have control
of the vehicle. However, greater steering
effort is needed, especially in sharp turns
and at low speeds.
The mode of the Power Steering can be
changed to:
. NORMAL
. SPORT
For more information, see “Vehicle infor-
mation display” (P.2-19).
ELECTRIC POWER STEERING
Page 369 of 508
BRAKING PRECAUTIONS
The brake system has two separate
hydraulic circuits. If one circuit malfunc-
tions, you will still have braking at two
wheels.
Vacuum assisted brakes
The brake booster aids braking by using
engine vacuum. If the engine stops, you
can stop the vehicle by depressing the
brake pedal. However, greater foot pres-
sure on the brake pedal will be required to
stop the vehicle and the stopping dis-
tance will be longer.
Using the brakes
Avoid resting your foot on the brake
pedal while driving. This will cause over-
heating of the brakes, wearing out the
brake pads faster and reduce gas mile-
age.
To help reduce brake wear and to prevent
the brakes from overheating, reduce
speed and downshift to a lower gear
before going down a slope or long grade.
Overheated brakes may reduce braking
performance and could result in loss of
vehicle control.
WARNING
.While driving on a slippery sur-
face, be careful when braking,
accelerating or downshifting.
Abrupt braking or accelerating
could cause the wheels to skid
and result in an accident.
. If the engine is not running or is
turned off while driving, the
power assist for the brakes will
not work. Braking will be harder.
Wet brakes
When the vehicle is washed or driven
through water, the brakes may get wet.
As a result, your braking distance will be
longer and the vehicle may pull to one
side during braking.
To dry brakes, drive the vehicle at a safe
speed while lightly tapping the brake
pedal to heat-up the brakes. Do this until
the brakes return to normal. Avoid driving
the vehicle at high speeds until the brakes
function correctly.
Parking brake break-in
Break in the parking brake shoes when-
ever the stopping effect of the parking
brake is weakened or whenever the
parking brake shoes and/or drums/ro-
tors are replaced, in order to assure the
best braking performance.
This procedure is described in the vehicle
service manual. It is recommended you
visit a NISSAN dealer for this service.
Starting and driving5-129
BRAKE SYSTEM