coolant temperature NISSAN SENTRA 1998 B14 / 4.G Owners Manual
[x] Cancel search | Manufacturer: NISSAN, Model Year: 1998, Model line: SENTRA, Model: NISSAN SENTRA 1998 B14 / 4.GPages: 216, PDF Size: 1.82 MB
Page 42 of 216

2 Instruments and controls
Meters and gauges ................................................2-2
Speedometer and odometer ..................................2-3
Tachometer (if so equipped) ..................................2-3
Engine coolant temperature gauge........................2-3
Fuel gauge .............................................................2-4
Warning/indicator lights and chimes ......................2-5
Theft warning (if so equipped) ...............................2-9
Windshield wiper and washer switch ...................2-11
Rear window defogger switch ..............................2-12
Headlight and turn signal switch ..........................2-13
Daytime running light system (Canada only) .......2-13Instrument brightness control ...............................2-14
Front fog light switch (if so equipped)..................2-14
Hazard warning flasher switch .............................2-15
Cigarette lighter (accessory) and ashtray ............2-15
Cup holder ............................................................2-16
Manual windows ...................................................2-17
Power windows (if so equipped) ..........................2-17
Sunroof (if so equipped).......................................2-19
Interior light...........................................................2-19
Trunk light (if so equipped) ..................................2-20
ZX
Page 44 of 216

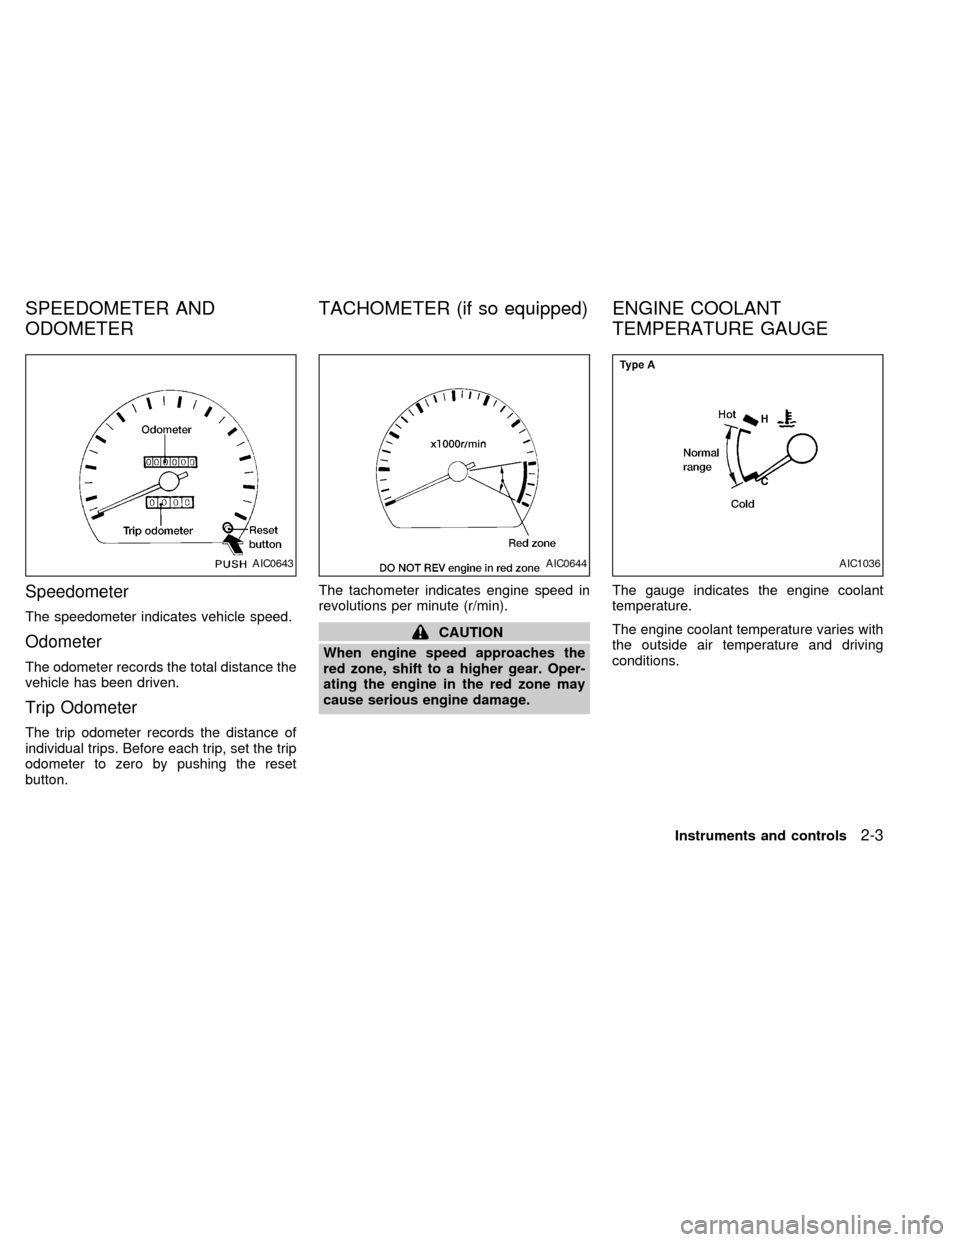
Speedometer
The speedometer indicates vehicle speed.
Odometer
The odometer records the total distance the
vehicle has been driven.
Trip Odometer
The trip odometer records the distance of
individual trips. Before each trip, set the trip
odometer to zero by pushing the reset
button.The tachometer indicates engine speed in
revolutions per minute (r/min).
CAUTION
When engine speed approaches the
red zone, shift to a higher gear. Oper-
ating the engine in the red zone may
cause serious engine damage.The gauge indicates the engine coolant
temperature.
The engine coolant temperature varies with
the outside air temperature and driving
conditions.
AIC0643AIC0644AIC1036
SPEEDOMETER AND
ODOMETERTACHOMETER (if so equipped) ENGINE COOLANT
TEMPERATURE GAUGE
Instruments and controls2-3
ZX
Page 45 of 216

CAUTION
If the gauge indicates engine coolant
temperature over the normal range,
stop the vehicle as soon as safely pos-
sible. If the engine is overheated, con-
tinued operation of the vehicle may
seriously damage the engine. See the
``In case of emergency'' section for the
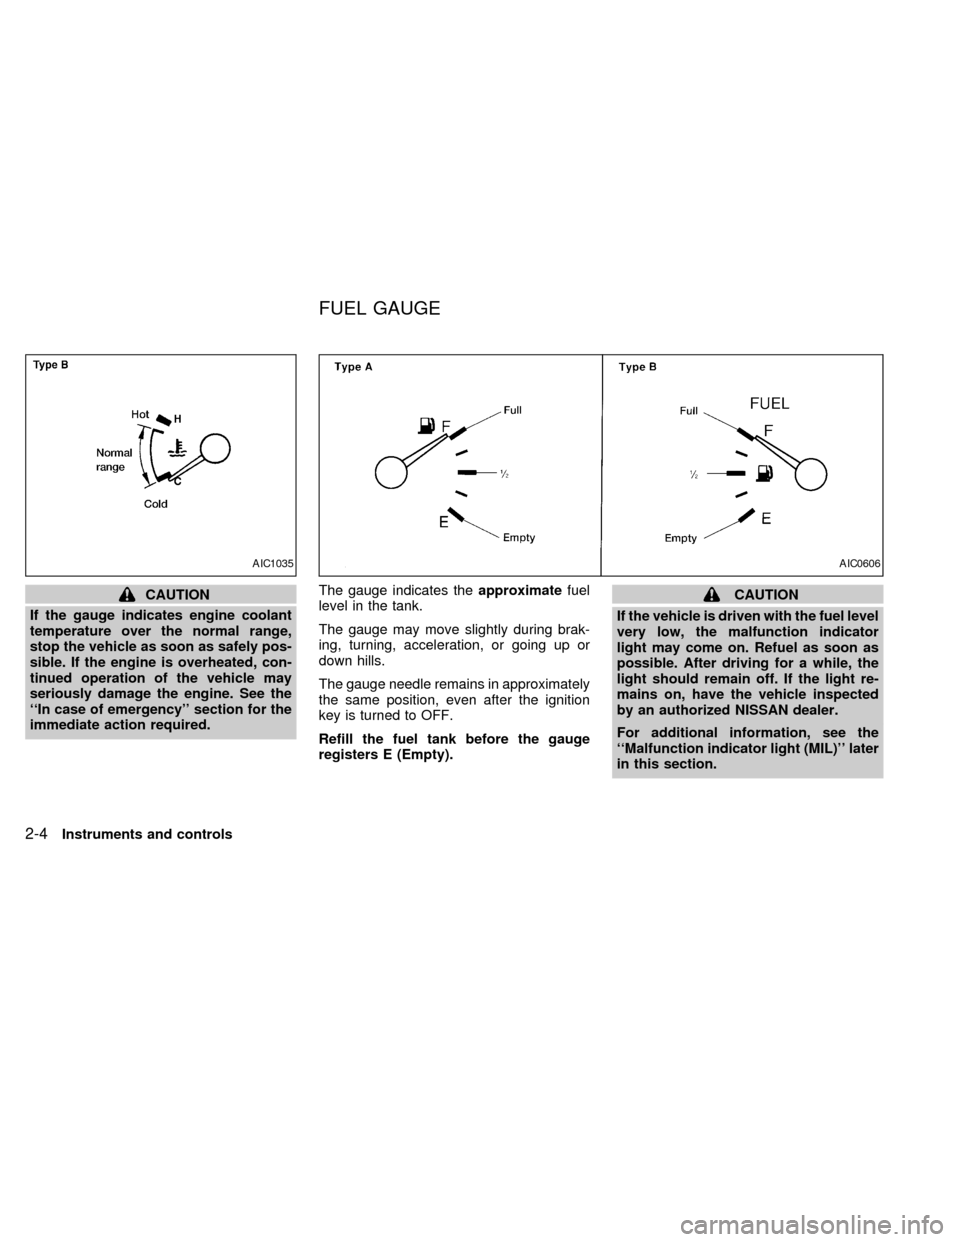
immediate action required.The gauge indicates theapproximatefuel
level in the tank.
The gauge may move slightly during brak-
ing, turning, acceleration, or going up or
down hills.
The gauge needle remains in approximately
the same position, even after the ignition
key is turned to OFF.
Refill the fuel tank before the gauge
registers E (Empty).CAUTION
If the vehicle is driven with the fuel level
very low, the malfunction indicator
light may come on. Refuel as soon as
possible. After driving for a while, the
light should remain off. If the light re-
mains on, have the vehicle inspected
by an authorized NISSAN dealer.
For additional information, see the
``Malfunction indicator light (MIL)'' later
in this section.
AIC1035AIC0606
FUEL GAUGE
2-4Instruments and controls
ZX
Page 83 of 216

For quick cooling when the outside tem-
perature is high, push the air recirculation
button to the ON position. Be sure to return
the air recirculation button to the OFF posi-
tion for normal cooling.
Dehumidified heating
This mode is used to heat and dehumidify
the air.
1. Push the air recirculation button to the
OFF position.
2. Move the air control dial to the
po-
sition.
3. Move the fan control dial to the desired
position.
4. Push on the air conditioner button. The
indicator light comes on.
5. Move the temperature control dial to the
desired position.
Dehumidified defogging
This mode is used to defog the windows
and dehumidify the air.
1. Move the air control dial to the
po-
sition.
cWhen the
position is selected the
(air recalculation) function auto-
matically cancels. Outside air is drawn
into the passenger compartment to im-
prove the defogging performance.
2. Move the fan control dial to the desired
position.
3. Push on the air conditioner button. The
indicator light comes on.
4. Move the temperature control dial to the
desired position.
Operating tips
cKeep windows and sunroof closed while
the air conditioner is in operation.
cAfter parking in the sun, drive for two or
three minutes with the windows open to
vent hot air from the passenger compart-
ment. Then, close the windows. This
allows the air conditioner to cool the
interior more quickly.
cThe air conditioning system should be
operated for about ten minutes at
least once a month. This helps pre-
vent damage to the system due to lack
of lubrication.
cIf the engine coolant temperaturegauge indicates engine coolant tem-
perature over the normal range, turn
the air conditioner off. See ``If your
vehicle overheats'' in the ``In case of
emergency'' section of this manual.
AIR FLOW CHARTS
The following charts show the button and
dial positions forMAXIMUM AND QUICK
heating, cooling or defrosting.The air recir-
culation switch should always be in the
OFF position for heating and defrosting.
4-6Heater, air conditioner and audio systems
ZX
Page 124 of 216

Freeing a frozen door lock
To prevent a door lock from freezing, apply
de-icer or glycerin through the key hole. If
the lock becomes frozen, heat the key be-
fore inserting it in the key hole.
Anti-freeze
In the winter when it is anticipated that the
temperature will drop below 32ÉF (0ÉC),
check the anti-freeze (ethylene glycol base)
to assure proper winter protection. For de-
tails, see ``Engine cooling system'' in the
``Do-it-yourself'' section of this manual.
Battery
If the battery is not fully charged during
extremely cold weather conditions, the bat-
tery fluid may freeze and damage the bat-
tery. To maintain maximum efficiency, the
battery should be checked regularly. For
details, see ``Battery'' in the ``Do-it-yourself''
section of this manual.
Draining of coolant
If the vehicle is to be left outside without
anti-freeze, drain the cooling system by
opening the drain valves located under the
radiator and on the engine block. Refillbefore operating the vehicle. See ``Chang-
ing Engine Coolant'' in the ``Do-it-yourself''
section of this manual.
Tire equipment
1.SUMMER tires are of a tread design to
provide superior performance on dry
pavement. However, the performance of
these tires will be substantially reduced in
snowy and icy conditions. If you operate
your vehicle on snowy or icy roads, NIS-
SAN recommends the use of MUD &
SNOW or ALL SEASON TIRES on all four
wheels. Please consult an authorized
NISSAN dealer for the tire type, size,
speed rating and availability information.
2. For additional traction on icy roads, stud-
ded tires may be used. However, most
U.S. States and Canadian provinces pro-
hibit their use. Check local, state and
provincial laws before installing studded
tires.
Skid and traction capabilities of studded
snow tires on wet or dry surfaces may be
poorer than that of non-studded snow
tires.
3. Tire chains may be used. Make sure they
are of proper size for the tires on yourvehicle and are installed according to the
chain manufacturer's suggestions.
Use of tire chains may be prohibited
according to location. Check the local
laws before installing tire chains. When
installing tire chains, make sure they are
of proper size for the tires on your vehicle
and are installed according to the chain
manufacturer's suggestions.Use only
SAE Class ªSº chains.Other types may
damage your vehicle. Use chain tension-
ers when recommended by the tire chain
manufacturer to ensure a tight fit. Loose
end links of the tire chain must be se-
cured or removed to prevent the possi-
bility of whipping action damage to the
fenders or underbody. If possible, avoid
fully loading your vehicle when using tire
chains. In addition, drive at a reduced
speed. Otherwise, your vehicle may be
damaged and/or vehicle handling and
performance may be adversely affected.
Never install tire chains on T-type spare
tires. Do not use tire chains on dry roads.
COLD WEATHER DRIVING
Starting and driving5-19
ZX
Page 135 of 216

If your vehicle is overheating (indicated by
an extremely high temperature gauge read-
ing), or if you feel a lack of engine power,
detect abnormal noise, etc., take the follow-
ing steps.
WARNING
cDo not continue to drive if your ve-
hicle overheats. Doing so could
cause a vehicle fire.
cTo avoid the danger of being
scalded, never remove the radiator
cap while the engine is still hot.
When the radiator cap is removed,
pressurized hot water will spurt out,
possibly causing serious injury.
cDo not open the hood if steam is
coming out.
1. Move the vehicle safely off the road,
apply the parking brake and move the
shift lever to N (Neutral) (manual trans-
mission) or the shift selector lever to P
(Park) (automatic transmission).
Do not stop the engine.
2. Turn off the air conditioner. Open all the
windows, move the heater or air condi-
tioner temperature control to maximumhot and fan control to high speed.
3. If engine overheating is caused by climb-
ing a long hill on a hot day, run the engine
at a fast idle (approximately 1,500 rpm)
until the temperature gauge indication
returns to normal.
4. Get out of the vehicle. Look and listen for
steam or coolant escaping from the ra-
diator before opening the hood. Wait until
no steam or coolant can be seen before
proceeding.
5. Open the hood.
WARNING
If steam or water is coming from the
engine, stand clear to prevent getting
burned.
6. Visually check drive belts for damage or
looseness. Also check if the cooling fan
is running. The radiator hoses and radia-
tor should not leak water. If coolant is
leaking, the water pump belt is missing or
loose, or the cooling fan does not run,
stop the engine.
WARNING
Be careful not to allow your hands, hair,
jewelry or clothing to come into contact
with, or to get caught in, the running
fan, belts, or fan motor. The fan motor
can start at any time when the coolant
temperature is high.
7. After the engine cools down, check the
coolant level in the reservoir tank with the
engine running. Add coolant to the res-
ervoir tank if necessary. Have your ve-
hicle repaired at an authorized NISSAN
dealer.
IF YOUR VEHICLE
OVERHEATS
6-10In case of emergency
ZX
Page 144 of 216

8 Do-it-yourself
Maintenance precautions .......................................8-2
Engine compartment check locations -
GA engine .............................................................8-3
Engine compartment check locations -
SR engine ..............................................................8-4
Engine cooling system ...........................................8-5
Checking engine coolant level ...............................8-5
Changing engine coolant .......................................8-6
Engine oil ...............................................................8-8
Checking engine oil level .......................................8-8
Changing engine oil ...............................................8-9
Changing engine oil filter .....................................8-10
Automatic transmission fluid (ATF) ......................8-11
Temperature conditions for checking ATF ...........8-12
Power steering fluid..............................................8-13
Brake fluid ............................................................8-14
Window washer fluid ............................................8-14
Battery ..................................................................8-15Jump starting ........................................................8-16
Drive belts ............................................................8-17
Spark plug replacement .......................................8-18
Air cleaner housing filter ......................................8-19
Wiper blades ........................................................8-20
Parking brake check.............................................8-21
Brake pedal ..........................................................8-21
Brake booster .......................................................8-22
Clutch pedal .........................................................8-23
Fuses and fusible links.........................................8-23
Light bulbs ............................................................8-25
Headlights ............................................................8-25
Headlight aiming adjustment ................................8-26
Bulb replacement .................................................8-26
Front fog light bulb replacement
(if so equipped) ....................................................8-31
Wheels and tires ..................................................8-32
ZX
Page 150 of 216

1. Move the heater or air conditioner tem-
perature control dial to the maximum hot
position.
2. Open the radiator drain plug. Open the
drain plug on the engine block.3. Open the radiator cap to drain the cool-
ant.
4. Flush the cooling system by running
fresh water through the radiator.
5. Close the drain plugs on the radiator and
the engine block securely.
6. See the ``Technical and consumer infor-
mation'' section for cooling system ca-
pacity. Fill the radiator slowly with the
proper mixture of coolant and water. Fill
the reservoir tank up to the MAX level.
7. Open and close the air release plug(s) to
release air. Then fill the radiator again
and install the radiator cap.
8.
Start the engine, and warm it up until it
reaches normal operating temperature.
Then race the engine two or three times
under no load. Watch the engine coolant
temperature gauge for signs of overheating.
ADI0632
ADI0615
Do-it-yourself8-7
ZX
Page 183 of 216

Parking brake* ÐCheck that the lever has
the proper travel and confirm that your
vehicle is held securely on a fairly steep hill
with only the parking brake applied.
Automatic transmission ``Park'' mecha-
nism ÐOn a fairly steep hill check that your
vehicle is held securely with the selector
lever in the P (Park) position without apply-
ing any brakes.
UNDER THE HOOD AND VEHICLE
The maintenance items listed here should
be checked periodically, such as each time
you check the engine oil or refuel.
Additional information on the following
items with an ``*'' is found in the ``Do-it-
yourself'' section of this manual.
Windshield washer fluid* ÐCheck for
adequate fluid in the tank.
Engine coolant level* ÐCheck the cool-
ant level when the engine is cold.
Radiator and hoses ÐCheck the front of
the radiator and clean off any dirt, insects,
leaves, etc., that may have accumulated.
Make sure the hoses have no cracks, de-
formation, rot or loose connections.Brake and (if so equipped) clutch fluid
level's* ÐMake sure the brake and clutch
fluid levels are between the MIN and MAX
lines on each reservoir.
Battery* ÐCheck the fluid level in each
cell.
Engine drive belts* ÐMake sure the drive
belts are not frayed, worn, cracked or oily.
Engine oil level* ÐCheck the level after
parking the vehicle on a level surface, with
the engine off. Wait a few minutes for the oil
to drain back into the oil pan.
Power steering fluid level* and lines Ð
Check the level when the fluid is cold, with
the engine off. Check the lines for proper
attachment, leaks, cracks, etc.
Automatic transmission fluid level* Ð
Check the level after putting the selector
lever in P (Park) with the engine idling at
operating temperature.
Exhaust system ÐMake sure there are no
cracks, holes, loose joints or supports. If the
sound of the exhaust seems unusual or
there is a smell of exhaust fumes, immedi-
ately have the exhaust system inspected by
an authorized NISSAN dealer. (See thecarbon monoxide warning in the ``Starting
and driving'' section of this manual.)
Underbody ÐThe underbody is frequently
exposed to corrosive substances such as
those used on icy roads or to control dust. It
is very important to remove these sub-
stances, from the underbody, otherwise rust
may form on the floor pan, frame, fuel lines
and exhaust system. At the end of winter,
the underbody should be thoroughly flushed
with plain water, especially those areas
where mud and dirt may have accumulate.
See the ``Appearance and care'' section of
this manual.
Fluid leaks ÐCheck under the vehicle for
fuel, oil, water or other fluid leaks after the
vehicle has been parked for awhile. Water
dripping from the air conditioner after use is
normal. If you should notice any leaks or if
gasoline fumes are evident, check for the
cause and have it corrected immediately by
an authorized NISSAN dealer.
9-4Maintenance
ZX
Page 185 of 216
![NISSAN SENTRA 1998 B14 / 4.G Owners Manual Schedule One
Abbreviations: R = Replace I = Inspect. Correct or replace if necessary. [ ]: At the mileage intervals only
MAINTENANCE OPERATIONMAINTENANCE INTERVAL
Perform at number of miles,
kilometer NISSAN SENTRA 1998 B14 / 4.G Owners Manual Schedule One
Abbreviations: R = Replace I = Inspect. Correct or replace if necessary. [ ]: At the mileage intervals only
MAINTENANCE OPERATIONMAINTENANCE INTERVAL
Perform at number of miles,
kilometer](/img/5/611/w960_611-184.png)
Schedule One
Abbreviations: R = Replace I = Inspect. Correct or replace if necessary. [ ]: At the mileage intervals only
MAINTENANCE OPERATIONMAINTENANCE INTERVAL
Perform at number of miles,
kilometers or months,
whichever comes first.Miles ý 1,000 3.75 7.5 11.25 15 18.75 22.5 26.25 30 33.75 37.5 41.25 45 48.75 52.5 56.25 60
(km ý 1,000) (6) (12) (18) (24) (30) (36) (42) (48) (54) (60) (66) (72) (78) (84) (90) (96)
Months 3 6 9 12 15 18 21 24 27 30 33 36 39 42 45 48
Emission control system maintenance
Drive belts See NOTE (1).I*
Air cleaner filter See NOTE (2). [R] [R]
Idle rpm (GA16DE engine)I* I*
EVAP vapor linesI* I*
Fuel linesI* I*
Fuel filter See NOTE (3)*.
Engine coolant See NOTE (4).R*
Engine oilRRRRRRRRRRRRRRRR
Engine oil filter (Use Nissan PREMIUM type or equivalent)RRRRRRRRRRRRRRRR
Spark plugs (GA16DE engine)[R] [R]
(SR20DE engine) (PLATINUM-TIPPED type) See NOTE (5).[R]
Intake & exhaust valve clearance (GA16DE engine) See NOTE (6)*.
NOTE: (1) After 60,000 miles (96,000 km) or 48 months, inspect every 15,000 miles (24,000 km) or 12 months.
(2) If operating mainly in dusty conditions, more frequent maintenance may be required.
(3) If vehicle is operated under extremely adverse weather conditions or in areas where ambient temperatures are either extremely low or extremely
high, the filters might become clogged. In such an event, replace them immediately.
(4) After 60,000 miles (96,000 km) or 48 months, replace every 30,000 miles (48,000 km) or 24 months.
(5) Original equipment platinum-tipped plugs should be replaced at 60,000 miles (96,000 km). Conventional spark plugs can be used but should be
replaced at 30,000 miles (48,000 km) intervals. (See ``Technical and consumer Information'' section for details.)
(6) If valve noise increases, inspect valve clearance.
* Maintenance items and intervals with an ``*'' are recommended by NISSAN for reliable vehicle operation. The owner need not perform such
maintenance in order to maintain the emission warranty or manufacturer recall liability. Other maintenance items and intervals are required.
9-6Maintenance
ZX