check engine NISSAN SENTRA 2000 B15 / 5.G Owner's Manual
[x] Cancel search | Manufacturer: NISSAN, Model Year: 2000, Model line: SENTRA, Model: NISSAN SENTRA 2000 B15 / 5.GPages: 240, PDF Size: 1.94 MB
Page 166 of 240

4. Close the drain plugs on the radiator and
the engine block securely.
5. See the ``Technical and consumer infor-
mation'' section for cooling system ca-
pacity. Fill the radiator slowly with the
proper mixture of coolant and water. Fill
the reservoir tank up to the MAX level.
6. Open and close the air release plug(s) to
release air. Then fill the radiator again
and install the radiator cap.
7.
Start the engine, and warm it up until it
reaches normal operating temperature.
Then race the engine two or three times
under no load. Watch the engine coolant
temperature gauge for signs of overheating.
8. Stop the engine. After it completely
cools down, refill the radiator up to the
filler opening. Fill the reservoir tank up to
the MAX level.
9. Open and close the air release plug(s)
to release air. Then fill the radiator again
and install the radiator cap.
10. Check the drain plugs on the radiator
and the engine block for any sign of
leakage. Also check the air release plug
for any sign of leakage.CHECKING ENGINE OIL LEVEL
1. Park the vehicle on a level surface and
apply the parking brake.
2. Start the engine and let it idle until it
reaches operating temperature.
ADI0615DI1249MWDI0014
ENGINE OIL
Do-it-yourself8-9
ZX
Page 167 of 240
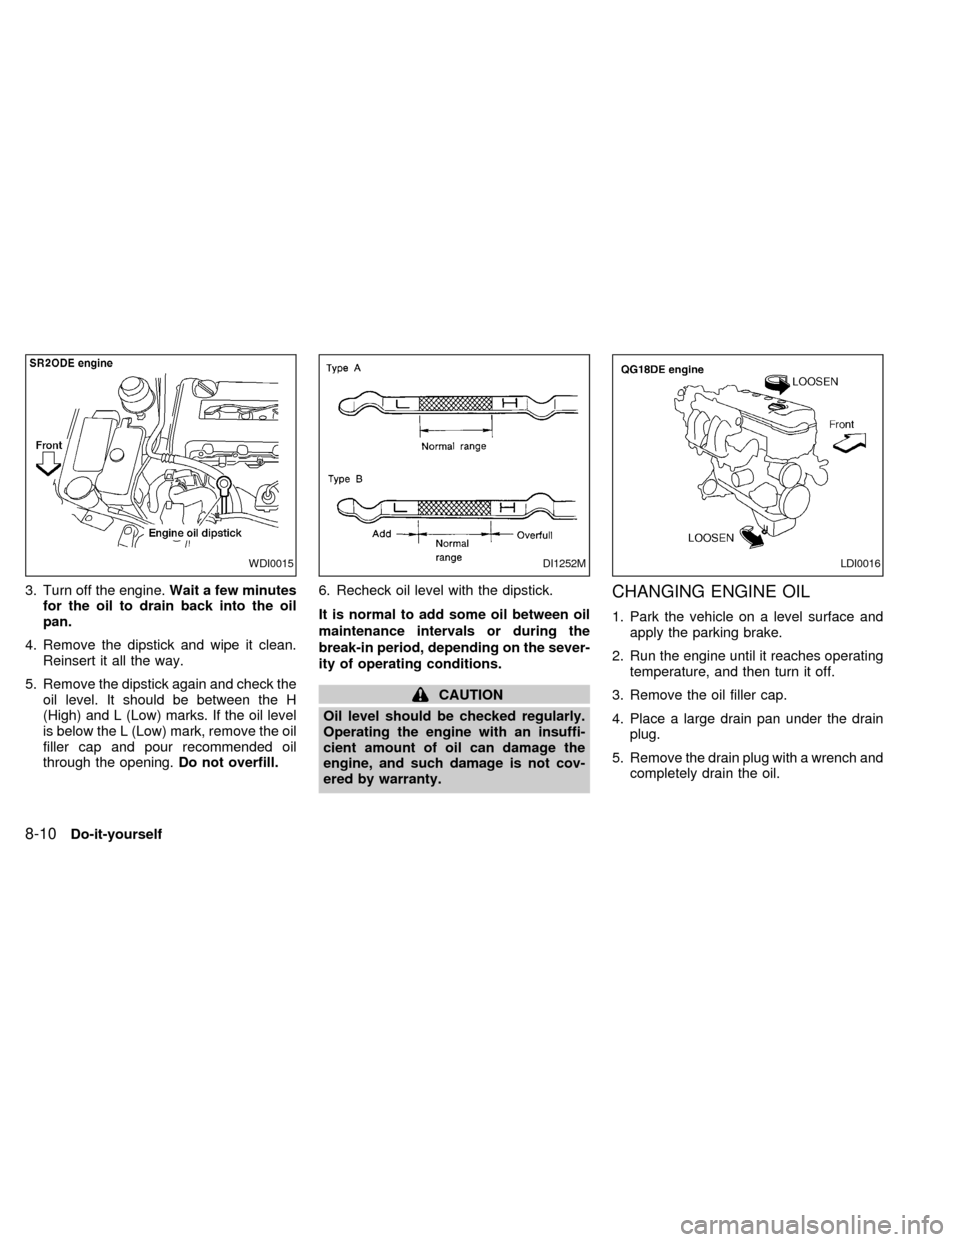
3. Turn off the engine.Wait a few minutes
for the oil to drain back into the oil
pan.
4. Remove the dipstick and wipe it clean.
Reinsert it all the way.
5. Remove the dipstick again and check the
oil level. It should be between the H
(High) and L (Low) marks. If the oil level
is below the L (Low) mark, remove the oil
filler cap and pour recommended oil
through the opening.Do not overfill.6. Recheck oil level with the dipstick.
It is normal to add some oil between oil
maintenance intervals or during the
break-in period, depending on the sever-
ity of operating conditions.
CAUTION
Oil level should be checked regularly.
Operating the engine with an insuffi-
cient amount of oil can damage the
engine, and such damage is not cov-
ered by warranty.
CHANGING ENGINE OIL
1. Park the vehicle on a level surface and
apply the parking brake.
2. Run the engine until it reaches operating
temperature, and then turn it off.
3. Remove the oil filler cap.
4. Place a large drain pan under the drain
plug.
5. Remove the drain plug with a wrench and
completely drain the oil.
WDI0015DI1252MLDI0016
8-10Do-it-yourself
ZX
Page 168 of 240
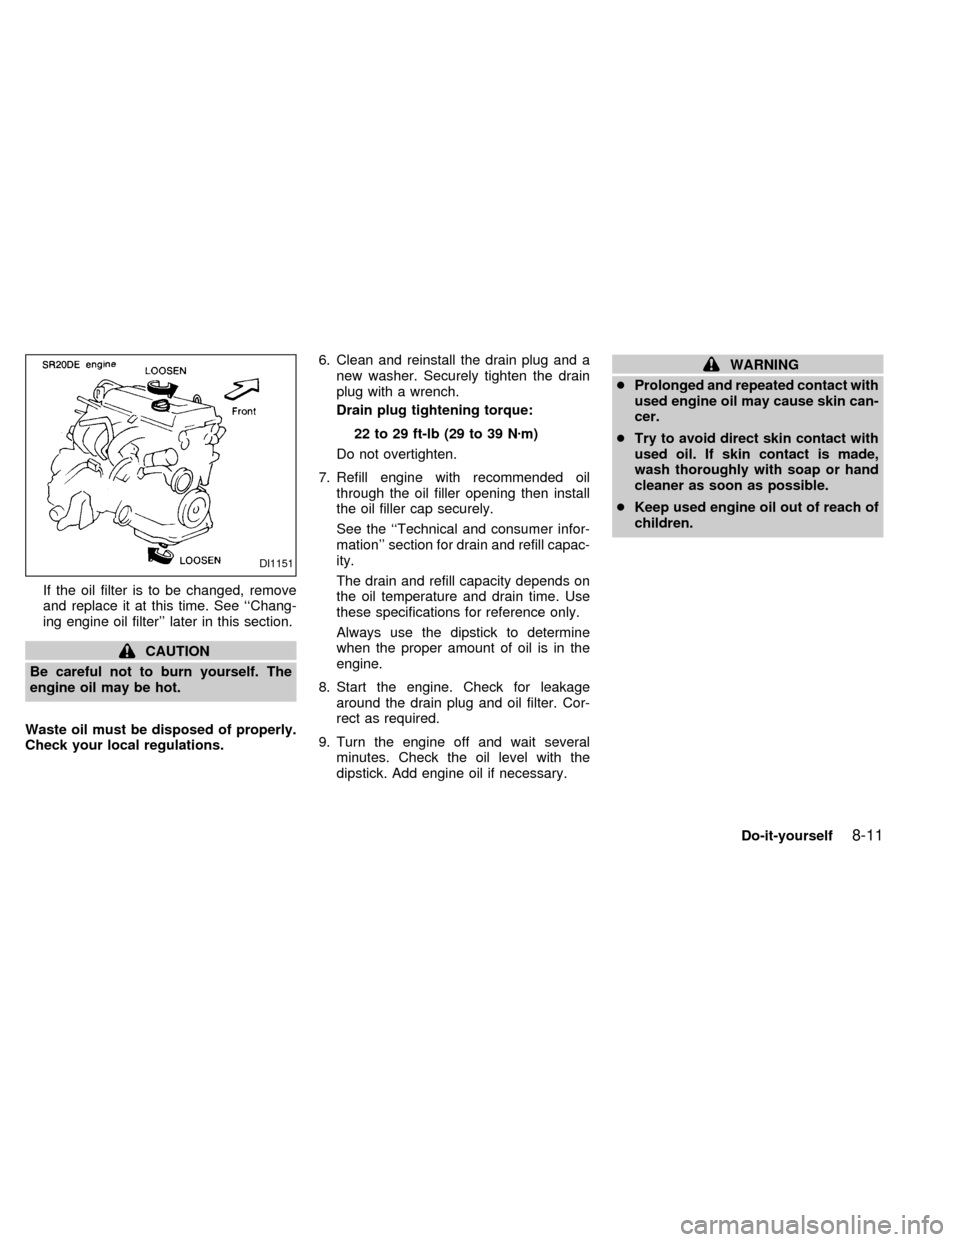
If the oil filter is to be changed, remove
and replace it at this time. See ``Chang-
ing engine oil filter'' later in this section.
CAUTION
Be careful not to burn yourself. The
engine oil may be hot.
Waste oil must be disposed of properly.
Check your local regulations.6. Clean and reinstall the drain plug and a
new washer. Securely tighten the drain
plug with a wrench.
Drain plug tightening torque:
22 to 29 ft-lb (29 to 39 Nzm)
Do not overtighten.
7. Refill engine with recommended oil
through the oil filler opening then install
the oil filler cap securely.
See the ``Technical and consumer infor-
mation'' section for drain and refill capac-
ity.
The drain and refill capacity depends on
the oil temperature and drain time. Use
these specifications for reference only.
Always use the dipstick to determine
when the proper amount of oil is in the
engine.
8. Start the engine. Check for leakage
around the drain plug and oil filter. Cor-
rect as required.
9. Turn the engine off and wait several
minutes. Check the oil level with the
dipstick. Add engine oil if necessary.
WARNING
cProlonged and repeated contact with
used engine oil may cause skin can-
cer.
cTry to avoid direct skin contact with
used oil. If skin contact is made,
wash thoroughly with soap or hand
cleaner as soon as possible.
cKeep used engine oil out of reach of
children.
DI1151
Do-it-yourself8-11
ZX
Page 169 of 240
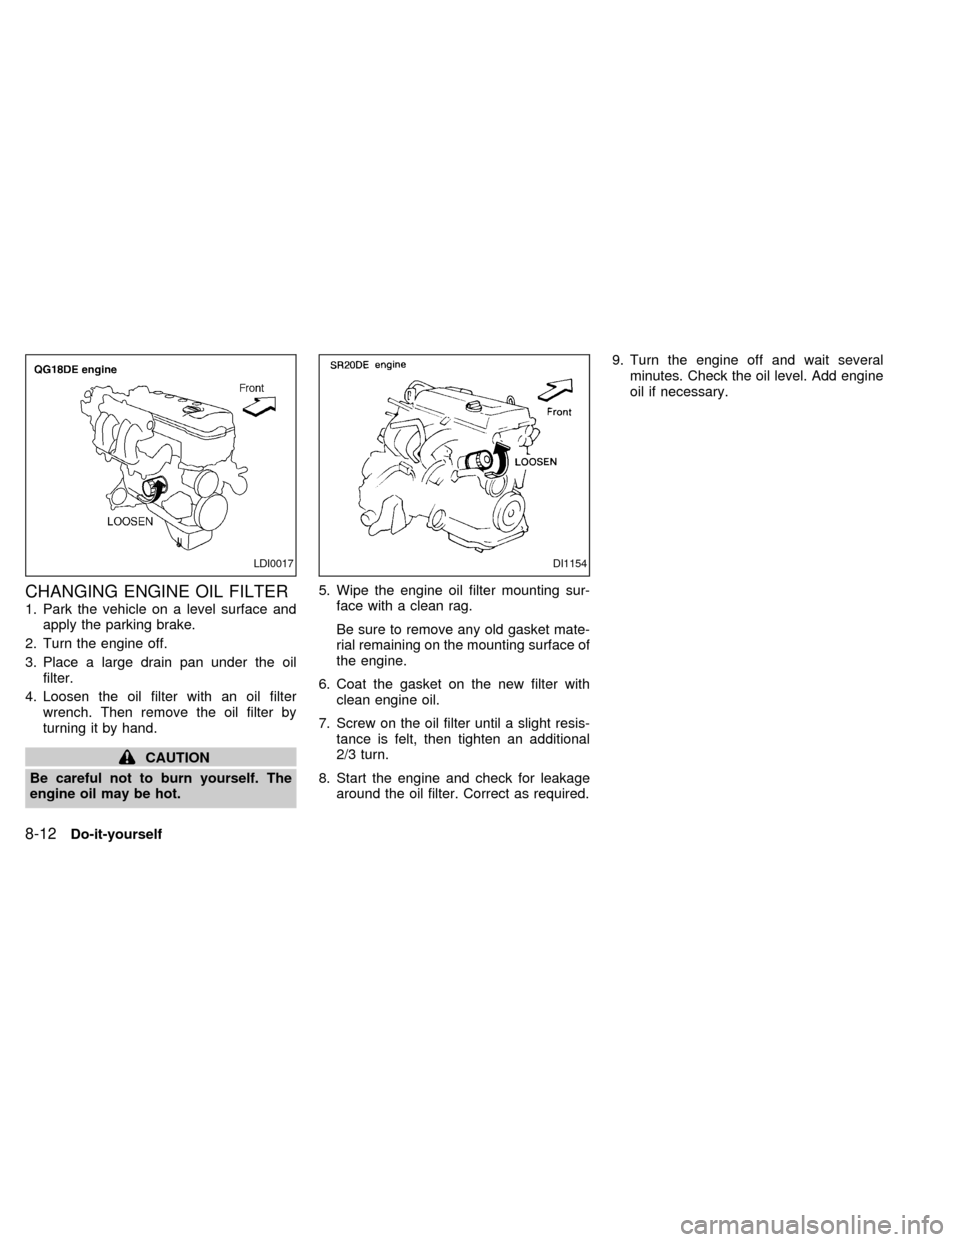
CHANGING ENGINE OIL FILTER
1. Park the vehicle on a level surface and
apply the parking brake.
2. Turn the engine off.
3. Place a large drain pan under the oil
filter.
4. Loosen the oil filter with an oil filter
wrench. Then remove the oil filter by
turning it by hand.
CAUTION
Be careful not to burn yourself. The
engine oil may be hot.5. Wipe the engine oil filter mounting sur-
face with a clean rag.
Be sure to remove any old gasket mate-
rial remaining on the mounting surface of
the engine.
6. Coat the gasket on the new filter with
clean engine oil.
7. Screw on the oil filter until a slight resis-
tance is felt, then tighten an additional
2/3 turn.
8. Start the engine and check for leakage
around the oil filter. Correct as required.9. Turn the engine off and wait several
minutes. Check the oil level. Add engine
oil if necessary.
LDI0017DI1154
8-12Do-it-yourself
ZX
Page 171 of 240

TEMPERATURE CONDITIONS
FOR CHECKING
cThe fluid level should be checked using
the HOT range on the dipstick after the
following conditions have been met:
Ð The engine should be warmed up to
operating temperature.
Ð The vehicle should be driven at least 5
minutes.
Ð The automatic transmission fluid should
be warmed to between 122 and 176ÉF
(50 and 80ÉC).cThe fluid can be checked at fluid tem-
peratures of 86 to 122ÉF (30 to 50ÉC)
using the COLD range on the dipstick
after the engine is warmed up and before
driving. However, the fluid should be
re-checked using the HOT range.
1. Park the vehicle on a level surface and
set the parking brake.
2. Start the engine and then move the shift
selector lever through each gear range.
Move the shift selector lever to P (Park)
after you have moved it through all
ranges.3. Check the fluid level with the engine
idling.
4. Remove the dipstick and wipe it clean
with lint-free paper.
5. Reinsert the dipstick into the dipstick
tube as far as it will go.
6. Remove the dipstick and note the read-
ing. If the level is at the low side of either
range, add fluid through the dipstick tube.
WDI0019
8-14Do-it-yourself
ZX
Page 175 of 240

1. Remove the battery caps with a screw-
driver as shown.2. Check the fluid level in each cell.
If it is necessary to add fluid, add only
distilled water to bring the level up to the
OK level indicator in each filler opening.
Do not overfill.
JUMP STARTING
If jump starting is necessary, see the ``In
case of emergency'' section of this owner's
manual. If the engine does not start by jump
starting, the battery may have to be re-
placed. Contact an authorized NISSAN
dealer.
WDI0020WDI0021
8-18Do-it-yourself
ZX
Page 176 of 240
WARNING
Be sure the ignition key is in the OFF or
LOCK position. The engine could rotate
unexpectedly.
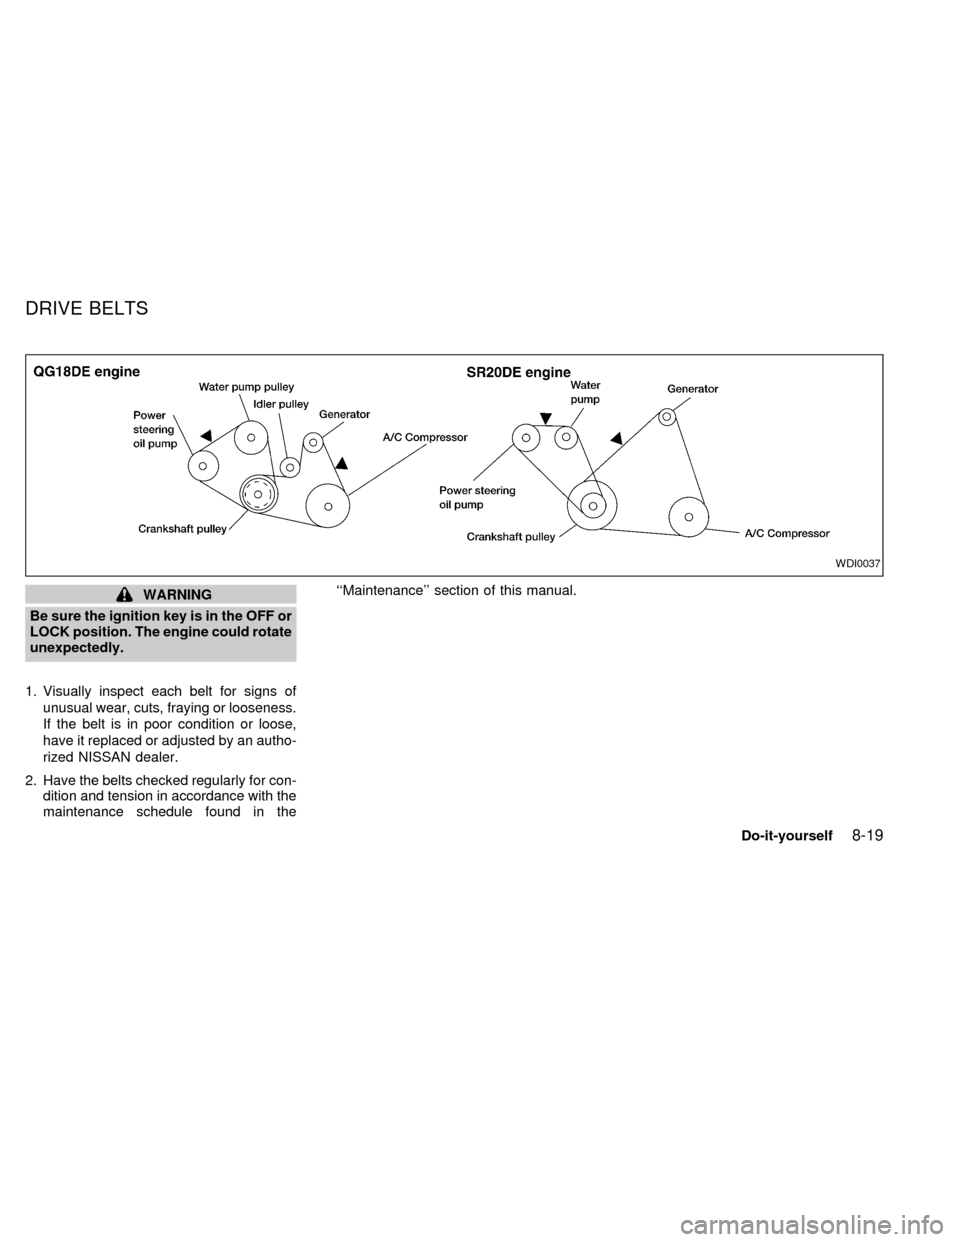
1. Visually inspect each belt for signs of
unusual wear, cuts, fraying or looseness.
If the belt is in poor condition or loose,
have it replaced or adjusted by an autho-
rized NISSAN dealer.
2. Have the belts checked regularly for con-
dition and tension in accordance with the
maintenance schedule found in the``Maintenance'' section of this manual.
WDI0037
DRIVE BELTS
Do-it-yourself8-19
ZX
Page 180 of 240

When you wax the surface of the hood, be
careful not to let wax get into the washer
nozzle. This may cause clogging or im-
proper windshield washer operation. If wax
gets into the nozzle, remove it with a needle
or small pin.
CHECKING PARK BRAKE
From the released position, pull the parking
brake lever up slowly and firmly. If the
number of clicks is out of the range listed
above, see an authorized NISSAN dealer.
CHECKING BRAKE PEDAL
With the engine running, check the distance
between the upper surface of the pedal and
the metal floor. If it is out of the range shown
above, see an authorized NISSAN dealer.
Self-adjusting brakes
Your vehicle is equipped with self-adjusting
brakes.
The front (and rear, if equipped) disc-type
brakes self-adjust every time the brake
pedal is applied. The rear drum-type brakes
also self-adjust every time the brake pedal
is applied.
ADI0613
WDI0036DI1020M
PARKING BRAKE AND BRAKE
PEDAL
Do-it-yourself8-23
ZX
Page 181 of 240
If the brake pedal goes down farther than
normal, it may be due to a lack of adjust-
ment of the rear drum brakes. To adjust,
apply the parking brake several times.
WARNING
See an authorized NISSAN dealer for a
brake system check if the brake pedal
height does not return to normal.
Brake pad wear indicators
The disc brake pads on your vehicle have
an audible wear indicator. When a brake
pad requires replacement, it makes a high
pitched scraping or screeching sound when
the vehicle is in motion whether or not the
brake pedal is depressed. Have the brakes
checked as soon as possible if the wear
indicator sound is heard.
Under some driving or climate conditions,
occasional brake squeak, squeal or other
noise may be heard. Occasional brake
noise during light to moderate stops is nor-
mal and does not affect the function or
performance of the brake system.
The rear drum brakes (if so equipped) do
not have audible wear indicators. Shouldyou ever hear an unusually loud noise from
the rear drum brakes, have them inspected
as soon as possible by an authorized NIS-
SAN dealer.
Proper brake inspection intervals should
be followed.For more information regard-
ing brake inspections, see the appropriate
maintenance schedule information in the
``Maintenance'' section of this manual.
BRAKE BOOSTER
Check the brake booster function as fol-
lows:
1. With the engine off, press and release
the brake pedal several times. When
brake pedal movement (distance of
travel) remains the same from one pedal
application to the next, continue on to the
next step.
2. While depressing the brake pedal, start
the engine. The pedal height should drop
a little.
3. With the brake pedal depressed, stop the
engine. Keeping the pedal depressed for
about 30 seconds, the pedal height
should not change.
4. Run the engine for one minute withoutdepressing the brake pedal, then turn it
off. Depress the brake pedal several
times. The pedal travel distance will de-
crease gradually with each depression
as the vacuum is released from the
booster.
If the brakes do not operate properly, see an
authorized NISSAN dealer.
8-24Do-it-yourself
ZX
Page 182 of 240
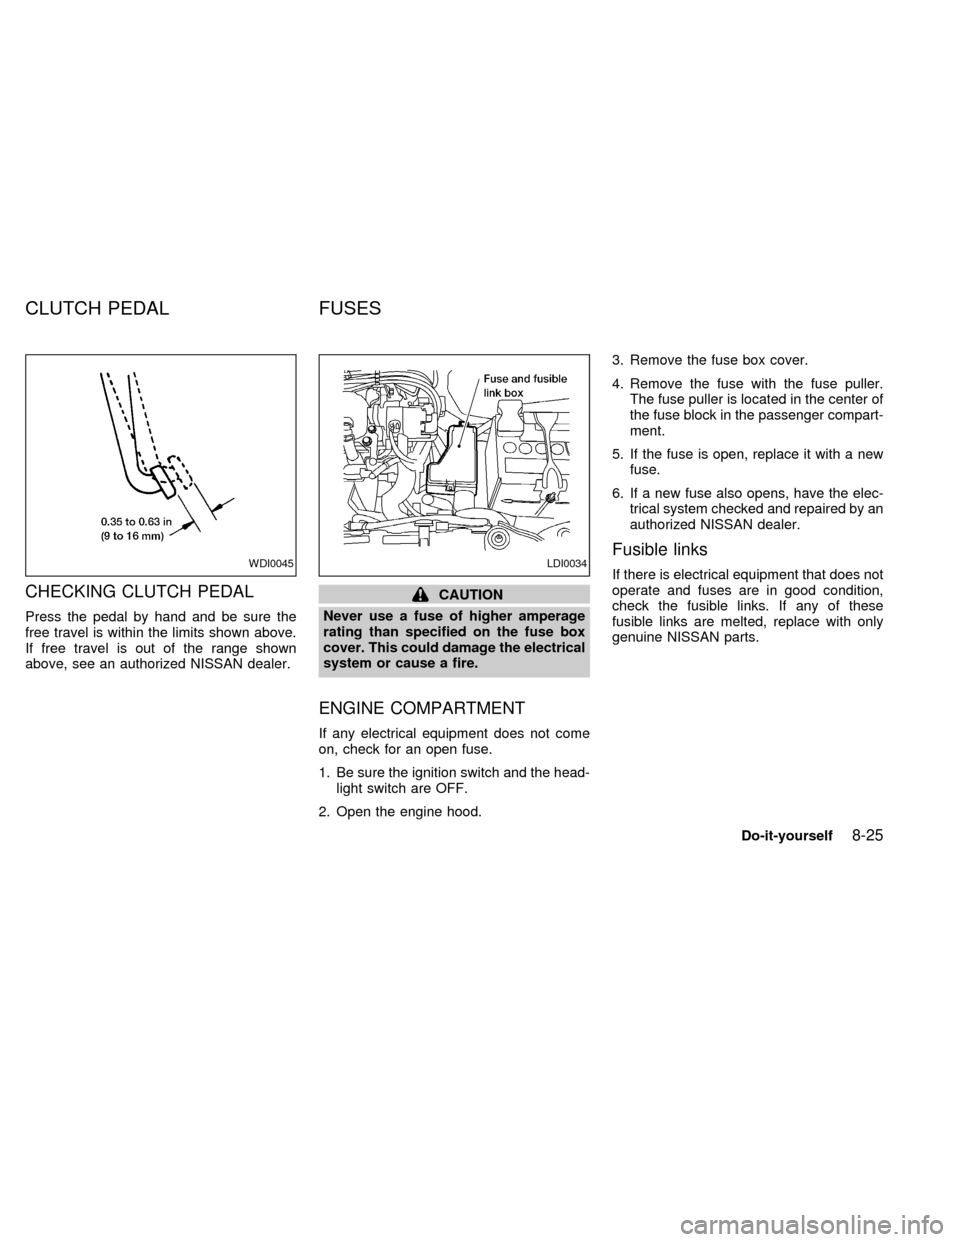
CHECKING CLUTCH PEDAL
Press the pedal by hand and be sure the
free travel is within the limits shown above.
If free travel is out of the range shown
above, see an authorized NISSAN dealer.
CAUTION
Never use a fuse of higher amperage
rating than specified on the fuse box
cover. This could damage the electrical
system or cause a fire.
ENGINE COMPARTMENT
If any electrical equipment does not come
on, check for an open fuse.
1. Be sure the ignition switch and the head-
light switch are OFF.
2. Open the engine hood.3. Remove the fuse box cover.
4. Remove the fuse with the fuse puller.
The fuse puller is located in the center of
the fuse block in the passenger compart-
ment.
5. If the fuse is open, replace it with a new
fuse.
6. If a new fuse also opens, have the elec-
trical system checked and repaired by an
authorized NISSAN dealer.
Fusible links
If there is electrical equipment that does not
operate and fuses are in good condition,
check the fusible links. If any of these
fusible links are melted, replace with only
genuine NISSAN parts.WDI0045LDI0034
CLUTCH PEDAL FUSES
Do-it-yourself8-25
ZX