NISSAN SENTRA 2003 B15 / 5.G Owners Manual
Manufacturer: NISSAN, Model Year: 2003, Model line: SENTRA, Model: NISSAN SENTRA 2003 B15 / 5.GPages: 224, PDF Size: 3.12 MB
Page 181 of 224

Replace the battery in the keyfob as follows:
s1Open the lid using a coin.
s2Remove the battery.
s3Install a new battery with the “+” facing
down.Recommended battery: Sanyo CR2025 or
equivalent.
s4Close the lid securely.
5. Press the LOCK button, then the UNLOCK
button two or three times to check the key-
fob operation.If the battery is removed for any reason
other than replacement, perform step 5.
cAn improperly disposed battery can hurt
the environment. Always confirm local
regulations for battery disposal.
cThe keyfob is water-resistant; however,
if it does get wet, immediately wipe com-
pletely dry.
cThe operational range of the keyfob ex-
tends to approximately 49 ft (15 m) from
the vehicle. This range may vary with
conditions.
FCC Notice:
Changes or modifications not expressly ap-
proved by the manufacturer for compliance
could void the user’s authority to operate
the equipment.
This device complies with Part 15 of the
FCC Rules and RSS-210 of Industry
Canada.
Operation is subject to the following two
conditions: (1) This device may not cause
harmful interference, and (2) this device
must accept any interference received, in-
cluding interference that may cause undes-
ired operation of the device.
WPD0116
KEYFOB BATTERY REPLACEMENT
Maintenance and do-it-yourself8-33
ZREVIEW COPY:Ð2003 Sentra(b15)
Owners Manual(owners)ÐUSA English(nna)
12/20/02Ðcathy
X
Page 182 of 224

HEADLIGHTS
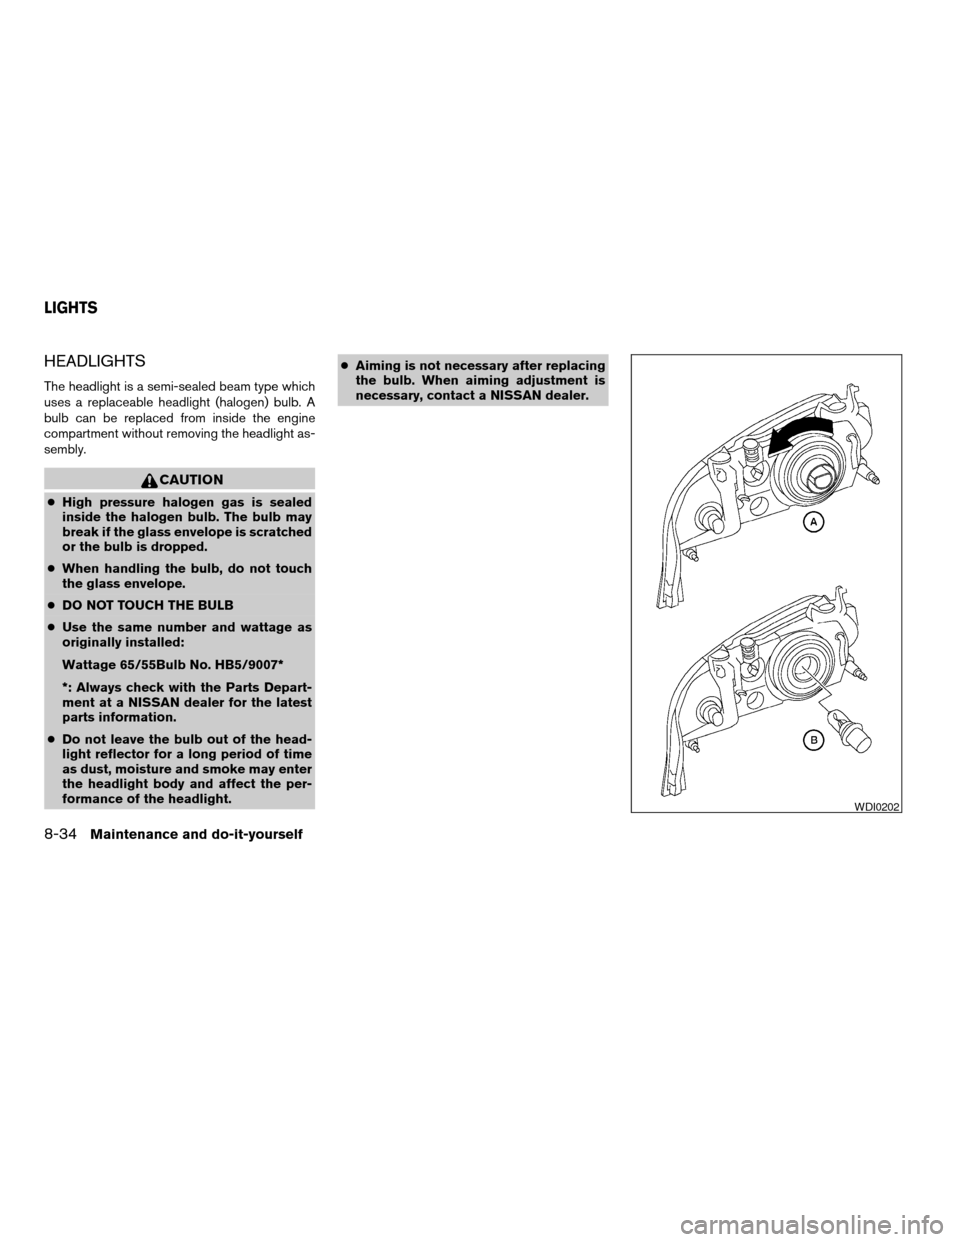
The headlight is a semi-sealed beam type which
uses a replaceable headlight (halogen) bulb. A
bulb can be replaced from inside the engine
compartment without removing the headlight as-
sembly.
CAUTION
cHigh pressure halogen gas is sealed
inside the halogen bulb. The bulb may
break if the glass envelope is scratched
or the bulb is dropped.
cWhen handling the bulb, do not touch
the glass envelope.
cDO NOT TOUCH THE BULB
cUse the same number and wattage as
originally installed:
Wattage 65/55Bulb No. HB5/9007*
*: Always check with the Parts Depart-
ment at a NISSAN dealer for the latest
parts information.
cDo not leave the bulb out of the head-
light reflector for a long period of time
as dust, moisture and smoke may enter
the headlight body and affect the per-
formance of the headlight.cAiming is not necessary after replacing
the bulb. When aiming adjustment is
necessary, contact a NISSAN dealer.
WDI0202
LIGHTS
8-34Maintenance and do-it-yourself
ZREVIEW COPY:Ð2003 Sentra(b15)
Owners Manual(owners)ÐUSA English(nna)
12/20/02Ðcathy
X
Page 183 of 224

Removing the headlight bulb
1. Open the engine hood.
2. Disconnect the negative (-) battery cable.
3. Disconnect the electrical connector from the
rear end of the bulb.
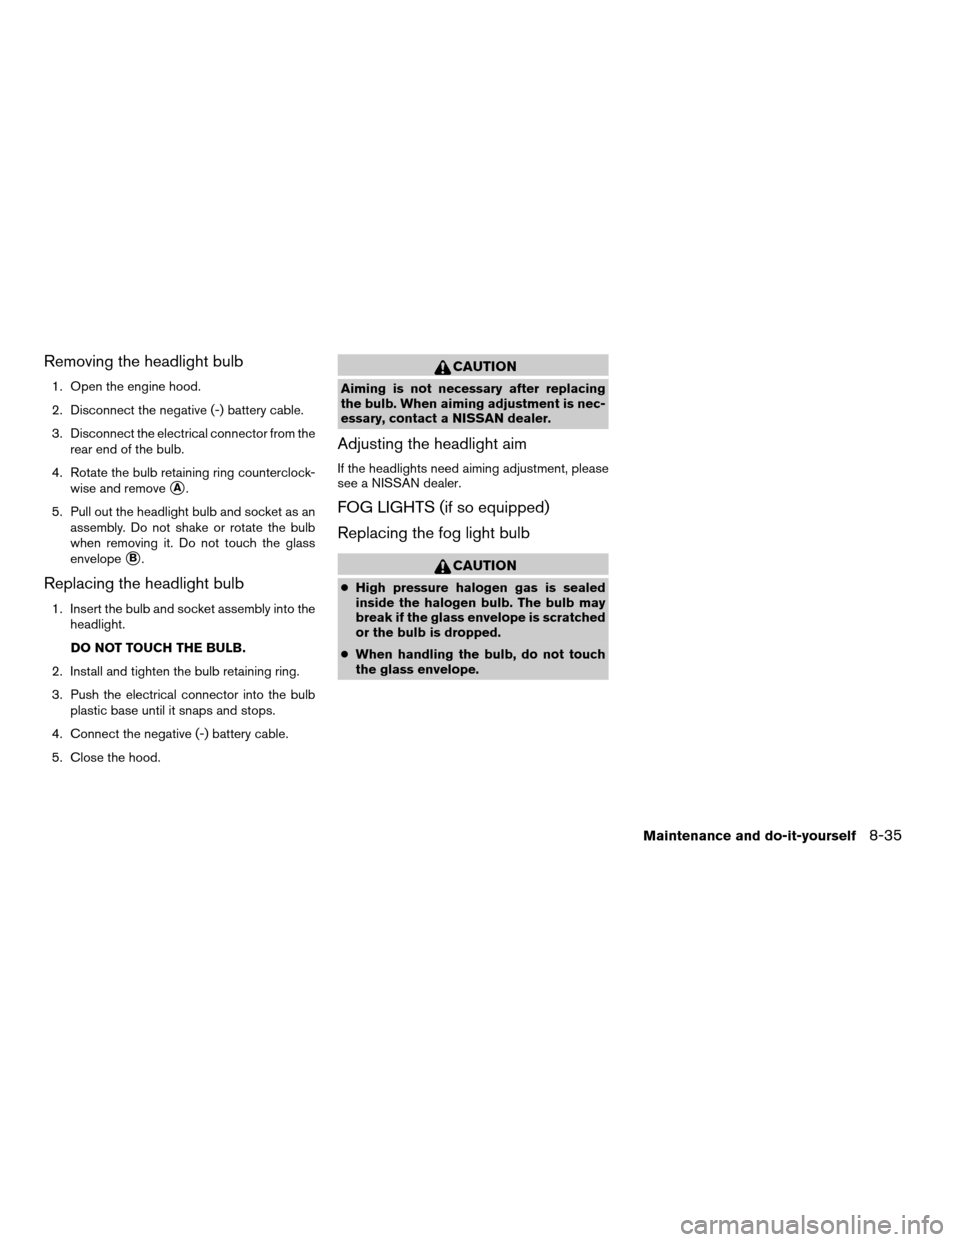
4. Rotate the bulb retaining ring counterclock-
wise and remove
sA.
5. Pull out the headlight bulb and socket as an
assembly. Do not shake or rotate the bulb
when removing it. Do not touch the glass
envelope
sB.
Replacing the headlight bulb
1. Insert the bulb and socket assembly into the
headlight.
DO NOT TOUCH THE BULB.
2. Install and tighten the bulb retaining ring.
3. Push the electrical connector into the bulb
plastic base until it snaps and stops.
4. Connect the negative (-) battery cable.
5. Close the hood.
CAUTION
Aiming is not necessary after replacing
the bulb. When aiming adjustment is nec-
essary, contact a NISSAN dealer.
Adjusting the headlight aim
If the headlights need aiming adjustment, please
see a NISSAN dealer.
FOG LIGHTS (if so equipped)
Replacing the fog light bulb
CAUTION
cHigh pressure halogen gas is sealed
inside the halogen bulb. The bulb may
break if the glass envelope is scratched
or the bulb is dropped.
cWhen handling the bulb, do not touch
the glass envelope.
Maintenance and do-it-yourself8-35
ZREVIEW COPY:Ð2003 Sentra(b15)
Owners Manual(owners)ÐUSA English(nna)
12/20/02Ðcathy
X
Page 184 of 224

1. Disconnect the negative (-) battery cable.
2. Remove screw.
3. Disconnect connector.
4. Push the fog light assembly toward the front
of the vehicle and pull out to expose the rear
of the assembly.
5. Rotate the bulb cover
sAcounterclockwise
and remove.
6. Lift the spring retainer
sB.
7. Remove the fog light bulb from housing
sC.
8. Disconnect the electrical connector
sD.
EXTERIOR AND INTERIOR LIGHTS
Item Wattage (W) Bulb No.*
Headlights 65/55 9007(HB5)
Parking and turn
signal light8/27 3157AK
Fog light (if so
equipped)55 H3
Map light (if so
equipped)868
Interior light 8 68
Rear combination
light
Turn 27 1156A
Stop/tail 27/8 1157
High-mounted stop
light
Inside 18 921
Spoiler (if so
equipped)See a NISSAN
dealer for as-
sistance
License plate light 5 194
Backup light 18 921
Trunk light 3.4 158
*: Always check with the Parts Department at a
NISSAN dealer for the latest parts information.
WDI0204
8-36Maintenance and do-it-yourself
ZREVIEW COPY:Ð2003 Sentra(b15)
Owners Manual(owners)ÐUSA English(nna)
12/20/02Ðcathy
X
Page 185 of 224

1. Map lights (if so equipped)
2. Interior light
3. Front combination light
4. Front fog light (if so equipped)
5. High-mounted stoplight
6. License plate lights
7. Stoplight in rear spoiler (if so equipped)
8. Backup lights
9. Rear combination light
Indicates bulb removal
Indicates bulb replacement
WDI0205
WDI0257
Maintenance and do-it-yourself8-37
ZREVIEW COPY:Ð2003 Sentra(b15)
Owners Manual(owners)ÐUSA English(nna)
12/20/02Ðcathy
X
Page 186 of 224

Replacement procedures
All other lights are either type A, B, C or D. When
replacing a bulb, first remove the lens and/or
cover.
Use a cloth
s1to protect the interior light hous-
ing.
Interior light
WDI0206
Trunk light (if so equipped)
WDI0207
8-38Maintenance and do-it-yourself
ZREVIEW COPY:Ð2003 Sentra(b15)
Owners Manual(owners)ÐUSA English(nna)
12/20/02Ðcathy
X
Page 187 of 224

Loosen the connector by turning it counterclock-
wise
s1.If you have a flat tire, see the “In case of
emergency” section in this manual.TIRE PRESSURE
Maximum inflation pressure
Do not exceed the maximum inflation pressures
shown on the sidewall of the tire
s1.
Tire inflation pressure
Check the tire pressure (including the spare) at
least once a month and always prior to long
distance trips. Incorrect tire pressure may ad-
versely affect tire life and vehicle handling. Tire
pressure should be checked when tires are
License plate light
WDI0208
Backup light
WDI0209WDI0210
WHEELS AND TIRES
Maintenance and do-it-yourself8-39
ZREVIEW COPY:Ð2003 Sentra(b15)
Owners Manual(owners)ÐUSA English(nna)
12/20/02Ðcathy
X
Page 188 of 224

COLD. Tires are considered COLD after the
vehicle has been parked for three or more hours,
or driven less than 1 mile (1.6 km) at moderate
speeds. COLD tire pressures are shown on the
tire placard affixed to the driver’s side rear door
pillar.
WARNING
cImproperly inflated tires can fail sud-
denly and cause an accident.
cThe vehicle weight capacity is indicated
on the F.M.V.S.S. certification label. Do
not load your vehicle beyond this ca-
pacity. Overloading your vehicle may
result in reduced tire life, unsafe oper-
ating conditions due to premature tire
failure, or unfavorable handling charac-
teristics and could also lead to a seri-
ous accident. Loading beyond the
specified capacity may also result in
failure of other vehicle components.
cBefore taking a long trip, or whenever
you heavily load your vehicle, use a tire
pressure gauge to ensure that the tire
pressures are at the specified level.cDo not drive your vehicle over 85 MPH
(137 km/h) unless it is equipped with
high speed rated tires. Driving faster
than 85 MPH (137 km/h) may result in
tire failure, loss of control and possible
injury.
cFor additional information regarding
tires, refer to Important Tire Safety In-
formation (US) or Tire Safety Informa-
tion (Canada) in the Warranty Informa-
tion Booklet.
TYPES OF TIRES
WARNING
cWhen changing or replacing tires, be
sure all four tires are of the same type
(i.e., Summer, All Season or Snow) and
construction. A NISSAN dealer may be
able to help you with information about
tire type, size, speed rating and avail-
ability. Replacement tires may have a
lower speed rating than the factory
equipped tires, and may not match the
potential maximum vehicle speed.
Never exceed the maximum speed rat-
ing of the tire.cFor additional information regarding
tires, refer to Important Tire Safety In-
formation (US) or Tire Safety Informa-
tion (Canada) in the Warranty Informa-
tion Booklet.
All season tires
NISSAN specifies All Season tires on some mod-
els to provide good performance all year, includ-
ing snowy and icy road conditions. All Season
tires are identified by ALL SEASON and/or M&S
on the tire sidewall. Snow tires have better snow
traction than All Season tires and may be more
appropriate in some areas.
Summer tires
NISSAN specifies summer tires on some models
to provide superior performance on dry roads.
Summer tire performance is substantially re-
duced in snow and ice. Summer tires do not have
the tire traction rating “M&S” on the tire sidewall.
If you plan to operate your vehicle in snowy or icy
conditions, NISSAN recommends the use of
SNOW tires or ALL SEASON tires on all four
wheels.
Snow tires
If snow tires are needed, it is necessary to select
tires equivalent in size and load rating to the
8-40Maintenance and do-it-yourself
ZREVIEW COPY:Ð2003 Sentra(b15)
Owners Manual(owners)ÐUSA English(nna)
12/20/02Ðcathy
X
Page 189 of 224

original equipment tires. If you do not, it can
adversely affect the safety and handling of your
vehicle.
Generally, snow tires have lower speed ratings
than factory equipped tires and may not match
the potential maximum vehicle speed. Never ex-
ceed the maximum speed rating of the tire.
If you install snow tires, they must be the same
size, brand, construction and tread pattern on all
four wheels.
For additional traction on icy roads, studded tires
may be used. However, some U.S. states and
Canadian provinces prohibit their use. Check
local, state and provincial laws before installing
studded tires. Skid and traction capabilities of
studded snow tires on wet or dry surfaces may be
poorer than that of non-studded snow tires.
TIRE CHAINS
Tire chains/cables cannot be installed on
P215/45ZR17 size tires. Installation of tire
chains/cables on P215/45ZR17 size tires
will cause damage to the vehicle. If you
plan to use tire chains/cables, you should
install P195/55R16 size tires on your ve-
hicle.
Use of tire chains may be prohibited according to
location. Check the local laws before installing
tire chains. When installing tire chains, make surethey are the proper size for the tires on your
vehicle and are installed according to the chain
manufacturer’s suggestions.Use only SAE
class “S” chains.Class9S9chains are used on
vehicles with restricted wheel well clearance.
Vehicles that can use Class “S” chains are de-
signed to meet the minimum clearances between
the tire and the closest vehicle suspension or
body component required to accommodate the
use of a winter traction device (tire chains or
cables) . The minimum clearances are determined
using the factory equipped tires. Other types may
damage your vehicle. Use chain tensioners when
recommended by the tire chain manufacturer to
ensure a tight fit. Loose end links of the tire chain
must be secured or removed to prevent the pos-
sibility of whipping action damage to the fenders
or underbody. If possible, avoid fully loading your
vehicle when using tire chains. In addition, drive
at a reduced speed. Otherwise, your vehicle may
be damaged and/or vehicle handling and perfor-
mance may be adversely affected.
Tire chains must be installed only on the
front wheels and not on the rear wheels.
Never install tire chains on a TEMPORARY USE
ONLY spare tire.Do not use tire chains on dry roads. Driving with
chains in such conditions can cause damage to
the various mechanisms of the vehicle due to
some overstress.
Maintenance and do-it-yourself8-41
ZREVIEW COPY:Ð2003 Sentra(b15)
Owners Manual(owners)ÐUSA English(nna)
12/20/02Ðcathy
X
Page 190 of 224

CHANGING WHEELS AND TIRES
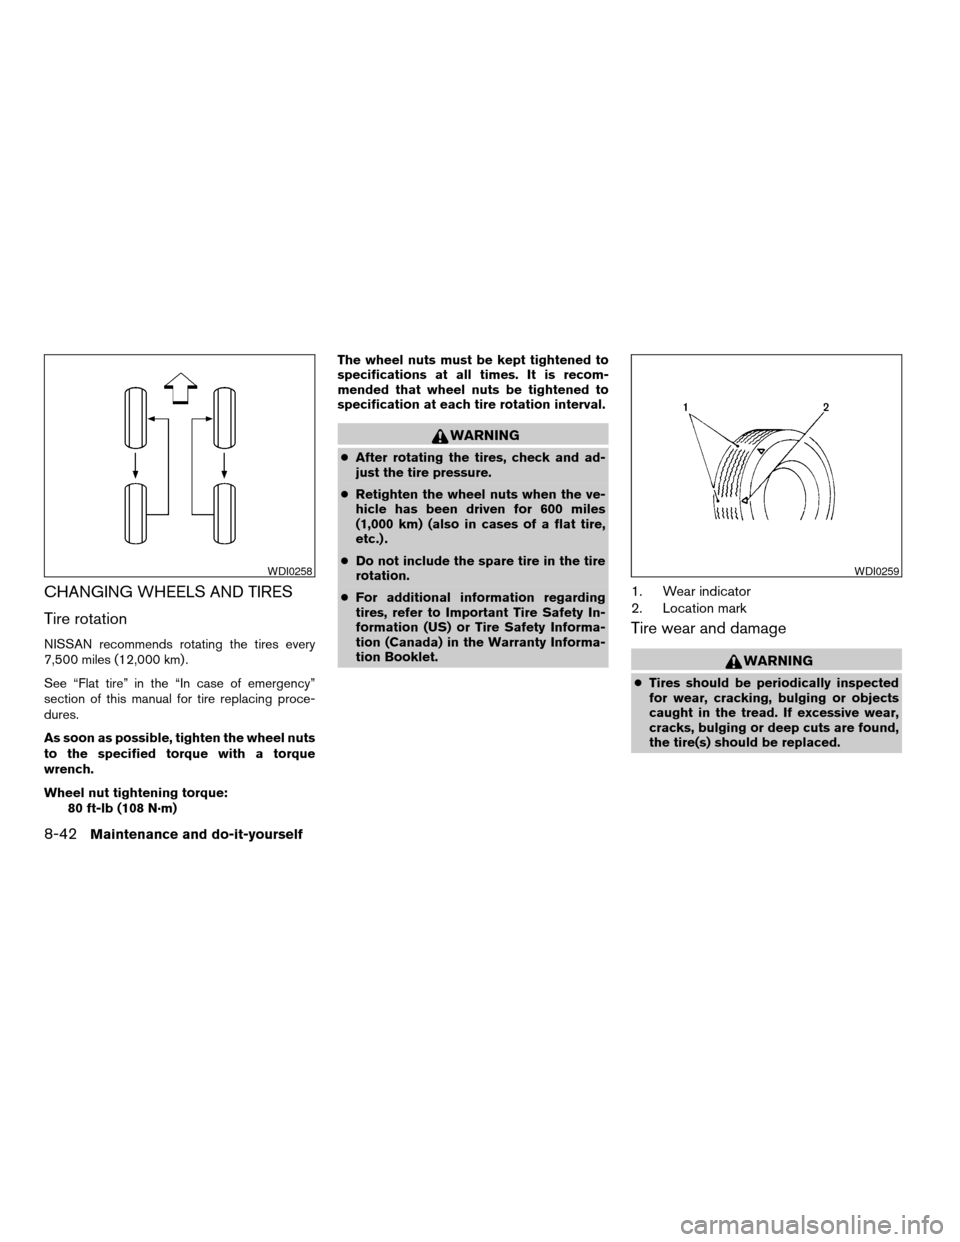
Tire rotation
NISSAN recommends rotating the tires every
7,500 miles (12,000 km) .
See “Flat tire” in the “In case of emergency”
section of this manual for tire replacing proce-
dures.
As soon as possible, tighten the wheel nuts
to the specified torque with a torque
wrench.
Wheel nut tightening torque:
80 ft-lb (108 N·m)The wheel nuts must be kept tightened to
specifications at all times. It is recom-
mended that wheel nuts be tightened to
specification at each tire rotation interval.
WARNING
cAfter rotating the tires, check and ad-
just the tire pressure.
cRetighten the wheel nuts when the ve-
hicle has been driven for 600 miles
(1,000 km) (also in cases of a flat tire,
etc.) .
cDo not include the spare tire in the tire
rotation.
cFor additional information regarding
tires, refer to Important Tire Safety In-
formation (US) or Tire Safety Informa-
tion (Canada) in the Warranty Informa-
tion Booklet.
1. Wear indicator
2. Location mark
Tire wear and damage
WARNING
cTires should be periodically inspected
for wear, cracking, bulging or objects
caught in the tread. If excessive wear,
cracks, bulging or deep cuts are found,
the tire(s) should be replaced.
WDI0258WDI0259
8-42Maintenance and do-it-yourself
ZREVIEW COPY:Ð2003 Sentra(b15)
Owners Manual(owners)ÐUSA English(nna)
12/20/02Ðcathy
X