full NISSAN SENTRA 2004 B15 / 5.G Owners Manual
[x] Cancel search | Manufacturer: NISSAN, Model Year: 2004, Model line: SENTRA, Model: NISSAN SENTRA 2004 B15 / 5.GPages: 248, PDF Size: 3.86 MB
Page 1 of 248
Welcome to the growing family of new NISSAN
owners. This vehicle is delivered to you with
confidence. It was produced using the latest
techniques and strict quality control.
This manual was prepared to help you under-
stand the operation and maintenance of your
vehicle so that you may enjoy many miles (kilome-
ters) of driving pleasure. Please read through this
manual before operating your vehicle.
A separate Warranty Information Booklet
explains details about the warranties cov-
ering your vehicle. The “NISSAN Service
and Maintenance Guide” explains details
about maintaining and servicing your ve-
hicle. Additionally, a separate Customer
Care/Lemon Law Booklet (U.S. only) will
explain how to resolve any concerns you
may have with your vehicle, as well as
clarify your rights under your state’s lemon
law.
Your NISSAN dealership knows your vehicle
best. When you require any service or have any
questions, they will be glad to assist you with the
extensive resources available to them.Before driving your vehicle please read this Own-
er’s Manual carefully. This will ensure familiarity
with controls and maintenance requirements, as-
sisting you in the safe operation of your vehicle.
WARNING
IMPORTANT SAFETY INFORMATION RE-
MINDERS FOR SAFETY!
Follow these important driving rules to
help ensure a safe and complete trip for
you and your passengers!
cNEVER drive under the influence of al-
cohol or drugs.
cALWAYS observe posted speed limits
and never drive too fast for conditions.
cALWAYS use your seat belts and appro-
priate child restraint systems. Preteen
children should be seated in the rear
seat.
cALWAYS provide information about the
proper use of vehicle safety features to
all occupants of the vehicle.
cALWAYS review this owner’s manual for
important safety information.
MODIFICATION OF YOUR VEHICLE
This vehicle should not be modified.
Modification could affect its
performance, safety or durability, and
may even violate governmental
regulations. In addition, damage or per-
formance problems resulting from
modifications may not be covered un-
der NISSAN warranties.
FOREWORD READ FIRST—THEN DRIVE SAFELY
ZREVIEW COPY:Ð2004 Sentra(b15)
Owners Manual(owners)ÐUSA English(nna)
03/18/04Ðtbrooks
X
Page 2 of 248
This manual includes information for all options
available on this model. Therefore, you may find
some information that does not apply to your
vehicle.
All information, specifications and illustrations in
this manual are those in effect at the time of
printing. NISSAN reserves the right to change
specifications or design without notice and with-
out obligation.
IMPORTANT INFORMATION ABOUT
THIS MANUAL
You will see various symbols in this manual. They
are used in the following ways:
WARNING
This is used to indicate the presence of a
hazard that could cause death or serious
personal injury. To avoid or reduce the
risk, the procedures must be followed
precisely.
CAUTION
This is used to indicate the presence of a
hazard that could cause minor or moder-
ate personal injury or damage to your ve-
hicle. To avoid or reduce the risk, the pro-
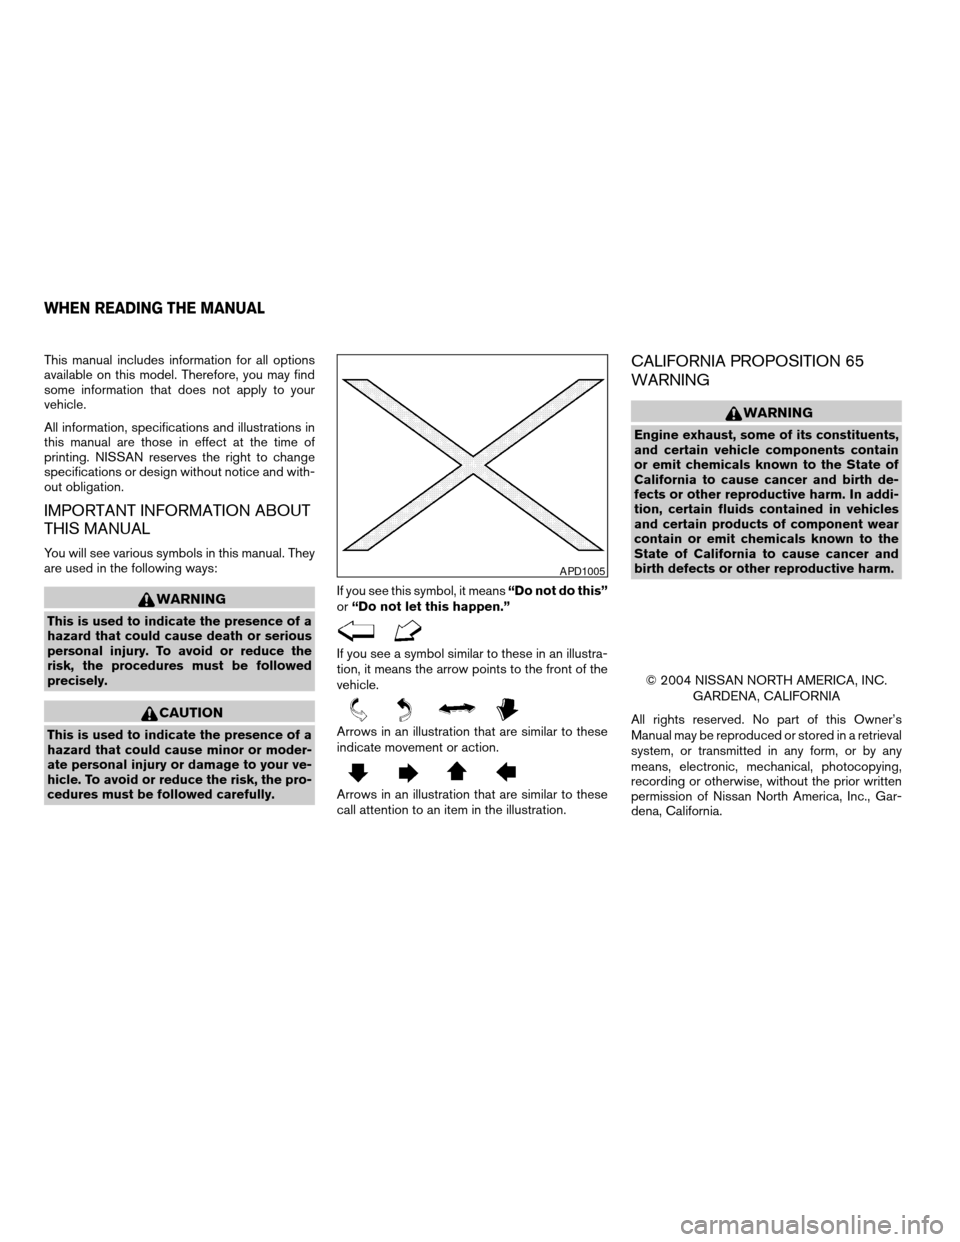
cedures must be followed carefully.If you see this symbol, it means“Do not do this”
or“Do not let this happen.”
If you see a symbol similar to these in an illustra-
tion, it means the arrow points to the front of the
vehicle.
Arrows in an illustration that are similar to these
indicate movement or action.
Arrows in an illustration that are similar to these
call attention to an item in the illustration.
CALIFORNIA PROPOSITION 65
WARNING
WARNING
Engine exhaust, some of its constituents,
and certain vehicle components contain
or emit chemicals known to the State of
California to cause cancer and birth de-
fects or other reproductive harm. In addi-
tion, certain fluids contained in vehicles
and certain products of component wear
contain or emit chemicals known to the
State of California to cause cancer and
birth defects or other reproductive harm.
© 2004 NISSAN NORTH AMERICA, INC.
GARDENA, CALIFORNIA
All rights reserved. No part of this Owner’s
Manual may be reproduced or stored in a retrieval
system, or transmitted in any form, or by any
means, electronic, mechanical, photocopying,
recording or otherwise, without the prior written
permission of Nissan North America, Inc., Gar-
dena, California.
APD1005
WHEN READING THE MANUAL
ZREVIEW COPY:Ð2004 Sentra(b15)
Owners Manual(owners)ÐUSA English(nna)
03/18/04Ðtbrooks
X
Page 18 of 248
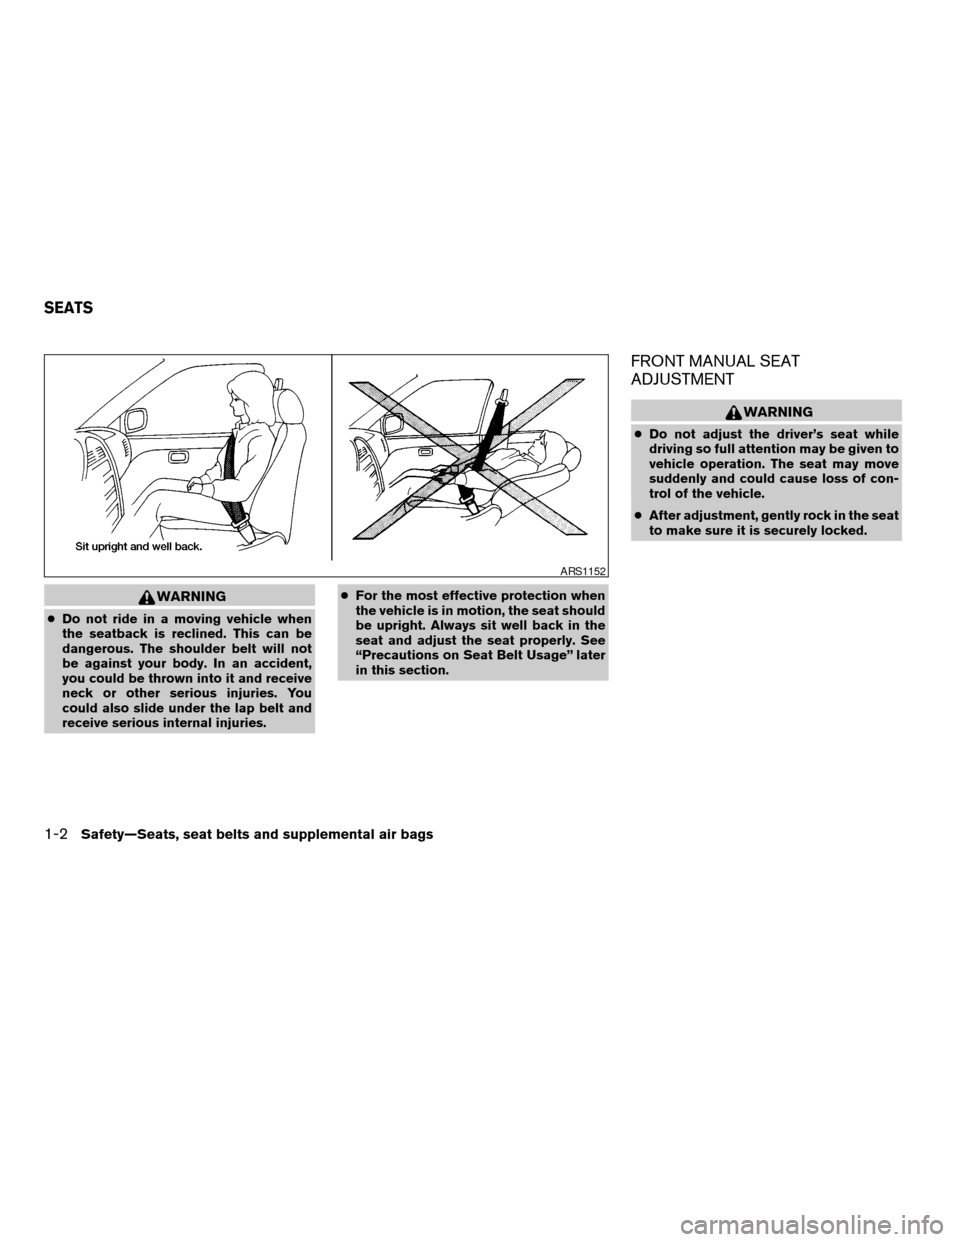
WARNING
cDo not ride in a moving vehicle when
the seatback is reclined. This can be
dangerous. The shoulder belt will not
be against your body. In an accident,
you could be thrown into it and receive
neck or other serious injuries. You
could also slide under the lap belt and
receive serious internal injuries.cFor the most effective protection when
the vehicle is in motion, the seat should
be upright. Always sit well back in the
seat and adjust the seat properly. See
“Precautions on Seat Belt Usage” later
in this section.
FRONT MANUAL SEAT
ADJUSTMENT
WARNING
cDo not adjust the driver’s seat while
driving so full attention may be given to
vehicle operation. The seat may move
suddenly and could cause loss of con-
trol of the vehicle.
cAfter adjustment, gently rock in the seat
to make sure it is securely locked.
ARS1152
SEATS
1-2Safety—Seats, seat belts and supplemental air bags
ZREVIEW COPY:Ð2004 Sentra(b15)
Owners Manual(owners)ÐUSA English(nna)
03/18/04Ðtbrooks
X
Page 28 of 248

1. Supplemental front air bag modules
2. Supplemental side-impact air bag
modules (if so equipped)
3. Satellite sensors (if so equipped)
4. Seat belt pre-tensioner retractor
5. Diagnosis sensor unit
Supplemental front air bag system
The driver supplemental front air bag is located in
the center of the steering wheel. The passenger
supplemental front air bag is mounted in the
dashboard above the glove box.
These systems are designed to meet optional
certification requirements under U.S. regulations.They are also permitted in Canada. The optional
certification allows the front air bags to be de-
signed to inflate somewhat less forcefully than
previously.However, all of the information,
cautions and warnings in this manual still
apply and must be followed.
The supplemental front air bag system is de-
signed to inflate in higher severity frontal colli-
sions, although it may inflate if the forces in an-
other type of collision are similar to those of a
higher severity frontal impact. It may not inflate in
certain frontal collisions. Vehicle damage (or lack
of it) is not always an indication of proper supple-
mental front air bag system operation.
SSS0162WRS0135
1-12Safety—Seats, seat belts and supplemental air bags
ZREVIEW COPY:Ð2004 Sentra(b15)
Owners Manual(owners)ÐUSA English(nna)
03/18/04Ðtbrooks
X
Page 39 of 248
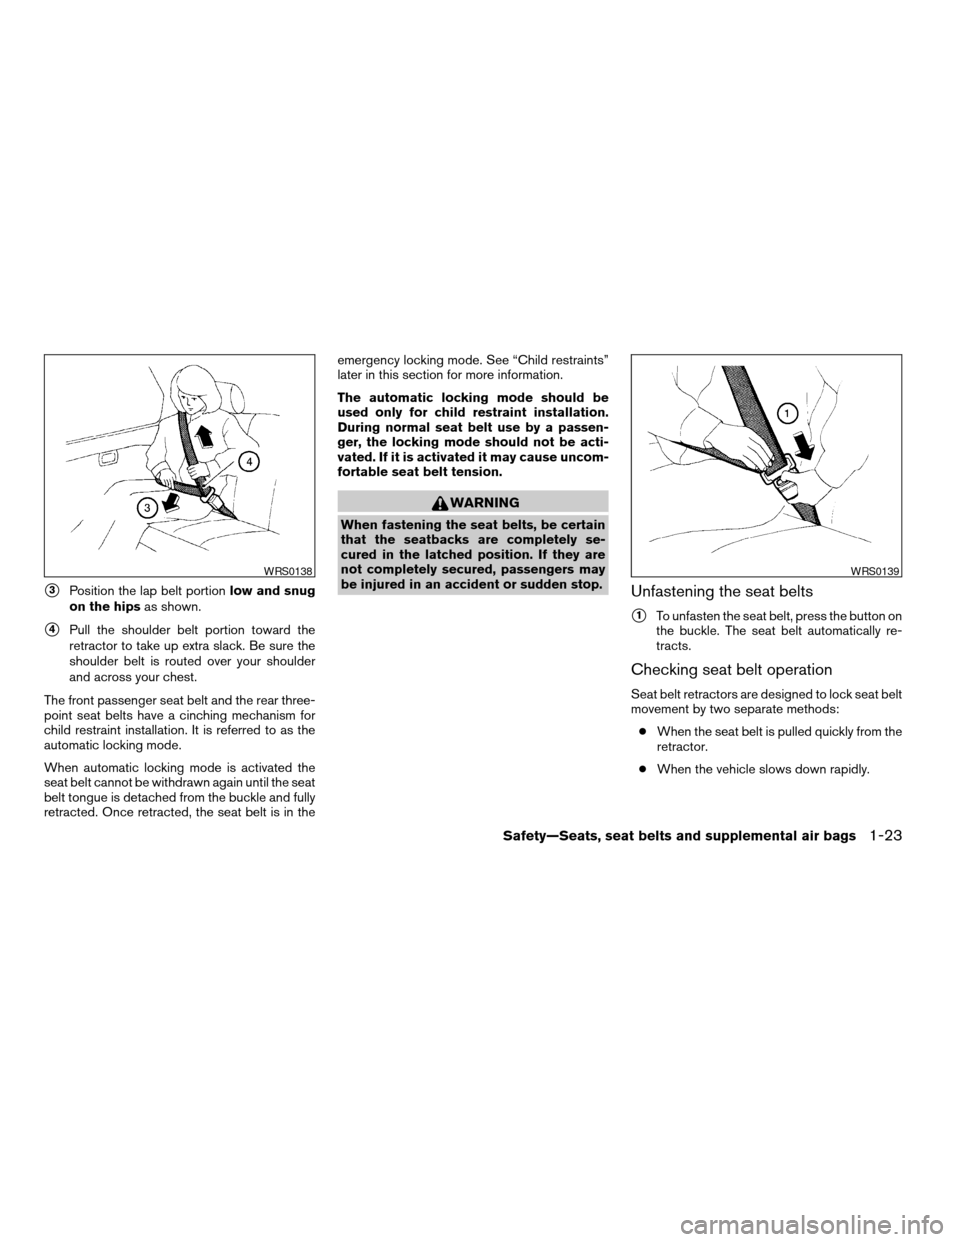
s3Position the lap belt portionlow and snug
on the hipsas shown.
s4Pull the shoulder belt portion toward the
retractor to take up extra slack. Be sure the
shoulder belt is routed over your shoulder
and across your chest.
The front passenger seat belt and the rear three-
point seat belts have a cinching mechanism for
child restraint installation. It is referred to as the
automatic locking mode.
When automatic locking mode is activated the
seat belt cannot be withdrawn again until the seat
belt tongue is detached from the buckle and fully
retracted. Once retracted, the seat belt is in theemergency locking mode. See “Child restraints”
later in this section for more information.
The automatic locking mode should be
used only for child restraint installation.
During normal seat belt use by a passen-
ger, the locking mode should not be acti-
vated. If it is activated it may cause uncom-
fortable seat belt tension.
WARNING
When fastening the seat belts, be certain
that the seatbacks are completely se-
cured in the latched position. If they are
not completely secured, passengers may
be injured in an accident or sudden stop.
Unfastening the seat belts
s1To unfasten the seat belt, press the button on
the buckle. The seat belt automatically re-
tracts.
Checking seat belt operation
Seat belt retractors are designed to lock seat belt
movement by two separate methods:
cWhen the seat belt is pulled quickly from the
retractor.
cWhen the vehicle slows down rapidly.
WRS0138WRS0139
Safety—Seats, seat belts and supplemental air bags1-23
ZREVIEW COPY:Ð2004 Sentra(b15)
Owners Manual(owners)ÐUSA English(nna)
03/18/04Ðtbrooks
X
Page 45 of 248

2. Route the seat belt tongue through the child
restraint and insert it into the buckle until you
hear and feel the latch engage.
Be sure to follow the child restraint manu-
facturer’s instructions for belt routing.3. Pull on the shoulder belt until all of the belt is
fully extended. At this time, the seat belt
retractor is in the automatic locking mode
(child restraint mode) . It reverts back to
emergency locking mode when the seat belt
is fully retracted.4. Allow the seat belt to retract. Pull up on the
shoulder belt to remove any slack in the belt.
Front Facing — step 2
WRS0250
Front Facing — step 3
WRS0251
Front Facing — step 4
WRS0146
Safety—Seats, seat belts and supplemental air bags1-29
ZREVIEW COPY:Ð2004 Sentra(b15)
Owners Manual(owners)ÐUSA English(nna)
03/18/04Ðtbrooks
X
Page 46 of 248

5. Before placing the child in the child restraint,
use force to tilt the child restraint from side
to side, and tug it forward to make sure that
it is securely held in place. It should not move
more than 1 inch (25mm) .
6. Check that the retractor is in the automatic
locking mode by trying to pull more seat belt
out of the retractor. If you cannot pull any
more belt webbing out of the retractor, the
retractor is in the automatic locking mode.7. Check to make sure that the child restraint is
properly secured prior to each use. If the belt
is not locked, repeat steps 3 through 6.
After the child restraint is removed and the seat
belt is fully retracted, the automatic locking mode
(child restraint mode) is canceled.Rear facing
When you install a child restraint in the rear seat,
follow these steps:
1. Position the child restraint on the seat. The
direction of the child restraint depends on
the type of the child restraint and the size of
the child. Always follow the restraint manu-
facturer’s instructions.
Front Facing — step 5
WRS0252
Rear Facing (outboard) — step 1
WRS0261
1-30Safety—Seats, seat belts and supplemental air bags
ZREVIEW COPY:Ð2004 Sentra(b15)
Owners Manual(owners)ÐUSA English(nna)
03/18/04Ðtbrooks
X
Page 47 of 248

2. Route the seat belt tongue through the child
restraint and insert it into the buckle until you
hear and feel the latch engage.
Be sure to follow the child restraint manu-
facturer’s instructions for belt routing.3. Pull on the shoulder belt until all of the belt is
fully extended. At this time, the seat belt
retractor is in the automatic locking mode
(child restraint mode) . It reverts to emer-
gency locking mode when the seat belt is
fully retracted.
Rear Facing (center) — step 1
WRS0262
Rear Facing — step 2
WRS0150
Rear Facing — step 3
WRS0260
Safety—Seats, seat belts and supplemental air bags1-31
ZREVIEW COPY:Ð2004 Sentra(b15)
Owners Manual(owners)ÐUSA English(nna)
03/18/04Ðtbrooks
X
Page 48 of 248

4. Allow the seat belt to retract. Pull up on the
shoulder belt to remove any slack in the belt.5. Before placing the child in the child restraint,
use force to tilt the child restraint from side
to side, and tug it forward to make sure that
it is securely held in place. It should not move
more than 1 inch (25mm) .
6. Check that the retractor is in the automatic
locking mode by trying to pull more seat belt
out of the retractor. If you cannot pull any
more seat belt webbing out of the retractor,
the retractor is in the automatic locking
mode.7. Check to make sure that the child restraint is
properly secured prior to each use. If the belt
is not locked, repeat steps 3 through 6.
After the child restraint is removed and the seat
belt fully retracted, the automatic locking mode
(child restraint mode) is canceled.
Rear Facing — step 4
WRS0253
Rear Facing — step 5
WRS0254
1-32Safety—Seats, seat belts and supplemental air bags
ZREVIEW COPY:Ð2004 Sentra(b15)
Owners Manual(owners)ÐUSA English(nna)
03/18/04Ðtbrooks
X
Page 50 of 248
is equipped with special anchor points that are
used with LATCH system compatible child re-
straints. Check your child restraint for a label
stating that it is compatible with the LATCH sys-
tem. This information may also be in the child
restraint owner’s manual. If you have such a child
restraint, refer to the illustration for the seating
positions equipped with LATCH system anchors
which can be used to secure the child restraint.
The LATCH system anchors are located at the
rear of the seat cushion near the seatback. A
label is attached to the seat back to help you
locate the LATCH system anchors.
LATCH child restraints generally require the use
of a top tether strap. See “Top tether strap child
restraint” later in this section for installation in-
structions.
When installing a child restraint, carefully read
and follow the instructions in this manual and
those supplied with the child restraint.
When you install a LATCH system compatible
child restraint to the lower anchor attachments,
follow these steps:WARNING
Inspect the lower anchors by inserting
your fingers into the lower anchor area
and feeling to make sure there are no
obstructions over the LATCH system an-
chors, such as seat belt webbing or seat
cushion material. The child restraint will
not be secured properly if the LATCH sys-
tem anchors are obstructed.
1. To install the LATCH system compatible
child restraint, insert the child restraint
LATCH system anchor attachments into the
anchor points on the seat. If the child re-
straint is equipped with a top tether, see
“Top tether strap child restraint” later in this
section for installation instructions.
2. After attaching the child restraint and before
placing the child in it, use force to tilt the
child restraint from side to side and tug it
forward to make sure that the child restraint
is securely held in place. It should not move
more than 1 inch.
3. Check to make sure that the child restraint is
properly secured prior to each use.
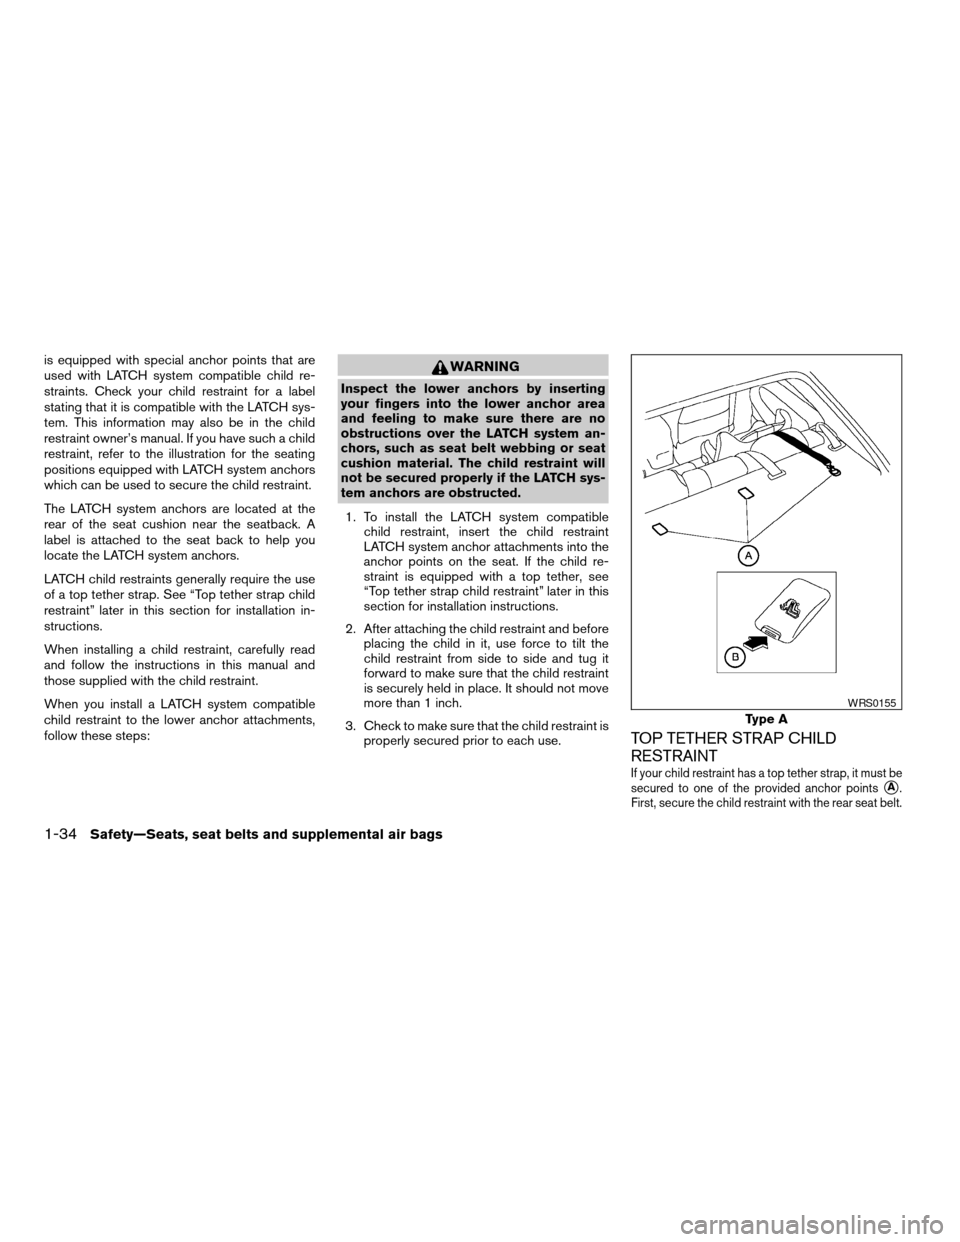
TOP TETHER STRAP CHILD
RESTRAINT
If your child restraint has a top tether strap, it must be
secured to one of the provided anchor points
sA.
First, secure the child restraint with the rear seat belt.
Type A
WRS0155
1-34Safety—Seats, seat belts and supplemental air bags
ZREVIEW COPY:Ð2004 Sentra(b15)
Owners Manual(owners)ÐUSA English(nna)
03/18/04Ðtbrooks
X