instrument panel NISSAN SENTRA 2014 B17 / 7.G Quick Reference Guide
[x] Cancel search | Manufacturer: NISSAN, Model Year: 2014, Model line: SENTRA, Model: NISSAN SENTRA 2014 B17 / 7.GPages: 24, PDF Size: 3.14 MB
Page 4 of 24
2
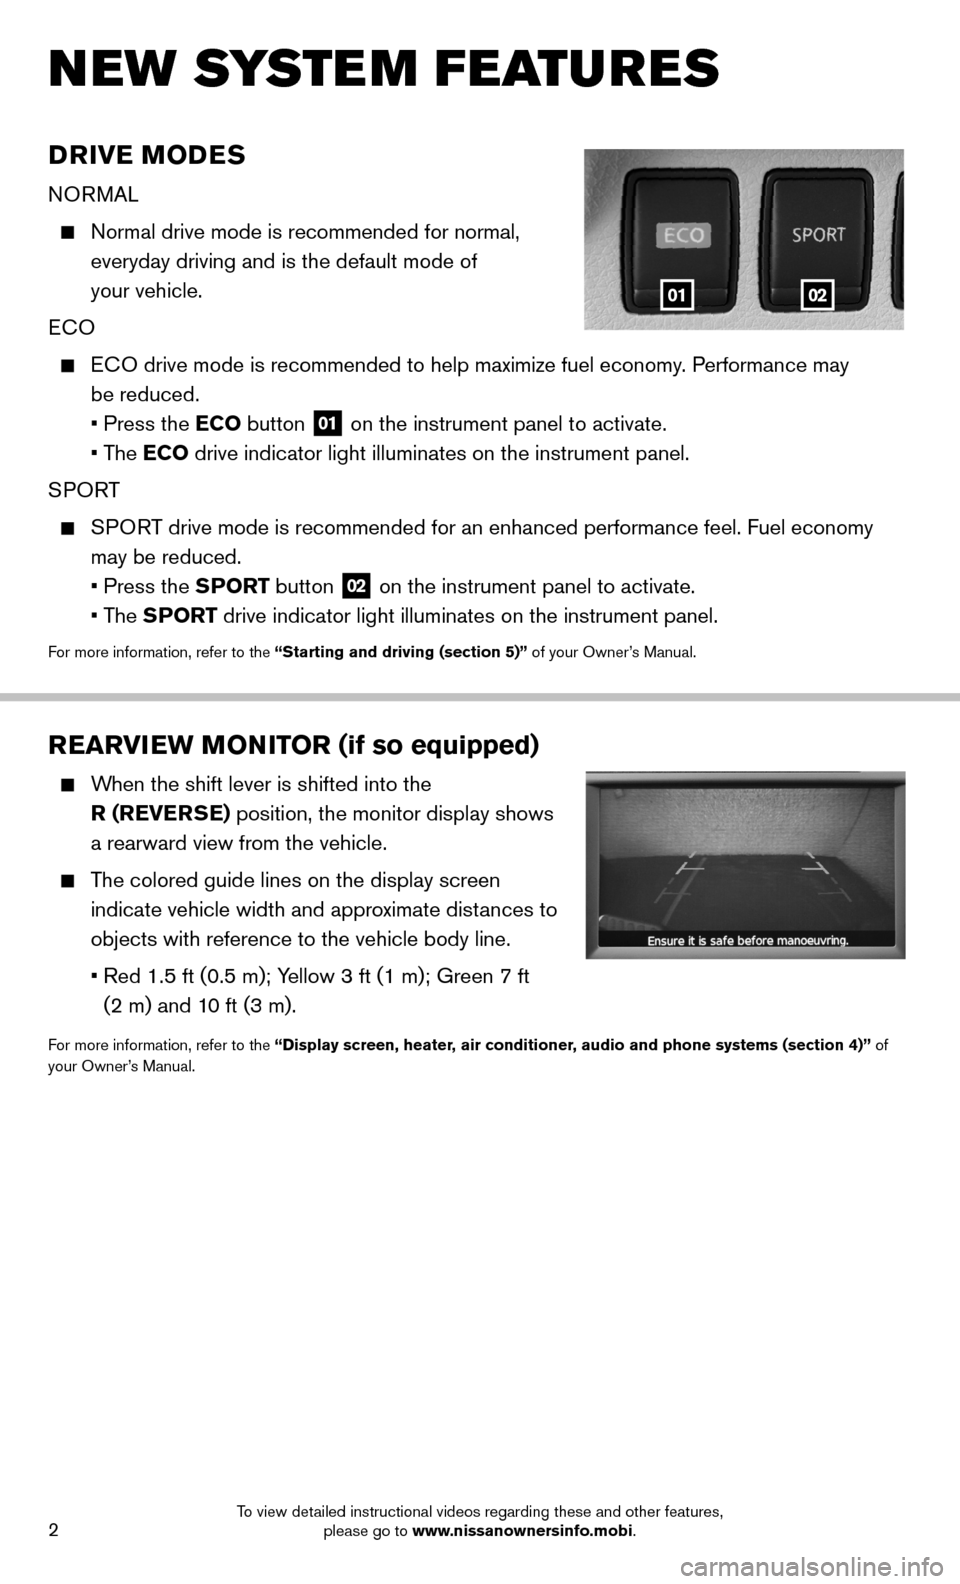
DRIVE MODES
NORMAL
Normal drive mode is recommended for normal,
everyday driving and is the default mode of
your vehicle.
ECO
ECO drive mode is recommended to help maximize fuel economy. Performance may
be reduced.
• Press the ECO button
01 on the instrument panel to activate.
• The ECO drive indicator light illuminates on the instrument panel.
SPORT
SPORT drive mode is recommended for an enhanced performance feel. Fuel econ\
omy
may be reduced.
• Press the SPORT button
02 on the instrument panel to activate.
• The SPORT drive indicator light illuminates on the instrument panel.
For more information, refer to the “Starting and driving (section 5)” of your Owner’s Manual.
NEW SYSTEM FEATURES
REARVIEW MONITOR (if so equipped)
When the shift lever is shifted into the
R (REVERSE) position, the monitor display shows
a rearward view from the vehicle.
The colored guide lines on the display screen
indicate vehicle width and approximate distances to
objects with reference to the vehicle body line.
• Red 1.5 ft (0.5 m); Yellow 3 ft (1 m); Green 7 ft
(2 m) and 10 ft (3 m).
For more information, refer to the “Display screen, heater, air conditioner, audio and phone systems (section 4)” of
your Owner’s Manual.
0102
To view detailed instructional videos regarding these and other features, please go to www.nissanownersinfo.mobi.
Page 6 of 24
4
ESSE NTIAL I N FOR MATION
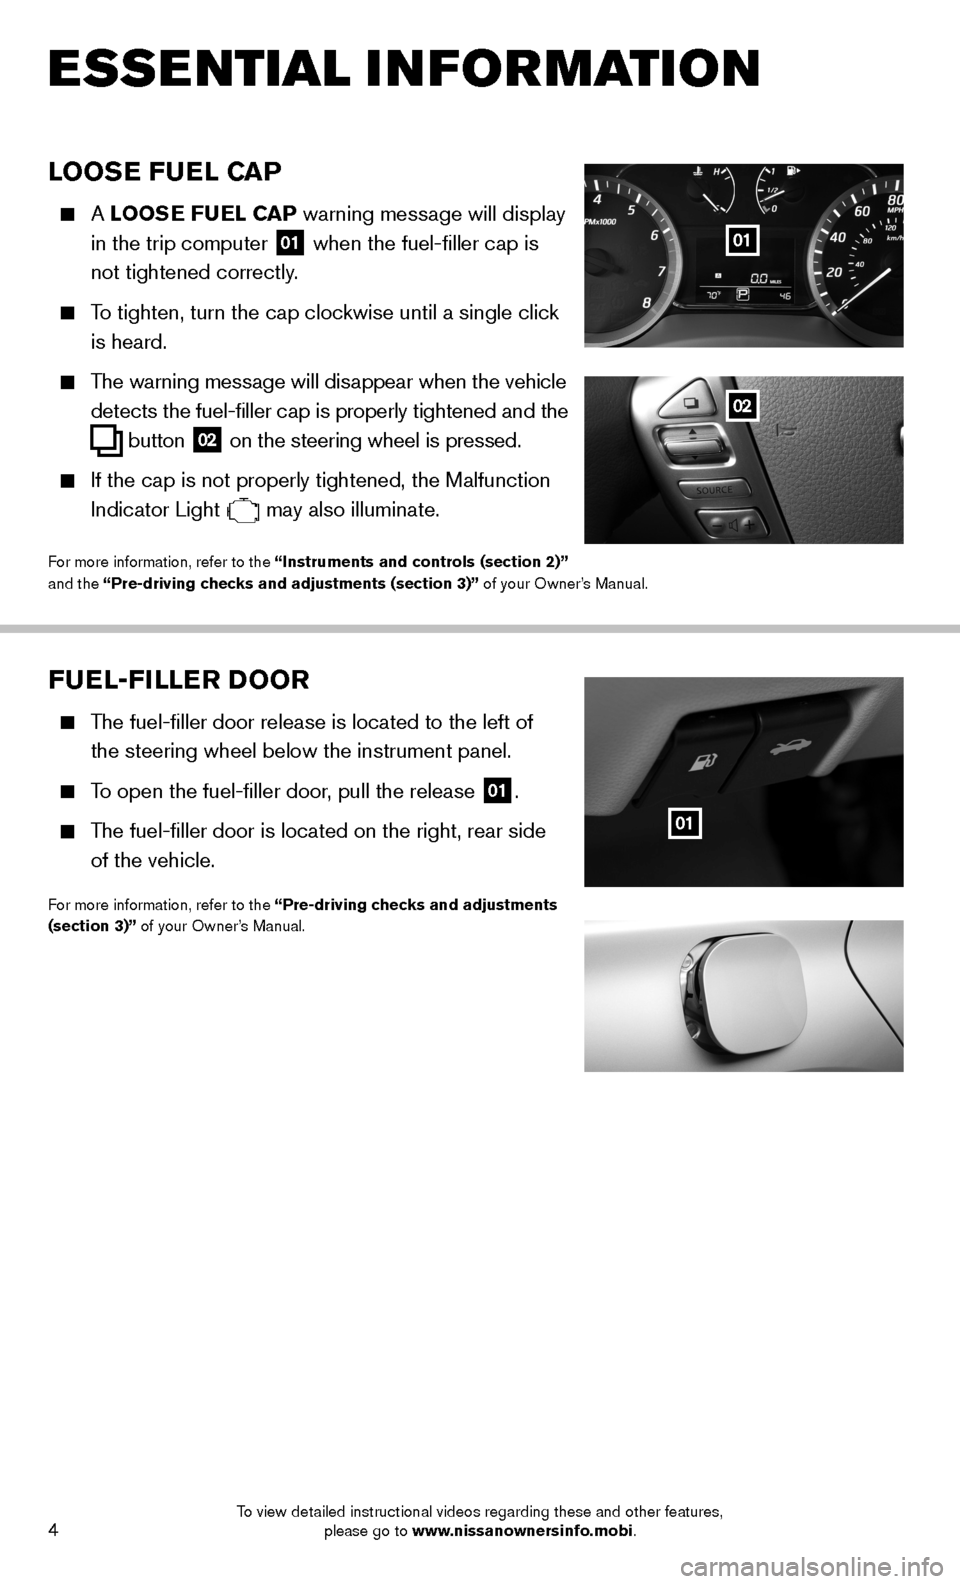
LOOSE FUEL CAP
A LOOSE FUEL CAP warning message will display
in the trip computer
01 when the fuel-filler cap is
not tightened correctly.
To tighten, turn the cap clockwise until a single click
is heard.
The warning message will disappear when the vehicle
detects the fuel-filler cap is properly tightened and the
button 02 on the steering wheel
is pressed.
If the cap is not properly tightened, the Malfunction
Indicator Light
may also illuminate.
For more information, refer to the “Instruments and controls (section 2)”
and the “Pre-driving checks and adjustments (section 3)” of your Owner’s Manual.
01
02
FUEL-FILLER DOOR
T
he fuel-filler door release is located to the left of
the steering wheel below the instrument panel.
To open the fuel-filler door, pull the release
01.
T he fuel-filler door is located on the right, rear side
of the vehicle.
For more information, refer to the “Pre-driving checks and adjustments
(section 3)” of your Owner’s Manual.
01
To view detailed instructional videos regarding these and other features, please go to www.nissanownersinfo.mobi.
Page 10 of 24
8
FIRST DRIVE FEATURES
TURNING THE ENGINE OFF
For a Continuously Variable Transmission, apply the brake pedal, move the shift lever to the
P (PARK) position, apply the parking brake and press the ignition switch.
For a manual transmission, apply the brake pedal, place the vehicle in 1s\
t gear, apply the
parking brake and push the ignition switch.
For more information, refer to the “Starting and driving (section 5)” of your Owner’s Manual.
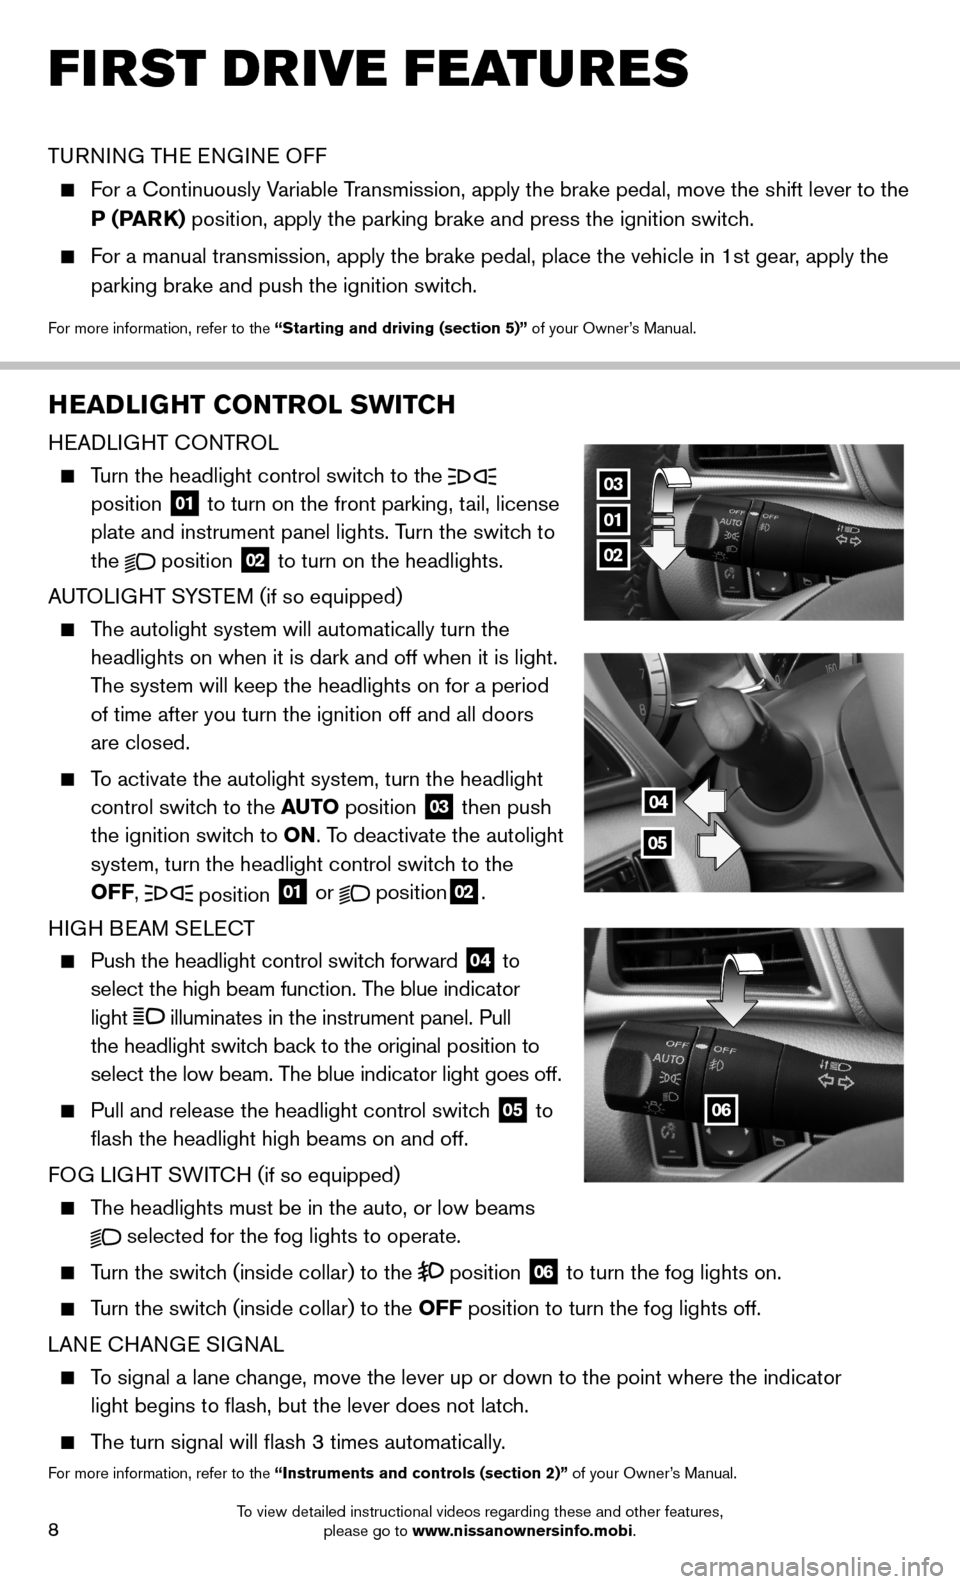
HEADLIGHT CONTROL SWITCH
HEADLIGHT CONTROL
Turn the headlight control switch to the
position 01 to turn on the front parking, tail, license
plate and instrument panel lights. Turn the switch to
the
position
02 to turn on the headlights.
AUTOLIGHT SYSTEM (if so equipped)
The autolight system will automatically turn the
headlights on when it is dark and off when it is light.
The system will keep the headlights on for a period
of time after you turn the ignition off and all doors
are closed.
To activate the autolight system, turn the headlight
control switch to the AUTO position
03 then push
the ignition switch to ON. To deactivate the autolight
system, turn the headlight control switch to the
OFF,
position 01 or position02.
HIGH BEAM SELECT
Push the headlight control switch forward
04 to
select the high beam function. The blue indicator
light
illuminates in the instrument panel. Pull
the headlight switch back to the original position to
select the low beam. The blue indicator light goes off.
Pull and release the headlight control switch
05 to
flash the headlight high beams on and off.
FOG LIGHT SWITCH (if so equipped)
The headlights must be in the auto, or low beams
selected for the fog lights to operate.
Turn the switch (inside collar) to the position
06 to turn the fog lights on.
Turn the switch (inside collar)
to the OFF position to turn the fog lights off.
LANE CHANGE SIGNAL
To signal a lane change, move the lever up or down to the point where the indicator
light begins to flash, but the lever does not latch.
The turn signal will flash 3 times automatically.
For more information, refer to the “Instruments and controls (section 2)” of your Owner’s Manual.
01
02
03
06
04
05
To view detailed instructional videos regarding these and other features, please go to www.nissanownersinfo.mobi.
Page 15 of 24
13
CRUISE CONTROL (if so equipped)
The cruise control system enables you to set a
constant cruising speed once the vehicle has
reached 25 MPH (40 km/h).
The system will automatically maintain the set speed
until you tap the brake pedal, accelerate, cancel or
turn the system off.
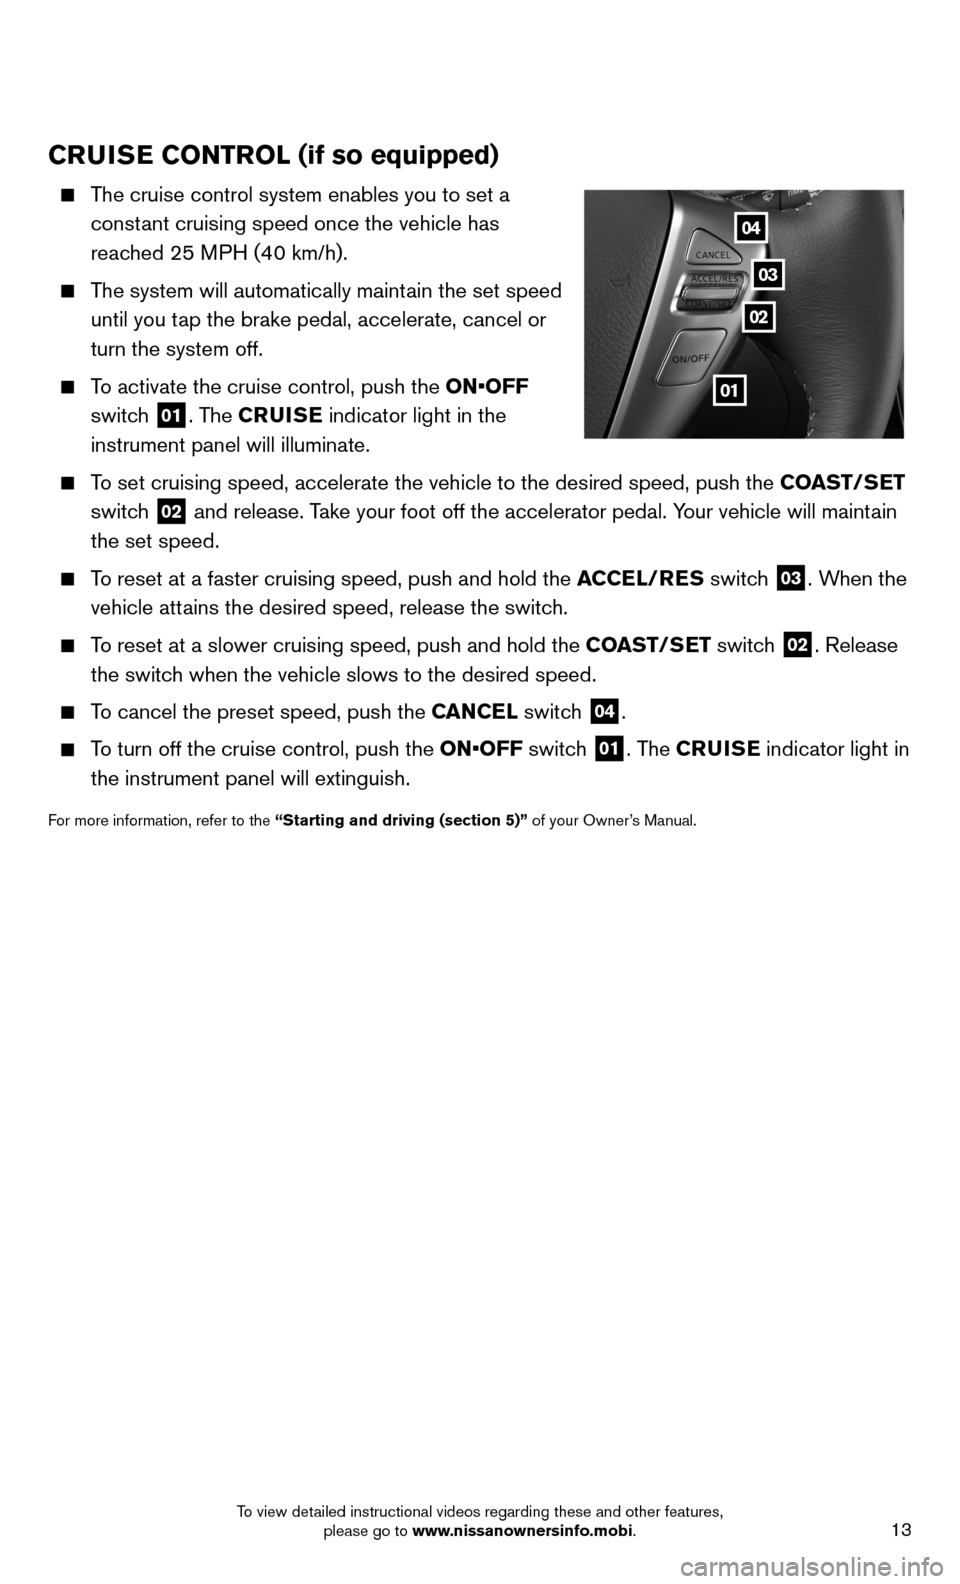
To activate the cruise control, push the ON•OFF
switch
01. The CRUISE indicator light in the
instrument panel will illuminate.
To set cruising speed, accelerate the vehicle to the desired speed, push \
the COAST/SET
switch
02 and release. Take your foot off the accelerator pedal. Your vehicle will maintain
the set speed.
To reset at a faster cruising speed, push and hold the ACCEL/RES switch
03. When the
vehicle attains the desired speed, release the switch.
To reset at a slower cruising speed, push and hold the COAST/SET switch
02. Release
the switch when the vehicle slows to the desired speed.
To cancel the preset speed, push the CANCEL switch
04.
To turn off the cruise control, push the ON•OFF switch
01. The CRUISE indicator light in
the instrument panel will extinguish.
For more information, refer to the “Starting and driving (section 5)” of your Owner’s Manual.
01
04
02
03
To view detailed instructional videos regarding these and other features, please go to www.nissanownersinfo.mobi.
Page 19 of 24
17
BLUETOOTH® SYSTEM WITH NAVIGATION (if so equipped)
Send predefined or custom text messages* through your vehicle’s Bluetooth® system.
Receive texts through your vehicle’s Bluetooth® system that can be read to you.
Bluetooth® Streaming Audio allows you to use a compatible Bluetooth® phone to play
audio files on your device. Your compatible cellular phone can be connected to the vehicle’s audio system, allowing audio files to play through the vehicle’s speakers.
SMARTPHONE INTEGRATION*
For information on how to pair your phone and use popular smartphone apps\
in your
NISSAN, please visit: www.nissanusa.com/connect/support.
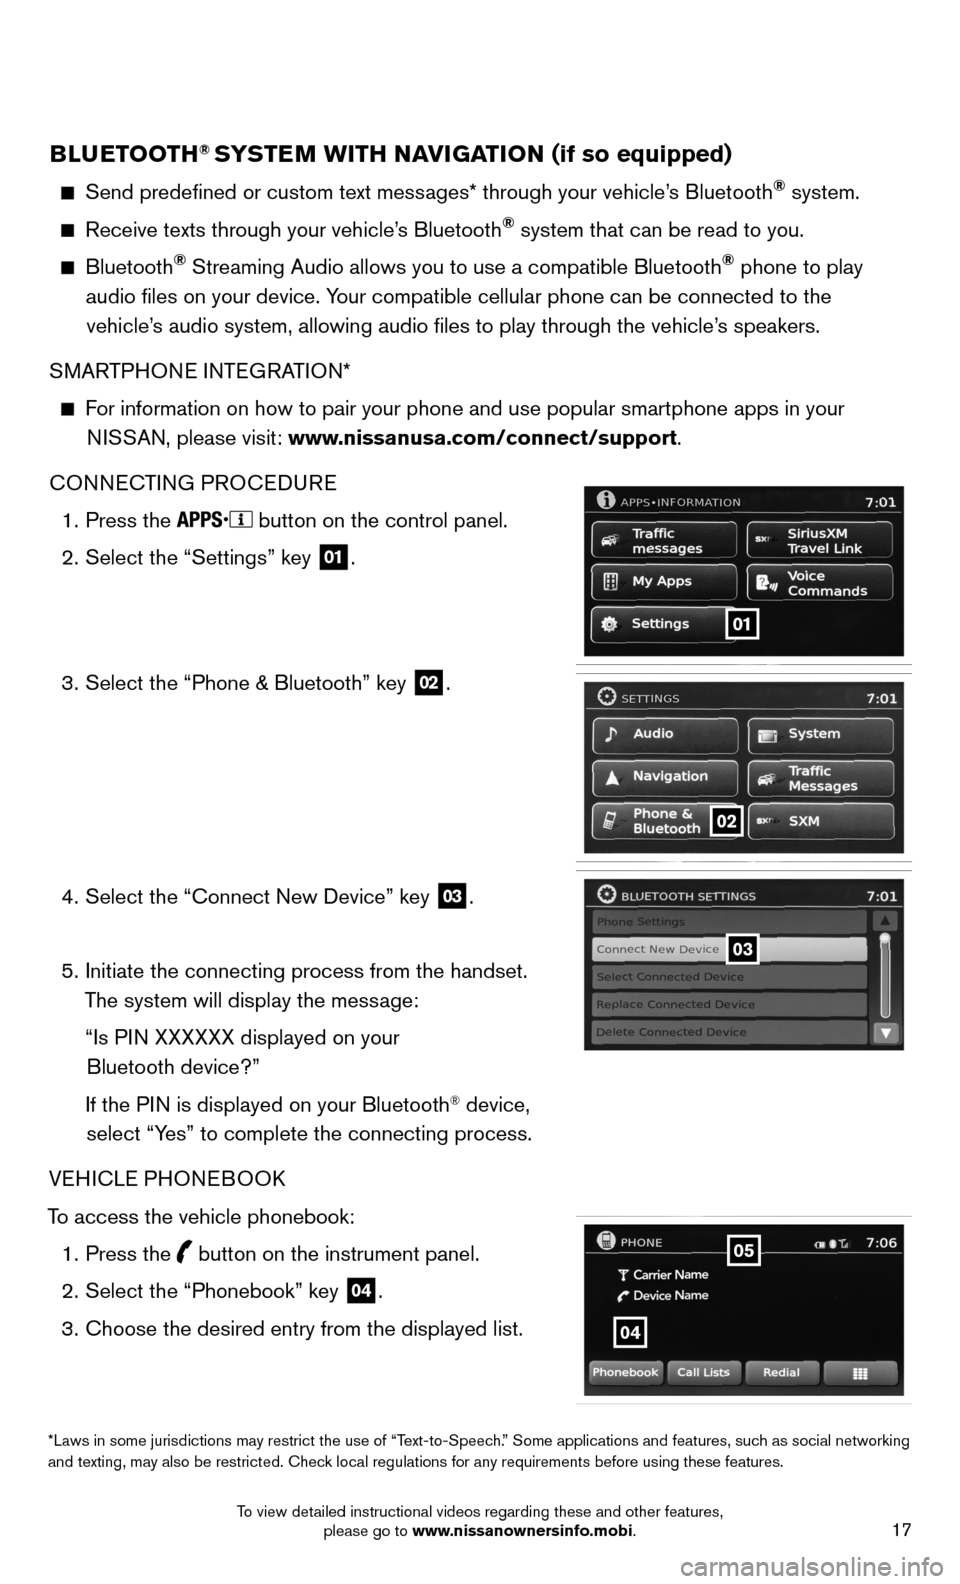
CONNECTING PROCEDURE
1. Press the
button on the control panel.
2. Select the “Settings” key
01.
3. Select the “Phone & Bluetooth” key
02.
4. Select the “Connect New Device” key
03.
5. Initiate the connecting process from the handset.
The system will display the message:
“Is PIN XXXXXX displayed on your
Bluetooth device?”
If the PIN is displayed on your Bluetooth
® device,
select “Yes” to complete the connecting process.
VEHICLE PHONEBOOK
To access the vehicle phonebook: 1. Press the
button on the instrument panel.
2. Select the “Phonebook” key
04.
3. Choose the desired entry from the displayed list.
01
02
03
*Laws in some jurisdictions may restrict the use of “Text-to-Speech.” Some applications and features, such as social networking
and texting, may also be restricted. Check local regulations for any requirements before using these features.
04
05
To view detailed instructional videos regarding these and other features, please go to www.nissanownersinfo.mobi.
Page 20 of 24
18
SYSTEM GUIDE
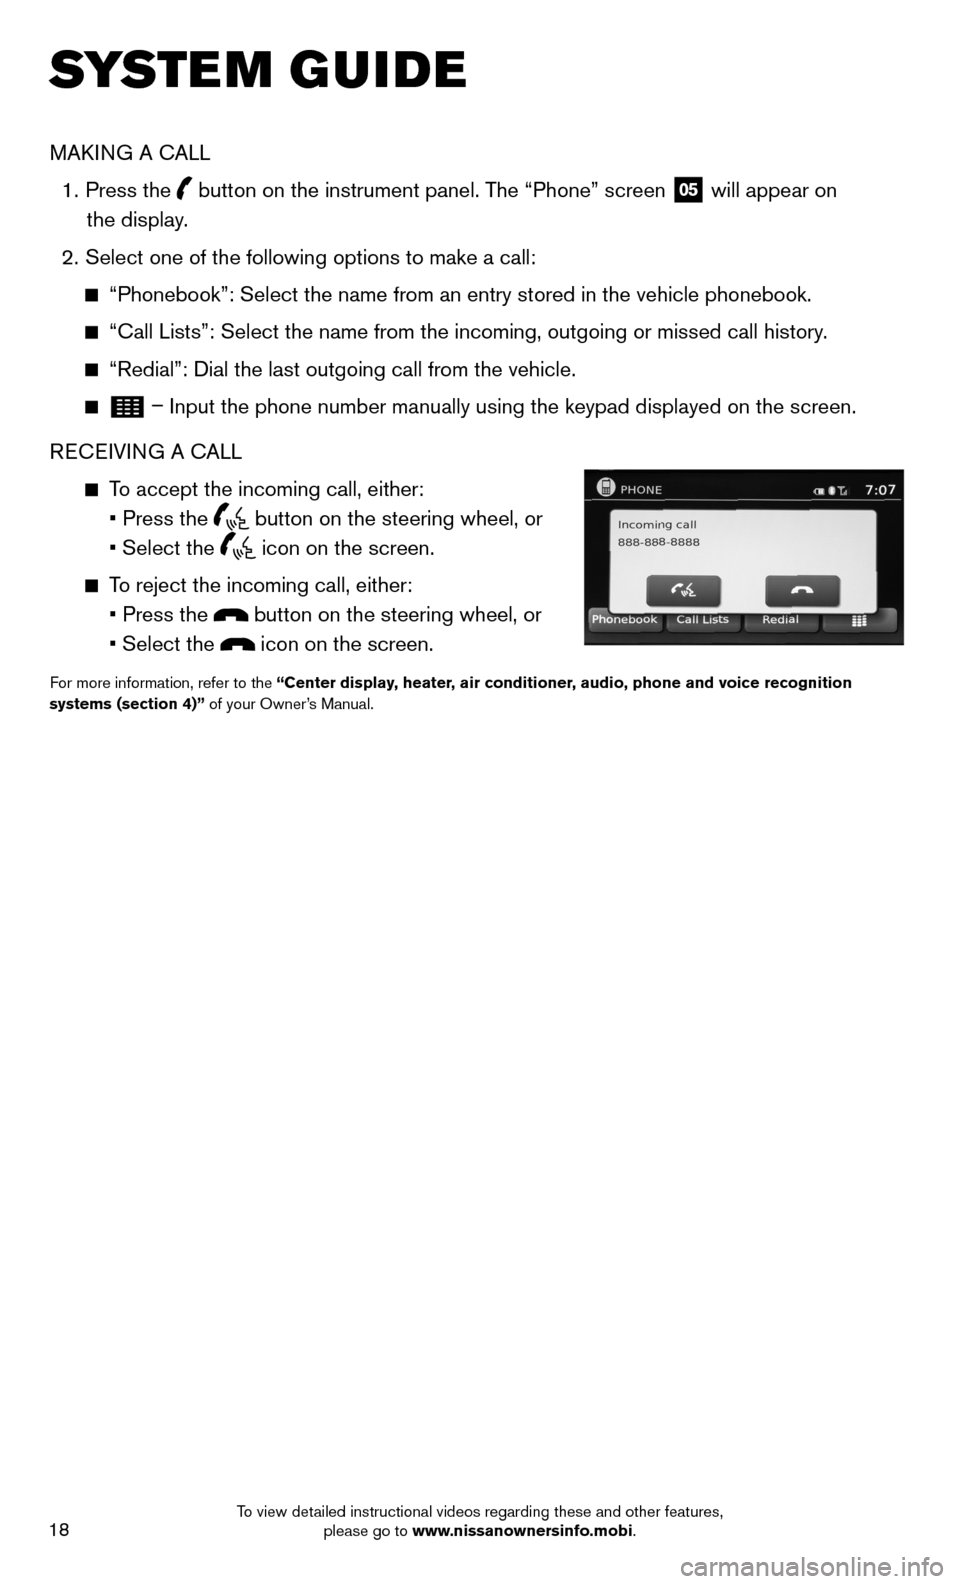
MAKING A CALL
1. Press the
button on the instrument panel. The “Phone” screen
05 will appear on
the display.
2. Select one of the following options to make a call:
“Phonebook”: Select the name from an entry stored in the vehicle p\
honebook.
“Call Lists”: Select the name from the incoming, outgoing or misse\
d call history.
“Redial”: Dial the last outgoing call from the vehicle.
– Input the phone number manually using the keypad displayed on the scree\
n.
RECEIVING A CALL
To accept the incoming call, either:
• Press the
button on the steering wheel, or
• Select the
icon on the screen.
To reject the incoming call, either:
• Press the
button on the steering wheel, or
• Select the
icon on the screen.
For more information, refer to the “Center display, heater, air conditioner, audio, phone and voice recognition
systems (section 4)” of your Owner’s Manual.
To view detailed instructional videos regarding these and other features, please go to www.nissanownersinfo.mobi.