tires NISSAN SERENA 1993 Service Repair Manual
[x] Cancel search | Manufacturer: NISSAN, Model Year: 1993, Model line: SERENA, Model: NISSAN SERENA 1993Pages: 1254, PDF Size: 89.68 MB
Page 828 of 1254
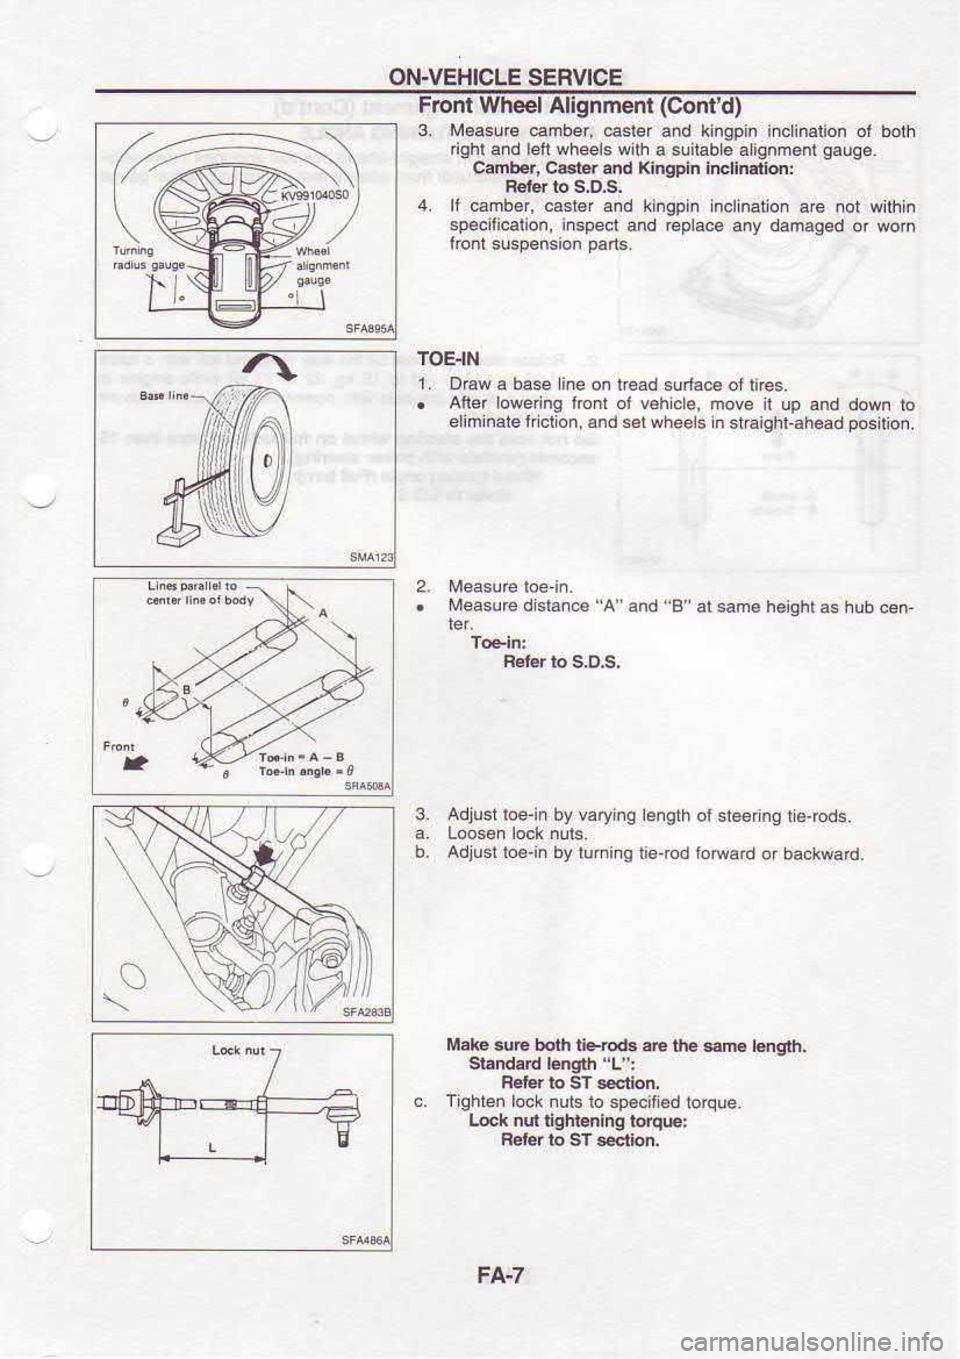
ON-VEHICLE
SERVICE
From Wheel Alignmeni (Cont'd)
3. M€asu@
@mber, esler and kingpin inclinalion ol bolh
ghl.nd lei whels
wlh a slilable aignm€ni g.uge
Ctmts, CGIF a.d Khspin inclindid:
Fetd to s.Ds.
4. ll emb.r, c.st€r and kingpin
lnclnation aG .ol wilhin
6peclic.lion, 'rsped
cno 'eplac€
a1v o.m.ged
or so'n
TOEIN 1. DEw
a base ine on tread surlae
ot tires.
. After lowering lrcnt oi v€h
cl€, move il up and down
to
elimlnalel.lclion, and stwheels
n stfaishl,ah€ad posiiion.
. Measurc dslane 'A
and B'
F3t€r to s,D.s, al
ssne heighl.s
hub cen
3. le.glh
ol slee ng t6jods.
li6{od fofrard
or backwad.
Make suE borh riebd.
@ ,E $m l.ngrh.
Feef ro Sl scctFn,
Tiqhten lock nuls lo sp€cif
ed toique.
L6k nd righ!€ninq
to.q@:
R.ler to sT s6rrion.
FA-7
Page 1160 of 1254

HEADLAMP
PUSH Io
\
_@. PUSH
lo Bulb
Replacement
The headlamp is
a semi-sealed beam type which
uses a
replaceable halogen
bulb. The
bulb can
be replaced from
the
f ront compartment side without
removing the headlamp
body.
r Grasp
only the plastic
base when
handling the bulb.
Never
touch the glass
envelope.
1. Disconnect the
battery cable.
2. Disconnect the
harness connector from
the back side ol the
bulb.
3. Pull
off the
rubber cap.
4. Remove the headlamp
bulb carefully. Do
not shake or
rotate the bulb when removing it.
5. Install
in the reverse
order of removal.
CAUTION:
o Do
not leave the bulb out of the headlamp
reflector for a
long period
of time as dust, moisture,
smoke, etc. may
enter the headlamp
body and aflect the pedormance
of the
headlamp. Thus, the headlamp
bulb should not
be
removed from
the headlamp reflector until just
before a
replac€ment bulb is
to be installed.
Aiming Adjustment
When performing
headlamp aiming adjustment, use
an aiming
machine, aiming wall screen or headlamp
lester. For
operating
instructions of any aimer, it should be in good
repair, calibrated
and used according to
respective operation manuals
supplied
with the unit.
lf any aimer is
not available, aiming adjustment can be done as
Iollows:
For details, reter
to the regulations in your
own country.
CAUTION:
a. Keep all tires inflated to correcl pressures.
b. Place vehicle
and tester on one
and same flat surface-
c. See that there
is noload in vehicle (coolant,
engine oil filled
up to correct level
and tull tuel tank) other than the driver
(or equivalent weight placed
in driver's position).
CAUTION: Be sure aiming switch
is set to "0"
when performing
aiming
adiustment on
vehicles equipped with
headlamp
aiming con-
trol.
lF-bl
l3 2
I 0l
L,\_-! S l l
,n
[) \/
EL-49