fog light NISSAN TITAN 2005 1.G Owners Manual
[x] Cancel search | Manufacturer: NISSAN, Model Year: 2005, Model line: TITAN, Model: NISSAN TITAN 2005 1.GPages: 352, PDF Size: 6.08 MB
Page 9 of 352

1. Engine hood (P. 3-10)
2. Windshield wiper and washer switch
(P. 2-23)
3. Windshield (P. 8-18)
4. Sunroof (if so equipped) (P. 2-48)
5. Power windows (P. 2-44)
6. Door locks, keyfob, keys
(P. 3-3, 3-7, 3-2)
7. Mirrors (P. 3-15)
8. Tire pressure (P. 9-12)
9. Flat tire (P. 6-2)
10. Tire chains (P. 8-36)
11. Replacing bulbs (P. 8-27)
12. Headlight and turn signal switch
(P. 2-24)
13. Fog light switch (P. 2-28)
14. Tow hooks (P. 6-13)
See the page number indicated in paren-
theses for operating details.
LII0030
EXTERIOR FRONT
Illustrated table of contents0-3
ZREVIEW COPYÐ2005 Titan(tzw)
Owners ManualÐUSA_English(nna)
08/26/04Ðtbrooks
X
Page 12 of 352

1. Ventilators (P. 4-12)
2. Instrument brightness control (P. 2-27)
3. Headlight/fog light (if so equipped)/
turn signal switch (P. 2-24)
4. Steering wheel switch for audio control
(P. 4-37)
5. Driver supplemental air bag/horn
(P. 1-43, P. 2-29)
6. Meters, gauges and warning/indicator
lights (P. 2-4, 2-12)
7. Cruise control main/set switches
(if so equipped) (P. 5-17)
8. Windshield wiper/washer switch
(P. 2-23)
9. Ignition switch (P. 5-7)
10. Navigation system* (if so equipped)
(P. 4-2)
11. Navigation system* controls
(if so equipped) (P. 4-2)
12. Audio system controls (P. 4-20)
13. Front passenger supplemental air bag
(P. 1-43)
14. Glove box (P. 2-38)
15. Climate controls (P. 4-13)
16. Aux jack (P. 4-36)
17. Heated seat switch (if so equipped)
(P. 2-30)
WIC0852
INSTRUMENT PANEL
0-6Illustrated table of contents
ZREVIEW COPYÐ2005 Titan(tzw)
Owners ManualÐUSA_English(nna)
08/26/04Ðtbrooks
X
Page 76 of 352

2 Instruments and controls
Instrument panel...................................2-2
Meters and gauges................................2-4
Speedometer and odometer.....................2-4
Tachometer....................................2-5
Engine coolant temperature gauge...............2-6
Fuel gauge....................................2-6
Engine oil pressure gauge.......................2-7
Voltmeter......................................2-8
Automatic transmission fluid temperature
gauge (if so equipped)..........................2-8
Compass and outside temperature display...........2-9
Outside temperature display.....................2-9
Compass display..............................2-10
Warning/indicator lights and audible reminders......2-12
Checking bulbs...............................2-12
Warning lights................................2-13
Indicator lights................................2-17
Audible reminders.............................2-20
Security systems (if so equipped)..................2-20
Vehicle security system.........................2-20
Nissan vehicle immobilizer system (NVIS)........2-22
Windshield wiper and washer switch...............2-23
Switch operation..............................2-23Rear window and outside mirror defroster switch
(if so equipped)..................................2-24
Headlight and turn signal switch....................2-24
Headlight control switch........................2-24
Daytime running light system (Canada only)......2-27
Instrument brightness control...................2-27
Turn signal switch.............................2-28
Fog light switch (if so equipped)................2-28
Hazard warning flasher switch.....................2-28
Cargo lamp switch...............................2-29
Horn............................................2-29
Heated seat (if so equipped).......................2-30
Vehicle dynamic control (VDC) off switch
(if so equipped)..................................2-31
Electronic locking rear differential (E-Lock) system
switch (if so equipped)............................2-31
Rear sonar system off switch (if so equipped)........2-32
Tow mode switch.................................2-33
Power outlet.....................................2-33
Cigarette lighter..................................2-35
Storage.........................................2-35
Instrument panel storage trays..................2-35
Console box (if so equipped)...................2-36
ZREVIEW COPYÐ2005 Titan(tzw)
Owners ManualÐUSA_English(nna)
08/26/04Ðtbrooks
X
Page 78 of 352

1. Ventilators (P. 4-12)
2. Instrument brightness control (P. 2-27)
3. Headlight/fog light (if so equipped)/
turn signal switch (P. 2-24)
4. Steering wheel switch for audio control
(P. 4-37)
5. Driver supplemental air bag/horn
(P. 1-43, P. 2-29)
6. Meters, gauges and warning/indicator
lights (P. 2-4, 2-12)
7. Cruise control main/set switches
(if so equipped) (P. 5-17)
8. Windshield wiper/washer switch
(P. 2-23)
9. Ignition switch (P. 5-7)
10. Navigation system* (if so equipped)
(P. 4-2)
11. Navigation system* controls
(if so equipped) (P. 4-2)
12. Audio system controls (P. 4-20)
13. Front passenger supplemental air bag
(P. 1-43)
14. Glove box (P. 2-38)
15. Climate controls (P. 4-13)
16. Aux jack (P. 4-36)
17. Heated seat switch (if so equipped)
(P. 2-30)
WIC0852
INSTRUMENT PANEL
2-2Instruments and controls
ZREVIEW COPYÐ2005 Titan(tzw)
Owners ManualÐUSA_English(nna)
08/26/04Ðtbrooks
X
Page 104 of 352

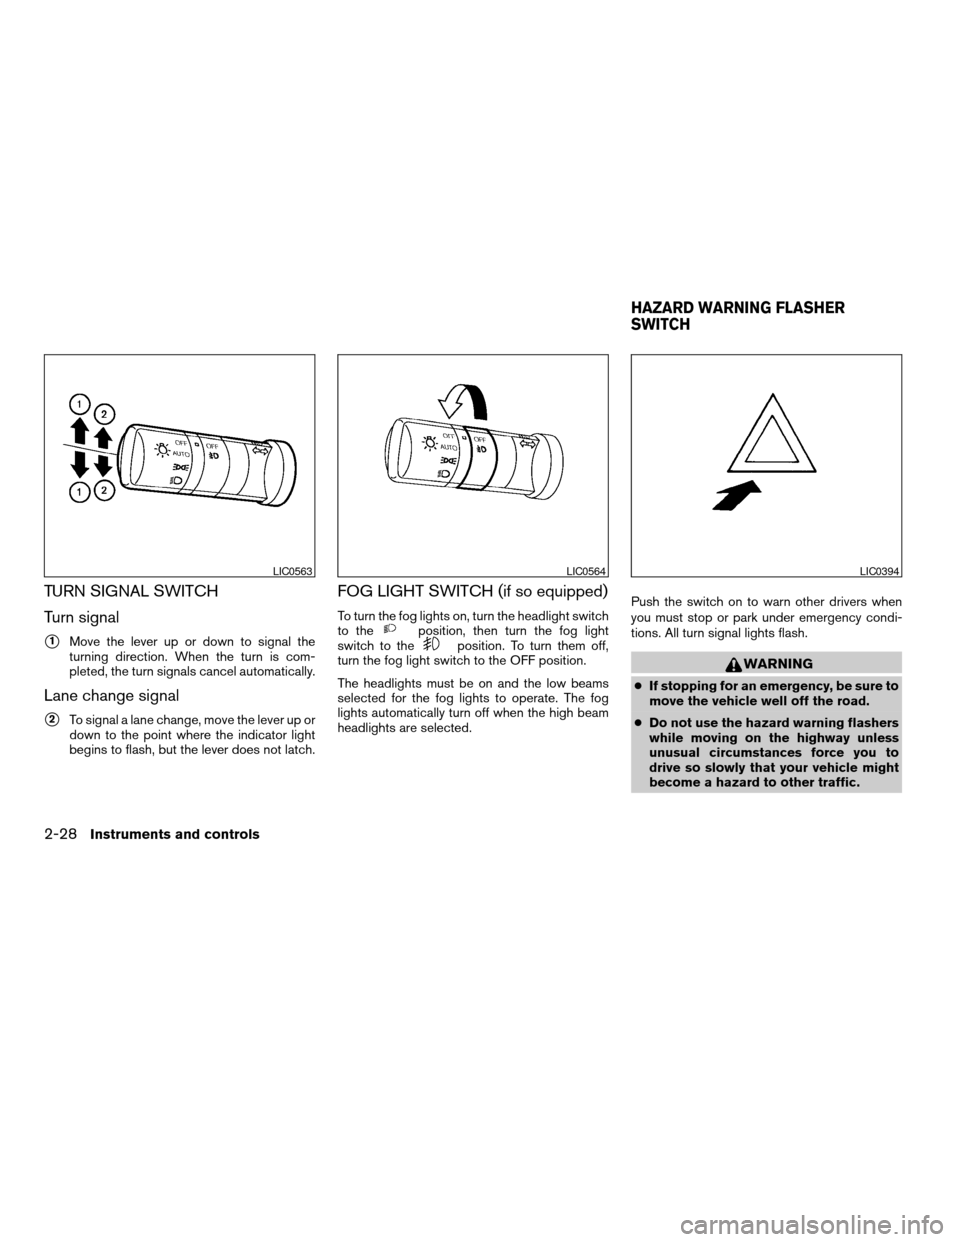
TURN SIGNAL SWITCH
Turn signal
s1Move the lever up or down to signal the
turning direction. When the turn is com-
pleted, the turn signals cancel automatically.
Lane change signal
s2To signal a lane change, move the lever up or
down to the point where the indicator light
begins to flash, but the lever does not latch.
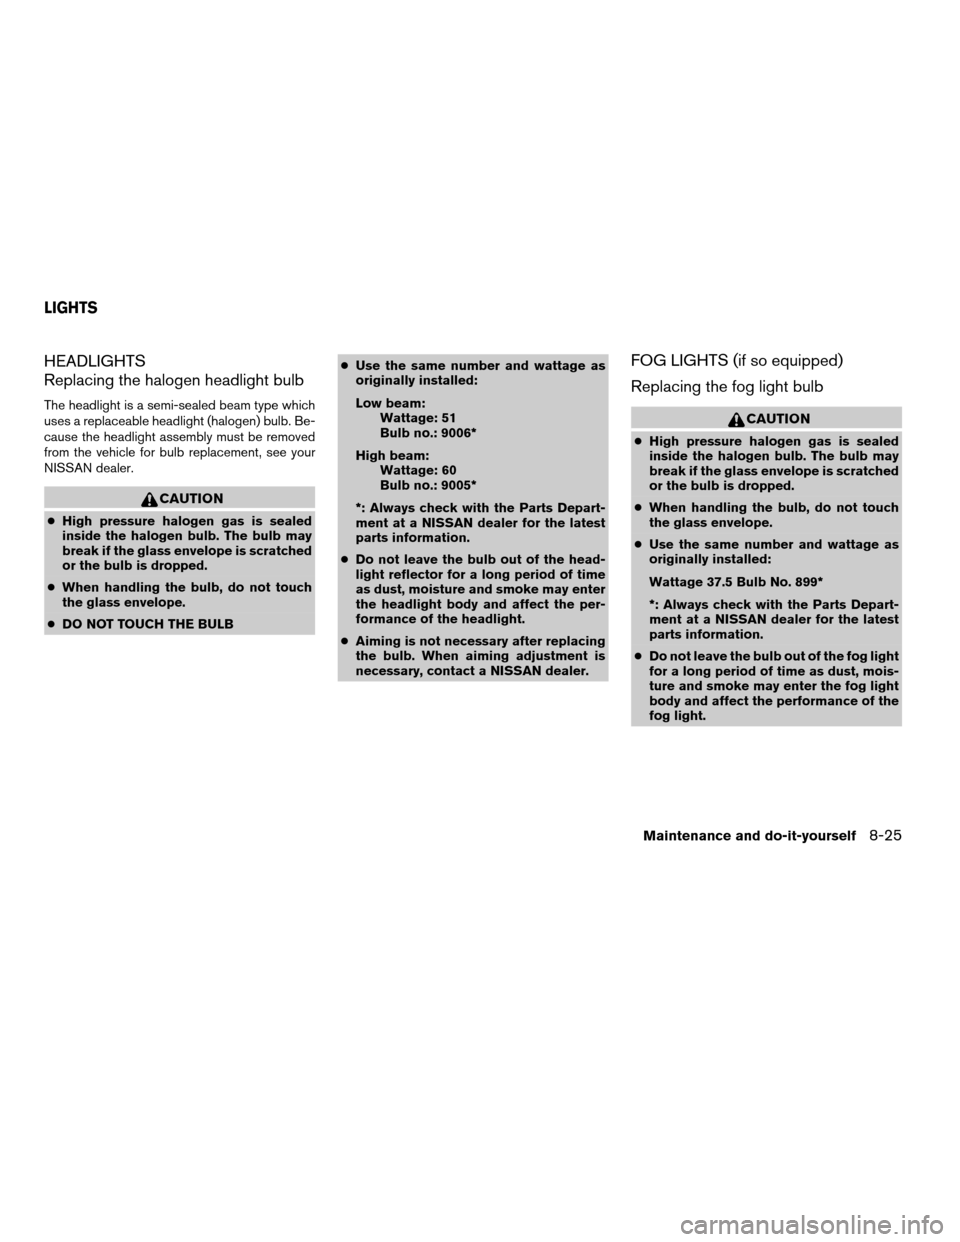
FOG LIGHT SWITCH (if so equipped)
To turn the fog lights on, turn the headlight switch
to theposition, then turn the fog light
switch to theposition. To turn them off,
turn the fog light switch to the OFF position.
The headlights must be on and the low beams
selected for the fog lights to operate. The fog
lights automatically turn off when the high beam
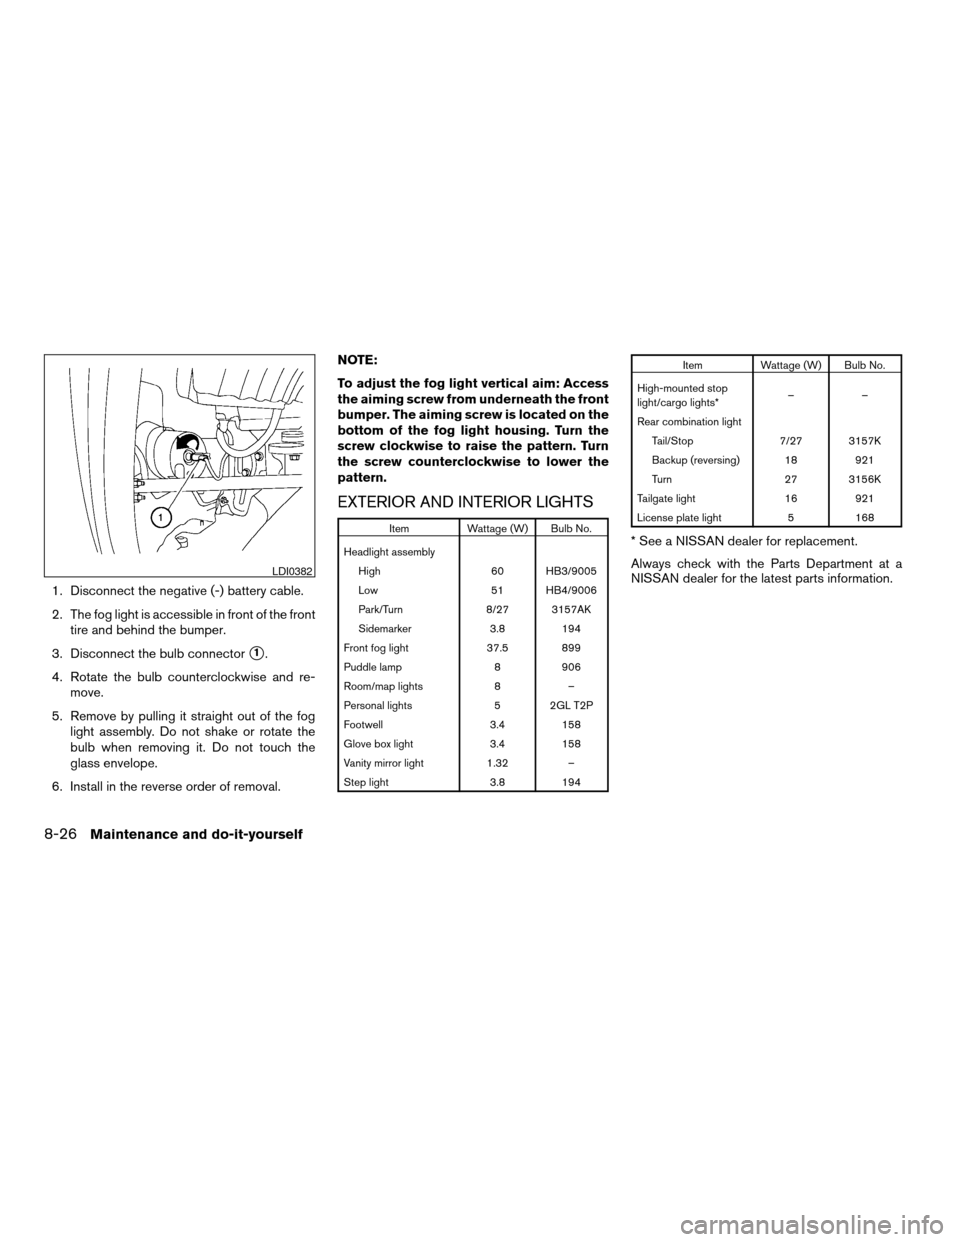
headlights are selected.Push the switch on to warn other drivers when
you must stop or park under emergency condi-
tions. All turn signal lights flash.
WARNING
cIf stopping for an emergency, be sure to
move the vehicle well off the road.
cDo not use the hazard warning flashers
while moving on the highway unless
unusual circumstances force you to
drive so slowly that your vehicle might
become a hazard to other traffic.
LIC0563LIC0564LIC0394
HAZARD WARNING FLASHER
SWITCH
2-28Instruments and controls
ZREVIEW COPYÐ2005 Titan(tzw)
Owners ManualÐUSA_English(nna)
08/26/04Ðtbrooks
X
Page 171 of 352

1. Push thebutton to the OFF position.
The indicator light on thebutton will
go off. (will appear on the display, if so
equipped.)
2. Turn the air flow control dial to the
position.
3. Turn the fan control dial to the desired posi-
tion.
4. Turn the temperature control dial to the de-
sired position.
Defrosting or defogging
This mode directs the air to the defrost outlets to
defrost/defog the windows.
1. Turn the air flow control dial to the
position.
2. Turn the fan control dial to the desired posi-
tion.
3. Turn the temperature control dial to the de-
sired position between the middle and the
hot position.
c
To quickly remove ice or fog from the windows,
turn the fan control dial to 4 and the tempera-
ture control lever to the full HOT position.
cWhen theposition is selected, the air
conditioner automatically turns on (however,
the indicator light on the
button willnot come on and A/C will not appear on the
display, if so equipped) if the outside tem-
perature is more than 36°F (2°C) . If in de-
frost mode for more than one minute, the air
conditioning system will continue to operate
until the fan control dial is turned to OFF or
the vehicle is shut off, even if the air flow
control dial is turned to a position other than
the
position. This dehumidifies the air
which helps defog the windshield.
The
mode automatically turns off, al-
lowing outside air to be drawn into the pas-
senger compartment to further improve the
defogging performance.
Bi-level heating
The bi-level mode directs warmed air to the side
and center vents and to the front and rear floor
outlets.
1. Push the
button to the OFF position.
The indicator light on thebutton will
go off. (will appear on the display, if so
equipped.)
2. Turn the air flow control dial to the
position.
3. Turn the fan control dial to the desired posi-
tion.
4. Turn the temperature control dial to the de-
sired position.
Heating and defogging
This mode heats the interior and defogs the wind-
shield.
1. Turn the air flow control dial to the
position.
2. Turn the fan control dial to the desired posi-
tion.
3. Turn the temperature control dial to the de-
sired position between the middle and the
hot position.
cWhen the
position is selected, the air
conditioner automatically turns on (however,
the indicator light on the
button will
not come on and A/C will not appear on the
display, if so equipped) if the outside tem-
perature is more than 36°F (2°C) . If in de-
frost mode for more than one minute, the air
conditioning system will continue to operate
until the fan control dial is turned to OFF or
the vehicle is shut off, even if the air flow
control dial is turned to a position other than
the
position. This dehumidifies the air
which helps defog the windshield.
The
mode automatically turns off, al-
lowing outside air to be drawn into the pas-
senger compartment to further improve the
defogging performance.
Display screen, heater, air conditioner and audio systems4-15
ZREVIEW COPYÐ2005 Titan(tzw)
Owners ManualÐUSA_English(nna)
08/26/04Ðtbrooks
X
Page 261 of 352

8 Maintenance and do-it-yourself
Maintenance requirements..........................8-2
General maintenance..............................8-2
Explanation of general maintenance items.........8-2
Maintenance precautions...........................8-5
Engine compartment check locations................8-6
Engine cooling system.............................8-7
Checking engine coolant level...................8-7
Changing engine coolant........................8-8
Engine oil.........................................8-8
Checking engine oil level........................8-8
Changing engine oil............................8-9
Changing engine oil filter.......................8-10
5-speed automatic transmission fluid...............8-11
Power steering fluid...............................8-11
Brake fluid.......................................8-11
Brake fluid....................................8-12
Window washer fluid.............................8-12
Window washer fluid reservoir..................8-12
Battery..........................................8-13
Jump starting.................................8-14
Drive belts.......................................8-14
Spark plugs......................................8-15
Replacing spark plugs.........................8-15Air cleaner.......................................8-16
In-cabin microfilter.............................8-16
Windshield wiper blades..........................8-18
Cleaning.....................................8-18
Replacing....................................8-18
Parking brake and brake pedal.....................8-19
Checking parking brake........................8-19
Checking brake pedal..........................8-19
Brake booster.................................8-20
Fuses...........................................8-20
Engine compartment...........................8-21
Passenger compartment.......................8-23
Battery replacement..............................8-24
Lights...........................................8-25
Headlights....................................8-25
Fog lights (if so equipped)......................8-25
Exterior and interior lights.......................8-26
Wheels and tires.................................8-30
Tire pressure..................................8-30
Tire labeling...................................8-33
Types of tires..................................8-36
Tire chains....................................8-36
Changing wheels and tires.....................8-37
ZREVIEW COPYÐ2005 Titan(tzw)
Owners ManualÐUSA_English(nna)
08/26/04Ðtbrooks
X
Page 285 of 352

HEADLIGHTS
Replacing the halogen headlight bulb
The headlight is a semi-sealed beam type which
uses a replaceable headlight (halogen) bulb. Be-
cause the headlight assembly must be removed
from the vehicle for bulb replacement, see your
NISSAN dealer.
CAUTION
cHigh pressure halogen gas is sealed
inside the halogen bulb. The bulb may
break if the glass envelope is scratched
or the bulb is dropped.
cWhen handling the bulb, do not touch
the glass envelope.
cDO NOT TOUCH THE BULBcUse the same number and wattage as
originally installed:
Low beam:
Wattage: 51
Bulb no.: 9006*
High beam:
Wattage: 60
Bulb no.: 9005*
*: Always check with the Parts Depart-
ment at a NISSAN dealer for the latest
parts information.
cDo not leave the bulb out of the head-
light reflector for a long period of time
as dust, moisture and smoke may enter
the headlight body and affect the per-
formance of the headlight.
cAiming is not necessary after replacing
the bulb. When aiming adjustment is
necessary, contact a NISSAN dealer.
FOG LIGHTS (if so equipped)
Replacing the fog light bulb
CAUTION
cHigh pressure halogen gas is sealed
inside the halogen bulb. The bulb may
break if the glass envelope is scratched
or the bulb is dropped.
cWhen handling the bulb, do not touch
the glass envelope.
cUse the same number and wattage as
originally installed:
Wattage 37.5 Bulb No. 899*
*: Always check with the Parts Depart-
ment at a NISSAN dealer for the latest
parts information.
cDo not leave the bulb out of the fog light
for a long period of time as dust, mois-
ture and smoke may enter the fog light
body and affect the performance of the
fog light.
LIGHTS
Maintenance and do-it-yourself8-25
ZREVIEW COPYÐ2005 Titan(tzw)
Owners ManualÐUSA_English(nna)
08/26/04Ðtbrooks
X
Page 286 of 352

1. Disconnect the negative (-) battery cable.
2. The fog light is accessible in front of the front
tire and behind the bumper.
3. Disconnect the bulb connector
s1.
4. Rotate the bulb counterclockwise and re-
move.
5. Remove by pulling it straight out of the fog
light assembly. Do not shake or rotate the
bulb when removing it. Do not touch the
glass envelope.
6. Install in the reverse order of removal.NOTE:
To adjust the fog light vertical aim: Access
the aiming screw from underneath the front
bumper. The aiming screw is located on the
bottom of the fog light housing. Turn the
screw clockwise to raise the pattern. Turn
the screw counterclockwise to lower the
pattern.
EXTERIOR AND INTERIOR LIGHTS
Item Wattage (W) Bulb No.
Headlight assembly
High 60 HB3/9005
Low 51 HB4/9006
Park/Turn 8/27 3157AK
Sidemarker 3.8 194
Front fog light 37.5 899
Puddle lamp 8 906
Room/map lights 8 –
Personal lights 5 2GL T2P
Footwell 3.4 158
Glove box light 3.4 158
Vanity mirror light 1.32 –
Step light 3.8 194
Item Wattage (W) Bulb No.
High-mounted stop
light/cargo lights*––
Rear combination light
Tail/Stop 7/27 3157K
Backup (reversing) 18 921
Turn 27 3156K
Tailgate light 16 921
License plate light 5 168
* See a NISSAN dealer for replacement.
Always check with the Parts Department at a
NISSAN dealer for the latest parts information.
LDI0382
8-26Maintenance and do-it-yourself
ZREVIEW COPYÐ2005 Titan(tzw)
Owners ManualÐUSA_English(nna)
08/26/04Ðtbrooks
X
Page 287 of 352

1. Room/map light
2. Front personal lights
3. Step light
4. Puddle lamp
5. High-mount stoplight/cargo lights
6. License plate light
7. Rear combination/tailgate light assem-
bly
8. Headlight assembly
9. Fog light
Replacement procedures
All other lights are either type A, B, C or D. When
replacing a bulb, first remove the lens, lamp
and/or cover.
Indicates bulb removal
Indicates bulb installationWDI0409
WDI0263
Maintenance and do-it-yourself8-27
ZREVIEW COPYÐ2005 Titan(tzw)
Owners ManualÐUSA_English(nna)
08/26/04Ðtbrooks
X