brake light NISSAN TITAN 2019 Owner´s Manual
[x] Cancel search | Manufacturer: NISSAN, Model Year: 2019, Model line: TITAN, Model: NISSAN TITAN 2019Pages: 682, PDF Size: 7.99 MB
Page 361 of 682
2. Do not apply the brakes.
3. Maintain a firm grip on the steeringwheel with both hands and try to hold a
straight course.
4. When appropriate, slowly release the accelerator pedal to gradually slow the
vehicle.
5. If there is nothing in the way, steer the vehicle to follow the road while vehicle
speed is reduced. Do not attempt to
drive the vehicle back onto the road
surface until vehicle speed is reduced.
6. When it is safe to do so, gradually turn the steering wheel until both tires re-
turn to the road surface. When all tires
are on the road surface, steer the ve-
hicle to stay in the appropriate driving
lane.
∙ If you decide that it is not safe to re- turn the vehicle to the road surface
based on vehicle, road or traffic con-
ditions, gradually slow the vehicle to a
stop in a safe place off the road.RAPID AIR PRESSURE LOSS
Rapid air pressure loss or a “blow-out” can
occur if the tire is punctured or is damaged
due to hitting a curb or pothole. Rapid air
pressure loss can also be caused by driving
on under-inflated tires.
Rapid air pressure loss can affect the han-
dling and stability of the vehicle, especially
at highway speeds.
Help prevent rapid air pressure loss by
maintaining the correct air pressure and
visually inspecting the tires for wear and
damage. For additional information, refer
to “Wheels and tires” in the “Do-it-yourself ”
section of this manual. If a tire rapidly loses
air pressure or “blows-out” while driving,
maintain control of the vehicle by following
the procedure below. Please note that this
procedure is only a general guide. The ve-
hicle must be driven as appropriate based
on the conditions of the vehicle, road and
traffic.
WARNING
The following actions can increase the
chance of losing control of the vehicle if
there is a sudden loss of tire air pres-
sure. Losing control of the vehicle may
cause a collision and result in personal
injury.
∙ The vehicle generally moves or pulls in the direction of the flat tire.
∙ Do not rapidly apply the brakes.
∙ Do not rapidly release the accelerator pedal.
∙ Do not rapidly turn the steering wheel.
1. Remain calm and do not overreact.
2. Maintain a firm grip on the steering wheel with both hands and try to hold a
straight course.
3. When appropriate, slowly release the accelerator pedal to gradually slow the
vehicle.
4. Gradually steer the vehicle to a safe location off the road and away from
traffic if possible.
5. Lightly apply the brake pedal to gradu- ally stop the vehicle.
5-8Starting and driving
Page 363 of 682
∙ Stay alert when driving to the top of ahill. At the top there could be a drop-
off or other hazard that could cause
an accident.
∙ If your engine stalls or you cannot make it to the top of a steep hill, never
attempt to turn around. Your vehicle
could tip or roll over. Always back
straight down in R (Reverse) gear and
apply brakes to control your speed.
∙ Heavy braking going down a hill could cause your brakes to overheat and
fade, resulting in loss of control and
an accident. Apply brakes lightly and
use a low gear to control your speed.
∙ Unsecured cargo can be thrown around when driving over rough ter-
rain. Properly secure all cargo so it will
not be thrown forward and cause in-
jury to you or your passengers.
∙ Secure heavy loads in the cargo area as far forward and as low as possible.
Do not equip the vehicle with tires
larger than specified in this manual.
This could cause your vehicle to roll
over. ∙ Do not grip the inside or spokes of the
steering wheel when driving off-road.
The steering wheel could move sud-
denly and injure your hands. Instead
drive with your fingers and thumbs on
the outside of the rim.
∙ Before operating the vehicle, ensure that the driver and all passengers
have their seat belts fastened.
∙ Lower your speed when encountering strong crosswinds. With a higher cen-
ter of gravity, your NISSAN is more af-
fected by strong side winds. Slower
speeds ensure better vehicle control.
∙ Do not drive beyond the performance capability of the tires, even with 4WD
engaged.
∙ For 4WD equipped vehicles, do not at- tempt to raise two wheels off the
ground and shif t the transmission to
any drive or reverse position with the
engine running. Doing so may result
in drivetrain damage or unexpected
vehicle movement which could result
in serious vehicle damage or personal
injury. ∙ Do not attempt to test a 4WD
equipped vehicle on a 2-wheel dyna-
mometer (such as the dynamometers
used by some states for emissions
testing) or similar equipment even if
the other two wheels are raised off the
ground. Make sure you inform test fa-
cility personnel that your vehicle is
equipped with 4WD before it is placed
on a dynamometer. Using the wrong
test equipment may result in drive-
train damage or unexpected vehicle
movement which could result in seri-
ous vehicle damage or personal
injury.
∙ Accelerating quickly, sharp steering maneuvers or sudden braking may
cause loss of control.
∙ If at all possible, avoid sharp turning maneuvers, particularly at high
speeds. Your NISSAN 4WD vehicle has
a higher center of gravity than a pas-
senger car. The vehicle is not de-
signed for cornering at the same
speeds as passenger cars. Failure to
operate this vehicle correctly could
result in loss of control and/or a roll-
over accident.
5-10Starting and driving
Page 368 of 682
∙ Make sure the area around the vehicle isclear.
∙ Check fluid levels such as engine oil, coolant, brake fluid, Diesel Exhaust Fluid
(Diesel only) and windshield-washer
fluid as frequently as possible, or at least
whenever you refuel.
∙ Check that all windows and lights are clean.
∙ Visually inspect tires for their appear- ance and condition. Also check tires for
proper inflation.
∙ Check that all doors are closed.
∙ Position seat and adjust head restraints/headrests.
∙ Adjust inside and outside mirrors.
∙ Fasten seat belts and ask all passen- gers to do likewise.
∙ Check the operation of warning lights when the ignition switch is placed in the
ON position. For additional information,
refer to “Warning lights, indicator lights
and audible reminders” in the “Instru-
ments and controls” section of this
manual. 1. Apply the parking brake.
2. Move the shif t lever to P (Park) or N
(Neutral). P (Park) is recommended.
The starter is designed not to oper-
ate unless the shif t lever is in either P
(Park) or N (Neutral).
3. Push the ignition switch to the ON po- sition. Depress the brake pedal and
push the ignition switch to start the
engine.
To start the engine immediately, push
and release the ignition switch while
depressing the brake pedal with the
ignition switch in any position.
∙ If the engine is very hard to start in extremely cold weather or when re-
starting, depress the accelerator
pedal a little (approximately 1/3 to the
floor) and while holding, crank the en-
gine. Release the accelerator pedal
when the engine starts.
∙ If the engine is very hard to start be- cause it is flooded, depress the accel-
erator pedal all the way to the floor
and hold it. Push the ignition switch
to the ON position to start cranking
the engine. Af ter 5 or 6 seconds, stop
cranking by pushing the ignition switch to the LOCK position. Af ter
cranking the engine, release the ac-
celerator pedal. Crank the engine
with your foot off the accelerator
pedal by depressing the brake pedal
and pushing the ignition switch to
start the engine. If the engine starts,
but fails to run, repeat the above pro-
cedure.
CAUTION
Do not operate the starter for more
than 15 seconds at a time. If the engine
does not start, push the ignition switch
to the OFF position and wait 10 seconds
before cranking again, otherwise the
starter could be damaged.
4. Warm-up
Allow the engine to idle for at least
30 seconds af ter starting. Do not race
the engine while warming it up. Drive at
a moderate speed for a short distance
first, especially in cold weather. In cold
weather, keep the engine running for a
minimum of 2 to 3 minutes before
shutting it off. Starting and stopping
the engine over a short period of time
may make the vehicle more difficult to
start.
BEFORE STARTING THE ENGINE STARTING THE ENGINE (gasoline engine only)
Starting and driving5-15
Page 369 of 682
5. To stop the engine, move the shif t leverto the P (Park) position and push the
ignition switch to the OFF position.
In preparation for the next engine start, the
engine may have a slightly delayed shutoff
af ter placing the ignition switch in the OFF
position, depending on the driving condi-
tions.
NOTE:
Care should be taken to avoid situations
that can lead to potential battery dis-
charge and potential no-start conditions
such as: 1. Installation or extended use of elec-
tronic accessories that consume bat-
tery power when the engine is not
running (phone chargers, GPS, DVD
players, etc.).
2. The vehicle is not driven regularly
and/or only driven short distances.
In these cases, the battery may need to
be charged to maintain battery health.REMOTE ENGINE START (if so
equipped)
Vehicles started with the Remote Engine
Start require the ignition switch to be
placed in the ON position before the shif t
lever can be moved from the P (Park) posi-
tion. To place the ignition switch in the ON
position, follow these steps: 1. Make sure that the Intelligent Key is on you.
2. Apply the brake.
3. Push the ignition switch once to the ON position.
For additional information, refer to “NISSAN
Intelligent Key®” in the “Pre-driving checks
and adjustments” section of this manual. For additional information on starting your
diesel engine, refer to the Titan Diesel Own-
er’s Manual.
STARTING THE ENGINE (diesel only)
5-16Starting and driving
Page 370 of 682
ENGINE PROTECTION MODE
The engine has an engine protection mode
to reduce the chance of damage if the
coolant temperature becomes too high
(for example, when climbing steep grades
in high temperatures with heavy loads,
such as when towing a trailer). When the
engine temperature reaches a certain
level:∙ The engine coolant temperature gauge will move toward the H position.
∙ Engine power may be reduced.
∙ The air conditioning cooling function may be automatically turned off for a
short time (the blower will continue to
operate).
Engine power and, under some conditions,
vehicle speed will decrease. Vehicle speed
can be controlled with the accelerator
pedal, but the vehicle may not accelerate at
the desired speed. The transmission will
downshif t or upshif t as it reaches pre-
scribed shif t points. You can also shif t
manually.
As driving conditions change and engine
coolant temperature is reduced, vehicle
speed can be increased using the accel- erator pedal, and the air conditioning cool-
ing function will automatically be turned
back on.
The Malfunction Indicator Light (MIL) may
also come on if the engine coolant tem-
perature is not reduced or the air condi-
tioning cooling function does not turn back
on. If
only it remains on, you do not need to
have your vehicle towed, but have it in-
spected soon. It is recommended that you
visit a NISSAN dealer for this service. For
additional information, refer to “Malfunc-
tion Indicator Light (MIL)” in the “Instru-
ments and controls” section of this manual.
WARNING
Overheating can result in reduced en-
gine power and vehicle speed. The re-
duced speed may be lower than other
traffic, which could increase the chance
of a collision. Be especially careful when
driving. If the vehicle cannot maintain a
safe driving speed, pull to the side of the
road in a safe area. Allow the engine to
cool and return to normal operation. For
additional information, refer to “If your
vehicle overheats” in the “In case of
emergency ” section of this manual.
CAUTION
Running the engine with the engine oil
pressure warning light on could cause
serious damage to the engine almost
immediately. Such damage is not cov-
ered by warranty. Turn off the engine as
soon as it is safe to do so.
AUTOMATIC TRANSMISSION (A/T)
WARNING
∙ Do not depress the accelerator pedal while shif ting from P (Park) or N (Neu-
tral) to R (Reverse) or D (Drive). Always
depress the brake pedal until shif ting
is completed. Failure to do so could
cause you to lose control and have an
accident.
∙ Cold engine idle speed is high, so use caution when shif ting into a forward
or reverse gear before the engine has
warmed up.
∙ Never shif t to either the P (Park) or R (Reverse) position while the vehicle is
moving forward and P (Park) or D
(Drive) position while the vehicle is re-
versing. This could cause an accident
or damage the transmission.
DRIVING THE VEHICLE
Starting and driving5-17
Page 375 of 682
To push the shif t lock release, complete the
following procedure:1. Place the ignition switch in the LOCK position.
2. Apply the parking brake.
3. Remove the shif t lock release cover. If a screwdriver is used to remove the
cover, it should be wrapped in a protec-
tive cloth to prevent damage to the
cover and surrounding plastic.
4. Insert a small object or finger in the shif t lock release slot and push.
5. Move the shif t lever to the N (Neutral) position while holding the shif t lock re-
lease.
6. Now the vehicle may be moved to the desired location.
If the shif t lever cannot be moved out of P
(Park), have the automatic transmission
system checked as soon as possible. It is
recommended that you visit a NISSAN
dealer for this service.WARNING
If the shif t lever cannot be moved from
the P (Park) position while the engine is
running and the brake pedal is de-
pressed, the stop lights may not work.
Malfunctioning stop lights could cause
an accident injuring yourself and
others.
Accelerator downshif t
— in D (Drive) position —
For passing or hill climbing, depress the
accelerator pedal to the floor. This shif ts
the transmission down into a lower gear,
depending on the vehicle speed.
Fail-safe
When the fail-safe operation occurs, please
note that the transmission will be locked in
any of the forward gears according to the
condition. If the vehicle is driven under extreme
conditions, such as excessive wheel
spinning and subsequent hard braking,
the fail-safe system may be activated.
This will occur even if all electrical cir-
cuits are functioning properly. In this
case, place the ignition switch in the OFF
position and wait for 3 seconds. Then
place the ignition switch back in the ON
position. The vehicle should return to its
normal operating condition. If it does not
return to its normal operating condition,
have the transmission checked and re-
paired, if necessary. It is recommended
that you visit a NISSAN dealer for this
service.
5-22Starting and driving
Page 376 of 682
WARNING
∙ Be sure the parking brake is fully re-leased before driving. Failure to do so
can cause brake failure and lead to an
accident.
∙ Do not release the parking brake from outside the vehicle.
∙ Do not use the shif t lever in place of the parking brake. When parking, be
sure the parking brake is fully
engaged.
∙ To help avoid risk of injury or death through unintended operation of the
vehicle and/or its systems, do not
leave children, people who require the
assistance of others or pets unat-
tended in your vehicle. Additionally,
the temperature inside a closed ve-
hicle on a warm day can quickly be-
come high enough to cause a signifi-
cant risk of injury or death to people
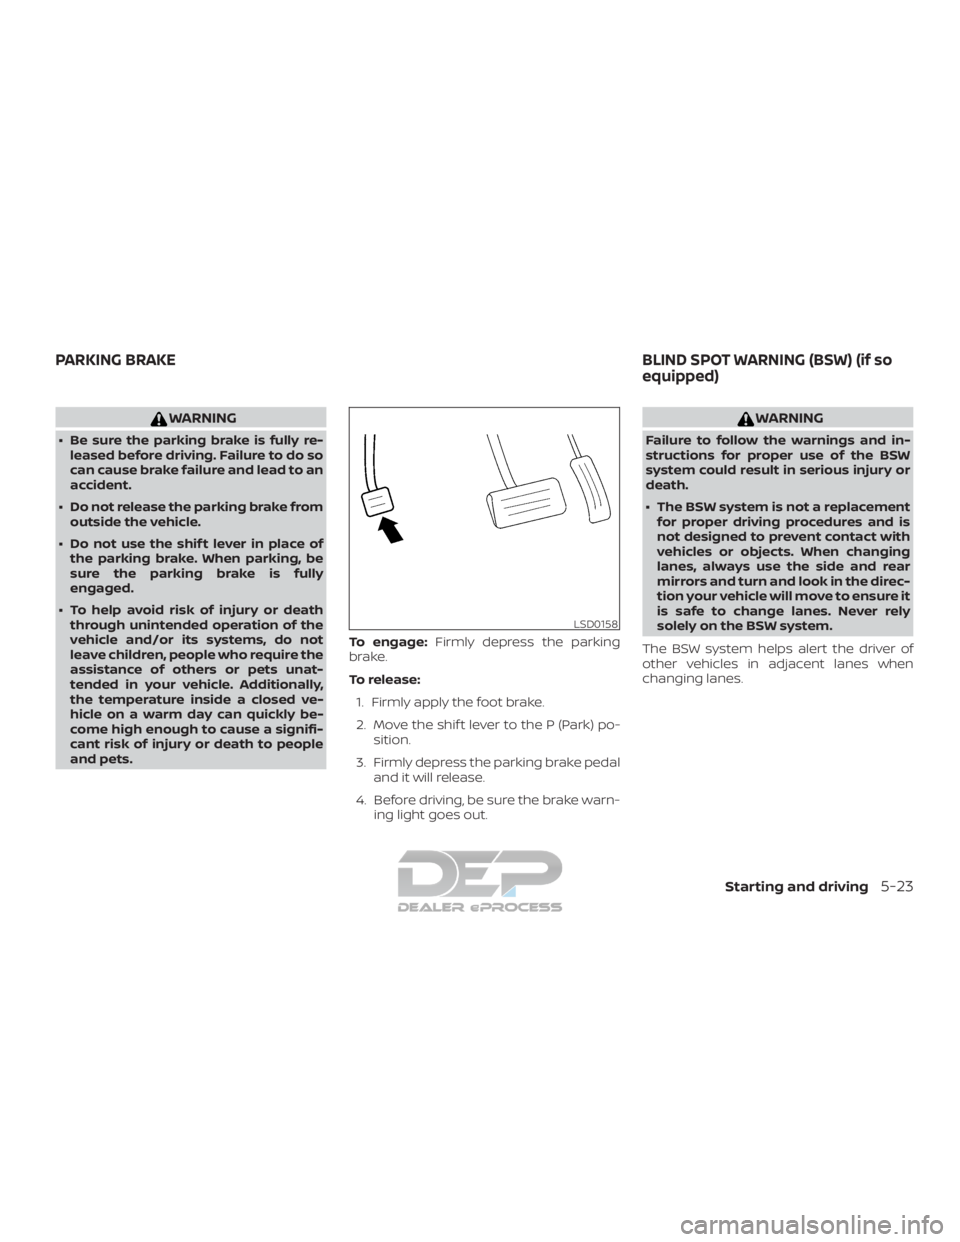
and pets. To engage:
Firmly depress the parking
brake.
To release:
1. Firmly apply the foot brake.
2. Move the shif t lever to the P (Park) po- sition.
3. Firmly depress the parking brake pedal and it will release.
4. Before driving, be sure the brake warn- ing light goes out.
WARNING
Failure to follow the warnings and in-
structions for proper use of the BSW
system could result in serious injury or
death.
∙ The BSW system is not a replacementfor proper driving procedures and is
not designed to prevent contact with
vehicles or objects. When changing
lanes, always use the side and rear
mirrors and turn and look in the direc-
tion your vehicle will move to ensure it
is safe to change lanes. Never rely
solely on the BSW system.
The BSW system helps alert the driver of
other vehicles in adjacent lanes when
changing lanes.
LSD0158
PARKING BRAKE BLIND SPOT WARNING (BSW) (if so
equipped)
Starting and driving5-23
Page 395 of 682
CRUISE CONTROL OPERATIONS
The cruise control allows driving at a speed
between 25 - 89 mph (40 - 144 km/h) with-
out keeping your foot on the accelerator
pedal.
To turn on the cruise control,push the
ON/OFF switch on. The
(white) indi-
cator in the vehicle information display will
illuminate.
To set cruising speed, accelerate the ve-
hicle to the desired speed, push the
COAST/SET switch and release it. The
(green) indicator in the vehicle information
display will illuminate. Take your foot off the
accelerator pedal. Your vehicle maintains
the set speed.
∙ To pass another vehicle, depress the
accelerator pedal. When you release the
pedal, the vehicle returns to the previ-
ously set speed.
∙ The vehicle may not maintain the set speed when going up or down steep
hills. If this happens, drive without the
cruise control. To cancel the preset speed,
use one of the
following three methods:
∙ Push the CANCEL switch; the
indi-
cator in the vehicle information display
goes out.
∙ Tap the brake pedal; the
indicator
goes out.
∙ Push the ON/OFF switch off. The
indicator in the vehicle information dis-
play goes out.
The cruise control is automatically can-
celed and the
indicator in the vehicle
information display goes out if:
∙ You depress the brake pedal while pushing the ACCEL/RES or COAST/SET
switch. The preset speed is deleted
from memory.
∙ The vehicle slows down more than 8 mph (13 km/h) below the set speed.
∙ You move the shif t lever to N (Neutral).
To reset at a faster cruising speed, use
one of the following three methods:
∙ Depress the accelerator pedal. When the vehicle attains the desired speed,
push and release the COAST/SET
switch. ∙ Push and hold the ACCEL/RES switch.
When the vehicle attains the speed you
desire, release the switch.
∙ Push and release the ACCEL/RES switch. Each time you do this, the set
speed increases by about 1 mph
(1.6 km/h).
To reset at a slower cruising speed, use
one of the following three methods:
∙ Lightly tap the brake pedal. When the vehicle attains the desired speed, push
the COAST/SET switch and release it.
∙ Push and hold the COAST/SET switch. Release the switch when the vehicle
slows to the desired speed.
∙ Push and release the COAST/SET switch. Each time you do this, the set
speed decreases by about 1 mph
(1.6 km/h).
To resume the preset speed, push and
release the ACCEL/RES switch. The vehicle
returns to the last set cruising speed when
the vehicle speed is over 25 mph (40 km/h).
5-42Starting and driving
Page 396 of 682
CAUTION
During the first 1,200 miles (2,000 km),
follow these recommendations to ob-
tain maximum engine performance
and ensure the future reliability and
economy of your new vehicle. Failure to
follow these recommendations may re-
sult in shortened engine life and re-
duced engine performance.∙ Avoid driving for long periods at con- stant speed, either fast or slow, and do
not run the engine over 4,000 rpm.
∙ Do not accelerate at full throttle in any gear.
∙ Avoid quick starts.
∙ Avoid hard braking as much as pos- sible.
∙ Do not tow a trailer for the first 500 miles (805 kilometers). Your engine, axle or
other parts could be damaged. Follow these easy-to-use Fuel Efficient
Driving Tips to help you achieve the most
fuel economy from your vehicle.
1. Use Smooth Accelerator and Brake
Pedal Application
∙ Avoid rapid starts and stops.
∙ Use smooth, gentle accelerator and brake application whenever possible.
∙ Maintain constant speed while com- muting and coast whenever pos-
sible.
2. Maintain Constant Speed
∙ Look ahead to try and anticipate and minimize stops.
∙ Synchronizing your speed with traffic lights allows you to reduce your num-
ber of stops.
∙ Maintaining a steady speed can mini- mize red light stops and improve fuel
efficiency.
3. Use Air Conditioning (A/C) at Higher
Vehicle Speeds
∙ Below 40 mph (64 km/h), it is more efficient to open windows to cool the
vehicle due to reduced engine load. ∙ Above 40 mph (64 km/h), it is more
efficient to use A/C to cool the vehicle
due to increased aerodynamic drag.
∙ Recirculating the cool air in the cabin when the A/C is on reduces cooling
load.
4. Drive at Economical Speeds and Dis-
tances
∙ Observing the speed limit and not exceeding 60 mph (97 km/h) (where
legally allowed) can improve fuel effi-
ciency due to reduced aerodynamic
drag.
∙ Maintaining a safe following distance behind other vehicles reduces un-
necessary braking.
∙ Safely monitoring traffic to anticipate changes in speed permits reduced
braking and smooth acceleration
changes.
∙ Select a gear range suitable to road conditions.
5. Use Cruise Control
∙ Using cruise control during highway driving helps maintain a steady
speed.
BREAK-IN SCHEDULE FUEL EFFICIENT DRIVING TIPS
Starting and driving5-43
Page 400 of 682
*1: Before moving the shif t lever from N (Neutral), wait until the 4LO indicator stays on steady. This indicates that the 4WD shif t procedureis completed and the transfer gear is correctly set in the 4LO position. If the vehicle is shif ted into gear before the indicator is on steady,
the transfer gear may grind, not engage correctly or stay in the N (Neutral) position.
- If the 4WD vehicle information display warning message illuminates, perform the following procedure to return the transfer case to
the correct operating condition.
1. Turn off the engine by placing the ignition switch in the OFF position.
2. Start the engine.
- Check that the 4WD vehicle information display warning message turns of f. If the warning message in the vehicle information display
stays on, have the system checked. It is recommended that you visit a NISSAN dealer for this service.
3. Apply the parking brake, depress the brake pedal and move the shif t lever to the N (Neutral) position.
4. With the brake pedal depressed, move the 4WD shif t switch to the desired mode.
- Be sure to wait until the transfer gear change completes before shif ting the shif t lever from the N (Neutral) position.
*2: While changing in and out of 4LO, the ignition switch must be in the ON position and the vehicle’s engine must be running for a shif t to take place and for the 4WD shif t and 4LO position indicators to be operable. Otherwise, the shif t will not take place and no indicators
will be on or flashing.
*3: Make sure the transfer 4LO position indicator turns on when you shif t the 4WD shif t switch to 4LO. The
indicator light will also turn
on when 4LO is selected. For additional information, refer to “Vehicle Dynamic Control (VDC) system” in this section.
Starting and driving5-47